To avoid these ads, REGISTER NOW!

Prentiss Vise Resto

DavidB

Well-known member
Joined
Feb 6, 2010
Messages
734
Location
Navarre, FL
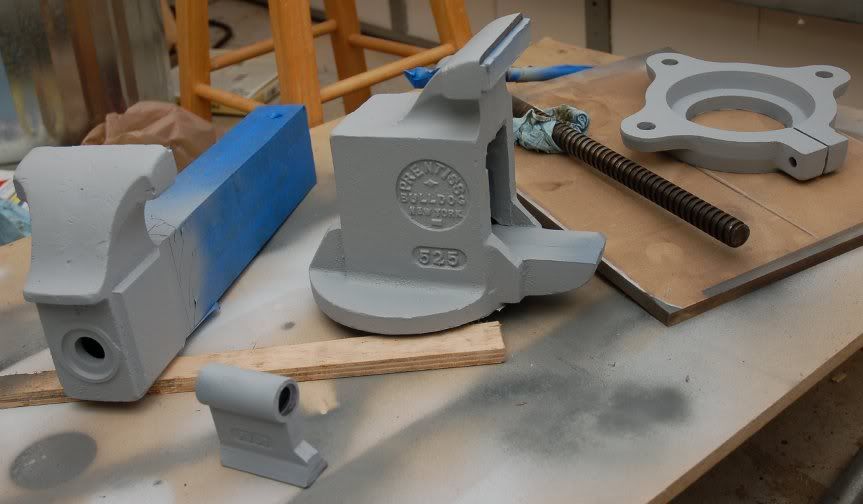
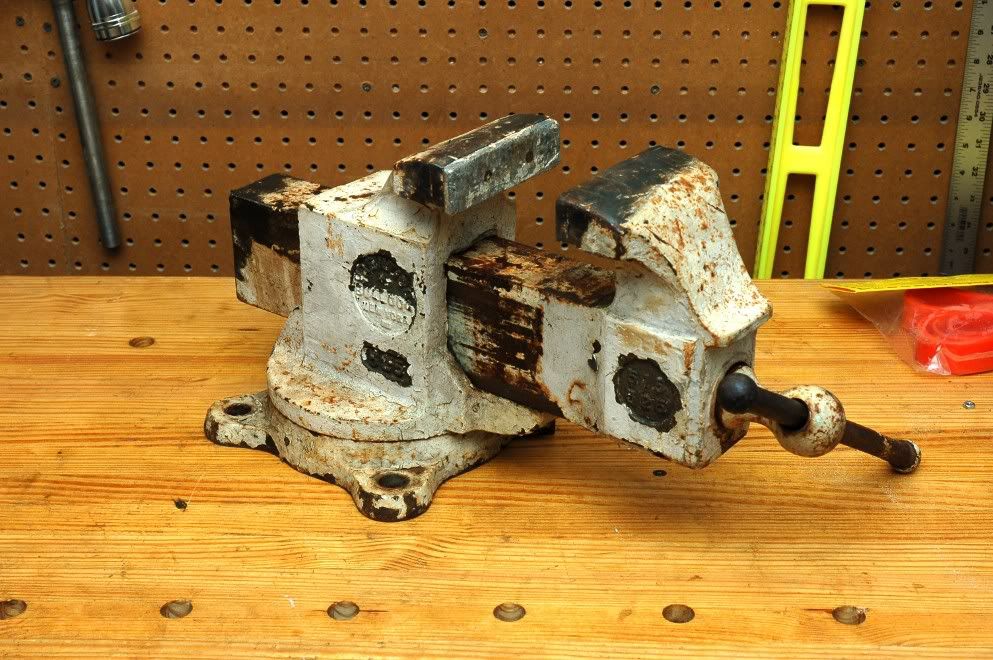
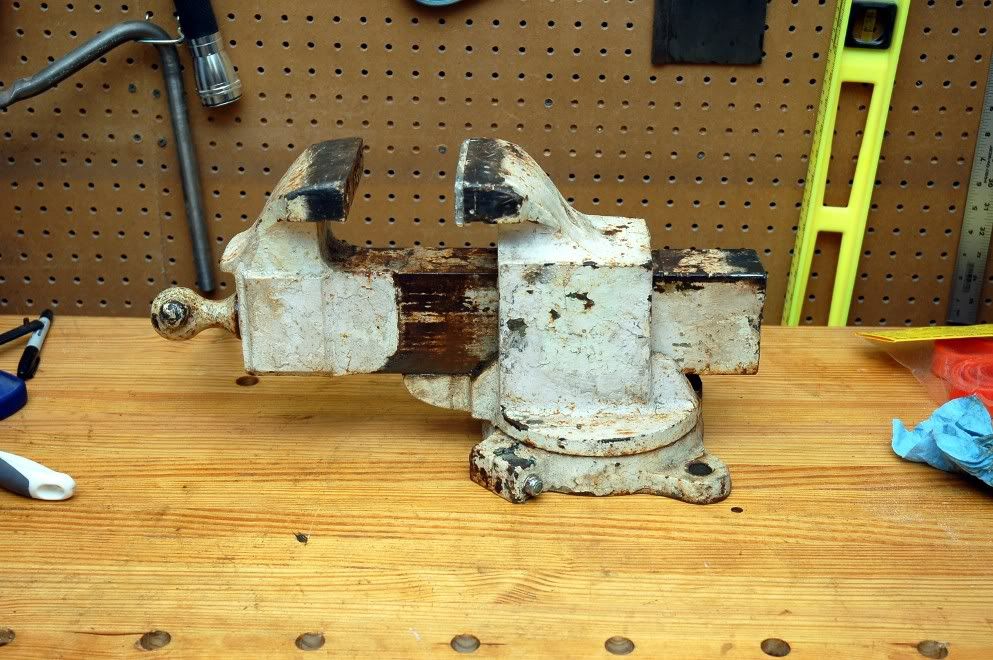
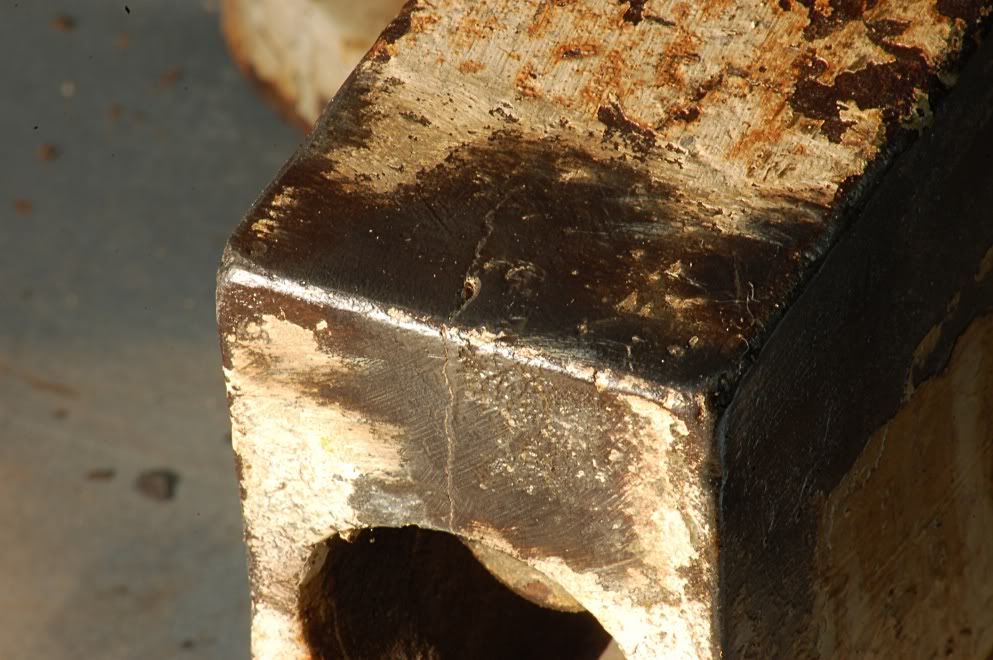
Everyone else seemed to be restoring a vise so I decided to get in on the fun. I found a Prentiss Bulldog 525 on Craigslist and was able to pick it up yesterday. It weighs in at 63 pounds has 4.5" wide jaws, and opens to 6". It's pretty ugly right now but that'll be getting changed soon. The person I bought it from said he bought it surplus from Pensacola Naval Air Station when he worked there. If so thats neat history but if not it doesn't bother me. The only problem I've found so far is a crack on the back of the slide. It's just a hairline one and is in a low stress area so I'm not concerned.

Here are some pics of the vise as it was yesterday.
Vise1.jpg

vise2.jpg


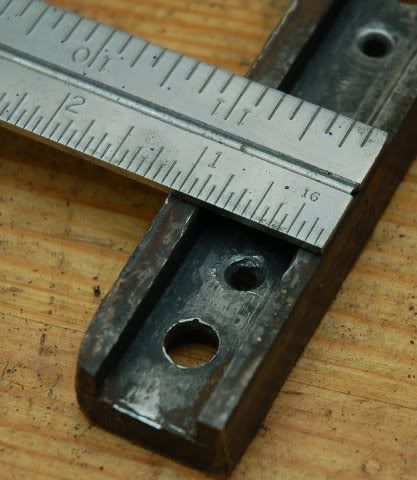
Here's a close up on the crack...
crack1scaled.jpg


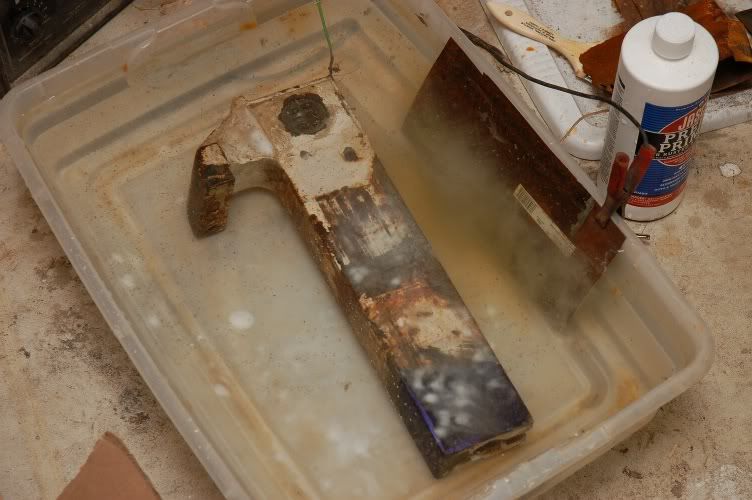
This evening I worked on getting it apart. It turned out that I could not completely remove the dynamic jaw and slide from the vise's body. I painted the end of the slide in machinist's blue and filed a little where it was catching. This was repeated multiple times but finally I succeeded in getting it apart. The retaining nut for the screw was also fun to remove. In the end I was able to get it apart and ready to be cleaned up.

apart.jpg


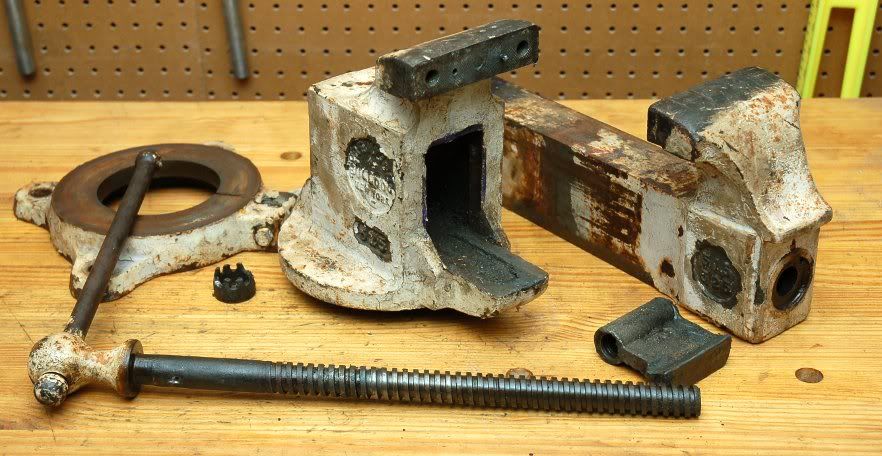
I'm going to see how well electrolysis does on it first. If it turns out poorly then I'll probably try to media blast it.

I do want to give a big thank you to mjozefow who answered multiple questions before I went to pick up the vise! You Rock!!
 
To avoid these ads, REGISTER NOW!

Zrexxer

Well-known member
Joined
Jan 23, 2007
Messages
5,058
Location
Pflugerville, TX
The person I bought it from said he bought it surplus from Pensacola Naval Air Station when he worked there.
That explains the 1/4" thick paint... the Navy's big on painting things.

I'd wager that crack resulted from someone using the back of the slide as a makeshift anvil. The good part is, that's just about a zero stress area as long as it doesn't propagate further. You should be just fine without doing anything about that.
 

BanjoSavesTheDay

Well-known member
Joined
Nov 10, 2009
Messages
627
Location
Huntington, WV
That thing looks hideous! :lol: It's really going to look fantastic when you're done with the restoration, though. Excellent aquisition!

One thing I might suggest is to hit it with a wire wheel to knock off a lot of that paint before you electrolysize it.

What would be REALLY cool is if you painted both the circles the same color, then masked them off and painted the rest of the vise another color, then highlighted the letters in either the same color as the rest of the vise or even a third color. :thumbup::thumbup::thumbup:
 
OP
D

DavidB

Well-known member
Joined
Feb 6, 2010
Messages
734
Location
Navarre, FL
I did wire wheel it a little bit but then though that the paint might have lead in it and I want to try to keep a minimal amount of it in my garage. Turns out it does have lead in it according to one of those tests you buy at the store. Luckily the electrolysis worked well on the paint. I left it in over night and all day. When I pulled it out the paint had bubbled up and peeled off easily with a scraper. There are still a few spots on there but I'll take care of those with the wire brush.

Here's a pic of the results. Its not rusty though it looks that way a little in the pic.
body.jpg


Currently I have the slide in the "tank"
slide.jpg
 

Boiler

Well-known member
Joined
Nov 20, 2009
Messages
1,967
Location
Indiana
How does the slide on that come out, just crank away and it falls apart? If so, I think the inside of the end of my slide on my "new" vise is jamming on the nut, right at the end of the stroke.
 
OP
D

DavidB

Well-known member
Joined
Feb 6, 2010
Messages
734
Location
Navarre, FL
Yes, on this one you open the jaws as much as possible until the screw disengages. Then you can pull the slide out. At first mine could not be removed because the end of the slide had been hammered on and deformed causing it to jam. After some careful filing, I was able to remove it.


For the folks who have restored vises before, do you use primer before shooting your top coat?
 

mjozefow

Well-known member
Joined
Apr 9, 2009
Messages
2,111
Location
Lafayette, IN
Let me guess...I can just send the vise up to you and you'll blast it and paint it. Then...eventually you'd return it....someday. :bounce:

Exactly! :beer:

You've got me figured out.

I like to have a cleaner vise to start the electrolysis, but it doesn't matter that much. I always seem to have to remore the vise from the bath 6-7 times when I don;t strip the paint first. Chemical stripper and a pressure washer is an old standby. Or a garden hose if the stripper is good! (take that one out of context, go ahead).
 
Last edited:

BanjoSavesTheDay

Well-known member
Joined
Nov 10, 2009
Messages
627
Location
Huntington, WV
For the folks who have restored vises before, do you use primer before shooting your top coat?

Yes I do. I bought some super thick marine/industrial primer at sherwin williams and that stuff really does the trick. Not only is it nice and strong, but it fills in a lot of the casting imperfections really well and makes the vise look better. I'll try to find the number on the can later.
 

BanjoSavesTheDay

Well-known member
Joined
Nov 10, 2009
Messages
627
Location
Huntington, WV
Oh and the vise is looking very nice! I never even would have thought about the paint having lead in it. Good call. Can't wait to see the slide clean.
 
OP
D

DavidB

Well-known member
Joined
Feb 6, 2010
Messages
734
Location
Navarre, FL
Any suggestions on how to remove the jaw inserts? They seem to be of the "U" design that is held on with screws. The screws were gone when I got vise. There is a pin in the middle of the face of the pad though.
 
OP
D

DavidB

Well-known member
Joined
Feb 6, 2010
Messages
734
Location
Navarre, FL
Nevermind. I managed to get them apart I just had to get a little rough with it but it turned out well. I just kept alternating from side to side wedging it off slowly. I got a couple coats of primer on the body, dynamic jaw/slide, screw cap, and nut tonight. The base is in the tank currently being cleaned.
 

mjozefow

Well-known member
Joined
Apr 9, 2009
Messages
2,111
Location
Lafayette, IN
Glad it worked out. Don't paint anything that slides. It will gum up the vise, and inevitably scrape off in contact areas.
 
OP
D

DavidB

Well-known member
Joined
Feb 6, 2010
Messages
734
Location
Navarre, FL
It's an exciting time in the restoration of the vise as I get to sit around and watch paint...well primer dry. If it's a sliding surface it's been masked to avoid the problems mjozefow spoke of.

Here, I'll let you share in the excitement.
primer.jpg


On to the jaw inserts. Is there a source out there for jaw inserts that will fit this vise? Here is a pic of the back of the insert to give an idea of it's size.

insert.jpg


Thanks,
David
 
To avoid these ads, REGISTER NOW!

mjozefow

Well-known member
Joined
Apr 9, 2009
Messages
2,111
Location
Lafayette, IN
On to the jaw inserts. Is there a source out there for jaw inserts that will fit this vise? Here is a pic of the back of the insert to give an idea of it's size.


Thanks,
David

You are going to be on your own with that, I have not heard of a place that sells them. A local machine shop is likely the best bet.

It is looking AWESOME!
 

BanjoSavesTheDay

Well-known member
Joined
Nov 10, 2009
Messages
627
Location
Huntington, WV
That thing is looking great! It's going to look so good when it's done.

Isn't there somebody on this forum who will make jaws for members? I thought I saw that somewhere but I can't remember who...
 
OP
D

DavidB

Well-known member
Joined
Feb 6, 2010
Messages
734
Location
Navarre, FL
Finally got the paint on it! I used Rustoleum "professional" primer and Hammered Black. Hopefully it'll hold up...but I'm not so sure since it scuffed through the paint in a couple areas already. Anyways here are some pics!

Here's the labeled side. I thought the silver would look nice and make the lettering stand out some.
painted1.jpg


A front perspective view.
painted2.jpg


Other side.
painted3.jpg


Close up on the labeling.
painted4.jpg


A couple of random shots of it apart.
painted5.jpg


painted6.jpg


A picture of the collar that originally linked the screw to the slide and the new set screw collar I replaced it with.
painted7.jpg


Pic of the Prentiss and the Babco vise I've been borrowing from a friend.
vises.jpg


In the future I'll probably replace the jaw inserts as they're very well worn but for now they're back in. All in all I think it turned out well. I expect to get many years of good service out of it. This probably won't be the last vise I restore as it was fun and pretty quick to complete.

I can post more pics if anyone wants to see anything specific.

Thanks!
David
Yes, the Babco comes from China.
 
OP
D

DavidB

Well-known member
Joined
Feb 6, 2010
Messages
734
Location
Navarre, FL
That looks great! I want a Prentiss! :drool::drool::drool::drool:

You really did a good job on that. Out of curiousity, what did you use to grease everything up with?

Any bare surface has Johnson's Paste floor wax on it. The screw and base have some synthetic wheel bearing grease on them. I had it on hand and figured I'd give it a try. Besides it's red and goes well with the black. :bounce:
 

BanjoSavesTheDay

Well-known member
Joined
Nov 10, 2009
Messages
627
Location
Huntington, WV
Any bare surface has Johnson's Paste floor wax on it. The screw and base have some synthetic wheel bearing grease on them. I had it on hand and figured I'd give it a try. Besides it's red and goes well with the black. :bounce:

Floor wax! That's a great idea. I bet it is a lot tougher than the stuff I used on my Reed. I will definitely use that next time though.
 
OP
D

DavidB

Well-known member
Joined
Feb 6, 2010
Messages
734
Location
Navarre, FL
Floor wax! That's a great idea. I bet it is a lot tougher than the stuff I used on my Reed. I will definitely use that next time though.

I use it on my tablesaw top and jointer bed. With regular applications (once a month) it works well keeping the surface smooth and rust free.
 

Boiler

Well-known member
Joined
Nov 20, 2009
Messages
1,967
Location
Indiana
Do they make synthetic sealants similar to paint sealants for bare metal that lasts longer than wax? Or has anyone tried paint sealant?
 

pfbz

Well-known member
Joined
Dec 17, 2008
Messages
953
What technique did you use to highlight the raised lettering? Just careful hand brushing of the silver paint?
 

Motown 454

Well-known member
Joined
Sep 25, 2008
Messages
1,359
The vise looks great. I just bought a 515 Prentiss bull dog. Heven't got it in yet. Nice work.
 
OP
D

DavidB

Well-known member
Joined
Feb 6, 2010
Messages
734
Location
Navarre, FL
Thanks! I appreciate the complements. Theres nothing complicated about doing it and I think anyone's could turn out like mine did.
 

Hooks

Member
Joined
May 10, 2009
Messages
5
Location
Michigan
I know this is an old thread, but thanks for the pics!....I was able to get this same vise from my fathers wood shop just recently as we cleaned it out to sell the property....I'm holding on to it to give to my son one day...
 

gilbo

Well-known member
Joined
Feb 1, 2010
Messages
716
I know this is an old thread, but thanks for the pics!....I was able to get this same vise from my fathers wood shop just recently as we cleaned it out to sell the property....I'm holding on to it to give to my son one day...


:needpics:
 

Tourabout

New member
Joined
May 21, 2014
Messages
1
Did anyone ever find a supplier for the jaw inserts on the prentiss bull dog vise? Mine is a 5 inch wide jaw and I am missing one.
Thanks
 
To avoid these ads, REGISTER NOW!
Top Bottom