To avoid these ads, REGISTER NOW!

Restoring my 1910 Buick to all of its' former beauty.

OldCarGuy

Well-known member
Joined
Nov 29, 2005
Messages
1,983
Location
Ohio
She was in a museum for the past fifty years and wasn't run since... Yes it's actually a 1910,, not a 1907 as the previous owner had thought. It took a few weeks of research to determine for sure. And confirmed by the body & engine serial numbers, along with a few subtle model year changes.. I kind of wished it was a single digit car though... However a few minor changes makes it a better car to tour with... The main reason I wanted an early two cylinder car...

I'll be adding to this post as I progress in the restoring of my 1910 Buick model 10 five passenger touring car. Don't expect this to happen too quickly. As I have a number of other projects going on in my life. Here's a link to the thread of adding the starter/generator.

http://www.garagejournal.com/forum/showthread.php?t=78619

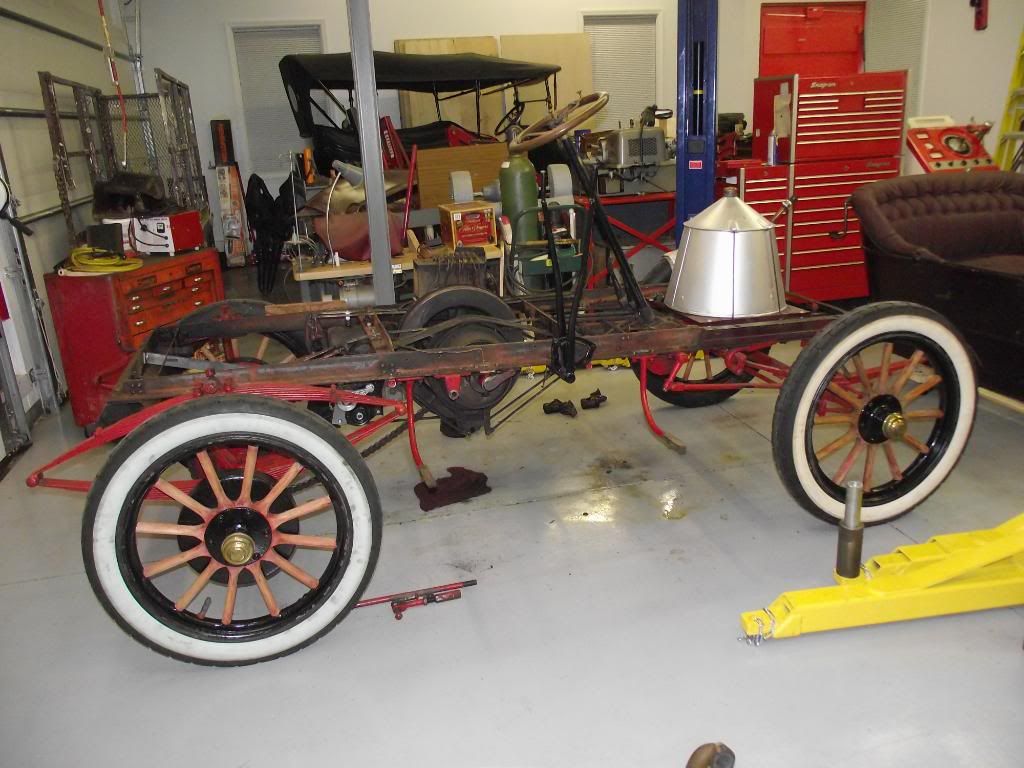
First things first. Remove the top. Then take out four bolts that hold the all wooden body to the frame and two bolts that hold the body to the steel firewall. Placed two 2”X6” between the body and the frame. That I installed eye-hooks to fasten lifting chains to. And 4” diameter soft wheel casters so the body could be easily maneuvered around the shop.

DSCF2565.jpg


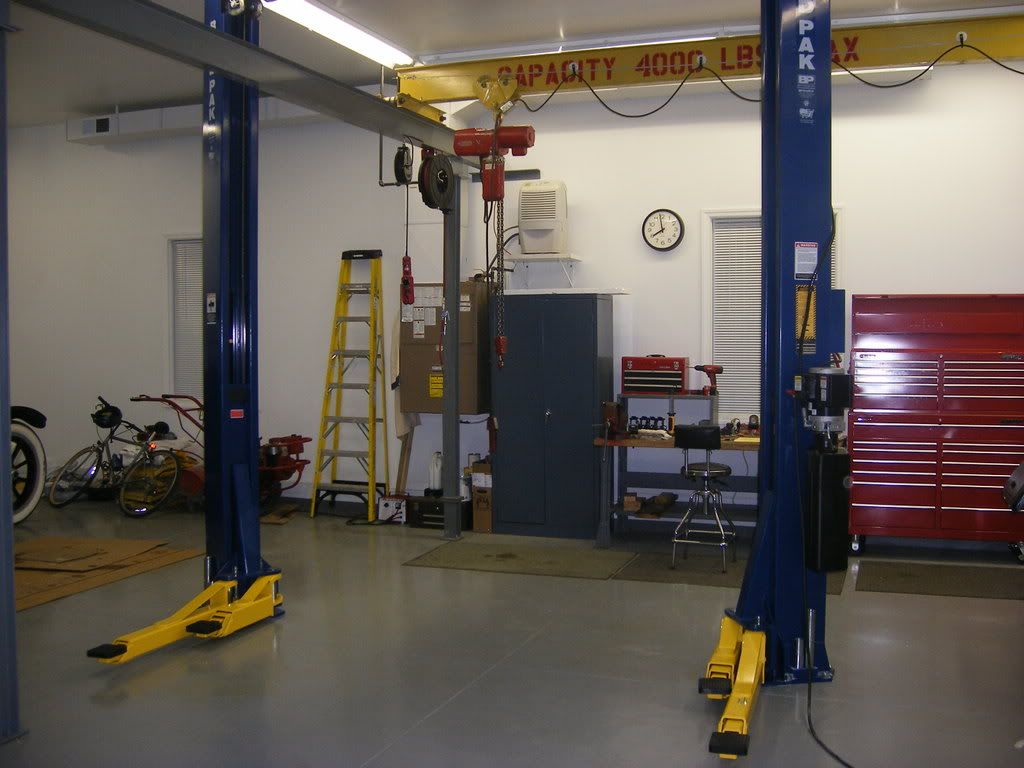
Followed by attaching chains to the lift arms of my Bendpak two-post lift. And raising the body off the frame....

DSCF2562.jpg


DSCF2558.jpg


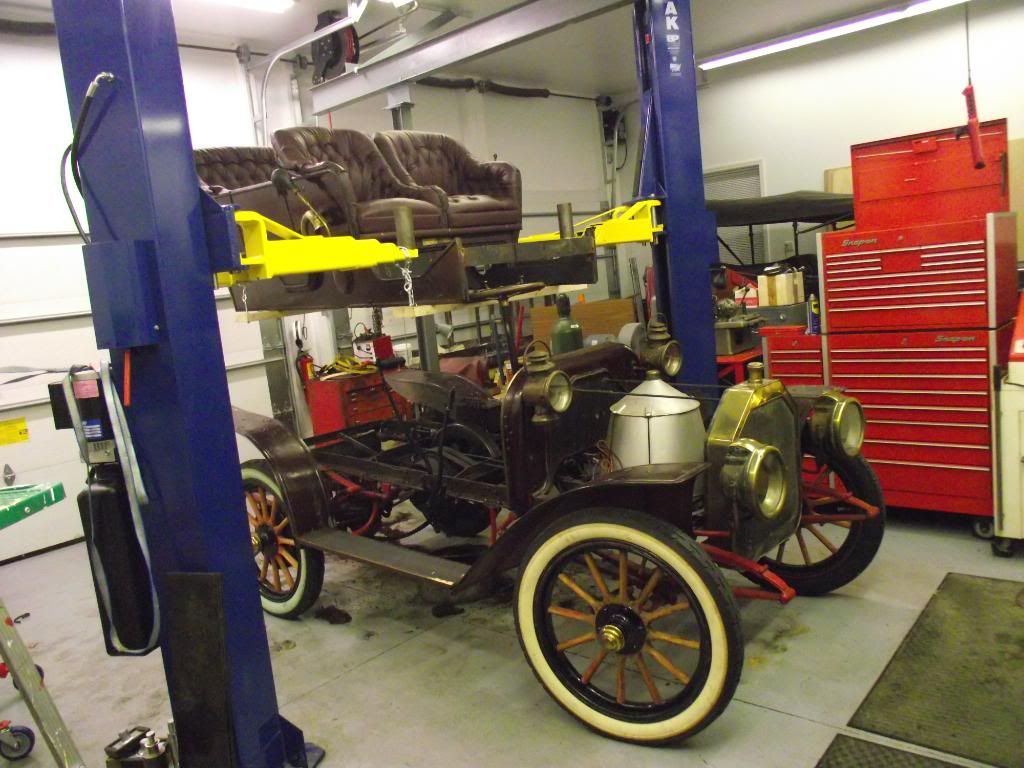
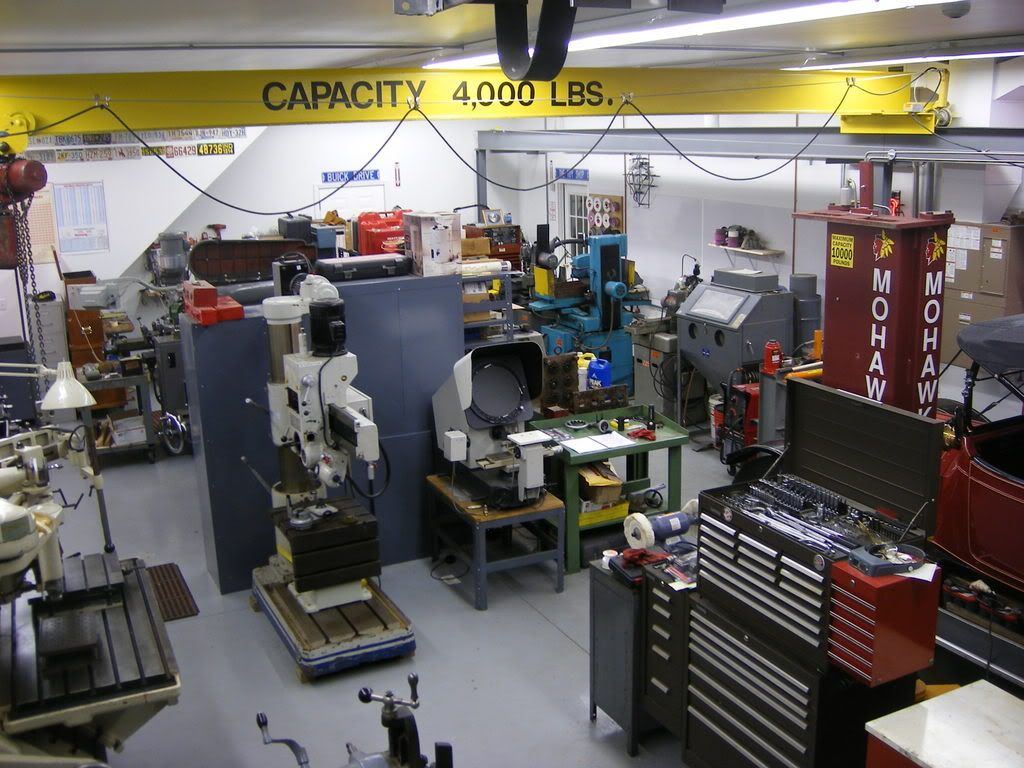
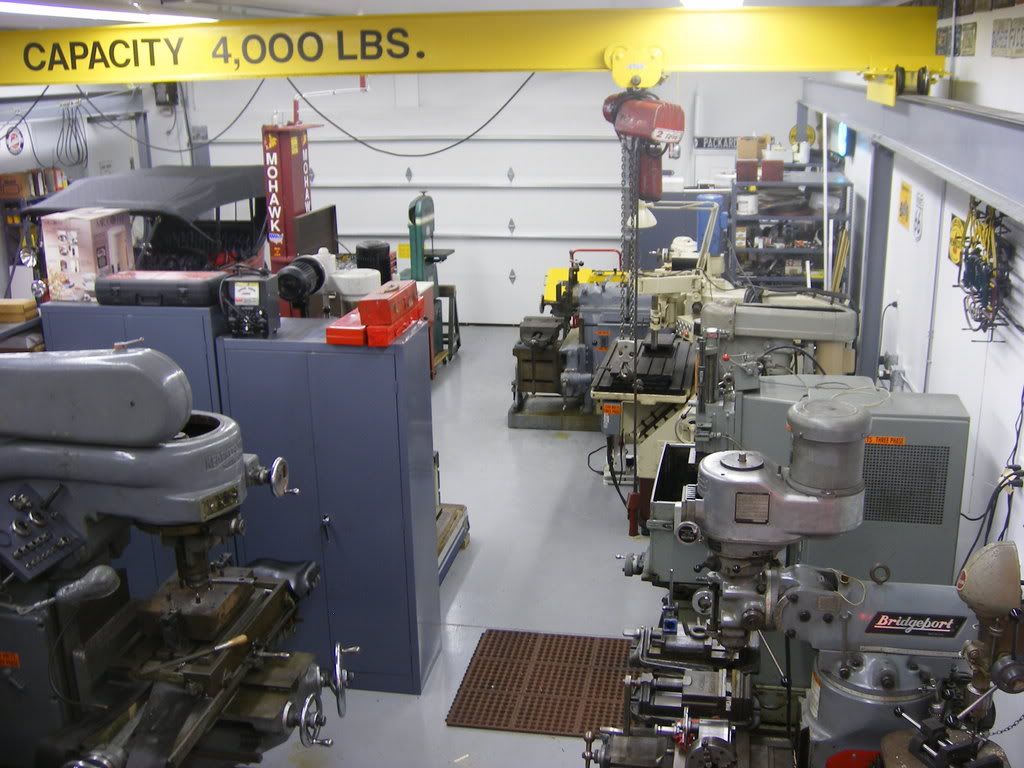
Rolled the bare chassis out of the garage. Then cleaned up the floor from the mess of oil and grit that this old car created on the floor. That's what so nice about a good epoxy floor coating. Simply wet mop using hot water mixed with degreaser and it's good as new.... Then lower the body to the floor and roll the chassis back in....

DSCF2585.jpg


Several views of the mechanics under the body...

DSCF2581.jpg


DSCF2567.jpg


DSCF2578.jpg


Two cylinder opposed engine. With 4 1/2” bore and 5” stroke... The water droplets are from the snow when I left it outside while I was mopping the floor.... On top the engine is the “oiler”. It consists of an oil reservoir, pump that runs off the engine, and a series meters & tubing. That feeds lubricant oil to all the engine bearings..

DSCF2573.jpg
 
To avoid these ads, REGISTER NOW!

tdkkart

Well-known member
Joined
Jun 17, 2006
Messages
6,887
Location
Eastern Iowa
S*&W?? Please keep your 4-letter words to yourself. Being November we are living on borrowed time, please don't push it.

Very much looking forward to watching this resto, you have a way with words and pictures that makes it very interesting.
 

eborcim

Well-known member
Joined
Apr 5, 2009
Messages
2,425
Location
Central, MO
Wow! I've been around old cars for a while, but never seen the underside of such a beast! This one will be good!
 

swharris

Well-known member
Joined
Jan 10, 2010
Messages
403
Location
So. Cal.
Is that a bridge crane(gray I-beams)? If so, any details you can share? I want to incorporate a light duty one in my shop design. Thanks.
 

santagary

Well-known member
Joined
Mar 23, 2010
Messages
821
Location
Pagosa Springs, Colorado
Wow, your thread makes me proud to be a buckeye from Akron...graduated from Kenmore in '59...parents went to Barberton and Norton Center...great grandfather retired from B&W in early fifties. Cousin, Nelson Eddy, at Copley, was fastest guy in pads in Ohio in the '50's. My best friend, Frank Manning, was head of propulsion at NASA. I'm enjoying south western Colorado's weather, but I miss Akron's culture and history.
 

bigdav160

Well-known member
Joined
Apr 14, 2007
Messages
2,027
Location
Deep in the heart of Texas
Wow, looks like the Buick that sat (unprotected) behind DeMontrond Buick (north of Houston).

Although it could have been mid teens. It had the engine underneath and similar chain drive.
 

Jay H 237

Well-known member
Joined
Apr 24, 2005
Messages
1,994
Location
Torrington, CT
For a car that has sat so long have you tried to turn the motor over by hand? Did they atleast keep oil and other fluids in it or was it a "dry" museum piece?
 

Kurn

Well-known member
Joined
Aug 15, 2007
Messages
1,066
Location
Ravenna, Oh
Wow, your thread makes me proud to be a buckeye from Akron...graduated from Kenmore in '59...parents went to Barberton and Norton Center...great grandfather retired from B&W in early fifties. Cousin, Nelson Eddy, at Copley, was fastest guy in pads in Ohio in the '50's. My best friend, Frank Manning, was head of propulsion at NASA. I'm enjoying south western Colorado's weather, but I miss Akron's culture and history.

Yeah,but you wouldn't miss Akron's mayor........
 
OP
O

OldCarGuy

Well-known member
Joined
Nov 29, 2005
Messages
1,983
Location
Ohio
You have some awesome toys there! Need an apprentice/shop monkey?

Actually I would really like to find said person..

For a car that has sat so long have you tried to turn the motor over by hand? Did they atleast keep oil and other fluids in it or was it a "dry" museum piece?

The first thing I did before I purchased the car was to see if the engine was free. And it was. Then I drained all the remaining fluids and added fresh before I started it.

Wow, looks like the Buick that sat (unprotected) behind DeMontrond Buick (north of Houston).

Although it could have been mid teens. It had the engine underneath and similar chain drive.

It couldn’t have been a mid-teen Buick. The 1910 model F and G were the last year that Buick had placed the engine was under the seat..

Is that a bridge crane(gray I-beams)? If so, any details you can share? I want to incorporate a light duty one in my shop design. Thanks.

Here’s the best picture of the bridge crane that I installed in te garage where I’m working on my 1910 Buick. It was at my old house and I was unsuccessful trying to sell it. And decided to put it up after all before in this garage before the BendPak lift was installed.... The travel is limitd by the lift. But it’s still okay to pull an engine with a car on the lift.... The main reason I put it there in the first place..

DSCF2210.jpg


I couldn’t find the thread that I started with the install of that crane. No doubt it’s lost in the FreeParking Zone....

But here’s a picture of the bridge crane that I built and installed in my 30" by 50' attached garage workshop...

DSCF2806.jpg


DSCF2811.jpg


Links to how I built it...

http://www.garagejournal.com/forum/showpost.php?p=30477&postcount=53

http://www.garagejournal.com/forum/showpost.php?p=30479&postcount=54


.
 
OP
O

OldCarGuy

Well-known member
Joined
Nov 29, 2005
Messages
1,983
Location
Ohio
I have since removed the fenders, running boards, firewall, and radiator.

Getting down to the bare bones...
DSCF2698.jpg


Then took off the front cylinder jug. After removing the intake & exhaust pipes, water cooling lines, along with the intake and exhaust valve cages. All Buick's, except for a few truck models, had overhead valves since the first one rolled off the assemble line in 1904. This engine has 159 cubic inch displacement,, 4 1/2” bore with a 5” stroke. While the Ford model T that were manufactured from 1908 till 1927 had 177 cubic inch four-cylinder engine,, 3 3/4” bore with 4” stroke...

Jug removed with valve cages, valves and rocker arms....

DSCF2686.jpg


Here's what the piston looks like. Notice the three solid compression rings, no oil rings...

DSCF2696.jpg


Wouldn't you know it? Valve push rods with roller cam followers...

DSCF2702.jpg


Here's the single-barrel Schebler carburetor with the intake manifold. Talk about ram induction! The fuel mixture travels two feet from the carburetor to the center of the engine. Only to return to the top of the two cylinder heads.... Nearly doubling that distance...

DSCF2701.jpg


The outside of the jug's water jacket is cracked on the lower side.

DSCF2687.jpg


Sand blasting revealed that the casting wall was paper thin and true extent of the damage... Not simply a crack...

DSCF2713.jpg
 

redsky49

Well-known member
Joined
Jan 21, 2009
Messages
582
Location
near the coast in eastern North Carolina
Sand blasting revealed that the casting wall was paper thin and true extent of the damage... Not simply a crack...

DSCF2713.jpg
[/QUOTE]

What do you do with a piece like this? Are there replacements available or do you try to repair? With cars this old, are there parts suppliers?
 

Falcon67

Well-known member
Joined
Jun 11, 2009
Messages
18,371
Location
Merkel, TX
Nice beast. Got to love the old wiring - it has a quality of appearance not found today. Looks like a very fun project and it's in the right home for makin' parts.

That intake is a hoot, wonder if it's a little cold natured! I'm digging on the upholstery from Gallery Furniture. You could put legs on the front buckets and set them in the living room.
 
Last edited:
OP
O

OldCarGuy

Well-known member
Joined
Nov 29, 2005
Messages
1,983
Location
Ohio
Sand blasting revealed that the casting wall was paper thin and true extent of the damage... Not simply a crack...

DSCF2713.jpg


What do you do with a piece like this? Are there replacements available or do you try to repair? With cars this old, are there parts suppliers?

There are no parts available today to replace this jug. And few are around to be purchased used.

It's not as bad as you may think! The good news is that it's only the outer water jacket that is cracked, not the cylinder wall. And that the coolant system is not pressurized. So we're only dealing with the weight of maybe two feet of water..

My first approach will be welding. Should have 75% chance that'll work. If that fails,, I'll turn the outside diameter of the jug round, removing all the bosses. Then press a tubular sleeve over the jug. Then re-machine the exhaust, intake and water ports. Along with all the tapped holes.... My only other option, and last resort, would be to make a wooden pattern and cast new jugs. Then finish machine.. very time consuming and costly....
 
Last edited:
OP
O

OldCarGuy

Well-known member
Joined
Nov 29, 2005
Messages
1,983
Location
Ohio
Looks like there was some welding repairs on that area before.

How big a section are you plannig to cut out of there?

You have a good eye. it was welding before, along with adding an epoxy patch. That my sand blasting removed! The metal is rather thin in and around all the cracked area. And looks as if I'll be cutting out a rather large section. Maybe 3" by 6".
 
To avoid these ads, REGISTER NOW!

chancez

Active member
Joined
Oct 28, 2010
Messages
35
This is way too cool. I will be following this for sure.

I Love the chain drive!

And you have your work cut out for you on that cylinder.
 

tdkkart

Well-known member
Joined
Jun 17, 2006
Messages
6,887
Location
Eastern Iowa
You have a good eye. it was welding before, along with adding an epoxy patch. That my sand blasting removed! The metal is rather thin in and around all the cracked area. And looks as if I'll be cutting out a rather large section. Maybe 3" by 6".


S'pose this had anything to do with why the car was parked??

Do you think the casting had issues from day 1 or is it a combination of corrosion and maybe a freeze or two??

Good luck with it, I'm sure you'll get 'er done.
 
OP
O

OldCarGuy

Well-known member
Joined
Nov 29, 2005
Messages
1,983
Location
Ohio
S'pose this had anything to do with why the car was parked??

Do you think the casting had issues from day 1 or is it a combination of corrosion and maybe a freeze or two??

Good luck with it, I'm sure you'll get 'er done.

I would guess that the car wasn't winterized many years ago. And the jugs cracked from cold weather. After unsuccessful attempt to repair them,, the owner just parked it. Then sat in a museum for another fifty years.. All the past owners aren't around to tell the story..

Seeing how badly the front jug was cracked. No doubt the rear jug has some issues as well. Removing the rear jug and sandblasting it. Revealed that it was also cracked. Along with a shoddy attempt to repair it with weld and epoxy...

DSCF2731.jpg


I have it this far, I might as well remove the rest of the engine. After disconnecting the planetary gear transmission from the flywheel, and a few more bolts and tubing. The crankcase assembly is lifted from the chassis.... Using a nylon sling and my overhead bridge crane.

DSCF2764.jpg
 

KrisKustomPaint

Well-known member
Joined
Sep 8, 2010
Messages
99
A 1910 buick was the oldest car I have ever worked on. Thanks for bringing back some frightful memories. Being told to drill holes in the body of a 95 year old car (at that time) seemed like lunacy.
 
OP
O

OldCarGuy

Well-known member
Joined
Nov 29, 2005
Messages
1,983
Location
Ohio
Just picked up my Radiator this weekend from the radiator shop. We salvaged the original 100 year old core. And only had to solder off two tubes. That busted from freezing. Made a new bottom tank. And an all new brass shell... All it needs is some final polishing and it's ready to mount on the frame...

The cylinder jugs are still at the welder's shop. Hopefully the first one will be ready this week... Surely the second one won't take so long. Then I can get on with re-building the engine... And now with my paint booth finished, I can return to the task on hand. Finish disassembling the frame and body...

DSCF3374.jpg


Closeup of Buick Script...

DSCF3391.jpg


Manufacturer's plate mounted to bottom...

DSCF3384.jpg
 

tdkkart

Well-known member
Joined
Jun 17, 2006
Messages
6,887
Location
Eastern Iowa
Wow, bet that wasn't done by just any "Joe's radiator shop down on the corner".

Unfortunately radiator shops are few and far between these days. Radiator repair is becoming another of those lost arts.
 

tdkkart

Well-known member
Joined
Jun 17, 2006
Messages
6,887
Location
Eastern Iowa
Hard to say what's up, OCG hasn't been on here since June, last posts were about his dog passing away.
Hope everything is OK...........
 

My Old Tools

Well-known member
Joined
Jun 4, 2014
Messages
5,424
Location
Hamrick Lake, TX
There are no parts available today to replace this jug. And few are around to be purchased used.

It's not as bad as you may think! The good news is that it's only the outer water jacket that is cracked, not the cylinder wall. And that the coolant system is not pressurized. So we're only dealing with the weight of maybe two feet of water..

My first approach will be welding. Should have 75% chance that'll work. If that fails,, I'll turn the outside diameter of the jug round, removing all the bosses. Then press a tubular sleeve over the jug. Then re-machine the exhaust, intake and water ports. Along with all the tapped holes.... My only other option, and last resort, would be to make a wooden pattern and cast new jugs. Then finish machine.. very time consuming and costly....
There are a few places that will cast from the original. I'm assuming the inside is simply bored? Cattail Foundry is one I'm familiar with. They support the old tool community and recast all kinds of parts from patched together originals. Bondo up the holes of course. They are VERY reasonable in price.

Looking at it some more, you would likely have to go to a two piece casting and then press in a cylinder. Still doable at some of the small foundries.
 
Last edited:

bigdav160

Well-known member
Joined
Apr 14, 2007
Messages
2,027
Location
Deep in the heart of Texas
I remember when I was a tech at Demontrond Buick they had a chain drive Buick touring car on the showroom floor. Someone made the decision to push it out to the back lot where it deteriorated pretty quickly.

Really a sad sight for an old car lover
 

speed bump

Well-known member
Joined
May 28, 2008
Messages
6,317
Location
Butte Montana
I was just wondering whatever happened to OCG the other day. Between the machine shop and the cars his threads were always a great read.
 
To avoid these ads, REGISTER NOW!
Top Bottom