
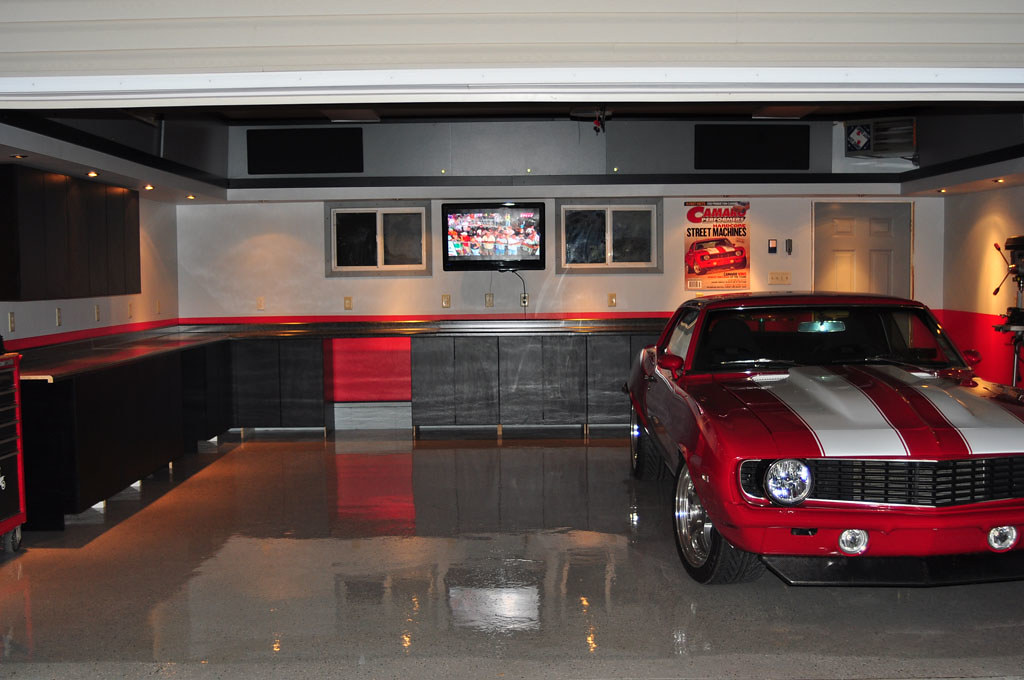
First things, first.... Gotta give props to the primary inspiration for my layout. When I saw what XcYZ did with his shop at http://www.garagejournal.com/forum/showthread.php?t=45022 as you see below, I knew it right then. Gotta do it!
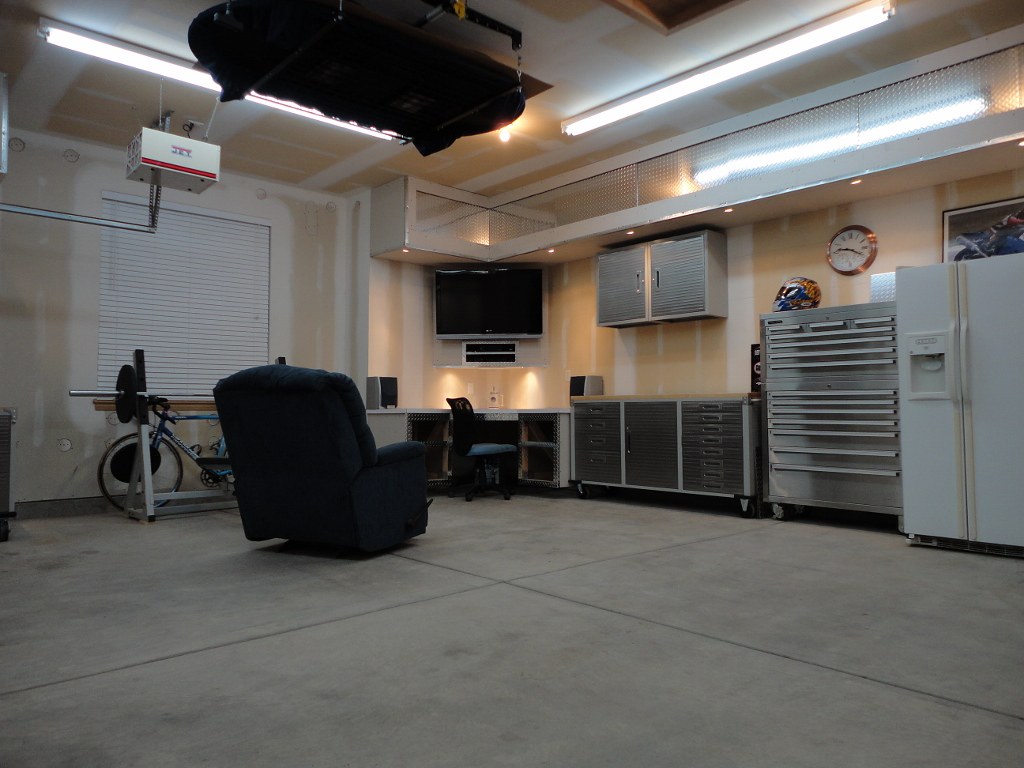
Ok, before I build this.....

I gotta build this.....


Yes, I will be painting the triple tuning fork on the epoxy floor...

Yeah, she's a work-in-progress, a labor of love, and a fun project. Much left to do including drywall patching (from wiring and blowing in insulation), mud & tape, paint, epoxy, running compressed air lines, new larger compressor, etc. Never stops. More to come on how I got to this point. Hope you enjoy. First, a few more pics of current progress.


Poker table and air cleaner hanging from the ceiling....

Alright, now for the build process in the order it occurred: wall & door separating the 1-car from the 2-car, whiteboard, blowing insulation behind the drywall (no pics), furnace and flue, ceiling cabinets, desk/media center.
Building the wall and door:


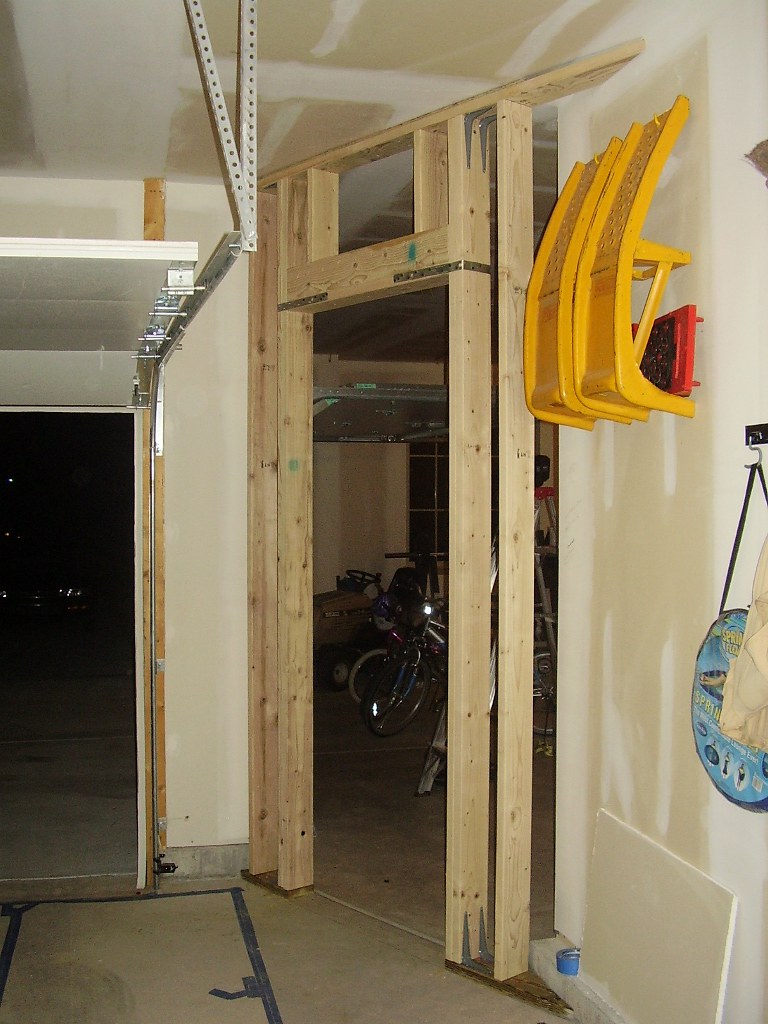
Lesson learned from building this wall. Code requires the garage floor to slope toward the driveway for drainage and I forgot to account for it. So after installing the door I had to modify the jam so the gaps around the door would be correct.
The opening above the door is for the through-the-wall air conditioner.
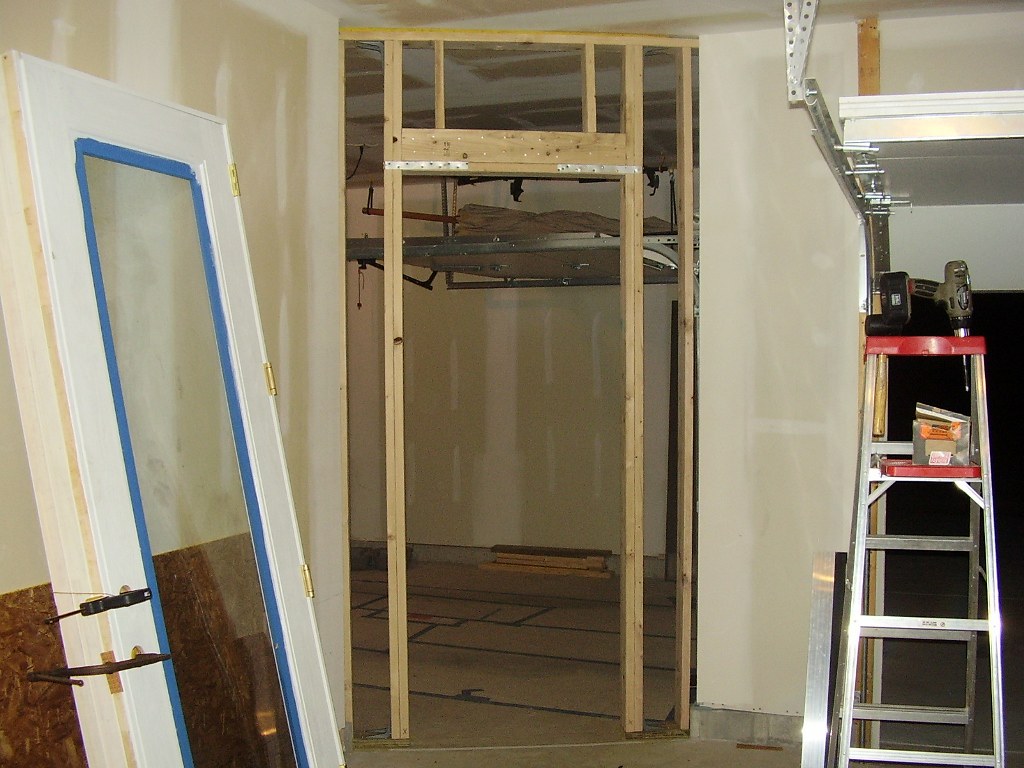

Door frame assembly. A little note about this door. I got it for $40 at the Habitat for Humanity Restore. With it's double pane and insulation I'm guessing it's probably a $400 door perhaps?


All kinds of creatures wanted in on the action!

Decided to add a built-in seat in the wall to sit and put shoes on and keep the kids' mud out of my Man Cave ("Mave" for short).

Drywall...

Could not get this shallow of an angle on my circular saw so I had to set up this hand saw guide to get the right angle for the drywall interface to the already existing wall.

Ten foot whiteboard. If I had to do it over again, I would have picked a smaller one. This one takes up too much valuable wall space. But I'll leave it the way it is since I now have enough storage elsewhere.

Like I said, no pics of blowing insulation inside the walls and above the ceiling. For the walls, I used a 4" hole saw so I could save the remnant and put it back in place for easier patching. Here's a tip when blowing insulation. I actually blew it twice. First I ran it through the blower into a huge fluffy pile in the middle of the garage. This eliminated the possibility of clogging and I think improved the R-value by making it extra fluffy. Settling after the fact probably reduced the R-value a little but it was really nice not having to deal with clogs. I used cellulose. Didn't want to hassle with airborne glass particles. Another thing, I got the blower rental for free when purchasing a 20 bag minimum at either Lowes or HD.
I wish I had more pics of installing the flue and natural gas line for the furnace. That was a fun job and worked out beautifully. Was a bit nerve-racking to cut a 14" hole in a perfectly good roof but that worked out well also and got it done just in time before cold winter temperatures. I found this furnace on Craigslist for $100. It's 100,000 Btu and heats the garage up to 70º in about 5 minutes. Whereas all the parts for the flue and gas line cost about $300. Kinda loud when it's running due to some rattling inside that I haven't investigated yet but nothing is better than working in a short sleeve shirt while it's blizzarding outside! Although it consumes valuable floor space I decided to install it on the floor to improve heating efficiency (heated air rises above colder air). Plus it would get in the way of ceiling cabinets above.


Ok, now the big job: Ceiling cabinets. I'm going to want lot's of closed storage when building the plane which keeps the majority of dust off the parts. When I saw XcYZ's garage, I knew instantly that's what I needed to build. I decided to go with 1 x 8 construction to keep the weight on the roof rafters lower. Needed 8 inches for the depth of the recessed lighting fixtures.

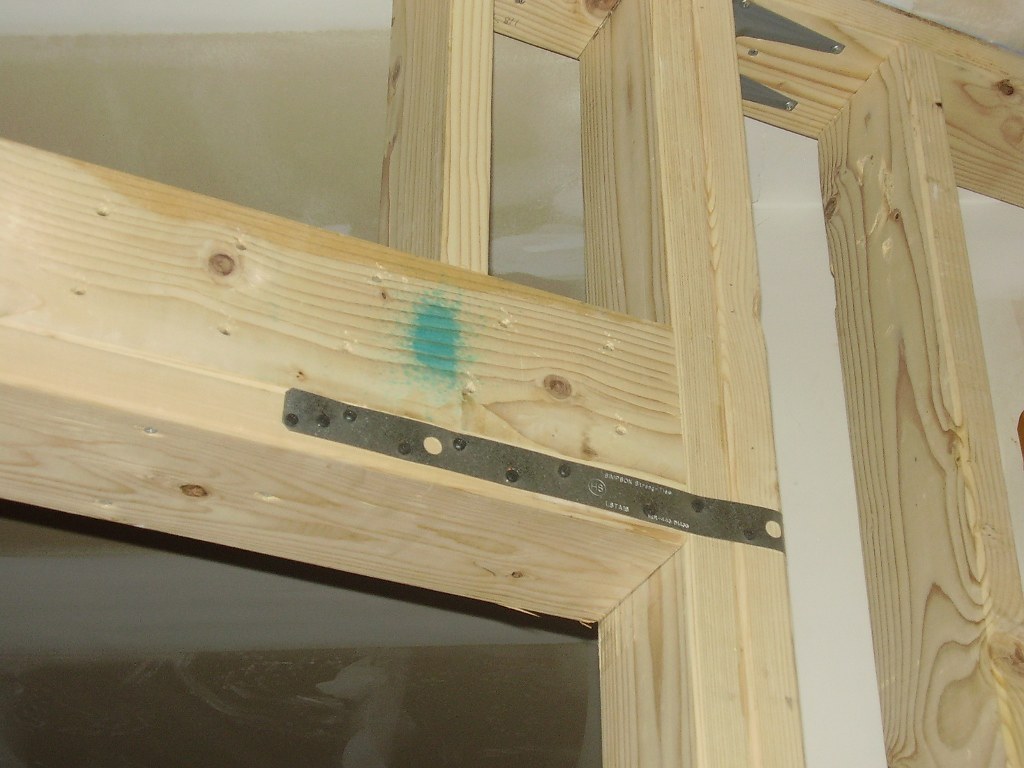
Step 1: Cut a small hole in the ceiling next to a rafter and tie the vertical supports into the roof rafters.

My son and my buddy Corey...

Next, set up the water level to trim the vertical support perfectly level. What I found was that the shelves were perfectly level but the roof and ceiling were not, causing more problems down the road with non-standard sliding door heights....


Trim next...

Ledger board and cross pieces next....

Framing complete....


Sheetrock.... yeah I have pushover friends who do all the work while I sit around and take pictures....


Wiring and decking.....


Let there be light!!!


Need some sliding doors.... queue the diamond plate....


Many more pics below..... keep scrolling down.
Ok, before I build this.....
I gotta build this.....
Yes, I will be painting the triple tuning fork on the epoxy floor...
Yeah, she's a work-in-progress, a labor of love, and a fun project. Much left to do including drywall patching (from wiring and blowing in insulation), mud & tape, paint, epoxy, running compressed air lines, new larger compressor, etc. Never stops. More to come on how I got to this point. Hope you enjoy. First, a few more pics of current progress.
Poker table and air cleaner hanging from the ceiling....
Alright, now for the build process in the order it occurred: wall & door separating the 1-car from the 2-car, whiteboard, blowing insulation behind the drywall (no pics), furnace and flue, ceiling cabinets, desk/media center.
Building the wall and door:
Lesson learned from building this wall. Code requires the garage floor to slope toward the driveway for drainage and I forgot to account for it. So after installing the door I had to modify the jam so the gaps around the door would be correct.
The opening above the door is for the through-the-wall air conditioner.
Door frame assembly. A little note about this door. I got it for $40 at the Habitat for Humanity Restore. With it's double pane and insulation I'm guessing it's probably a $400 door perhaps?
All kinds of creatures wanted in on the action!
Decided to add a built-in seat in the wall to sit and put shoes on and keep the kids' mud out of my Man Cave ("Mave" for short).
Drywall...
Could not get this shallow of an angle on my circular saw so I had to set up this hand saw guide to get the right angle for the drywall interface to the already existing wall.
Ten foot whiteboard. If I had to do it over again, I would have picked a smaller one. This one takes up too much valuable wall space. But I'll leave it the way it is since I now have enough storage elsewhere.
Like I said, no pics of blowing insulation inside the walls and above the ceiling. For the walls, I used a 4" hole saw so I could save the remnant and put it back in place for easier patching. Here's a tip when blowing insulation. I actually blew it twice. First I ran it through the blower into a huge fluffy pile in the middle of the garage. This eliminated the possibility of clogging and I think improved the R-value by making it extra fluffy. Settling after the fact probably reduced the R-value a little but it was really nice not having to deal with clogs. I used cellulose. Didn't want to hassle with airborne glass particles. Another thing, I got the blower rental for free when purchasing a 20 bag minimum at either Lowes or HD.
I wish I had more pics of installing the flue and natural gas line for the furnace. That was a fun job and worked out beautifully. Was a bit nerve-racking to cut a 14" hole in a perfectly good roof but that worked out well also and got it done just in time before cold winter temperatures. I found this furnace on Craigslist for $100. It's 100,000 Btu and heats the garage up to 70º in about 5 minutes. Whereas all the parts for the flue and gas line cost about $300. Kinda loud when it's running due to some rattling inside that I haven't investigated yet but nothing is better than working in a short sleeve shirt while it's blizzarding outside! Although it consumes valuable floor space I decided to install it on the floor to improve heating efficiency (heated air rises above colder air). Plus it would get in the way of ceiling cabinets above.
Ok, now the big job: Ceiling cabinets. I'm going to want lot's of closed storage when building the plane which keeps the majority of dust off the parts. When I saw XcYZ's garage, I knew instantly that's what I needed to build. I decided to go with 1 x 8 construction to keep the weight on the roof rafters lower. Needed 8 inches for the depth of the recessed lighting fixtures.
Step 1: Cut a small hole in the ceiling next to a rafter and tie the vertical supports into the roof rafters.
My son and my buddy Corey...
Next, set up the water level to trim the vertical support perfectly level. What I found was that the shelves were perfectly level but the roof and ceiling were not, causing more problems down the road with non-standard sliding door heights....
Trim next...
Ledger board and cross pieces next....
Framing complete....
Sheetrock.... yeah I have pushover friends who do all the work while I sit around and take pictures....
Wiring and decking.....
Let there be light!!!
Need some sliding doors.... queue the diamond plate....
Many more pics below..... keep scrolling down.
Last edited:
")


