To avoid these ads, REGISTER NOW!

Armorpoxy water based low VOC epoxy install!!

Killer95Stang

Well-known member
Joined
Jan 1, 2008
Messages
341
I'll start by saying, I was one of the two lucky winners of the contest Armorpoxy ran a few months back, for a free waterbased low VOC epoxy floor kit. With that said, I did receive the product and most of the installation tools for free, so I am sorta biased, but I do not have any loyalty to any coating or manufacture. I also did not have any prior installation experience of any kind on epoxy floors and my garage did meet Armorpoxy's requirements, of being 500sq ft or less. I kinda figure that living in CA with our mind crushing EPA laws helped me a little in the contest, since a lot of their solvent based products can't be shipped to CA. Who knows:dunno: Regardless, I am more than happy and honored to give their product a try.

As far as me the end user, I've gone back and forth for about 10 years on whether I would do epoxy or some sort of tile for my small 1961 18.5 x 19 foot CA two car garage. I've read this "flooring" forum for 10 years and I've watched pretty much every installation video on youtube. I even watched all those terrible Epoxy Shield and Rock Solid install videos. I guess winning the contest gave me a kick in the **** to finally get it done.

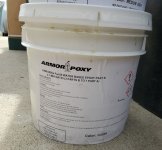
The product itself. I was given a kit large enough to do 550-600 sqft garage. This included a two part (A and B) water based low VOC epoxy base coat in light grey. I also received a two part (A and B) water based low VOC epoxy top coat. Also included was a large bag of flecks in black/white/blue color (about 4 quarts worth), Armorpoxy floor etch and a couple bags of Armorgrip anti-slip topcoat additive. Along with that, I received all the tools necessary (minus the rollers) to complete a small garage install. They also threw in a half gallon kit of Armorpoxy crack patch/ filler.

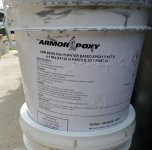
The product itself. Since the kit I was given hasn't been released to the public, it is only identified by its product numbers. I received a 2-1/2 gallon pail of ARM-8000X water based epoxy based coat in grey, with a 1 quart container of activator. I also received a 2-1/2 gallon pail ARM-0000X water based epoxy clear topcoat, with another 1 quart container of Part A activator.
 

Attachments

  • 20210307_125344.jpg
    20210307_125344.jpg
    102.1 KB · Views: 60
  • 20210307_125349.jpg
    20210307_125349.jpg
    128.6 KB · Views: 49
To avoid these ads, REGISTER NOW!
OP
K

Killer95Stang

Well-known member
Joined
Jan 1, 2008
Messages
341
The Garage:
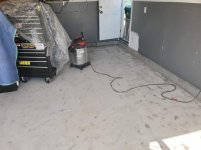
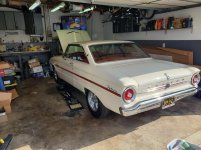
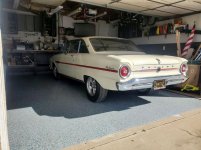
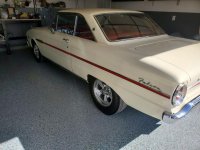
My garage is your standard 1961 18.5 x 19 foot So Cal special. They consider this a two car, but in reality it is not. Although I did have two Mustangs in the garage shortly after moving into the house, one was bumped out when I decided I needed a tool box and a broom leaned against the wall. Nowadays, I can only park my 1963.5 Falcon Sprint along side a Powerwheels Barbie quad for my six year old.

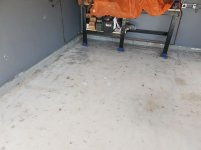
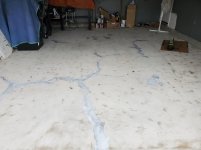
As far as prep goes, I was give a quart of Armorpoxy etch. I ultimately decided that the concrete was too old, glazed over, oil soaked and divoted for the etch. I knew I would have to grind the floor in order to get proper adhesion. I initially planned to rent an Endco walk behind grinder from HD, but after watching a few videos of people grinding an entire floor with a 7" angle grinder, I figured I would give it a try. Worst case senerio, I would try the angle grinder, I would get frustrated and just rent the one from HD. I ended up purchasing a 7" Metabo grinder, 7" diamond cup, dust shroud and fine particle filter bags for the ShopVac. I also made sure to buy a proper 3M respirator with P100 air filters. Concrete dust can be deadly and I expected tons of dust. I was pleasantly surprised by the effeciency of the dust shroud with shopvac combo and really didn't have a lot of dust. I did have about 25-30 pounds of concrete dust in the filter bag.
 

Attachments

  • 20210301_133300 (1).jpg
    20210301_133300 (1).jpg
    95.9 KB · Views: 98
  • 20210306_091818.jpg
    20210306_091818.jpg
    86.9 KB · Views: 96
  • 20210301_095412.jpg
    20210301_095412.jpg
    73.4 KB · Views: 92
  • 20210301_095402.jpg
    20210301_095402.jpg
    109.5 KB · Views: 96
  • 20200321_095406.jpg
    20200321_095406.jpg
    141.1 KB · Views: 99
OP
K

Killer95Stang

Well-known member
Joined
Jan 1, 2008
Messages
341
Prep continued:

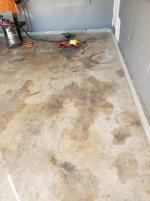
It took about 2-1/2 hours of grinding to get the garage done to a point where I felt like I hit every necessary spot. I also spent some time fixing some of the half moons I ground into the soft spots, when I let the grinder get away from me or didn't hold it completely flat. Although not the toughest job, I probably wouldn't do it again, since my 43 year old back took the brunt of the discomfort.

After the grinding, I fixed as many of tiny hairline cracks in the concrete. I also filled most of the divots. I used the provided 2 part Armorpoxy crack filler, which works just like bondo. Mix it up in equal parts, then spread it out like spackle. I did have to apply it twice, since it did shrink a little. To level it back down, I ended having to use the 7" grinder again, because that stuff gets really hard.

After all the grinding, I vacuumed and then used a blower. I followed that up with a pressure wash and clean up with a squeegee.
 

Attachments

  • 20210303_103200.jpg
    20210303_103200.jpg
    90.5 KB · Views: 99
OP
K

Killer95Stang

Well-known member
Joined
Jan 1, 2008
Messages
341
Base Coat:

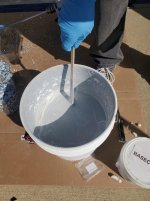
After almost a week after the concrete ground down and cleaned, I started the application of the base coat. The provided epoxy was already premeasured for a 4:1 mixing ratio. On the day of the application, I got up at 7:00am for a final blow out of the garage, then prepared everything for the application. Because most of the generic videos online used a squeegee for spreading out the epoxy, I was under the impression that I needed one. Concerned about this, I called Armorpoxy and was told that this product is thin enough, that it can be spread out with a roller. This proved to be 100% true, because it ended up being very easy to spread with the 18" Wooster Epoxy rollers I purchased.

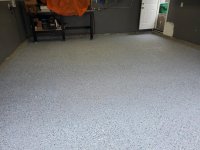
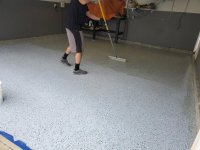
So after a 3-5 minute mix with the provided mixing paddle and a high speed drill, I poured a little bit of the epoxy into cup and started cutting in the corners. I then poured out ribbons of the product to about 1/3rd of the garage. I then rolled it out in two directions. I then poured out some more of the epoxy and overlapped my previous sections I rolled. Total time was about 25 - 30 minutes before I applied the flecks. Since they gave me so much of the flecks, I decided to split up in 4 equal parts. I then planned on applying 1 part to half the garage at a time. By the time I got half way through the 3rd 1 quart container, I realized I done. I did end up have some spots with too many flakes by the door, because I let my 6 year old throw some from the driveway. She didn't really get the concept of spreading them out.

The temperature was about 70 degrees by the time we finished with the floor and it took about 4 - 5 hours for epoxy to feel like it was completely dry. Coverage was good, but the coating not being as thick as a traditional solvent based epoxy, kinda does not allow the chips to sink in at all. They are definitely stuck to the surface of the base coat, which aided in my decision to not use the armor-grip traction additive.
 

Attachments

  • 20210307_080457.jpg
    20210307_080457.jpg
    147.6 KB · Views: 103
  • 20210306_101908.jpg
    20210306_101908.jpg
    147.3 KB · Views: 92
  • 20210306_101905.jpg
    20210306_101905.jpg
    147.5 KB · Views: 98
  • 20210306_093324.jpg
    20210306_093324.jpg
    78.1 KB · Views: 79
OP
K

Killer95Stang

Well-known member
Joined
Jan 1, 2008
Messages
341
Top coat:

After letting the coating dry over night, I woke up my wife (she was thrilled) to help me lay down the top coat. Only difference was, our normal 70 degree CA temperatures were gone and it was a brisk 50 degrees when I went outside. This is important, because that is the bottom limit of recommended installation temperature. I decided to scrape off any lose flake then used the blower to get it out of the garage. This helped me buy some time, so the temperature outside could get to the high 50's.

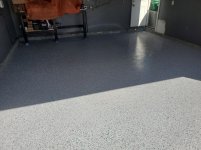
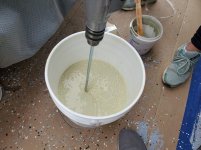
Mixing once again was pretty easy, but I could tell that this clear top coat would have a yellowish hue to it. The part B was a dark beer color and the part A activator was a greenish grey honey. Once mixed, it was a straight grayish milky color. I used the same technique as the base coat for the install of the top coat, although this was pretty thin, so I wasn't sure if I was getting the correct coverage. In the end, I used about 3/4 of the supplied coating, which did add a slight tint to the applied base coat and chips. What I ended up with was a semi-gloss finish, that in my opinion did not need the addition of grip additive. Because the coating are thin, the chips appear to add all the traction that I need.
 

Attachments

  • 20210307_172859.jpg
    20210307_172859.jpg
    147 KB · Views: 124
  • 20210307_093114.jpg
    20210307_093114.jpg
    147.6 KB · Views: 109
  • 20210307_091820.jpg
    20210307_091820.jpg
    147.4 KB · Views: 113
  • 20210307_090144.jpg
    20210307_090144.jpg
    143 KB · Views: 97
OP
K

Killer95Stang

Well-known member
Joined
Jan 1, 2008
Messages
341
Conclusion (For now until I can drive on it):

So far I'm very happy with the product, but will hold complete judgement until the end of the week when I can finally drive the car in the garage. Stay tuned!!

Also, don't worry about the walls and base of the garage. That is all being painted later this week. I tried to get it done before the floor coating install, but my painter friend couldn't make it down in time. I really can't stand painting, but for some reason the floor didn't feel that bad.
 

Armorpoxy

Well-known member
Joined
Aug 18, 2013
Messages
3,735
Location
NJ
Thank you for the feedback. Looks excellent.

We are awaiting our other winner's feedback and plan on adding this to our offerings. Lots of applications especially where odor is an issue since this formulation is very low voc.
 
Last edited:

blacksporty

Well-known member
Joined
Oct 24, 2011
Messages
1,248
Location
So Cal
Great write up. I am the other winner and been waiting for temps to rise above 50F for a 48hr period...right now they are lows of 42, highs of 66 for the next 2 weeks. Hopefully your cold day won't cause you any problems.
 
To avoid these ads, REGISTER NOW!

Armorpoxy

Well-known member
Joined
Aug 18, 2013
Messages
3,735
Location
NJ
We actually applied this product for testing at about 45 and it cures fine!
 
OP
K

Killer95Stang

Well-known member
Joined
Jan 1, 2008
Messages
341
Finally brave enough to put the car back in after letting the floor dry almost 5 complete days. So far so good, although I haven't driven enough to get the tires hot.

I do have a question for Armorpoxy regarding the topcoat. I'm pretty sure I put it on thicker than I was supposed to, because it appears to be a little more yellow than I believe it is supposed to look like. When I rolled it out, It appeared to go on in a yellowish color that wasn't uniform with my installation method of pouring out ribbons and then using the 18" roller to spread it out. Because of this I moved around more product to the lighter areas in order to make it look more uniform. After 5 days of drying, I do notice most of the floor being a little yellowish in hue, but that is mostly under LED lighting. When I get sunshine in there, the color looks great.

Are their any issues I might have, because I went on too thick? Or think I went on too thick? Overall I'm happy, because it looks 1000x's better than my old floor.

Thanks...
 

Attachments

  • 20210311_091141.jpg
    20210311_091141.jpg
    145.1 KB · Views: 87
  • 20210311_091148.jpg
    20210311_091148.jpg
    146.4 KB · Views: 87

Armorpoxy

Well-known member
Joined
Aug 18, 2013
Messages
3,735
Location
NJ
Hi,
Yes the clear should have been put on thinner and 'tighter' since it does have a very slight amber cast to it. Your feedback is excellent and we will note this on our instructions that for the clear epoxy topcoat it should not be poured on the floor, but into a pan and then dip & roll with the roller not too wet. Also an 18" roller is also tough to control in a smaller area like a garage so best to use 9" rollers in garages for better control. We find that the 18" rollers in areas under 1500 sq ft can lead to issues sometimes.

Many thanks for the feedback. It's important to us.

Sharp looking car too!
 
Last edited:

sns1938

Well-known member
Joined
Nov 1, 2014
Messages
290
I last looked into epoxy three years ago, and the house we were in had terrible concrete that was going to be too much work to sort out, so never did anything. Now we are about to move into a new house, and in CA.

I take it that there is the "rest of the US" version, and the current CA version, and now there is this ultra low version too?

Is there any negatives for using the lower VOC versions? Sounds like they go on thinner, so if someone could collect the full strength product from another State, and wasnt worried about the CA-EPA rules, then they'd get a thicker and possibly longer lasting finish?

I just want a finish that is durable and never have to do this again.

Thanks.
 

Armorpoxy

Well-known member
Joined
Aug 18, 2013
Messages
3,735
Location
NJ
We have 100% solids high build systems that can be shipped to CA.

Please contact us directly for info and pricing at below (not PM please). Thank you.
 
OP
K

Killer95Stang

Well-known member
Joined
Jan 1, 2008
Messages
341
So after a couple weeks with the coating completed, I'm happy with the results. So far no hot tire pickup and very minor scratches from me dragging a new Peloton over it are not noticeable with my "medium" flake.

I would catagorize this finish as a satin rather than a semi-gloss, because it really isn't that shiny, but still looks great in my opinion. I also do not think it needs anti-skid added to the clear coat, because this base is thinner than a normal 100% solids epoxy. The chips tend to be on top of the base coat surface and when clear is added it creates plenty of grip. Even when wet, I didn't feel like I was slipping at all.

Install was easy enough, although I think a little more clarification on the install of the clear coat would be helpful. In my case, I layed down the clear thicker than I was supposed to, which added a little yellowing to the finish in some spots. It probably also increased the drying time. Once I pulled the car in the garage and some of my tools, I don't even notice any variations in color.

I'll try to update this in a year!!

Thanks again ARMORPOXY!!
 
OP
K

Killer95Stang

Well-known member
Joined
Jan 1, 2008
Messages
341
Pulled everything out of the garage today so I could clean the 9 month old epoxy floor. I figured it was a good time to give an upate, since I have a lot work planned for the Falcon and probably won't have a clean floor for a while. As far as cleaning, I just used Simple Green diluted in warm water, and scrubbed using a stiff bristled brush. So far, the floor has been really durable with no hot tire pickup and no spots where I was able to scratch through the painted surface. I do mostly oil changes, brake work, tire rotations, using Quick Jacks. I do tend to place cardboard down where I'm doing most of the work, but that's only because I hate the cleanup afterward. I will say that I do have two yellow spots where the rear tires of my car sit. This probably has more to do with the length of time the car sits between drives and the soft cheater slick compound of the tires. Still happy so far.
 

Attachments

  • 20211231_133908.jpg
    20211231_133908.jpg
    372.2 KB · Views: 39
  • 20211231_133913.jpg
    20211231_133913.jpg
    385.8 KB · Views: 37
  • 20211231_151456.jpg
    20211231_151456.jpg
    407.8 KB · Views: 36
To avoid these ads, REGISTER NOW!
Top Bottom