Hammerdown
Well-known member
Ok, after lurking her for a long time and trying to be of some use on this forum, and after prodding by other members I have decided to post my first thread on an epoxy floor I installed with a buddy of mine. He is a member of Bent Wheels C.C. an off road motorcycle club that does Enduro Racing and enjoys off road motorcross. We installed this at his clubhouse about five years ago. This is approximately 1500s/f of concrete in good condition. His club members had to approve any modifications to the clubhouse and the funding, so they did some research into floor coatings. Since I have familiarity with it and get a contractor price on Ucoatit, they decided to go with that and it was approved by the members. We just needed to coordinate a time when our schedules would work out, since this was a "pro-bono" job on my part.
Excuse my long winded post, I am a frustrated writer and take any opportunity to provide a detailed account of anything I can. I could write three pages on eating a bowl of cereal in the morning. I did reference the Ucoatit website and speak with my buddy Chris to make sure I had the details correct.
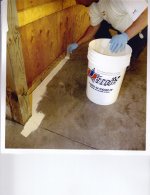
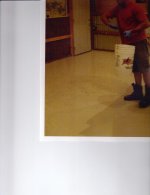
My buddy Chris is an avid photographer and decided to take pictures of the different steps of application. He presented these to the members of his club to justify the costs. He gave me these photos of the installation so I could post them here. They are not the best because I had to scan them into my computer, so the colors may be off but they should give you the idea of what is happening.
We purchased the materials for about $1200 dollars after discount. During the purchase he really pressed the salesman about sponsoring any of his club activities. He couldn’t get a commitment on the spot, but the salesman gave him a Ucoatit decal and said if he put it the floor and sent a picture of it, he’d do his best to see if they could “do something” on a sponsorship. He left satisfied. He also had a decal made up of the club logo and decided to put both of these in the floor. A local sign shop made the appropriate vinyl decal.
Flash forward and the weekend had arrived that the weather and schedules matched and we drove from suburbia into the “Great White North” of Michigan. After a 3 hour drive we arrived at the clubhouse location in beautiful Rose City Michigan, for those of you familiar with it, it is located just northeast of West Branch. The clubhouse serves as a multi-purpose building. It is the maintenance shed where all the bikes and vehicles are wrenched on, the meeting place, the dining hall and the sleeping quarters! It is a 30x50 pole barn construction with a concrete slab, electricity and a wood burning stove for heat. Friday night was reserved for grilling steaks and drinking beer as a precursor to the work.
This is a list of materials used in the process. The epoxy primer and color coat, decorative flakes and high gloss urethane top coat were all purchased from Ucoatit. This is what they call a “kit and two double packs” of material worth, which amounted to six (6) gallons of epoxy base with six (6) quarts of its activator, and three (3) gallons of urethane base with three (3) ½ gallons of its activator. The flakes were provided in 3 jubs that weighed about 3-4lbs each. Since everything was neatly packaged and came with an instructional manual and video, we watched that after dinner with some members who offered to help. I put in my two cents on the video since I’ve done this before and separated the products into 3 parts. There were other things needed for the preparation like a degreaser (Simple Green & dish soap) and muriatic acid, which we needed 3 gallons. Push brooms, paint poles and extra brushes and roller covers were also purchased. Since there was 1500s/f, the math was easy. The epoxy bases are required for two (2) coats, so each 500s/f section would receive 2gals w/2qts of the epoxy & activator, 1gal w/ 1 ½ gal of the urethane & activator, a 1 jug of flakes. So far so good.
STEP 1-
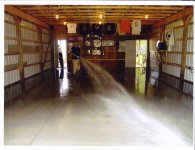
It was early in the morning and about 60* degrees, getting to a high of about 76*. Clean the floor free of any dirt, debris, oils and soils. The instructions indicate water has to be able to absorb in over the surface first, so the floor was scrubbed with the detergents and push brooms repeatedly, until there was no beading action and the water soaked in over the whole slab.
Then the floor was rinsed thoroughly with fresh water until no soap bubbles remained or re-appeared and the rinse was clear.
Excuse my long winded post, I am a frustrated writer and take any opportunity to provide a detailed account of anything I can. I could write three pages on eating a bowl of cereal in the morning. I did reference the Ucoatit website and speak with my buddy Chris to make sure I had the details correct.
My buddy Chris is an avid photographer and decided to take pictures of the different steps of application. He presented these to the members of his club to justify the costs. He gave me these photos of the installation so I could post them here. They are not the best because I had to scan them into my computer, so the colors may be off but they should give you the idea of what is happening.
We purchased the materials for about $1200 dollars after discount. During the purchase he really pressed the salesman about sponsoring any of his club activities. He couldn’t get a commitment on the spot, but the salesman gave him a Ucoatit decal and said if he put it the floor and sent a picture of it, he’d do his best to see if they could “do something” on a sponsorship. He left satisfied. He also had a decal made up of the club logo and decided to put both of these in the floor. A local sign shop made the appropriate vinyl decal.
Flash forward and the weekend had arrived that the weather and schedules matched and we drove from suburbia into the “Great White North” of Michigan. After a 3 hour drive we arrived at the clubhouse location in beautiful Rose City Michigan, for those of you familiar with it, it is located just northeast of West Branch. The clubhouse serves as a multi-purpose building. It is the maintenance shed where all the bikes and vehicles are wrenched on, the meeting place, the dining hall and the sleeping quarters! It is a 30x50 pole barn construction with a concrete slab, electricity and a wood burning stove for heat. Friday night was reserved for grilling steaks and drinking beer as a precursor to the work.
This is a list of materials used in the process. The epoxy primer and color coat, decorative flakes and high gloss urethane top coat were all purchased from Ucoatit. This is what they call a “kit and two double packs” of material worth, which amounted to six (6) gallons of epoxy base with six (6) quarts of its activator, and three (3) gallons of urethane base with three (3) ½ gallons of its activator. The flakes were provided in 3 jubs that weighed about 3-4lbs each. Since everything was neatly packaged and came with an instructional manual and video, we watched that after dinner with some members who offered to help. I put in my two cents on the video since I’ve done this before and separated the products into 3 parts. There were other things needed for the preparation like a degreaser (Simple Green & dish soap) and muriatic acid, which we needed 3 gallons. Push brooms, paint poles and extra brushes and roller covers were also purchased. Since there was 1500s/f, the math was easy. The epoxy bases are required for two (2) coats, so each 500s/f section would receive 2gals w/2qts of the epoxy & activator, 1gal w/ 1 ½ gal of the urethane & activator, a 1 jug of flakes. So far so good.
STEP 1-
It was early in the morning and about 60* degrees, getting to a high of about 76*. Clean the floor free of any dirt, debris, oils and soils. The instructions indicate water has to be able to absorb in over the surface first, so the floor was scrubbed with the detergents and push brooms repeatedly, until there was no beading action and the water soaked in over the whole slab.
Then the floor was rinsed thoroughly with fresh water until no soap bubbles remained or re-appeared and the rinse was clear.