To avoid these ads, REGISTER NOW!

ZMotorsports Shop Projects 2.0

IndyGarage

Well-known member
Joined
Apr 29, 2010
Messages
9,744
Location
Indy
Finally had a couple of hours in the shop last night, for the first time this week.

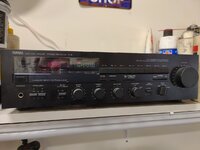
I figured the best place to start for the evening was to get some crackle free tunes in going. For that I removed the old Yamaha receiver from the shelf. I bought this new back in 1984 when I got my first paying job of peddling auto parts in high school. I bought the receiver and a set of JBL speakers. My dad was NOT pleased and thought it a complete waste of money. Looking back I would have to agree with him. We never had money growing up and at the time I was helping my BIL with some side gigs of doing the music at dances back then before I could drive and I always marveled at his hi-fi equipment. After getting my truck on the road and a job at a local auto parts store I wanted to buy a high quality sound system for my room and figured one day when I moved out it could go into my home, which it did. But for a person who didn't have a pot to piss in or a window to throw it out of, it was a pretty stupid purchase.

When my wife and I got married in 1989 it was moved into our rental and then into our first home in 1991 as part of our entertainment system in the living room. We continued to have it located there until 2016 when we moved to our new home in which it then got moved to the shop. The past few years of use in the house it started to develop some issues but I figured it would be good enough for the shop someday. I have tolerated (barely) the crackling and popping of the sound system in the shop for 6+ years now and have tried various antennas as well as disassembled it and played with knobs and circuit boards for probably 4 of the past 6 years with no success. I realize it isn't worth much so after enjoying the work in the shop so much last Saturday and the only despairing part being that damn crackling and popping radio reception I went on the hunt for something else but of the same era, "vintage".

Here is my old Yamaha receiver before removing from the shelf.
rec1.jpg

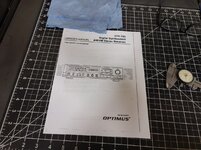
I stumbled across this Optimus STA-795 at a local pawn shop the other day on my lunch hour and then did some Google searches on it because I hadn't heard of it before. I was surprised due to its age that there was even anything listed online pertaining to this old thing. There was one audio forum in particular that someone had inquired about it and several people commented on it being a great receiver in its day with 50 w/channel and great sound. One guy even specified that although it's old it would be a great receiver for a garage or workshop and another person strongly agreed. Holy ****, it was like they were talking to me.

The next day I went back to the pawn shop and offered $30 and the owner accepted. With the guarantee that it worked which he insured me it did. I haven't had any shop time this for most of the week but last night I figured I had a few hours so I may as well set this up and make certain it works. Plugged it in, hooked up the ceiling mounted speakers and the antenna and away it went. Sounds AWESOME!!
rec2.jpg

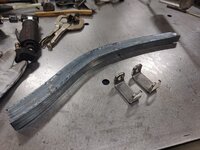
I was even able to locate a factory owner's manual for it online and printed it off to keep on hand.
rec3.jpg

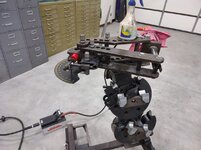
Hopefully that will provide many years of quality sound in the shop.
rec4.jpg


Thanks for looking.
Wow, we have almost the exactly the same story. I went to college in the early 80's in a town that had a small stereo shop. I didn't have anything better to do than to go look at the stuff, and good stereo seemed to be real important at the time.

I bought a Yamaha receiver too - paid way too much. I still have it somewhere. I'll have to look for the model number. It looked like this one:

yamaha.png

That may be the higher model that I couldn't afford, but the one I bought still cost several hundred dollars. Anyway I loved that thing.
 
To avoid these ads, REGISTER NOW!

Graham08

Well-known member
Joined
Dec 10, 2007
Messages
713
Location
Iron Station, NC
Good to hear Graham. I have to say I loved that shop that you built and how you set it up/laid out the equipment. That is still one of my favorite shop builds on the forum.

Thanks! I would like to think the building I've got under construction should turn out nicer yet. I'll start a build thread once it's a little further along...
 
OP
Z

zmotorsports

ALLIANCE MEMBER
Joined
Oct 20, 2009
Messages
21,464
Location
Northern Utah
Wow, we have almost the exactly the same story. I went to college in the early 80's in a town that had a small stereo shop. I didn't have anything better to do than to go look at the stuff, and good stereo seemed to be real important at the time.

I bought a Yamaha receiver too - paid way too much. I still have it somewhere. I'll have to look for the model number. It looked like this one:

yamaha.png

That may be the higher model that I couldn't afford, but the one I bought still cost several hundred dollars. Anyway I loved that thing.

Awesome. I remember when I purchased mine I had the choice between brushed aluminum finish or the black and I went black because my BIL had all the brushed aluminum finish and I think I just wanted to be different. I really like the brushed finish however.

My son and I were talking in the shop Saturday and we both commented on how much that receiver was used over the past 34 years that the wife and I have been married. Granted I didn't use it as much as I thought I would when I first bought it because I was only in my bedroom to sleep and study but once my wife and I got married in 1989 it was incorporated into our main television and home entertainment system as all of the audio for TV, VHS and CD's went through that Yamaha receiver and out through the JBL speakers which were bookends to our entertainment system. That receiver was switched on at the same time as the television and it remained that way until 2016 when we moved to our new home.

Funny thing is when we closed down our old shop, I actually (finally) retired my receiver that had the built in 8-track player. Yep, that's right, the 8-track receiver was finally retired in late 2016. :LOL: When we were closing the old shop down it went in the trash with the thinking that the Yamaha receiver would take its place in the new shop. So the old Yamaha receiver has had a long but fulfilling life so I feel less disappointed that if finally succumbed to its old age and had to be replaced. :bounce:
 

zanyad

ALLIANCE MEMBER
Joined
Apr 26, 2018
Messages
2,834
Location
NE Ohio
Once the hooks were pressed into the holes they were welded on the backside then wiped down with wax & grease remover and prepped for paint.
Mike, how did you press the hooks in? Was the fit in the hole such that you could push them in by hand? If you used an arbor or hydraulic press, how did you align and prevent collapsing the hook while pressing it in? Thanks!
 
OP
Z

zmotorsports

ALLIANCE MEMBER
Joined
Oct 20, 2009
Messages
21,464
Location
Northern Utah
Mike, how did you press the hooks in? Was the fit in the hole such that you could push them in by hand? If you used an arbor or hydraulic press, how did you align and prevent collapsing the hook while pressing it in? Thanks!

It was a very slight interference fit where I tapped the hooks in with a hammer then TIG welded on the backside.
 

zanyad

ALLIANCE MEMBER
Joined
Apr 26, 2018
Messages
2,834
Location
NE Ohio
Hah. In my world press fit usually means using something with some mechanical advantage. Somehow a light interference with hammer persuasion never occurred to me! :bitchslap
 
OP
Z

zmotorsports

ALLIANCE MEMBER
Joined
Oct 20, 2009
Messages
21,464
Location
Northern Utah
Not sure what's going on but I've had a hell of a time making any progress on the Radio Flyer project lately. I'm not doing it intentionally, but I sure keep having other things pop up and take over my evening schedule.

Yesterday the wife and I awoke to lack of hot water and found water heater issues so the task of the day was to replace water heaters. That drummed up other questions about my plumbing system and more food for thought which I asked in another thread so I'm sure there will be another side project as a result.

Finally after getting the water heaters replaced I headed back to work for a few hours. Upon arriving home from work last night I had a few things to do in the shop but in between them I was able to finish welding out the left frame horn for the Radio Flyer as well as cut and bend up the two knuckles for the front axle.

I waffled on design for the steering. I could have either machined the pivot tube and then made the knuckles offset for the kingpin inclination angle from flat plate with the spindle protruding out to accept the front wheel/tire OR, make the knuckle from flat and weld it to the front axle then have the spindle weld to a bushed tube for the actual spindle assembly.

I chose the latter so after locating the small piece of P&O to minimize waste, measuring, marking and bending the plate it is ready to drill for the kingpin/bolt and construct the front axle as well as the spindles. I lucked out and found a couple of small pieces of 3/16" x 1" P&O that already had a hole drilled at one end. Now to set up perpendicular and match at the opposite end of the knuckle is all that is needed.
rf60.jpg

Next will be to metal finish the left frame horn and commence work on the front and rear axles in which will allow me to set ride height and rake.
 
OP
Z

zmotorsports

ALLIANCE MEMBER
Joined
Oct 20, 2009
Messages
21,464
Location
Northern Utah
Lucky Max, he’s going to know what “GOOD” looks like from birth!

Funny you mention that Sterling. I used to have two large promotional posters in my last shop. My son now has them hanging in his home garage, but they have sentimental meaning to me and both would fit this narrative.

snapon1.jpg


snapon2.jpg
 
OP
Z

zmotorsports

ALLIANCE MEMBER
Joined
Oct 20, 2009
Messages
21,464
Location
Northern Utah
In addition to the two posters above, here are two more that I had hanging in my last shop. Funny thing is I had obtained then when they were new and current promotional posters. Now they're considered "vintage". :rolleyes: I'm starting to recognize a theme with that whole "vintage" thing lately when it comes to tools. :unsure:

hotrodder.jpg


gearhead.jpg
 

LXCam

ALLIANCE MEMBER
Joined
Apr 23, 2013
Messages
19,202
Location
AZ
In addition to the two posters above, here are two more that I had hanging in my last shop. Funny thing is I had obtained then when they were new and current promotional posters. Now they're considered "vintage". :rolleyes: I'm starting to recognize a theme with that whole "vintage" thing lately when it comes to tools. :unsure:
Get used to it grandpa cause you'll start picking up speed with this going downhill thing. :sad:
 
OP
Z

zmotorsports

ALLIANCE MEMBER
Joined
Oct 20, 2009
Messages
21,464
Location
Northern Utah
Well, he's right, Mike. Just think of all the upcoming doctors visits. You will especially like the "Welcome to Medicare" doctor visit. :headshake

:beer:

Well you guys just ****. ;) I was feeling pretty good about myself, especially after last year's health fiasco and now I'm so happy I opened up my own thread this morning and read what I have to look forward to. :unsure:
 
OP
Z

zmotorsports

ALLIANCE MEMBER
Joined
Oct 20, 2009
Messages
21,464
Location
Northern Utah
It has been a hell of a week and some late nights as we had a family here from Texas that drove all the way here to have me take a look at and make some adjustments to his Jeep. He had been experiencing some handling issues and posted about them on his YouTube channel that I follow and I had made some suggestions of things to check as well as things not to just throw money at with parts.

After several phone conversations and text exchanges over the past several weeks he, his wife and his daughter decided to make the 1700~ish mile drive up this past week to have me take a look at his Jeep. To say I was flabbergasted is an understatement. Then in the middle of all of that I had our water heater fiasco.

In the midst of everything that's been going on I was less than vigilant in taking pictures, matter of fact I didn't take any.

Needless to say I am ready for a relaxing weekend and after looking at the weather it is supposed to be a nice one.
 
OP
Z

zmotorsports

ALLIANCE MEMBER
Joined
Oct 20, 2009
Messages
21,464
Location
Northern Utah
So you do do house calls?! When can I get my DuraMax in for its ZMotorsports Spa days?
I’m only kinda joking….

Sorry, no house calls Sterling. I end up doing enough of that when we go to rallies or gatherings with our RV'ing friends. :LOL:

I really didn't actually offer or suggest they take a road trip but one thing led to another and next thing I knew they were heading our way with the Jeep in tow behind their coach. It worked out fine as far as timing and although there is one thing I don't think is an easy fix, or an inexpensive one for that matter, it was a good turnout and hopefully I was able to explain things well enough. They are great people and have a very interesting life story so it was nice to meet them.

I'll admit, I was nervous as hell that as soon as they arrived I'd get a call from my son or DIL saying it was time and their trip would be for not but the timing worked out fine. I think they are heading back to Texas this morning as they've also been doing some sightseeing around our beautiful state.
 
To avoid these ads, REGISTER NOW!
OP
Z

zmotorsports

ALLIANCE MEMBER
Joined
Oct 20, 2009
Messages
21,464
Location
Northern Utah
Were you able to solve the issue with the Jeep?

Not completely but I made recommendations on what I felt like he needed as next steps. I did make a couple of minor adjustments which he said helped but for a full-on remedy I think he needs more pinion to caster separation. We adjusted it to around 5.5 degrees of caster but any more than that and he picked up some rather significant driveshaft vibrations as the pinion angle suffered. Personally on 37" tires and 4.5" of lift I have found closer to 7 degrees of caster to work exceptionally well. I suggested he either have the knuckles cut and re-clocked or better yet to upgrade to either a Currie or Dynatrac ProRock 44 front axle as he would get more than just the caster to pinion angle separation, he would benefit from much thicker walled tubing, better castings and much thicker bracketry so it is a win all around.

I informed he by the time he paid to have the knuckles re-clocked on the OEM Dana 44 he would be approaching close to what he would be looking at to replace the front axle and even after he had the knuckles re-clocked, he'd still have the same weak spots of the OEM Dana 44, unless he could perform the job himself, then it could be cost beneficial and only if he replaced the OEM bracketry. When we did my son's we upgraded the brackets at the same time we re-clocked the knuckles and it was cost beneficial to do it in house but I don't think many others have that option. I also found that the passenger front axle was about 3/16" more forward than the driver's side which I adjusted as well. He actually had toe dialed right in pretty much spot on. Lastly, there was some variation between the drag link and track bar which he should look into correcting by raising the passenger's side mount at the track bar. He recently did a drag link flip but the track bar needs to be about an inch or so higher to meet the same geometry as the drag link.

Sorry for the long description, it wasn't exactly a yes or no answer. :LOL:
 
OP
Z

zmotorsports

ALLIANCE MEMBER
Joined
Oct 20, 2009
Messages
21,464
Location
Northern Utah
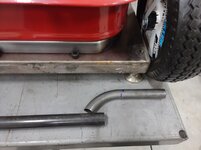
Last night I rolled the tube bender from the RV/storage bay over into the shop to begin work on the axles for the Radio Flyer wagon project.

Once I determined a design I loaded a stick of 4130 chromoly into the die and made a bend creeping up on what I thought would look good. Using .875"x .065" 4130 tubing.
rf61.jpg

Cutting it just a little long to sneak up on the length.
rf62.jpg

At first I thought 45-degrees would be about right but that didn't look right and 90-degrees with the 3.5" centerline radius die I have will put the rear too high so I thought I'd shoot for around 60~ish degrees. Ended up at 62 degrees.
rf63.jpg

Bent the second one taking springback into consideration and both bends match perfectly.
rf64.jpg

Now slowly creeping up on the downward leg to determine where I want the rear end's ride height to be. I think I'm getting close.
rf65.jpg


Thanks for looking.
 

Lanzg

Member
Joined
May 19, 2022
Messages
17
Location
Haslet TX
Not completely but I made recommendations on what I felt like he needed as next steps. I did make a couple of minor adjustments which he said helped but for a full-on remedy I think he needs more pinion to caster separation. We adjusted it to around 5.5 degrees of caster but any more than that and he picked up some rather significant driveshaft vibrations as the pinion angle suffered. Personally on 37" tires and 4.5" of lift I have found closer to 7 degrees of caster to work exceptionally well. I suggested he either have the knuckles cut and re-clocked or better yet to upgrade to either a Currie or Dynatrac ProRock 44 front axle as he would get more than just the caster to pinion angle separation, he would benefit from much thicker walled tubing, better castings and much thicker bracketry so it is a win all around.

I informed he by the time he paid to have the knuckles re-clocked on the OEM Dana 44 he would be approaching close to what he would be looking at to replace the front axle and even after he had the knuckles re-clocked, he'd still have the same weak spots of the OEM Dana 44, unless he could perform the job himself, then it could be cost beneficial and only if he replaced the OEM bracketry. When we did my son's we upgraded the brackets at the same time we re-clocked the knuckles and it was cost beneficial to do it in house but I don't think many others have that option. I also found that the passenger front axle was about 3/16" more forward than the driver's side which I adjusted as well. He actually had toe dialed right in pretty much spot on. Lastly, there was some variation between the drag link and track bar which he should look into correcting by raising the passenger's side mount at the track bar. He recently did a drag link flip but the track bar needs to be about an inch or so higher to meet the same geometry as the drag link.

Sorry for the long description, it wasn't exactly a yes or no answer. :LOL:
That's my life, all day, everyday. We turn some knuckles (Have been since Scout axles in your CJ was the hot tip) and undo flips that people did with out attending to the track bar or having any knowledge why they did it. We install quite a few of the brackets that raise the track bar the right amount but that turns into moving stabilizers etc. and people are cheap.

The newest craze is folks with JLs that have to delete the CAD (the same happens when you go to an aftermarket front axle) and don't believe that leads to drive line vibrations.

Thanks for posting all of your exploits, things like this make me feel better about my existence.

Also, I'm in DFW if your friends cant get their situation sorted.

LG
 
OP
Z

zmotorsports

ALLIANCE MEMBER
Joined
Oct 20, 2009
Messages
21,464
Location
Northern Utah
That's my life, all day, everyday. We turn some knuckles (Have been since Scout axles in your CJ was the hot tip) and undo flips that people did with out attending to the track bar or having any knowledge why they did it. We install quite a few of the brackets that raise the track bar the right amount but that turns into moving stabilizers etc. and people are cheap.

The newest craze is folks with JLs that have to delete the CAD (the same happens when you go to an aftermarket front axle) and don't believe that leads to drive line vibrations.

Thanks for posting all of your exploits, things like this make me feel better about my existence.

Also, I'm in DFW if your friends cant get their situation sorted.

LG

Thanks for following along and chiming in. Sounds like we have similar experiences with these.

The gentleman also mentioned after he saw my setup that he'd like to go hydro-assist and I told him NOT to use that EOM track bar bracket under any circumstance as I repair quite a few of those with OEM components mounted to them that fail, let alone the added pressures of hydraulics. I said at bare minimum if he decides to stay with the factory Dana 44 then add a more robust track bar mount and even showed him how I added gussets on my ProRock 44 for a bit of added strength. I hope I convinced him at this point he should really be looking to upgrade the axle housing and get all of the benefits as a package vs. piece-mealing it and then still having a weak link.

I have gone over and over and over the detailed points with people in our Jeep clubs about staying on 35's vs. what it takes to properly step to 37's and the extra forces involves. I have even explained that the step to 37's really doesn't change much in the range of trails to be run and unless you are willing to make a lot of investment and a lot of work then it is much more practical to stay on 35's but some people think they're the exception to the rule and the laws of physics will skip them. :headscrat Seems like over the past couple/few years 37's have become the new 35's and 40's have become the new 37's. I'm even starting to see more 42's on the trails over the past year. But people really need to understand the process involved to properly step from 35's to 37's and up or they are setting themselves up for major failure.
 

Lanzg

Member
Joined
May 19, 2022
Messages
17
Location
Haslet TX
Thanks for following along and chiming in. Sounds like we have similar experiences with these.

The gentleman also mentioned after he saw my setup that he'd like to go hydro-assist and I told him NOT to use that EOM track bar bracket under any circumstance as I repair quite a few of those with OEM components mounted to them that fail, let alone the added pressures of hydraulics. I said at bare minimum if he decides to stay with the factory Dana 44 then add a more robust track bar mount and even showed him how I added gussets on my ProRock 44 for a bit of added strength. I hope I convinced him at this point he should really be looking to upgrade the axle housing and get all of the benefits as a package vs. piece-mealing it and then still having a weak link.

I have gone over and over and over the detailed points with people in our Jeep clubs about staying on 35's vs. what it takes to properly step to 37's and the extra forces involves. I have even explained that the step to 37's really doesn't change much in the range of trails to be run and unless you are willing to make a lot of investment and a lot of work then it is much more practical to stay on 35's but some people think they're the exception to the rule and the laws of physics will skip them. :headscrat Seems like over the past couple/few years 37's have become the new 35's and 40's have become the new 37's. I'm even starting to see more 42's on the trails over the past year. But people really need to understand the process involved to properly step from 35's to 37's and up or they are setting themselves up for major failure.
Having been into Jeeps my whole life and in industry since the mid 90s, I have had these conversations more than I care to admit, I'm not sure I've ever made a dent. It's fun though having been through all the changes and even saying, "no one needs bigger than 35's" I'm sure at some point.

Hard to preach too much, everything I owns one tons, min 40s, big motors, beat like rented mules, they should do as I say, not as I do, their bank accounts would thank them.

LG
 
OP
Z

zmotorsports

ALLIANCE MEMBER
Joined
Oct 20, 2009
Messages
21,464
Location
Northern Utah
Having been into Jeeps my whole life and in industry since the mid 90s, I have had these conversations more than I care to admit, I'm not sure I've ever made a dent. It's fun though having been through all the changes and even saying, "no one needs bigger than 35's" I'm sure at some point.

Hard to preach too much, everything I owns one tons, min 40s, big motors, beat like rented mules, they should do as I say, not as I do, their bank accounts would thank them.

LG

If I had a nickel for every time someone told me I was crazy and would be breaking **** left and right when I put 425hp into my JKUR on Dana 44's I'd be a rich man. I tried explaining that if I wasn't breaking **** on 35's with the V6 why would you assume I would automatically start breaking **** with more if my driving style doesn't change? People seem to just preach the **** they read on the internet but yet won't look at something right in front of them that shatters all of that nonsense. Now if someone beats on their stuff then I would agree that Dana 44's are not the best option but my Jeep sees a lot of off-road and now has 149k miles on the clock and still runs and drives as good (probably better) as new.

I finally left my local Jeep club a year ago because of all of the idiots that seemed to migrate to it over the previous couple of years. I hated going on runs with them near the end because the newbies all thought that in order to leave the pavement they just had to have tons and 40's or they get stuck or break. I tried explaining that they should really wheel them in stock form for a while to first, get a feel for what a stock Jeep can actually do and how it is supposed to respond to various obstacles and secondly, so they can determine first hand what "THEIR" style of off-roading will be. But NOPE, the guys on tons and 40's got ahold of the newbies and insisted that they if they were to be any good they needed the big boy stuff. :rolleyes: What was worse is even on 40's many still couldn't drive or navigate an obstacle worth the damn. :wtf:
 

Bodj Built

Well-known member
Joined
Feb 3, 2016
Messages
1,167
Location
Moorpark, CA
If I had a nickel for every time someone told me I was crazy and would be breaking **** left and right when I put 425hp into my JKUR on Dana 44's I'd be a rich man. I tried explaining that if I wasn't breaking **** on 35's with the V6 why would you assume I would automatically start breaking **** with more if my driving style doesn't change? People seem to just preach the **** they read on the internet but yet won't look at something right in front of them that shatters all of that nonsense. Now if someone beats on their stuff then I would agree that Dana 44's are not the best option but my Jeep sees a lot of off-road and now has 149k miles on the clock and still runs and drives as good (probably better) as new.

I finally left my local Jeep club a year ago because of all of the idiots that seemed to migrate to it over the previous couple of years. I hated going on runs with them near the end because the newbies all thought that in order to leave the pavement they just had to have tons and 40's or they get stuck or break. I tried explaining that they should really wheel them in stock form for a while to first, get a feel for what a stock Jeep can actually do and how it is supposed to respond to various obstacles and secondly, so they can determine first hand what "THEIR" style of off-roading will be. But NOPE, the guys on tons and 40's got ahold of the newbies and insisted that they if they were to be any good they needed the big boy stuff. :rolleyes: What was worse is even on 40's many still couldn't drive or navigate an obstacle worth the damn. :wtf:

It's the same in the prerunner world. You have to have 39s, coilovers and BIG bypasses with 5+tubes, full floaters on a fabricated housing... Meanwhile I'm beebopping through the desert, happy as a clam, with my small 2.5 coilovers, no bypasses, 35" tires, and very underpowered 4.3L lol.
 

gearhead1960

ALLIANCE MEMBER
Joined
Mar 21, 2019
Messages
1,864
Location
Manassas, VA, a small blot in history
It doesn't matter if you are doing off-road stuff or on tarmac like auto-cross or road racing. If you are going to increase power, stress the suspension/chassis more than the standard OEM setup, you better be ready to fork out some bucks to upgrade or increase the ability of the vehicle to withstand higher forces than the manufacturer intended. Also, it's not about just bolting on parts, you have to consider how everything you do affects other parts and systems. Not everything you bolt on is intended to work with other bolt ons. @zmotorsports is right about thinking everything you do through. Not done right, S**t will break or not work as intended!
 

Lanzg

Member
Joined
May 19, 2022
Messages
17
Location
Haslet TX
It's the same in the prerunner world. You have to have 39s, coilovers and BIG bypasses with 5+tubes, full floaters on a fabricated housing... Meanwhile I'm beebopping through the desert, happy as a clam, with my small 2.5 coilovers, no bypasses, 35" tires, and very underpowered 4.3L lol.
HEY I resemble that remark! I might be triggered....

But we actually pre-run.


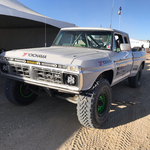
1679084082111.png
1679084131569.png

We do some pre-runner stuff, this unit beebops pretty fine.
1679084584273.png
Ill stop messing up Mikes killer thread.

LG
 
OP
Z

zmotorsports

ALLIANCE MEMBER
Joined
Oct 20, 2009
Messages
21,464
Location
Northern Utah
Made a little progress on my grandson's Radio Flyer wagon over the weekend.

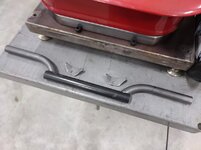
Friday night I thought I'd fabricate some rear axle mounting tabs as well as cope the outer axle extensions and determine a mounting height.

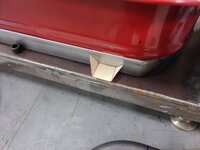
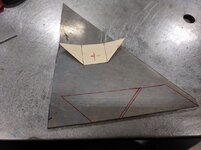
Started with some CAD design (Cardboard Aided Design) for the axle mounts. Tried a couple different sizes and styles to determine what I thought looked good. Settled on this style of mount.
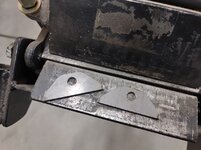
rf76.jpg

Transferred the pattern to some .125" P&O and nested them to be cut on the vertical bandsaw.
rf77.jpg

Cut out and ready to deburr on the disc/belt sander. Drilled the 3/8" holes and chamfered them before cutting them out.
rf78.jpg

Deburred and ends knocked down slightly, for aesthetics, then ready to put a little bend on each side in the brake.
rf79.jpg

Snuck up on the degree of bend until I was happy with the results then mocked into position.
rf80.jpg

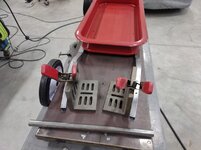
After determining the axle mounting height I could turn my attention to the outer axle stubs and determine an overall height and cope the mounting point. Here I am making sure the coped end is allowing the extension to be parallel with the tube before cutting the outer tube to length.
rf81.jpg

I am liking that.
rf82.jpg

The axle here is a mock up and overall axle width will be determined shortly. Then I can machine a couple of mounting bungs for the axle shaft (bolt) and start welding the axle together.
rf83.jpg


Thanks for looking.
 
OP
Z

zmotorsports

ALLIANCE MEMBER
Joined
Oct 20, 2009
Messages
21,464
Location
Northern Utah
Saturday morning with coffee in hand I headed out to the shop to work on the wagon some more.

I ground down and metal finished the left frame horn and started mocking into position to determine the front dimension and exactly how far I'd pinch the nose of the frame inward.
rf66.jpg

rf67.jpg

So far I am liking this. Not too much of a narrowing but enough to give some tire clearance for turning and yet still allow the appearance of a nice frame pinch. Looks like about 15-degrees is where I landed.
rf68.jpg

Now that the pinch is determined I will focus on the front crossmember that will be welded into the nose of the frame once the frame horns are grafted onto the side rails. Here I started machining the plugs that will get welded into the outer ends of the front crossmember. I am matching the .875" overall outside diameter of the tubing.
rf69.jpg

Next I machined a small .750' step into the end cap and machine a small chamfer in which the weld will lie down in nicely.
rf70.jpg

Tubing fits nice and snug and has a nice trough for the weld.
rf71.jpg

I also used a ground radius tool to machine a small radius onto the outer end of the plug. Both plugs completed, wiped with acetone and ready to be welded onto the front crossmember.
rf73.jpg

Front crossmember completed.
rf74.jpg

rf75.jpg


Thanks for looking.
 
OP
Z

zmotorsports

ALLIANCE MEMBER
Joined
Oct 20, 2009
Messages
21,464
Location
Northern Utah
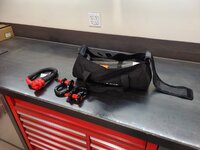
I almost forgot to show the nice raffle prize that the gentleman that we met last week brought me. On AJ's YouTube channel he was having a raffle for a milestone subscription giveaway. Evidently I had won one of the prizes he was raffling off and he joked that he drove 1700-miles to deliver it. :ROFLMAO:

It's a nicely packaged kinetic recovery rope that came with two rigid shackles and a soft shackle. It came in a nice carrying bag that will be easily thrown into the Jeep. I have a different 30' kinetic rope that I have stored under the seat of the Jeep that I may have to donate to my son to put in his Jeep.
kineticrope.jpg


We had such a nice sunny weekend here along the Wasatch Front that Saturday afternoon I pulled the cover off the Camaro and the wife and I went for a drive. Ended up logging just over 200 miles during our Saturday afternoon drive. Just enough to wet my appetite for more miles in the car. Come on spring....
camaromarch.jpg


I also think I have finally decided on a wheel choice so you'll have to stay tuned.

Thanks for looking.
 
Last edited:

bigdave_185

Well-known member
Joined
Feb 14, 2021
Messages
443
Location
Utah
Your little car ride the weekend is to blame for the down pour we just got? Yep gonna blame you I think.


How long is the wagon from axle to axle?
 
OP
Z

zmotorsports

ALLIANCE MEMBER
Joined
Oct 20, 2009
Messages
21,464
Location
Northern Utah
Your little car ride the weekend is to blame for the down pour we just got? Yep gonna blame you I think.


How long is the wagon from axle to axle?

Probably Dave. We had a nice spring like weekend resulting in a ride and now we're right back into winter mode. 🤬

Not sure on the axle centerline yet as I haven't yet determined the exact front axle placement. I have it narrowed down to a "rough" placement but once I start making front axle mounts I'll measure it and let you know. It will be "slightly altered" from original however. :ROFLMAO: When I built Version 1 back in 1991 I made it too short and the front end would lift with very little input from the pull handle so extending the length on Version 2 (V2) was based on function as well as form by having a bit more weight out front of the tub and with the entire thing being much than V1. It's a double edge sword however, as I don't want it so low that it catches going over a sidewalk seam. :bounce:
 

Honch

Well-known member
Joined
Jul 30, 2011
Messages
401
Location
Danville, IN
We had such a nice sunny weekend here along the Wasatch Front that Saturday afternoon I pulled the cover off the Camaro and the wife and I went for a drive. Ended up locking just over 200 miles during our Saturday afternoon drive. Just enough to wet my appetite for more miles in the car. Come on spring....
I can't tell you how many times we have gotten in the Corvette on a Saturday or Sunday and drove 200 miles to nowhere.

I second the want for spring...
 

Blackbyrd

Well-known member
Joined
Nov 28, 2020
Messages
1,172
Location
TN
AHHHH that first spring ride after the winter naps.... always great!

rodster wagon is coming along nicely! Im enjoying following along on that one!


Though I am curious now that some time has elapsed, how do you feel about the chair? Im considering pulling the trigger come around June.
 
OP
Z

zmotorsports

ALLIANCE MEMBER
Joined
Oct 20, 2009
Messages
21,464
Location
Northern Utah
AHHHH that first spring ride after the winter naps.... always great!

rodster wagon is coming along nicely! Im enjoying following along on that one!


Though I am curious now that some time has elapsed, how do you feel about the chair? Im considering pulling the trigger come around June.

Thanks. As I get more seat time I find myself liking it more and more. I am still happy I went with the Acme seat stem as it is very smooth and convenient to pivot around to the TIG welder without having to have the casters roll in an arc. One thing I can say with 100% certainty is that it is stable as hell. I have found myself putting it through the testing phase by rolling from the fabrication table to the bike lift where the wagon is on the fixture for test fitments and measurements and it continues to please me with how smooth and stable it is. I generally don't wheel around the shop like that but figured if I'm going to test it out I may as well give it the full test.

This has been a strange and odd week so I haven't been in the shop but I am looking forward to getting back out in the shop and getting more seat time and hood time doing more welding and fabrication as I go full steam ahead on the wagon project. :D
 
To avoid these ads, REGISTER NOW!
Top Bottom