To avoid these ads, REGISTER NOW!

Between 485 & 705 SQ/FT Bob Heine's Auto Emporium

Workspaces between 485 and 705 squarefeet.

Ford52PU

Well-known member
Joined
Aug 7, 2007
Messages
799
Location
Coatesville PA
Great job on the headlights. I've done the same thing numerous times to my daughters Sentra. I use a product by 3M called MicroMesh, it starts at 1500 and goes to 12000, then I switch to liquid polishes. Meanwhile the old 6volt headlights from my 52 pickup sit on the shelf clear and shiny like they day they were made.
 
To avoid these ads, REGISTER NOW!

Squankum

Well-known member
Joined
Mar 28, 2011
Messages
7,862
Location
Southeast
Great job on the headlights. I've done the same thing numerous times to my daughters Sentra. I use a product by 3M called MicroMesh, it starts at 1500 and goes to 12000, then I switch to liquid polishes. Meanwhile the old 6volt headlights from my 52 pickup sit on the shelf clear and shiny like they day they were made.

Well, that's on the shelf! If they were out the sun they'd be... clear and shiny like the day they were made. :D
 
OP
B

Bob Heine

ALLIANCE MEMBER
Joined
Oct 24, 2009
Messages
10,708
Location
Boca Raton, Florida
Excellent work Bob.

I have done a few headlights now, not with the finesse you use, but the improvements were vast.

and of course the S10 got some clear front side, repeaters with LED’s and still make me happy.
Thank you Rian, I think it's little things that motivate me to do more to the cars.
Bob, you're clearly doing a great job; brilliant work- and your descriptions are illuminating.
Scott, my world is dull compared to yours but now that this job is almost done I see a light at end of the train tunne....
Great job on the headlights. I've done the same thing numerous times to my daughters Sentra. I use a product by 3M called MicroMesh, it starts at 1500 and goes to 12000, then I switch to liquid polishes. Meanwhile the old 6volt headlights from my 52 pickup sit on the shelf clear and shiny like they day they were made.
Dennis, I have not tried MicroMesh but I see it isn't cheap. How do those fine grits hold up? In 2013 I bought a box of fifteen 6" 3M Trizact 5000 discs for $90 and the foam disintegrated in minutes. Back in 1963 European cars like the Jaguar XKE and Ferrari 250 GTO had really cool covers over the headlight tunnels and wished US cars would come with them. I mean, the '63 Corvette was sleek until you turned on the headlights. It didn't occur to me that those plastic covers came with baggage and work. I've seen the light so my '72 Corvette and '87 Corvette will always have good old crystal clear glass headlights (still ugly when you turn them on).
Well, that's on the shelf! If they were out the sun they'd be... clear and shiny like the day they were made. :D
@Squankum, except when you forget to mask them when spraying paint nearby.
Meanwhile, people without skills or tools just buy new cars. And pay a heavy price!! The poor bastards.
There has to be a happy medium between trading it in when the headlights get foggy and keeping it until no one recognizes it. [What are these Packards, Plymouths and Pontiacs you speak of].
 
OP
B

Bob Heine

ALLIANCE MEMBER
Joined
Oct 24, 2009
Messages
10,708
Location
Boca Raton, Florida
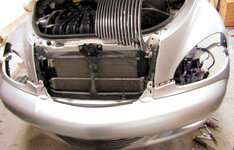
I worked on the headlights over the weekend, expecting to get them changed in a day. According to the Shop Manual the front wheels and inner fender liners have to be removed and the bumper cover loosened to start. Moved the Cruiser into the garage so I could turn on the A/C (we had a high of 89.6°F on Saturday). Quickly got the car up on jack stands and removed the wheels and fender liners. Two bolts hold the upper grille in place and nine hold the bumper cover in place. Took a minute for the grill and another two minutes for eight of the bumper fasteners. The last nut on the driver side wouldn't come off. I thought it was a welded on stud but it isn't. I had to fight the headlight out so I could see the problem. The bolt is captured in a plastic plate and it was turning free. Ripped the plate halfway off and was able to get my smallest Vicegrip on the head.
PT Cruiser Headlights 24.jpg
Got the nut off but couldn't remove the captured bolts because they had sheet metal nuts holding them on. I managed to mangle them off and then hammer them back to a shape I hoped would work with the new assembly I ordered (of course there are delays in the supply chain yadda yadda yadda). Someday a new one of these $9 (+$12 shipping) things may show up in my mailbox or front yard.
PT Cruiser Headlights 25.jpg
As the day passes I uncover the name of and ordered the broken part and removed both headlights.

I may make my own "Hole Cover Retainer 5288791AA" and let them know I have passed on and my widow no longer needs the part. I can cut some scrap stainless 1/8 or 3/16 flat bar to size, thread two holes for M6 1.0 studs and tack them in with my TIG. I'll be using my imaginary milling machine to make a perfect replica.
PT Cruiser Headlights 23.jpg
Even managed to install the driver side headlight before I quit for the day.

At the end of the day I remembered to take the $600 (came with the car) Cadillac CTS-V cover back in the house so it doesn't go for a stroll overnight. A decade or so ago I would have finished this job in the morning. Sigh, Sunday's another day.
 
OP
B

Bob Heine

ALLIANCE MEMBER
Joined
Oct 24, 2009
Messages
10,708
Location
Boca Raton, Florida
Putting headlights in a car was always an easy job, even one-handed. Now it's a giant production and yes, I know bulb changes on today's cars are pretty simple. For the life of me I couldn't get the rubber gasket to stay in place while installing the four nuts in the fender wells. As usual wood scraps came to my rescue and I was able to insert the housing and put upward pressure on it at the same time. The driver side took an hour and with that experience I was able to do the passenger side in two the next day. These are the original factory parts so I just don't understand the drama.
PT Cruiser Headlights 26.jpg
I know the headlight looks cloudy but it's just a coating of sweat and dirt.

Liane wanted the car ready to go (nowhere) Monday so I jury rigged the driver side attachment of the bumper cover to the fender. I thank my invisible friend for Zip ties.
PT Cruiser Headlights 27.jpg
It's finished for now but as soon as the Mopar Hole Cover Retainer or Bob Heine's Hole Cover Retainer is ready, I get to repeat the process because the driver side headlight has to come out to get to the spot it goes in. To that end the front fender liners are sitting in the garage waiting to be washed and buffed!
PT Cruiser Headlights 28.jpg
 

madison069

Well-known member
Joined
Nov 5, 2010
Messages
4,228
Location
Monroeville, PA
I hate that kind of job. $9 part puts a stop to your progress and now you have to jerry rig it to use it.

I would be looking for some scrap metal to weld those bolts to and reinstall the whole mess, specially with their whole "supply issue so it's going to take some imaginary time before the part will arrive" attitude.

I had a facebook reminder yesterday telling me about a $8 part that stopped me from getting the transmission back in a 1978 Bronco I used to own. I recall it was a seal for the torque convertor. Strangely the part store didn't have one in stock which I thought would of been a very common part to stock for a C6 transmission, this was in 2012.
 

Ford52PU

Well-known member
Joined
Aug 7, 2007
Messages
799
Location
Coatesville PA
"I have not tried MicroMesh but I see it isn't cheap. How do those fine grits hold up?"

Bob,
I think they hold up pretty good the sheets are like 4x6" but for the purpose of headlights or chrome they work pretty good. I used them both wet and dry. I got used to using them when I was working, to polish metal lenses to a mirror like finish for the laboratory equipment I used to service. They were "free" then!! But now I'm retired I ordered from Amazon.
 
OP
B

Bob Heine

ALLIANCE MEMBER
Joined
Oct 24, 2009
Messages
10,708
Location
Boca Raton, Florida
I hate that kind of job. $9 part puts a stop to your progress and now you have to jerry rig it to use it.

I would be looking for some scrap metal to weld those bolts to and reinstall the whole mess, specially with their whole "supply issue so it's going to take some imaginary time before the part will arrive" attitude.

I had a facebook reminder yesterday telling me about a $8 part that stopped me from getting the transmission back in a 1978 Bronco I used to own. I recall it was a seal for the torque convertor. Strangely the part store didn't have one in stock which I thought would of been a very common part to stock for a C6 transmission, this was in 2012.
Cody, I'm not in a huge rush because it's back together for now and we can use the car. I often start projects by ordering the parts and invariably one of them is back ordered. The term 'back ordered' can mean they've ordered more or it can mean we don't have any and have no idea where or when we'll get more.

I do have a hoard scrap collection with some flat bar very close to the size needed. Now that I have a collection of split point drill bits it's going to be easy to drill the holes and the welder is ready to go.

Everywhere I turn my screens remind me of both recent and distant past searches. It's like Groundhog Day taking place in Orwell's 1984. I take my phone with me less every day and I unplugged Alexa after she started posting family photos on our stupidly smart TV without asking.
"I have not tried MicroMesh but I see it isn't cheap. How do those fine grits hold up?"

Bob,
I think they hold up pretty good the sheets are like 4x6" but for the purpose of headlights or chrome they work pretty good. I used them both wet and dry. I got used to using them when I was working, to polish metal lenses to a mirror like finish for the laboratory equipment I used to service. They were "free" then!! But now I'm retired I ordered from Amazon.
Dennis, I ordered the $24.50 kit Amazon offers. It comes with nine 2"x3" pieces of MicroMesh (1500, 1800, 2400, 3200, 3600, 4000, 6000, 8000, 12000 grit) and a small 2x3 foam block. The description says the 1500 is similar in grit range to conventional 400 grit wet/dry sandpaper. I'm guessing it's part of the P-series versus ANSI grits thing:

1678907848594.png
I guess grits above 1500 or P3000 are in a special category.
 
OP
B

Bob Heine

ALLIANCE MEMBER
Joined
Oct 24, 2009
Messages
10,708
Location
Boca Raton, Florida
I was expecting a problem with my decision to switch the directional/emergency lights to LED. Sure enough, the blinking is real close to Epilepsy triggering flashing. Doesn't bother me but I expect SWMBO will freak out. For some reason, multiple flashers show up for the PT Cruiser. I checked the Factory Service Manual and it's a 5-blade relay. At first I was upset the flasher was hidden inside the steering column.
Flasher 1.jpg
Turns out it's all held together with two Phillips screws. Sure enough, the flasher is a 5-blade unit.
Flasher 2.jpg
I wasn't paying close attention to the orientation and got a little panicky when the new flasher didn't go right in. Took a deep breath and tried the obvious orientation that puts the label on top.
Flasher 3.jpg
I did remember to test the new flasher before buttoning everything up and it appears the new flasher fixes the fast flashing problem. The job took all of five minutes.
 

patlun

Well-known member
Joined
Apr 12, 2015
Messages
244
Location
Värmland, Sweden
Nice when those five minutes jobs actually takes five minutes. Living in the far north have some advantages it seems, I have never heard about someone polishing the headlights because of sunshine. We only need to remove scratches.
 

driftpin

Well-known member
Joined
Dec 22, 2016
Messages
11,308
Location
Miami-Dade/Broward Co. Florida
I have respect for your headlight work. I agree about saving the old OEM headlights, even when replacing them with Rock Auto parts, and leaving 'em on a shelf. My wife's last-century Camry 3L V6 is looking fairly-foggy, though she doesn't drive much at night, I need to either buy another set of aftermarket ones or re-do the OEM ones. Reading your supplies list and those of the other posters, is incentive to do...something. I have other projects going on and just buying a set of aftermarket lenses would be the time-saving solution. I've done lenses a couple of times, and I dunno if I have the patience to do it, now. I went to a local paint & body supplies store where I've bought stuff before, and the UV-resistant paint was about half the price of the aftermarket lenses, so I just bought the latter. Less trouble, and they lasted about 6 years, I estimate, and are now ready for sanding/polishing, or replacement. I'll be checking the lenses prices.
 
OP
B

Bob Heine

ALLIANCE MEMBER
Joined
Oct 24, 2009
Messages
10,708
Location
Boca Raton, Florida
Nice when those five minutes jobs actually takes five minutes. Living in the far north have some advantages it seems, I have never heard about someone polishing the headlights because of sunshine. We only need to remove scratches.
Patrik, my normal process is to turn five minute jobs into five hour jobs. You'll notice I didn't vacuum or detail the exposed mechanisms under the steering column cover. I'd normally spray some kind of cleaner in there and cause an electrical problem as well.

When I lived up north my cars mostly disintegrated from the bottom. In South Florida they disintegrate from the top. We moved south in 1975 when our Pontiac GTO was almost 8 years old. There was a little rust in the lower quarter panels but the trunk, roof and hood were perfect. A year of Florida sunshine destroyed the paint on those surfaces and buffing it back to a shine didn't help. The other flaw in the GTO was the air conditioning -- it didn't have it and the black interior made it a rolling oven.
I have respect for your headlight work. I agree about saving the old OEM headlights, even when replacing them with Rock Auto parts, and leaving 'em on a shelf. My wife's last-century Camry 3L V6 is looking fairly-foggy, though she doesn't drive much at night, I need to either buy another set of aftermarket ones or re-do the OEM ones. Reading your supplies list and those of the other posters, is incentive to do...something. I have other projects going on and just buying a set of aftermarket lenses would be the time-saving solution. I've done lenses a couple of times, and I dunno if I have the patience to do it, now. I went to a local paint & body supplies store where I've bought stuff before, and the UV-resistant paint was about half the price of the aftermarket lenses, so I just bought the latter. Less trouble, and they lasted about 6 years, I estimate, and are now ready for sanding/polishing, or replacement. I'll be checking the lenses prices.
Philip, the coating the factory headlights have seems to last longer than the aftermarket ones. The polishing process strips that coating off in either case so once you've brought them back the first time you'll have to repeat the process much more frequently. A couple of coats of high solids UV resistant clear coat is far better than the original factory coating and likely will never need more than hand buffing, like the paint on the car's body.
Was theswitch toLEDs worth it?
Kirk, yes and no. We rarely drive at night anymore but the last time we did Liane was driving. She complained that the headlights didn't work as well as they did a few decades ago. Showed her how bright the new LEDs are and she was pleased so the switch to LEDs was worth it. How bright they are and how far they throw light doesn't matter if you don't drive at night so no, it was a waste of money. In the end I at least get some revenge on the drivers who have similar lighting when I'm driving in the rain. I may be driving in the rain with the main beams, high beams and driving lights on just to piss them off.
 
OP
B

Bob Heine

ALLIANCE MEMBER
Joined
Oct 24, 2009
Messages
10,708
Location
Boca Raton, Florida
Looking at the low driving lamps, they are better, by far.
Philip, I don't know if a photo will show it very well but the driving lights broadcast light to the sides better than the headlights. That's a good thing considering how many bicycle riders and pedestrians are on the road at night in South Florida. No coincidence that Florida is the deadliest state for cyclists and pedestrians.
 
OP
B

Bob Heine

ALLIANCE MEMBER
Joined
Oct 24, 2009
Messages
10,708
Location
Boca Raton, Florida
Few small jobs completed.

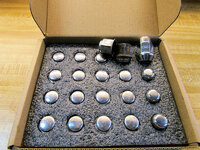
As I was putting the wheels back on the PT Cruiser several caps came off the lug nuts. I decided to buy new lug nuts that are chrome plated but I'm keeping the originals just in case.
Lug Nuts 1.jpg
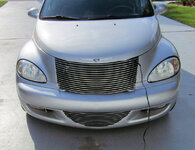
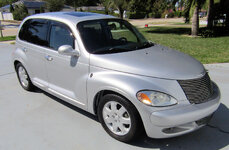
The dirty car didn't match the shiny lugnuts so the PT Cruiser got a bath. The car will turn 20 in late July.
Lug Nuts 2.jpg
No word on the bumper bracket so I dug out a nice 3/16 piece of scrap steel and cut a piece off the side. Not sure where I got the piece but it was probably cut off a bumper hitch vise mount. Ground off the paint and sharp edges and drilled two undersize holes with the drill press.
PT Cruiser Headlights 29.jpg
I bought a small set of metric drill bits, a first for me, earlier this year. Tried a 5.0mm bit and it was too small (I couldn't get the tap started). A 5.5mm worked perfect so I have a home made bracket ready to go if the place I ordered the Mopar factory part from doesn't come through. I'll give them another week before I cancel the order.
PT Cruiser Headlights 30.jpg
 

OutlawDrifter

Well-known member
Joined
Jan 20, 2015
Messages
3,898
Location
KS
Well all it needs now is a shot of black paint and its ready to go Bob! Might as well just cancel the part now, that will offset the cost of the paint job ;)
 

Squankum

Well-known member
Joined
Mar 28, 2011
Messages
7,862
Location
Southeast
Few small jobs completed.

As I was putting the wheels back on the PT Cruiser several caps came off the lug nuts. I decided to buy new lug nuts that are chrome plated but I'm keeping the originals just in case.
Lug Nuts 1.jpg

Bob - I converted the Durango to real lug nuts with chrome plating years ago. A friend of mine told a horror story of being stuck out deep in the woods with a pickup truck with lug nuts like that, the goofy sheet metal cladding came off, and he didn't have a size on his 4-way lug wrench to remove what was left of it and his weekend really got screwed up. Sold!

Also, I had noticed the deformation of our clad lug nuts, probably from me rotating tires, and the high mileage of it all. I noticed in the junkyard that the same lug nuts on other Durangos on the back were relatively newish... and that's when I realized most people just blunder through life only replacing tires on each end as they wear out, and rears wear out less often... so those rear lug nuts didn't get much use!


Last edited:
OP
B

Bob Heine

ALLIANCE MEMBER
Joined
Oct 24, 2009
Messages
10,708
Location
Boca Raton, Florida
Well all it needs now is a shot of black paint and its ready to go Bob! Might as well just cancel the part now, that will offset the cost of the paint job ;)
Marc, I plan to shoot a coat or two as soon as I get a couple of tacks on those weird bolt heads.
Bob - I converted the Durango to "real lug nuts with chrome plating years ago. A friend of mine told a horror story of being stuck out deep in the woods with a pickup truck with lug nuts like that, the goofy sheet metal cladding came off, and he didn't have a size on his 4-way lug wrench to remove what was left of it and his weekend really got screwed up. Sold!

Also, I had noticed the deformation of our clad lug nuts, probably from me rotating tires, and the high mileage of it all. I noticed in the junkyard that the same lug nuts on other Durangos on the back were relatively newish... and that's when I realized most people just blunder through life only replacing tires on each end as they wear out, and rears wear out less often... so those rear lug nuts didn't get much use!
@Squankum, I was also worried about one of those sheet metal covers getting stuck in the lug wrench. I was able to get it out but there's more than a 50% chance some good Samaritan would stop to help Liane and they'd be stuck. There's a flip phone in the PT Cruiser's glove compartment but I don't think Liane has mastered it. The power button is not obvious -- it's the End Call button but held down longer to power the phone on and off.
 
To avoid these ads, REGISTER NOW!

casmurbax

Well-known member
Joined
Sep 25, 2012
Messages
2,761
Location
Wilton, NY
Hi Bob,

Nice job on the lights. I can't recall if I used wood before, but I have probably used everything else in the garage for holding something in place.

When the wife comes out and sees that I rigged something to help me, she always says" why didn't you get me", cause doing the jerry rig was quicker is m usual reply. Now she doesn't say anything nor do I....
 

xtremek

Well-known member
Joined
Apr 13, 2012
Messages
11,603
Location
St. Johns, Mi
I'd love to find my cohort who thought these capped lugnuts was a good idea. Then again, I don't want to end up in jail.
 

Squankum

Well-known member
Joined
Mar 28, 2011
Messages
7,862
Location
Southeast
Hi Bob,

Nice job on the lights. I can't recall if I used wood before, but I have probably used everything else in the garage for holding something in place.

When the wife comes out and sees that I rigged something to help me, she always says" why didn't you get me", cause doing the jerry rig was quicker is m usual reply. Now she doesn't say anything nor do I....

My answer might be, "I've been working solo since I was a child."
:)
 

RickP

Well-known member
Joined
Jan 15, 2013
Messages
1,557
Location
Annapolis, MD
Those headlights look like they were a fair bit of work -- hope that clear will block the UV better this time.
I bought a small set of metric drill bits, a first for me, earlier this year. Tried a 5.0mm bit and it was too small (I couldn't get the tap started). A 5.5mm worked perfect so I have a home made bracket ready to go
I'm going to look into a set of those bits -- that would be a first for me too. It seems like I'm using more metric fasteners every year, so maybe it's time to get the drills too. Plus, I'm sick of trying to find the closet fractional bit on the conversion chart whenever I need to use a metric tap.
 
OP
B

Bob Heine

ALLIANCE MEMBER
Joined
Oct 24, 2009
Messages
10,708
Location
Boca Raton, Florida
Well all it needs now is a shot of black paint and its ready to go Bob! Might as well just cancel the part now, that will offset the cost of the paint job ;)
Marc, I took your suggestion to heart. It was late Friday night and I forgot to cancel the order. The post office delivered the part Saturday.
Stick it into a Glad sandwich bag w/a 1-page note containing that info. Then, back into the glovebox.
Good idea Philip. I put a note in the owner's manual wallet that tells where the locking lug nut key is located.
Hi Bob,

Nice job on the lights. I can't recall if I used wood before, but I have probably used everything else in the garage for holding something in place.

When the wife comes out and sees that I rigged something to help me, she always says" why didn't you get me", cause doing the jerry rig was quicker is m usual reply. Now she doesn't say anything nor do I....
Hi John, I use sticks and stones if nothing else is handy. Always seems I don't have enough clamps but it's better than it used to be.

Help seems to slow me down as well. Every session starts with "Why don't you...." Sometimes it's followed by a great idea but most of the time it requires a 'why that won't work' explanation. That's a rinse and repeat process around here. The final suggestion is "It's getting late, why don't you try again tomorrow."
I'd love to find my cohort who thought these capped lugnuts was a good idea. Then again, I don't want to end up in jail.
Kirk, I suspect a bean counter was involved. They always have the best ideas.
They're in a nursing home by now. Just creep in and steal their Jell-O.
@Squankum, hiding their remote would be more devastating.
My answer might be, "I've been working solo since I was a child."
:)
I think the question is asked with the best intentions. We single wingers look pathetic to other people so it triggers their sympathetic traits. I appreciate the help and as I age I'm in less of a rush to get things done so it's a win-win.
Those headlights look like they were a fair bit of work -- hope that clear will block the UV better this time.

I'm going to look into a set of those bits -- that would be a first for me too. It seems like I'm using more metric fasteners every year, so maybe it's time to get the drills too. Plus, I'm sick of trying to find the closet fractional bit on the conversion chart whenever I need to use a metric tap.
Rick, I have SPI clear on things that are out in the sun all day every day and the clear still looks brand new.

I always used fractional bits and then used the metric tap and it's a **** shoot whether it will strip right away or wait to surprise me.
That's very interesting. It's the one thing I don't have. That and metric for the mill.
Kirk, old dogs may not be teachable but we're good at digging up excuses to buy tools.
 

GeddyT

Well-known member
Joined
Jun 17, 2015
Messages
1,243
Location
Bellingham, WA
On metric bits and taps, I've been turned on lately to the existence of form taps, and I really like the idea. They're stronger and less likely to break and form a stronger thread. The downside is that they require odd sized pilot holes, somewhere slightly smaller than splitting the difference between minor and major thread diameter.

I used to really want a metric drill bit set, as I pretty much exclusively work with metric fasteners. In practice, though, I don't know that a set of whole and half metric diameters would be helpful. A clearance hole is always three or four tenths over, and a tap hole is always somewhere two or three decimals down the rabbit hole. When searching for the optimal hole size for a metric form tap, sometimes a fractional bit is closest, sometimes a letter bit, and sometimes I just have to bite the bullet for a metric decimal bit.

Take M8 for instance. Close fit clearance drill is 8.4 mm. That's .331". Closest letter drill is a Q at .332". Closest fractional is 21/64, which would be tight at .328". I think I ended up buying a letter Q because it was less expensive than an 8.4 mm. When it comes to the M8x1.25 tap drill, you're looking for a 7.53 mm bit. These exist, but they're specialty and expensive. A letter M drill is 7.49 mm (.295") and is much more common and affordable. A 19/64 fractional is also common and comes in at 7.54 mm (.297"). I chose the latter as my tap drill.

Long story short, if I were making a metric drill bit set and trying to be frugal, most of the bits wouldn't be metric! There's usually a fractional or letter bit that's within a thou, which is plenty close. I've also recently discovered the amazing cost-per-performance drill bits that are the YG-1 Gold P line. Instead of piecing together individual fractional, letter, and metric bits to make the perfect set for common metric fastener sizes, I recently just bought a full 1/16 to 1/2 fractional set, as it was an amazing value. This is just the general shop set, so hand tapping. There'll be a bit for tapping any metric size there that'll be close enough for hand tapping.
 
OP
B

Bob Heine

ALLIANCE MEMBER
Joined
Oct 24, 2009
Messages
10,708
Location
Boca Raton, Florida
On metric bits and taps, I've been turned on lately to the existence of form taps, and I really like the idea. They're stronger and less likely to break and form a stronger thread. The downside is that they require odd sized pilot holes, somewhere slightly smaller than splitting the difference between minor and major thread diameter.

I used to really want a metric drill bit set, as I pretty much exclusively work with metric fasteners. In practice, though, I don't know that a set of whole and half metric diameters would be helpful. A clearance hole is always three or four tenths over, and a tap hole is always somewhere two or three decimals down the rabbit hole. When searching for the optimal hole size for a metric form tap, sometimes a fractional bit is closest, sometimes a letter bit, and sometimes I just have to bite the bullet for a metric decimal bit.

Take M8 for instance. Close fit clearance drill is 8.4 mm. That's .331". Closest letter drill is a Q at .332". Closest fractional is 21/64, which would be tight at .328". I think I ended up buying a letter Q because it was less expensive than an 8.4 mm. When it comes to the M8x1.25 tap drill, you're looking for a 7.53 mm bit. These exist, but they're specialty and expensive. A letter M drill is 7.49 mm (.295") and is much more common and affordable. A 19/64 fractional is also common and comes in at 7.54 mm (.297"). I chose the latter as my tap drill.

Long story short, if I were making a metric drill bit set and trying to be frugal, most of the bits wouldn't be metric! There's usually a fractional or letter bit that's within a thou, which is plenty close. I've also recently discovered the amazing cost-per-performance drill bits that are the YG-1 Gold P line. Instead of piecing together individual fractional, letter, and metric bits to make the perfect set for common metric fastener sizes, I recently just bought a full 1/16 to 1/2 fractional set, as it was an amazing value. This is just the general shop set, so hand tapping. There'll be a bit for tapping any metric size there that'll be close enough for hand tapping.
Tom, much as I would love to have some form taps, they make my wallet hurt. A Titanium carbonitride (TiCN) set of 3 would cost almost $75 (M3 0.5 - $25.60, M6 1.0 - $22.33 M8 1.25 - $24.86) from McMaster-Carr. I see myself running one into a hole that isn't the perfect size and breaking the tap off. With no flutes in the tap I wouldn't have a snowball's chance in hell getting the tap out.

Back in 2018 I discovered my drill bit collection was sorely lacking. I didn't have many numbered bits, no lettered bits and no metric bits. I blew $45.99 on a 115 yellow bit set (not really sure they are Titanium coated) that covered numeric bits from 1 to 60, alphabetic bits from A to Z and fractional bits from 1/16" to 1/2" in 1/64" increments. Because it didn't include metric bits I bought a set of metric bits in HSS from 1mm to 13mm in 0.5mm increments. I had forgotten I had those metric bits because they've never been used. All 140 of these bits have plain round shanks.
115 and 25 bit sets.jpg
I really like my M12 1/4" hex drive tools so I recently purchase the smaller selection of metric bits (up to 6.5MM). I also bought a case set of hex drive fractional bits from 1/16" to 1/2" in '64ths so I could be sure I have all of them with me when I need to do a remote repair.
 
OP
B

Bob Heine

ALLIANCE MEMBER
Joined
Oct 24, 2009
Messages
10,708
Location
Boca Raton, Florida
How you been Bob, I haven’t been around for a bit.

Found you another car to play with.
EF934278-1278-4C0E-BD3B-67CD66E967D9.png
Hope all is well.

Craig
Craig, tempting as that is, the garage is full. While it has been droughty dry lately and rumor has it we may someday get rain. It appears Mother Nature is really pissed, sending Florida weather to California and California weather to Florida. Based on the ability of a freshly washed car to attract huge birds full of acid poop and vast quantities of rain, what appears to be a shiny ******* Cadillac would be a nightmare come to life. Were I to buy it, monsoon rains that never end would be our future. Or, La Palma in the Canary Islands collapses and sends us a Tsunami.

I'm doing well. It's been a while since anyone suggested pulling something out -- or stuffing something in -- my body
Can you stuff that in a flat rate box and send it North? ;)
Kay, you want that with all-weather tires? I can see the boys riding on top of the rear seat backs wearing goggles.
 

bulletpruf

Well-known member
Joined
Nov 28, 2013
Messages
11,136
Location
San Antonio
Hi Bob,

Nice job on the lights. I can't recall if I used wood before, but I have probably used everything else in the garage for holding something in place.

When the wife comes out and sees that I rigged something to help me, she always says" why didn't you get me", cause doing the jerry rig was quicker is m usual reply. Now she doesn't say anything nor do I....

My wife doesn't help much, but she's getting pretty good at removing windshields and hoods or gently lowering them into place.
 
OP
B

Bob Heine

ALLIANCE MEMBER
Joined
Oct 24, 2009
Messages
10,708
Location
Boca Raton, Florida
Paint it black and hit the track!
Good advice Scott. Had I canceled the order sooner, that's what I would do. Now I need to label the jar with my fix for the next time.
My wife doesn't help much, but she's getting pretty good at removing windshields and hoods or gently lowering them into place.
Scott, there was a time when Liane volunteered to help but those days ended when she started visiting nail salons.
Liane Holds the Compressor 800.jpg
 

madison069

Well-known member
Joined
Nov 5, 2010
Messages
4,228
Location
Monroeville, PA
Strange, I had to enlist my wife's help on the camaro this past weekend. I rarely ask for help and generally do things on my own. I do have to say she did really well holding the delete plates while i install the bolts and test fit the plates before applying the silicone to the surface. I doubt she wants to do it, but she was willing to help.
 
OP
B

Bob Heine

ALLIANCE MEMBER
Joined
Oct 24, 2009
Messages
10,708
Location
Boca Raton, Florida
I'm following Mike (@zmotorsports) as he corrects the paint on his Camaro. The paint job looks real shiny but in this photo it looks like his Camaro's paint has the same level of orange peel as my 2011 Cadillac.
1680543722002.png
I bought the Cadillac when it was five and a half years old with 11,705 miles on the odometer. In my seven years of ownership I've driven it 7,038 miles (sitting at 18,743 today). It has been garage for those seven years and I've never taken it through a car wash. I don't see a lot of scratches but the factory orange peel bothers me.
Orange Peel.jpg
I am really tempted to give it a thorogh wash, clay bar and then cut the clear with a hard block starting with 1,000 and stepping up through 5000 before beginning the buffing process. I wouldn't consider cutting the clear for the orange peel if there weren't a couple of flaws in the paint. There's one on the roof and a similar one on the trunk.
Paint Flaw.jpg
The other flaw is a spot on the passenger front fender, where a buzzard's poop landed.
Bird Turd 1.jpg
It's amazing how strong that stuff is.
Bird Turd 3.jpg
When I sanded the spot I could see the orange peel pretty clearly.
Bird Turd 4.jpg
Worked my way through the wet or dry grits until I got to 5000 and then buffed with four grades of compound.
Bird Turd 6.jpg
It looked good when I finished but over the years it has returned so can see the marks.
Bird Turd 7.jpg
My biggest concern is sanding through the clear. Like Mike's Crystal Red Camaro, the paint on my Thunder Gray Cadillac is difficult to repair and real hard to blend. Did I mention expensive?
 

madison069

Well-known member
Joined
Nov 5, 2010
Messages
4,228
Location
Monroeville, PA
If I recall, GM was notorious about thin clear coat. As much as I’ve always wanted to remove the orange peel on my truck, I just can’t do it. Call me a chicken, but I don’t want to mess up the paint anymore! Lol
 

Dan in Pasadena

Well-known member
Joined
Feb 18, 2009
Messages
13,162
Location
Pasadena, CA
If I recall, GM was notorious about thin clear coat. As much as I’ve always wanted to remove the orange peel on my truck, I just can’t do it. Call me a chicken, but I don’t want to mess up the paint anymore! Lol
For awhile GM and a lot of maker's clear coat would turn into the white flakiness of a glazed donut in a few runs through a car wash since most people never ever wax their cars.
 
To avoid these ads, REGISTER NOW!
Top Bottom