To avoid these ads, REGISTER NOW!

Metal Shaping and Restomods - My Fab Thread

phivelug

Well-known member
Joined
Apr 17, 2023
Messages
87
Location
Florida
Hi fellas, I'm new here. My name is Justin Garner and I've been building big money restomods, racecars and now rockets for quite sometime; currently living in Space Coast Florida area. I left the automotive industry about a year ago and transitioned into aerospace and now I'm a TIG/Plasma welder for a big space company. I'm currently building a house and will outfit my garage as a fabshop to continue my side business building racecar turbo manifolds/parts and probably get back into some sheet metal shaping once I get more equipment. I felt this would be a cool place to share some of my fab work and pass on and gain some knowledge. I post a few photos in this first post and go back later and describe the projects and processes with more text and photos as I have time.
Check me out on instagram at www.instagram.com/justingarner_ www.silhouettepower.com onto some pics.

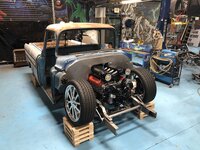
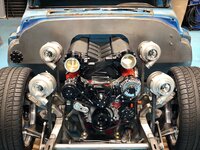
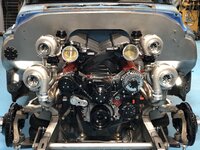
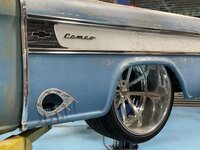
1957 Chevy Cameo truck I built with a quad turbo charged LSX engine, with a BMW DCT gearbox behind it. Here's a few, ill post more later.
Engine bay, LSX 376
H0Fizyu.jpeg
bKP1VaQ.jpg
CNC billet steering wheel, 12" motec digital dash displayed fabricated into stock sheet metal dash.

joMwSIt - Imgur.jpgA ton of fabwork underneath the bed floor.
Z9nfBoQ - Imgur.jpg
Epoxy/wood river bedfloor. Handmade stamped old school chevy fill panel.

1968 Camaro I built when working for the Roadster Shop
pMcjpTU - Imgur.png
a6bUMXr - Imgur.png
Sc1rHO2 - Imgur.jpg
5AvMPcB - Imgur.jpg

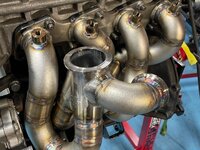
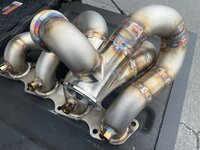
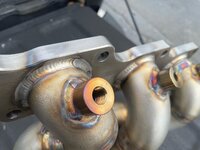
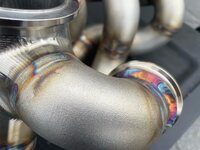
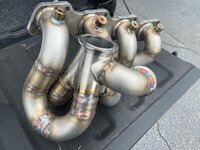
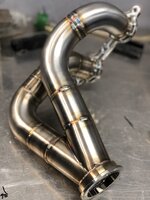
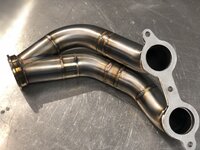
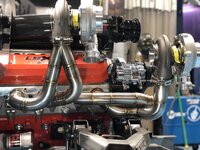
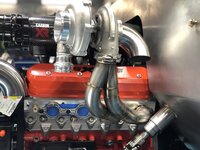
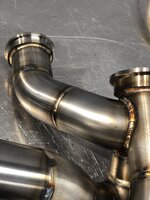
Turbo manifolds I build for Japanese motors.
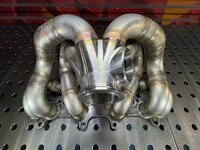
P2wooDP - Imgur.jpg
0q5qL8H - Imgur.jpg
Ill post a lot more projects with in depth stuff also that i've built over the years, also limited to 10 images per post. For some reason its not allowing my to insert with hyperlink via imgur (and help with that?) Garage and house build photos coming also!
 
Last edited:
To avoid these ads, REGISTER NOW!

LXCam

ALLIANCE MEMBER
Joined
Apr 23, 2013
Messages
19,203
Location
AZ
Now we're talking, you're going to fit right in here. Nice work and welcome to the joint bud.

Don't get me wrong, you're work is very clean and very impressive. But that stainless billet collector is flipping killer too. Are you working directly with them on the design?. Just wondering.
 

engineer2

Well-known member
Joined
Dec 13, 2009
Messages
11,825
Location
Chicago burbs
Nice fab work! The Roadster Shop is near here. They look like they keep pretty busy.
Question: Do they do stock restorations, or is that not their thing?
I worked in that same building in 1972-1977 when it was Arrow Pneumatics (formerly Arrow Tool Co.)
Saw your Camaro pic and instantly recognized the photo location as West Winchester Rd. off of Rt. 83.
 
OP
P

phivelug

Well-known member
Joined
Apr 17, 2023
Messages
87
Location
Florida
Now we're talking, you're going to fit right in here. Nice work and welcome to the joint bud.

Don't get me wrong, you're work is very clean and very impressive. But that stainless billet collector is flipping killer too. Are you working directly with them on the design?. Just wondering.
Its a CNC shop out of Finland, I just have them slap my logo on them. www.elmerracing.com
Nice fab work! The Roadster Shop is near here. They look like they keep pretty busy.
Question: Do they do stock restorations, or is that not their thing?
I worked in that same building in 1972-1977 when it was Arrow Pneumatics (formerly Arrow Tool Co.)
Saw your Camaro pic and instantly recognized the photo location as West Winchester Rd. off of Rt. 83.
They don't really do "stock restorations" They do have their survivor and legend series though. Survivor is typically a mostly rust free car where they keep the paint on the car, throw a ls3 and a chassis under it an update the interior some. Legend series is their new line of square body trucks that come with lt4 powerplant and their chassis that incorporates a ton of oem gm parts to make and repair needed easy on the road.
 
OP
P

phivelug

Well-known member
Joined
Apr 17, 2023
Messages
87
Location
Florida
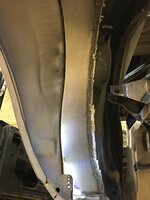
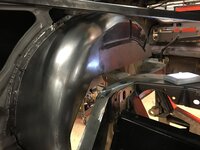
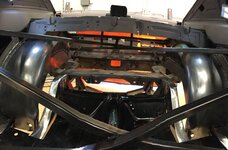
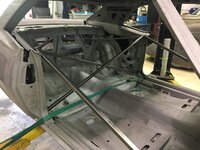
Ill start off with some of the work on that Camaro. I did about 95% of all the fabwork on that car when I first started at RoadsterShop in 2016, I was super green in metal shaping at this point. That car came in "restored" and painted. Following stripping the paint we found a ton of issues. It needed new 1/4s, floors, etc. Seen in the first post you can see where I cut out the entire floor pan. I replaced the front half with an oem replacement type floor and the back half and tubs I had to make from scratch to accommodate the IRS on the RS fast track chassis this car received.
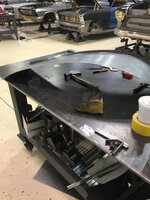
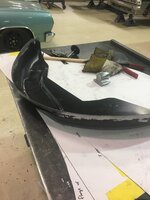
Lets start off with some mini tubs. This was my first attempt at this process. Take an oem wheel tub, cut it in half and widen it for maximum clearance that the frame allows.

The body line where the tub meets up isnt square, its actually very curvy and changes directions multiple times, so i made a template of that body line and transferred it to a flat sheet of 18 gauge sheet metal. Once i had it all layed out, i threw my sheet in a slip roll to give it a head start with some shape, and my mounting flange i tipped with a bead roller.

here is the first stage of that
nCvJ7P3.jpg

here is the factory panel after i cut the mounting flange off, this will **** weld to my hand made section
T7lAfCH (1).jpg
fast forward a bit through the hard part, which was shrinking/stretching the piece to get the desired radius to match the body tub line. now i have that set and i locate my inner oem tub panel and scribe my cut line to **** weld them together.
BMl2k9Z.jpg

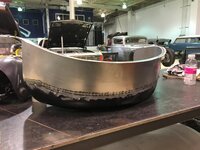
here it is welded together, you can see how much shape the mounting flange has and its key to get that spot on.

IQTzORL.jpg

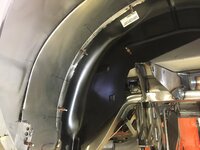
here you can see the inner body line that i said was crucial to get right, not bad for my first attempt at making a tub from scratch
C6wlhRd.jpg

After some planishing, hammering and metal finishing they are in the car.
fVyKXiW.jpg
fkdJBCy.jpg
onto the back half of the floor for the next post.
 
OP
P

phivelug

Well-known member
Joined
Apr 17, 2023
Messages
87
Location
Florida
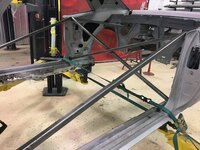
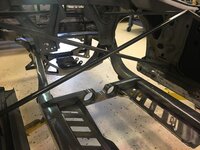
Actually ill throw in some front floor action also. Braced everything real good before cutting out.
kNy2o50.jpg

got to work
NWxzFy9.jpg
began fitting the new chassis
7KRsfvL.jpg

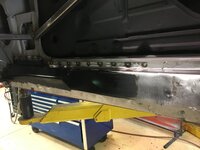
both inner rockers were in pretty bad shape so i cut out the front half on each side and replaced
8312wvG.jpg
PlWdK0e.jpg


hEbJBf5.jpg

and new floor welded in, had to channel both sides to fit our frame rail and bolt up.
2AUPsZm.jpg
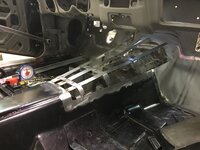
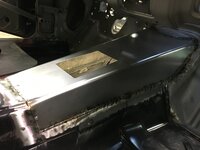
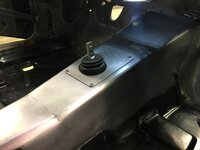
onto the transmission tunnel. made a sheet metal buck to help make a template and get the fitment i wanted.
cU08dLO.jpg
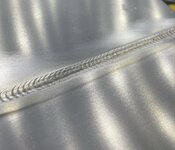
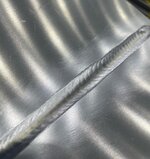
tig welded in
jTPbzHI.jpg
QPK3TP1.jpg

and metal finished with a trim plate for the shifter
 
To avoid these ads, REGISTER NOW!
OP
P

phivelug

Well-known member
Joined
Apr 17, 2023
Messages
87
Location
Florida
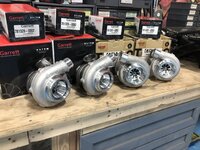
Thanks for the love everybody, lets dive into that quad turbo 57 chevy truck build. Mirror image Garett GTX3071r Gen 2 turbos.

7GACTZt.jpg

Modified the engine mounts with this chassis and moved the motor back 4 inches into the cab to be able to eventually cram and fmic and radiator in front of this engine package. Had to open up the firewall I had already built for this truck when we thought it was gonna be a tamer twin turbo ls setup. Here i get the motor mounted where i want it and build jigs to mock up the turbos in the location I liked.

2Edl9ke.jpg

Also when this truck airs out and lays on the ground the wheel and tire clearance to the motor shrinks drastically so I really got to check all my measurements and fitments to make sure this will all work, be symmetrical and look cool without any interference.

nHGpfKG.jpg

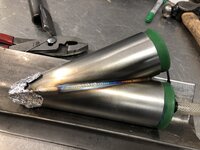
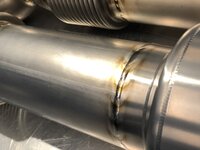
Here I started fabbing the collectors for the turbo manifolds.
MsOYC4o.jpg
oBSDFmZ.jpg
Silcon bronze weld onto the flange for some extra ductility since I built them with thin wall stainless. Manifolds now coming together, got to build 4.
xIGWB7F.jpg
UfoygA0.jpg
eJAwlR7.jpg
Rq43SY0.jpg
Also had to factor in all the downpipes, charge piping, wastegate dump tubes etc. It was alot for such a small space.
 
OP
P

phivelug

Well-known member
Joined
Apr 17, 2023
Messages
87
Location
Florida
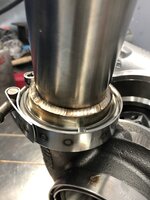
Here I modified the turbo housings to weld on the vangen flanges for the fmic piping, no silicone couplers on this build. Had to flare it out for the right size of the 2" if I recall correctly flange. Just did that in a press brake.
rGwQ1Sm.jpg
0UCwTCo.jpg

All 4 manifolds done with turbos hanging.
LLaJhOE.jpg

Wastegates were next.
WpzaLWw.jpg
0uNa4LZ.jpg

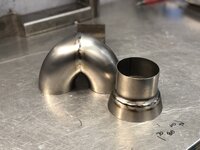
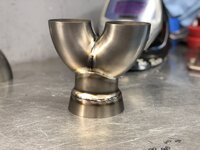
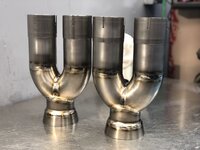
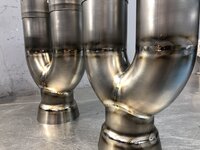
Next I started building the main section of the exhaust on each side of the truck so I can properly route the 4 downpipes to them. This is all built out of titanium, was my first major ti project at the time. I needed to build some merge collectors for them. 3" 2-1 into a 4" flare out for the exhaust.

hbqmDcu.jpg
mvfcBVW.jpg
mB6AwkR.jpg

rLcAHos.jpg

Slip fit to make install easier. More on the next post.
 
OP
P

phivelug

Well-known member
Joined
Apr 17, 2023
Messages
87
Location
Florida
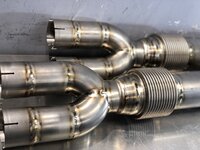
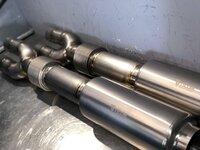
Mated the exhaust collectors to the rest of the exhaust.

V55UqVl.jpg
rJXwE87.jpg
yzmGvRH.jpg

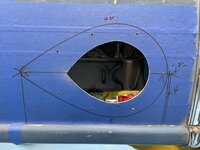
Cant find pics on my phone, im sure they are there somewhere of this installed under the truck. These two sections then had a slip fit on the end with the remainder shooting out of the bedside. Here you can see the trim piece I had made with the shop logo and the truck owners company logo, with the tear drop sitting flush.

yPeihpX - Imgur.jpg
Bmq9ayE - Imgur.jpg
DEETupy - Imgur.jpg
ZrjUMsM - Imgur.jpg
 
To avoid these ads, REGISTER NOW!
Top Bottom