To avoid these ads, REGISTER NOW!

The VISES of Garage Journal

RTM

Well-known member
Joined
May 13, 2019
Messages
13,467
Location
SF Bay Area
The plastic-handled units below are from Harbor Freight, as I recall. Cheapies.

The full-size "real" scratch brushes are in a different place.

I do not remember whether the Dollar Store had brass. I know they had steel and the plastic-bristled ones like the one below. They were crazy cheap. I'll try to remember to look.
I've had luck w some dollar store ones, they shed the bristles really quick, so never bought more.
 
To avoid these ads, REGISTER NOW!

JSGAuto

Well-known member
Joined
Aug 29, 2009
Messages
750
Location
Northern NJ
I am looking for a Columbian 604 base. Recently inherited a few of my great grandfathers tools. WW1 Aviator, and International Harvester carear after the war....would have liked to have a chat with him.

Anyway, The vice is pretty beat up, and the base is missing, but I'd like to return it to it's glory as best I can. If anyone has a lead on a swivel base, please shoot me a message.

Thanks!
Jim
[email protected]
 

Attachments

  • 20230925_171748.jpg
    20230925_171748.jpg
    733.7 KB · Views: 139

Smitty

Well-known member
Joined
Sep 4, 2018
Messages
2,409
Location
USA
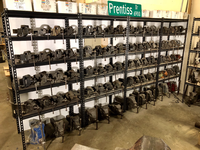
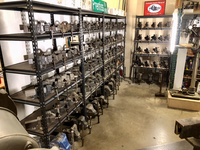
I finally completed the fourth shelving unit on my Prentiss vise smalls collection. These are all in the 2”-3” class with some larger Prentiss vises on the floor. There’s not a single broken base, chipped brow or cracked slide in the bunch.
 

Attachments

  • 548C8AD8-F051-4FE6-92CE-681F40A9414C.png
    548C8AD8-F051-4FE6-92CE-681F40A9414C.png
    6.2 MB · Views: 131
  • 5A3F5883-9B96-42DF-BA7E-FF5E2BEEDB92.png
    5A3F5883-9B96-42DF-BA7E-FF5E2BEEDB92.png
    6.4 MB · Views: 140
  • 7B2AF73C-24A7-4081-ADEC-8970C078CF8A.png
    7B2AF73C-24A7-4081-ADEC-8970C078CF8A.png
    6.5 MB · Views: 123

fishwatcher

Well-known member
Joined
Jan 26, 2023
Messages
761
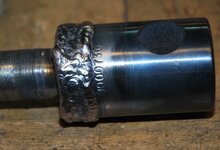
While doing some research on newer Wilton bullet vises I found that they include a metal circular shim in between the screw shaft and the dynamic jaw.

I don’t know when they started putting these on their vises but they didn’t have them for older vises like my Wilton 1760 from 1986. I also added some anti-seize on the horseshoe collar where it holds the shaft in place. You can see where the shim is supposed to go on the 3rd picture.

I noticed immediately that it operates extremely smooth with no more slop. If you have an older Wilton bullet vise I highly advise to add a shim. I originally used a rubber one but while tightening down the jaws it wouldn’t bite down like normal.
I’m very interested in this “upgrade” for older Wilton’s. Any sources for the right shims? Size considerations as far as thickness or OD and ID? I’ll measure of course.. but if there are standards to follow.. that’ll help. I have a 3" Wilton Bullet 9300 (early 80’s) and an 4.5” Cadet (8145? - 1972) each with maybe 45 degree worth of play before engagement. What’s a normal amount of play?

Thanks.
 

KMScott

Well-known member
Joined
Feb 14, 2012
Messages
4,655
Location
Daufuskie Island, South Carolina
I’m very interested in this “upgrade” for older Wilton’s. Any sources for the right shims? Size considerations as far as thickness or OD and ID? I’ll measure of course.. but if there are standards to follow.. that’ll help. I have a 3" Wilton Bullet 9300 (early 80’s) and an 4.5” Cadet (8145? - 1972) each with maybe 45 degree worth of play before engagement. What’s a normal amount of play?

Thanks.
You have to see where the wear is. If it’s in the Dynamic jaw support then you can add shims up to a point even though it should be machined flat. Then you can and shims so the flange shoulder is around .015 above the counterbore.

If it’s in the slot that is cut in the spindle and is showing wear then the spindle should be replaced. What I have done is welding the slot closed and recutting the groove. This is a design flaw Wilton did by allowing grit to fall into the washer area and cause wear.
 

Attachments

  • IMG_4428.jpeg
    IMG_4428.jpeg
    951.1 KB · Views: 57
  • IMG_4427.jpeg
    IMG_4427.jpeg
    393.7 KB · Views: 49
  • IMG_4426.jpeg
    IMG_4426.jpeg
    263.1 KB · Views: 45
  • IMG_4425.jpeg
    IMG_4425.jpeg
    574.8 KB · Views: 45
  • IMG_4424.jpeg
    IMG_4424.jpeg
    457.2 KB · Views: 51
Last edited:

TheRealZeus

Well-known member
Joined
Oct 4, 2021
Messages
5,013
Location
CONTINENTAL USA
Based on my attempts at same parts hunt. The U shaped is referred to by Wilton as the “Spindle Retainer” (exterior, and usually has 3 screws), the part you seek is referred to as the “Thrust Washer,” internal to the dynamic. The thrust washer is not sold individually by Wilton, but usually available/included in replacement kits for all said. Picture example; I do not have a thickness to the thrust washer, but will look further when able.
 

Attachments

  • IMG_9044.jpeg
    IMG_9044.jpeg
    1.5 MB · Views: 49
  • IMG_9044.jpeg
    IMG_9044.jpeg
    1.5 MB · Views: 46

fishwatcher

Well-known member
Joined
Jan 26, 2023
Messages
761
You have to see where the wear is. If it’s in the Dynamic jaw support then you can add shims up to a point even though it should be machined flat. Then you can and shims so the flange shoulder is around .015 above the counterbore.

If it’s in the slot that is cut in the spindle and is showing wear then the spindle should be replaced. What I have done is welding the slot closed and recutting the groove. This is a design flaw Wilton did by allowing grit to fall into the washer area and cause wear.
Thanks for sharing how this should be done right.

Unfortunate, but I won’t have access to any machining equipment. I will keep an eye out for replacement spindles for a good deal.

In the meantime, I’ll see if a shim would help.
 
To avoid these ads, REGISTER NOW!

Firstram

Well-known member
Joined
May 16, 2017
Messages
1,404
fishwatcher:
If it was me, I wouldn’t worry about a mere 45 degrees of free play.
I agree, I have an old Prentiss that was beat to death and put away wet. After adding thrust bearings, align boring and bushing the screw I may have 15 degrees Of free play. It’s sort of a PITA being so tight, that free play is is nice to “bump” the vise open or closed. As it is now, my vise is so smooth I find the lack of feedback disconcerting.
 

fishwatcher

Well-known member
Joined
Jan 26, 2023
Messages
761
@TheRealZeus Thanks! Seems like finding the right circular shim is doable.

@Shiftless and @Firstram - okay. I checked and the Cadet has just over 45 degrees of play before engagement and the Bullet has near zero. As soon as you move the handle.. the jaws move.

I thought this might be an easy upgrade. Not having to do anything is the easier though.

I’m always learning from GJ!
 

bleedinorange

Active member
Joined
Jul 2, 2023
Messages
40
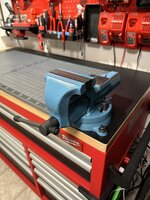
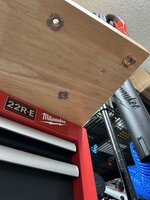
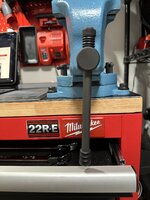
Gonna be using this for light duty/ third hand kinda things. I didn’t want to go through the metal on the box so I used Tee Nuts. It’s a 3 prong steel nut that bites into the wood when tightened. They worked great. I used 2 rubber grommets on the handle so it would clear my top drawer. Pretty happy with how it turned out.
IMG_2841.jpegIMG_2844.jpegIMG_2838.jpegIMG_2845.jpeg
 

tool_scrounge

Well-known member
Joined
Jul 20, 2010
Messages
4,242
Location
Southern California
Based on my attempts at same parts hunt. The U shaped is referred to by Wilton as the “Spindle Retainer” (exterior, and usually has 3 screws), the part you seek is referred to as the “Thrust Washer,” internal to the dynamic. The thrust washer is not sold individually by Wilton, but usually available/included in replacement kits for all said. Picture example; I do not have a thickness to the thrust washer, but will look further when able.
The washer that was on an old Columbian bench vise leadscrew sure looked like an oil impregnated thrust bearing (aka Oilite or similar) McMaster Carr sell them in various sizes.

https://www.mcmaster.com/products/b...ra-low-friction-oil-embedded-thrust-bearings/
 

fishwatcher

Well-known member
Joined
Jan 26, 2023
Messages
761
That's a nice work area you've got there!

I like your idea of using grommets to keep the handle from fouling the drawer. T-nuts were a good idea as well. (y)
Agree 💯!
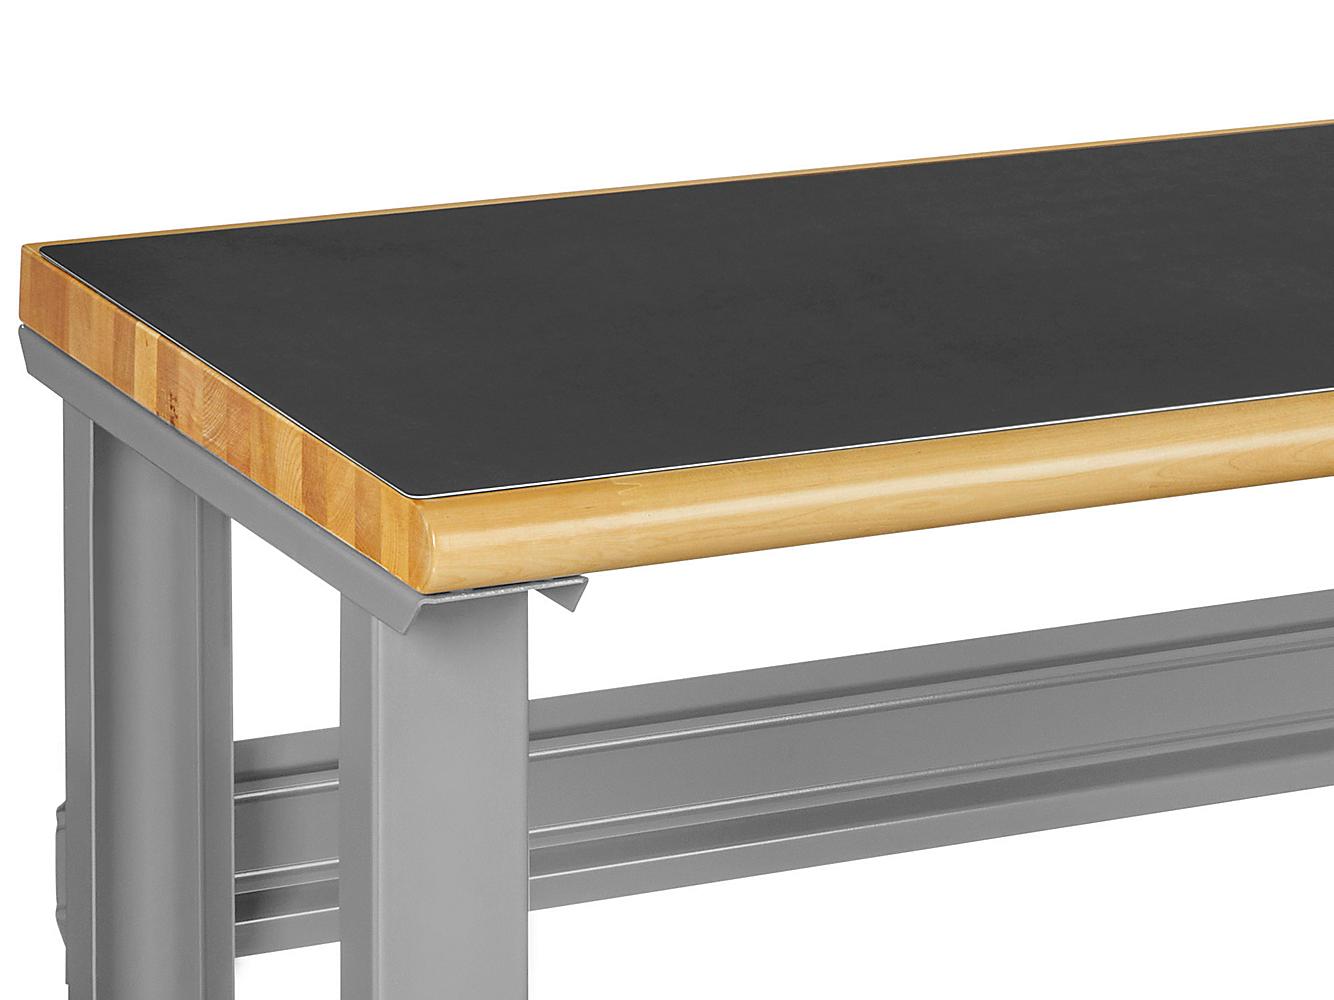
@bleedinorange What mat are you using on your work top? It looks perfect.

That blue Capri Tools vise adds a nice pop of blue to your red workspace. How wide are those jaws? I have a 6” of the same vise. I haven’t put it to hard work.. but it is ready when I need it. IMG_3860.jpeg
 
Last edited:

bleedinorange

Active member
Joined
Jul 2, 2023
Messages
40
Agree 💯!
@bleedinorange What mat are you using on your work top? It looks perfect.

That blue Capri Tools vise adds a nice pop of blue to your red workspace. How wide are those jaws? I have a 6” of the same vise. I haven’t put it to hard work.. but it is ready when I need it. IMG_3860.jpeg
It’s a Uline workbench mat. They have different sizes but mine is 48x22. They are 4inch.I am in the process of painting it red as we speak lol
 

fishwatcher

Well-known member
Joined
Jan 26, 2023
Messages
761
I’ve been wanting Wilton copper jaw caps and with a Zoro 20% off sale I pulled the trigger this week. It only took a day to arrive as they FedEx for free (I bought a few other things to make my purchase over $50).

I don’t have a torch to anneal or otherwise soften the caps and I was eager to form them over my vise. I laid down some duct tape to protect the paint and used my hands and a soft mallet to bend the fingers of the vise.

No tears in the metal.. so I’m happy.

IMG_6696.jpeg
 
Last edited:

diman

Member
Joined
Mar 12, 2023
Messages
7
A small win every weekend with my (originally) seized Reed No 32. It's stamped with 325 on the left side of both jaws. Evidently Reed fixed casting defects with bondo (3rd picture).
 

Attachments

  • IMG_9472.jpg
    IMG_9472.jpg
    1.1 MB · Views: 47
  • IMG_9615.jpg
    IMG_9615.jpg
    1,019.5 KB · Views: 52
  • IMG_9758.jpg
    IMG_9758.jpg
    1 MB · Views: 50

XCMTB83

Well-known member
Joined
Mar 22, 2015
Messages
108
Location
Iowa
Hey Gang, I am looking at online pictures of a Massey 134 coming up at a sale in the future. I’m not familiar with Masseys and there is very little chatter about them online so maybe someone here can chime in.

One thing that jumps out to me is how the spindle is barely visible on the backside of the slide. Unfortunately, there aren't many pictures of Massey vises online, so I don't have anything to reference to know if this is normal on this model. The reality is, either it is normal, or the spindle has been swapped out, or maybe the slide has been cut exposing the spindle. Any thoughts?

1000050127.jpg1000050108.jpg
 

ALLFAST

Well-known member
Joined
Feb 20, 2017
Messages
1,233
Location
Northern California
I have had great results/utilizing the Self-etching primer. The adhesion to cast iron has never been a problem for me, so I’m sticking to what I know works.

⁉️ I recommend this product specifically, but also ask if anyone has tried painting vises utilizing the ‘Automotive Primer,’ also by rust-oleum? 🔱 I have not, but was curious! 🧐
I concur. Been using Duplicolor Self Etching primer with excellent success for 5 years. From what I read, DC makes the primer for Rustoleum.

The zinc green is very light, similar to gray. As always , prep is key on vises; as you know, every nook and cranny needs scrubbing/degreased.

I put on one coat, as lightly as possible. Special attention to hitting the hard to reach spots first.

Wait 30 minutes or a tad more for it to dry, then topcoat. I try and use Duplicolor Ceramic engine aerosols exclusively: Outstanding paint.

I also have excellent results with all of Rustoleum’s Stop Rust aerosols, including their textured line. Krylon Max two in one is excellent as well, but YOU MUST put a primer underneath all of the two in one ( primer-paints in one) or the results will be less than optimal.

I did a test portion on my gray Rock Island with just the Krylon Gray…It was GHASTLY without primer. I regrouped, primed according, and the gray looks and acts like powder coat.

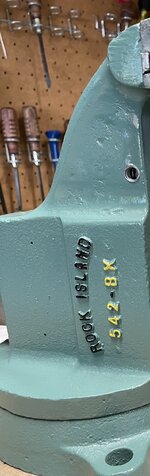
I did my 542-BX in a gray, and my buddies in Detroit Diesel Alpine green. Baked them in the summer sun for four hours and they look incredible. The reason I favor engine enamel is it’s designed for cast iron surfaces, and our vintage vises are obviously cast iron/steel.

The texture and every little mark shows nicely under engine enamel, plus, the final sheen looks very clean and industrial, not over the top like a vintage car restoration…I don’t enjoy my vintage tools looking “over done” or too nice.

I appreciate anyone willing to do this to their own stuff, and still admire their dedication and skill, but this type of look is not me.

Here are the two 542-BXs.

A few days ago I did a nose cap for my 1952 Dewalt GR radial arm saw in the Detroit Alpine Green (under Duplicolor self etching primer) as a test.

About 12 minutes of time primering/topcoating with a sun bake and it looks like it was done in a booth, not my driveway…Also, SEM makes an excellent ( reasonably priced as well) self etch aerosol in satin black.

Keep up the good work everyone!
 

Attachments

  • IMG_5700.png
    IMG_5700.png
    4.2 MB · Views: 28
  • IMG_5675.jpeg
    IMG_5675.jpeg
    369.8 KB · Views: 24
  • IMG_5679.jpeg
    IMG_5679.jpeg
    435 KB · Views: 23
  • IMG_5678.jpeg
    IMG_5678.jpeg
    296.2 KB · Views: 34

ALLFAST

Well-known member
Joined
Feb 20, 2017
Messages
1,233
Location
Northern California
I concur. Been using Duplicolor Self Etching primer with excellent success for 5 years. From what I read, DC makes the primer for Rustoleum.

The zinc green is very light, similar to gray. As always , prep is key on vises; as you know, every nook and cranny needs scrubbing/degreased.

I put on one coat, as lightly as possible. Special attention to hitting the hard to reach spots first.

Wait 30 minutes or a tad more for it to dry, then topcoat. I try and use Duplicolor Ceramic engine aerosols exclusively: Outstanding paint.

I also have excellent results with all of Rustoleum’s Stop Rust aerosols, including their textured line. Krylon Max two in one is excellent as well, but YOU MUST put a primer underneath all of the two in one ( primer-paints in one) or the results will be less than optimal.

I did a test portion on my gray Rock Island with just the Krylon Gray…It was GHASTLY without primer. I regrouped, primed according, and the gray looks and acts like powder coat.

I did my 542-BX in a gray, and my buddies in Detroit Diesel Alpine green. Baked them in the summer sun for four hours and they look incredible. The reason I favor engine enamel is it’s designed for cast iron surfaces, and our vintage vises are obviously cast iron/steel.

The texture and every little mark shows nicely under engine enamel, plus, the final sheen looks very clean and industrial, not over the top like a vintage car restoration…I don’t enjoy my vintage tools looking “over done” or too nice.

I appreciate anyone willing to do this to their own stuff, and still admire their dedication and skill, but this type of look is not me.

Here are the two 542-BXs.

A few days ago I did a nose cap for my 1952 Dewalt GR radial arm saw in the Detroit Alpine Green (under Duplicolor self etching primer) as a test.

About 12 minutes of time primering/topcoating with a sun bake and it looks like it was done in a booth, not my driveway…Also, SEM makes an excellent ( reasonably priced as well) self etch aerosol in satin black.

Keep up the good work everyone!

 

Attachments

  • IMG_3811.jpeg
    IMG_3811.jpeg
    924.2 KB · Views: 37
  • IMG_4038.jpeg
    IMG_4038.jpeg
    346.7 KB · Views: 35
  • IMG_4061.jpeg
    IMG_4061.jpeg
    663.9 KB · Views: 53

ALLFAST

Well-known member
Joined
Feb 20, 2017
Messages
1,233
Location
Northern California
My friend’s 1943 Rocky…WWII vet from the Mare Island Ship Yard, and served its second hitch in the sixties at Naval Air Station Alameda in aircraft maintenance 😎🤙🏼. Unfortunately, her original finish was in a horrible state and required a total redo.
 

Attachments

  • IMG_4198.jpeg
    IMG_4198.jpeg
    1.2 MB · Views: 56
  • IMG_2609.jpeg
    IMG_2609.jpeg
    894 KB · Views: 51
  • IMG_2700.jpeg
    IMG_2700.jpeg
    952.4 KB · Views: 42
  • IMG_2608.jpeg
    IMG_2608.jpeg
    373.1 KB · Views: 33
Last edited:
To avoid these ads, REGISTER NOW!
Top Bottom