To avoid these ads, REGISTER NOW!

Craftsman Commercial line tool chest restore

KeyCutter

Well-known member
Joined
May 24, 2023
Messages
49
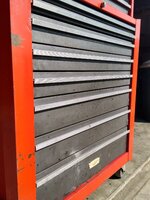
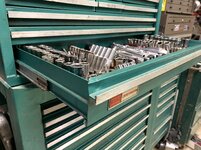
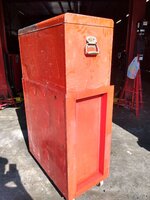
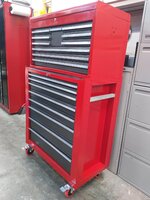
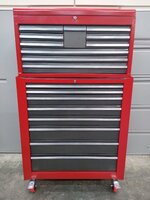
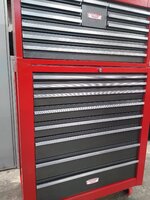
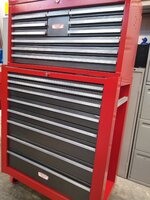
Newly acquired 1975 Craftsman Commercial top and bottom box set. Compete with the original catalog! I've had my eye on this stack for several months now and the previous owner finally decided to sell. For those that aren't aware, the commercial line is thicker steel and has larger dimensions than standard. It's 33 1/2" wide and each drawer is deeper than standard. The whole set weighs about 330 pounds.

Now the process of restoration begins. I wanted to powder coat everything like I have for smaller boxes in the past, but the cost for this pair is far too expensive for what it is. So....it'll get paint.

If you have personal knowledge of what paint and process is going to be best, please share. Thanks!


IMG_20230908_162037495_HDR.jpgIMG_20230908_162231149_HDR.jpgIMG_20230908_162248918_HDR.jpgIMG_20230908_162253896_HDR.jpgIMG_20230908_162241343_HDR.jpgIMG_20230908_190819330.jpgIMG_20230908_190901005.jpg
 
To avoid these ads, REGISTER NOW!
OP
K

KeyCutter

Well-known member
Joined
May 24, 2023
Messages
49
To add, I'm trying to avoid using rattle can paint if possible. I would prefer to spray it properly with an automotive grade if I can determine the correct colors to use.
 

Oregon rock crusher

Well-known member
Joined
Jun 28, 2016
Messages
1,911
Location
West of Salem
I'm not sure about the best paint process but I used an automotive paint on my "Sears Best" set from the late 70's. At least one year they offered the 12 drawer chest. This set had done hard time with a traveling road crew for the first 20 years of it's life and had suffered significant damage. I knocked out most of the dents and straightened out the slides until the drawers would slide again. No where near perfect but passes the 6' test. It's been one of my main boxes for the last 20 plus years.

These are great boxes and I put heavy loads in the drawers without issues. Back when I painted mine I went with the green because I had most of a gallon on hand from a different project. Acrylic enamel I believe but this was when the paints were still one part and you just thinned them and sprayed. It has held up really well even inside the drawers and in the slides. I use two part automotive paint for some of my projects now but it has gotten to the point of being prohibitively expensive. Ed.
 

Attachments

  • IMG_1114c.jpg
    IMG_1114c.jpg
    931.5 KB · Views: 125
  • IMG_1114b.jpg
    IMG_1114b.jpg
    808.8 KB · Views: 114
  • IMG_1114a.jpg
    IMG_1114a.jpg
    708.9 KB · Views: 114
  • IMG_1114.JPG
    IMG_1114.JPG
    291.1 KB · Views: 116

genog

Well-known member
Joined
Sep 4, 2021
Messages
2,015
Location
Silicon Valley
I'm trying to avoid using rattle can paint if possible.
A Big +1 for that

A good Auto Paint store can take a paint sample off of your box and mix you up an exact color match.
Take something small, maybe lug the top box over to them?

The color that you are looking for should be on the inside somewhere, perhaps behind the drawers where the original color didn't get Sun Fade or Age Fade...

IMHO, better than fussing over the "closest" rattle can from Walmart or from Amazon :LOL:
 

4xdog

Well-known member
Joined
Aug 18, 2012
Messages
5,623
Location
Santa Fe, NM
I shot a later (mid 1980s) Craftsman top-box I inherited from my brother with a mix (about 1:1) of Rustoleum Safety Red and Regal Red, thinned slightly with mineral spirits for spraying with my home gear. I was quite happy with the color -- very close to Craftsman of the period, and better than either one alone.
 
OP
K

KeyCutter

Well-known member
Joined
May 24, 2023
Messages
49
A Big +1 for that

A good Auto Paint store can take a paint sample off of your box and mix you up an exact color match.
Take something small, maybe lug the top box over to them?

The color that you are looking for should be on the inside somewhere, perhaps behind the drawers where the original color didn't get Sun Fade or Age Fade...

IMHO, better than fussing over the "closest" rattle can from Walmart or from Amazon :LOL:
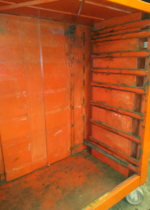
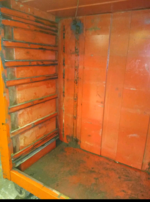
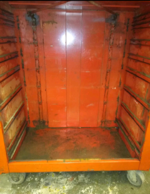
Good idea. The exterior is shot. Almost looks orange next to other red boxes. Maybe the inside of the top box will reveal unblemished paint. Although lugging around a 130lbs box isn't getting any easier. Lol!

I was just hoping someone has "been there, done that" and already had a paint code for an automotive grade paint that I could walk in to a store and order. That's all. But I'll do the leg work if necessary it's all part of the story of "how it got restored". 😎
 
OP
K

KeyCutter

Well-known member
Joined
May 24, 2023
Messages
49
I shot a later (mid 1980s) Craftsman top-box I inherited from my brother with a mix (about 1:1) of Rustoleum Safety Red and Regal Red, thinned slightly with mineral spirits for spraying with my home gear. I was quite happy with the color -- very close to Craftsman of the period, and better than either one alone.
I was unaware that that you could buy the same rattle can colors in quart or gallon cans that can be sprayed through an air sprayer setup. Do you have to order it that way? Surely you aren't somehow mixing aerosol can paints?
 

4xdog

Well-known member
Joined
Aug 18, 2012
Messages
5,623
Location
Santa Fe, NM
I was unaware that that you could buy the same rattle can colors in quart or gallon cans that can be sprayed through an air sprayer setup. Do you have to order it that way? Surely you aren't somehow mixing aerosol can paints?

Those colors are available as quart-size brush on paints. Probably available at any HD, Lowes, Ace, etc. They're almost certainly not the same specific formulation as in the rattlecans, but they're decent oil-based paints and can definitely be sprayed at home.

As noted, I blend Safety Red and Regal Red in about equal proportions for my Craftsman stuff. But run your own small-scale experiments— they’re easy with a quart of each color.

They're not automobile quality but for what I was doing they were more than good enough. I didn't buff and polish my chest, but I'm guessing the paint could have been given a very good finish had I been willing to do that.

i-Wfhbt79.png
 
Last edited:

genog

Well-known member
Joined
Sep 4, 2021
Messages
2,015
Location
Silicon Valley
If I absolutely had to have an Exact color match, I would go to an Auto Paint Store
On the other hand...
If you feel that the Rustoleum Red is close enough, I would go that route.

I painted up four truck bumpers using similar Rustoleum Flat Black enamel that I bought from Ace Hardware
Shot them with a cheapo paint gun
They came out just fine
 
OP
K

KeyCutter

Well-known member
Joined
May 24, 2023
Messages
49
If I absolutely had to have an Exact color match, I would go to an Auto Paint Store
On the other hand...
If you feel that the Rustoleum Red is close enough, I would go that route.

I painted up four truck bumpers using similar Rustoleum Flat Black enamel that I bought from Ace Hardware
Shot them with a cheapo paint gun
They came out just fine
I've got a Husky brand gravity air sprayer. It hasn't let me down for other projects. My plan is to sand blast, then an automotive grade primer, base coat, and lastly a quality clear. Polish it out with a good 3M cutter and it'll shine like new.

The hardest part will be the little details, like hand painting the plastic emblems back to the original white w/ red lettering. That kind of stuff takes real patience and a steady hand.
 
Last edited:

ALLFAST

Well-known member
Joined
Feb 20, 2017
Messages
1,233
Location
Northern California
Extremely cool setup. Have you given any thought to possibly buffing out the red and see how it responds?

I’ve been doing this with the old gray and red CM’s but then I repaint just the drawer fronts….I use Banner Red aerosol. It gives you the best of both worlds: The original patina of the majority color ( The main body/lid) and a little new “pop” and curb appeal with newly done up drawer fronts…

You might like the look, and if you don’t , you’re free to go hog wild on a full restoration. The buff/polish drawer front rehab is about 85% less labor and materials cost.

Just a thought….That is a very nice combo set right there! Congrats and good luck!
 
OP
K

KeyCutter

Well-known member
Joined
May 24, 2023
Messages
49
Sadly, the finish and overall box condition does not make it a candidate for a polish "as is". The paint is just shot, damaged, faded, and scuffed. It even looks orange because I believe it's been exposed to the sun too much. Besides, there's a large black over spray area across the top of the lid. But it's rust free and all the drawers work well. So it's got a great foundation to work with.

I refinished a middle box earlier this summer by changing the drawers from red to black, but with powder coat. It's $35 a drawer for sand blasting and powder coating, plus a couple hundred for larger boxes. Needless to say it all adds up REAL quick. So because of costs I'll just have to do a full new paint job myself. Not the end of the world. Spraying it is the easy part. It's the prep that'll take me days to get through with a little work each day.

Attached is a pic of the middle box with freshly powder coated drawers. To me it just looks more traditional over the red w/ red drawers. IMG_20230908_162121775_HDR.jpgIMG_20230804_161109876_HDR~2.jpg
 

Attachments

  • Screenshot_20230908-191347.png
    Screenshot_20230908-191347.png
    1.3 MB · Views: 96

ALLFAST

Well-known member
Joined
Feb 20, 2017
Messages
1,233
Location
Northern California
The back side, lid, and rear quarter shot gives me a better idea of what you’re talking about now !

She’s a definite solid candidate worthy of your efforts. The mid box came out great. Nice work.

Looking forward to seeing your progress updates
 
OP
K

KeyCutter

Well-known member
Joined
May 24, 2023
Messages
49
So much to update...


Notes:

- I discovered someone painted it hugger orange many moons ago.

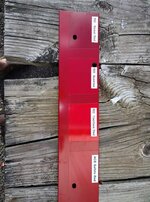
- Ace Hardware house brand - Safety Red is the closest oil based enamel available after some testing.

- Oil based primer after sanding is a must

- Thank God for a solvent tank wash bay. Makes cleaning slides and hardware so much easier.

- The $20 Harbor Freight spray gun isn't bad at all for the money!


Lots of power washing after engine degreaser. Lots of sanding and 2 coats of primer. 2 coats of red with more sanding before the second coat.


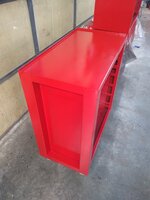
Added some hardener and thinner to both primer and paint. Layed down very smooth. Red is done. Attached are teaser pics.


Still have to tackle the drawers. They need sanded, primed and painted. Can't quite figure out what paint to use for the drawers. Found out GM's Iridium grey is the perfect match, but $266 a quart. Yikes. So that's out. Who has a dark grey solution for the drawers? If I don't find another options, I'm just going to spray them with the oil based Rustoleum Gloss Charcoal Grey. It just doesn't have any metallic to it and may not look perfect.
 

Attachments

  • FB_IMG_1697778569719.jpg
    FB_IMG_1697778569719.jpg
    110.3 KB · Views: 71
  • received_1397271787804095.jpeg
    received_1397271787804095.jpeg
    106.9 KB · Views: 63
  • received_6228561613909940.jpeg
    received_6228561613909940.jpeg
    156.4 KB · Views: 53
  • Screenshot_20231020-104750.png
    Screenshot_20231020-104750.png
    800.2 KB · Views: 50
  • Screenshot_20231020-104726.png
    Screenshot_20231020-104726.png
    750 KB · Views: 48
  • Screenshot_20231020-104648.png
    Screenshot_20231020-104648.png
    622.5 KB · Views: 47
  • Screenshot_20231020-104624.png
    Screenshot_20231020-104624.png
    760.5 KB · Views: 46
  • Screenshot_20231020-104521.png
    Screenshot_20231020-104521.png
    937.4 KB · Views: 47
  • Screenshot_20231020-104450.png
    Screenshot_20231020-104450.png
    955.2 KB · Views: 46
  • Screenshot_20231020-105235.png
    Screenshot_20231020-105235.png
    384.4 KB · Views: 65
OP
K

KeyCutter

Well-known member
Joined
May 24, 2023
Messages
49
Probably sometime in the ‘70s. i never found a date on the box but found this undated flyer.
-DonIMG_7281.jpeg
From my understanding the Craftsman Commercial series was only for a couple of years. The Super Duty came before it, and the Sears Best Pro series came after it and run up through the mid 80's.

I'd venture to say it's a '75-'77.
 
To avoid these ads, REGISTER NOW!
OP
K

KeyCutter

Well-known member
Joined
May 24, 2023
Messages
49
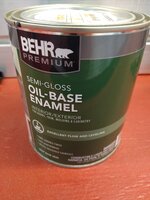
Well I've decided to settle on a grey to use for my tool box restorations.

Close enough for me, and readily available.

Behr oil base enamel - Dark Secret PPU 26-23A
 

Attachments

  • IMG_20231026_205809540.jpg
    IMG_20231026_205809540.jpg
    590.1 KB · Views: 60
  • IMG_20231026_205918035.jpg
    IMG_20231026_205918035.jpg
    612.9 KB · Views: 58
  • IMG_20231026_205841560.jpg
    IMG_20231026_205841560.jpg
    697.8 KB · Views: 57
  • IMG_20231026_205716081.jpg
    IMG_20231026_205716081.jpg
    693.4 KB · Views: 56
  • IMG_20231026_205938267.jpg
    IMG_20231026_205938267.jpg
    575.2 KB · Views: 52
  • IMG_20231026_210426219.jpg
    IMG_20231026_210426219.jpg
    507.3 KB · Views: 50
  • IMG_20231026_210432686.jpg
    IMG_20231026_210432686.jpg
    636 KB · Views: 49
  • IMG_20231026_210458610.jpg
    IMG_20231026_210458610.jpg
    936.3 KB · Views: 67

ColorMeOrange

Well-known member
Joined
Oct 11, 2023
Messages
62
To add, I'm trying to avoid using rattle can paint if possible. I would prefer to spray it properly with an automotive grade if I can determine the correct colors to use.
I like that original orange. Tremclad has one called 'real Orange'. I believe its American counterpart Rustolium calls it
'Orange peel'. I wasn't able to find it in the small tins. Every colour but the orange. Sadly I went against my 1st colour choice.

I've painted countless things with the Tremclad stuff including tool boxes. In my strongest opinion in your case. I would scuff with a 320 grit (minimum) foam sanding block or power sander. Then roll the paint on after thinning it. Its a lot more durable and uniform compared to its rattle can counterpart.

Its almost goop from the factory and close to impossible to brush on and avoid brush strokes unless you thin it down. Even in perfectly ideal weather conditions.

I thin it out then apply it with dense foam roller applicators. Load just enough paint to apply very thin even coats. 2 or 3 thin coats if you so choose. 2 usually does it for me. As thin as possible then I give each 24 hours to dry in between coats.

The foam rollers give a beautifully uniform result. Just prep and mask as you normally would.

When people comment on things I painted this way it gets implied that I laid the paint down with compressed air. Then people seem to be surprised after I tell them its rolled on.

I strongly nominate the Tremclad 'real' orange for your tool chest.

Paint cure up note. You can sink a fingernail in to the surface of some Tremclad paints for as long as a week after painting. Initially I thought a can of black didn't get an adequate mixture at the factory but I was wrong. It takes up to a week sometimes longer to fully cure and harden. Once it does its fairly tough stuff and durable. Its perfect for tools and boxes and more.

I even did the inner fenders of my 1980 Camaro flat Tremclad black using the same roll on method. The engine bay gets compliments. Yes on that paint method result specifically.

 
Last edited:
OP
K

KeyCutter

Well-known member
Joined
May 24, 2023
Messages
49
In my strongest opinion in your case. I would scuff with a 320 grit (minimum) foam sanding block or power sander. Then roll the paint on after thinning it. Its a lot more durable and uniform compared to its rattle can counterpart.
I sprayed the boxes with an automotive paint gun, used thinner and Japan Drier mixed in the paint, and layed on 2 coats of primer and 2 coats of red, with sanding in between. The drawers have the first coat of grey on them now and will get a light sanding and a second coat in a day or two. I've bed going 2 or more days on dry times between each coat.

I've got a few more Craftsman tool chests that still need restored. I'm learning alot on this first one.
 

ColorMeOrange

Well-known member
Joined
Oct 11, 2023
Messages
62
I sprayed the boxes with an automotive paint gun, used thinner and Japan Drier mixed in the paint, and layed on 2 coats of primer and 2 coats of red, with sanding in between. The drawers have the first coat of grey on them now and will get a light sanding and a second coat in a day or two. I've bed going 2 or more days on dry times between each coat.

I've got a few more Craftsman tool chests that still need restored. I'm learning alot on this first one.
Toolboxes have the perfect surface to practice on. Especially if you get in to air brushing too later down the road.

I'm guessing you used some sort of acrylic enamel because you didn't mention any clear? But you mentioned levelling maybe you just forgot.

Nothing wrong with spraying auto paints on boxes too if you don't mind sparing the expense for the paint and added time. The only hesitation I might have with auto paint is that they can appear ordinary under anything else but true sunlight. Sunlight brings out the brilliance in auto paints. So it can be too much time and expense for something that may not look all that much better comparatively than something at much lower cost.

Paints might advance just as fast as computers. Perhaps not but paints and everything attached are constantly being redeveloped and improved for better easier systems, and durability so on so forth. What's not to love. Painting is always good fun.

I might paint a little 5 drawer box I want to put back in action. Perhaps with a rustic theme because I wouldn't be able to remove the rust pits in the lid. Or just brush off and neutralize it then a clear only. I like the colours in rust. Plus I'm starting to rust a bit here and there myself. It wouldn't be right to discriminate.

It will be cool to see this thread continue rolling on.
 
Last edited:

ColorMeOrange

Well-known member
Joined
Oct 11, 2023
Messages
62
Red is done. Slow progress.
Yes agreed, you did good with this one. When any kind of craftsman says its a "slow process" it's usually a good sign.

I'm working on a base for a chest. I went with a similar industrial grey from the factory. I had to build it all in first and make some locking doors from scratch. I'm happy with it so far. I'll try to get that one up later.

Side note. The gauges of steel they use for this stuff now has decreased dramatically. Even compared to a mere 15 -20 and beyond years ago. They used similar gauges of metal in average boxes back then as they do in the higher end priced boxes now. Restoring anything often seems like the better way to go.
 
Last edited:

vavet

Well-known member
Joined
Mar 6, 2012
Messages
5,330
Location
Ashland, VA
My usual advice when people ask about restoring an old box is to say not to do it. Toolbox imperfections are not blemishes to correct. They are battle scars And should be displayed proudly.
but….you do nice work.
perhaps if there was some sentimental value of that toolbox to you…it was your dad’s, grandpas’s, etc, then I’d say not to repaint it. But if it’s something you bought secondhand, then I say…dang…nice work.
i have one of similar vintage, maybe a bit older. It belonged to my dad. he gave it to me when they were downsizing and moving cross country 20 years ago, hoping my son will have some interest in it when he gets older.
 

ColorMeOrange

Well-known member
Joined
Oct 11, 2023
Messages
62
Yes he does nice work for sure.

This is how I have to dry painted parts in Toronto atm. It gets nice and toasty inside with the doors closed 9o%.

Smelly. So I got the boot outside
 

Attachments

  • 20231030_183732.jpg
    20231030_183732.jpg
    394.4 KB · Views: 85
OP
K

KeyCutter

Well-known member
Joined
May 24, 2023
Messages
49
You guys are giving me way too much credit. I'm no professional painter, but I have watched enough to get some paint sprayed on some metal boxes. One day, maybe ONE day I'll grow the courage to paint a hood or fender. Right now I'm just figuring it out as I go. My uncle was an automotive painter. One of my closest friends owns a collision shop. Between them I've seen enough to understand how to mix up some paint, pour it into the gun hopper, point and pull the trigger. Overlap 50% and remember to clean the gun IMMEDIATELY.

The rest is just dumb luck....and a **** load of sanding. Haha!

I wanted to spray automotive paint, but the color match I found was almost $300 a quart after tax. So this was done in oil base enamel, thinned, and a bit of Japan Drier added.

No sentimental value this time around. This Commercial series stack was purchased used from a guy who I sometimes buy used Craftsman tools off of. He was hurting for money, so he sold it to me for a fair deal. I'll probably have $500 in it after all the paint and materials when it's all said and done, but these vintage Commercial series boxes are climbing in value quick. I'd rather have $500 in this than $500 in another Harbor Freight box. Not that there's anything wrong with HF. I have one of their tool carts. I just like collecting old school Craftsman tool boxes.

As for an update, I have the drawers in primer now. Will need another light sand to knock down the primer, but after that hope to have them painted grey some time this week. I thought I had made up my mind on the grey I had picked out, but I'm already second guessing it and may go back and have another sample made up to try.
 

ColorMeOrange

Well-known member
Joined
Oct 11, 2023
Messages
62
You have more than a couple positive attributes that are apparent in your posts cutter. Mix them all in with a little talent and keep evolving your skills.

I've seen a lot worse painters believe me. I can't picture a bad painter in you. The right attitude can go a long way.

Keep a file for favorite personal work and projects you do for a portfolio. If you consider a long term career in the field that will be helpful.

If you don't feel confident enough to paint cars that will get a lot of scrutiny yet. Maybe you can start sealing and priming until you (and the shop owner) feel confident to step you up to colours and clearing.

I started by painting mostly bikes and motorbikes in my teens. Then when I got my license I sealed and painted my junkers in the yard after doing all the body work. Or if I was lucky enough someone would let me use a garage. When I was in my early twenties I took a job in a pro shop that was contracted to do insurance claims for GM. I didn't put in the time and left after a couple years to do other things.

I still like painting a lot. But its more enjoyable on a personal level. I'm going to spray my dads vintage car next year after its down to metal. It's been a while but like said many times, it's just like riding a bike you never forget.

I also taught myself how to weld. Mostly just from seeing it done and then I was given a small welder strong enough for heavy gauge sheet metal. I still remember the tip I was given from the start. "when it sounds like your sizzling bacon, that's right about where you want to be". I went by that and it really helped me get started. Often the best way to start learning how to do something is to just get right in there and put hands on. But keep an open mind and check any egos at the door to continue to evolve. Even the worlds best of the best painters continue to pick up new things and never stop honing their skill. Same applies to most everything out there.
 
Last edited:
OP
K

KeyCutter

Well-known member
Joined
May 24, 2023
Messages
49
You have more than a couple positive attributes that are apparent in your posts cutter. Mix them all in with a little talent and keep evolving your skills.

I've seen a lot worse painters believe me. I can't picture a bad painter in you. The right attitude can go a long way.

Keep a file for favorite personal work and projects you do for a portfolio. If you consider a long term career in the field that will be helpful.

If you don't feel confident enough to paint cars that will get a lot of scrutiny yet. Maybe you can start sealing and priming until you (and the shop owner) feel confident to step you up to colours and clearing.

I started by painting mostly bikes and motorbikes in my teens. Then when I got my license I sealed and painted my junkers in the yard after doing all the body work. Or if I was lucky enough someone would let me use a garage. When I was in my early twenties I took a job in a pro shop that was contracted to do insurance claims for GM. I didn't put in the time and left after a couple years to do other things.

I still like painting a lot. But its more enjoyable on a personal level. I'm going to spray my dads vintage car next year after its down to metal. It's been a while but like said many times, it's just like riding a bike you never forget.

I also taught myself how to weld. Mostly just from seeing it done and then I was given a small welder strong enough for heavy gauge sheet metal. I still remember the tip I was given from the start. "when it sounds like your sizzling bacon, that's right about where you want to be". I went by that and it really helped me get started. Often the best way to start learning how to do something is to just get right in there and put hands on. But keep an open mind and check any egos at the door to continue to evolve. Even the worlds best of the best painters continue to pick up new things and never stop honing their skill. Same applies to most everything out there.
This will always just be a hobby at best. I own/operate two businesses...a mobile locksmith business, servicing commercial, residential, and automotive. And I also run an auto and mechanical shop, focusing mostly on light duty repairs, brakes, chassis coatings (Woolwax & Fluid Film), suspension & steering work, as well as several offroad truck and Jeep builds. I've also been a part of a few classic truck restorations, including interior restoration, engine builds, and drivetrain installation.

I'm a one-man band running the shop and the locksmith services all by myself. I stay busy about 8 days a week, 27 hrs a day. 😂
 

ColorMeOrange

Well-known member
Joined
Oct 11, 2023
Messages
62
This will always just be a hobby at best. I own/operate two businesses...a mobile locksmith business, servicing commercial, residential, and automotive. And I also run an auto and mechanical shop, focusing mostly on light duty repairs, brakes, chassis coatings (Woolwax & Fluid Film), suspension & steering work, as well as several offroad truck and Jeep builds. I've also been a part of a few classic truck restorations, including interior restoration, engine builds, and drivetrain installation.

I'm a one-man band running the shop and the locksmith services all by myself. I stay busy about 8 days a week, 27 hrs a day. 😂
I hear you friend. I've been pulling anywhere between 10 and 15 hour days average this week and last. Plus Saturdays and occasional Sundays. I work FT and recently got my business license for the first time. I've been doing custom work on cars and homes for some time. I already had my regular clients since introducing more serious intent a year ago. Word gets around because suddenly I had several new customers calling me with jobs. I'm at the point where I actually have to hire someone, maybe two people to help me out.
 
Last edited:
OP
K

KeyCutter

Well-known member
Joined
May 24, 2023
Messages
49
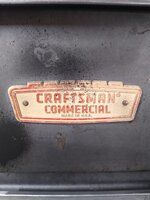
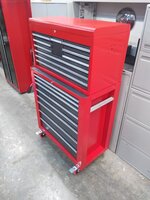
More progress. Down to just soaking the handles in EvapoRust, and badges, which are close to being done. New locking casters on all 4 corners. Hated not being able to slide it into a space between other cabinets. Now it'll do donuts! 🤘😎🤘

How many 48 yr olds look this good? 😂
 

Attachments

  • IMG_20231101_203057962.jpg
    IMG_20231101_203057962.jpg
    691.2 KB · Views: 69
  • IMG_20231101_203051463.jpg
    IMG_20231101_203051463.jpg
    700 KB · Views: 68
  • IMG_20231101_203157025.jpg
    IMG_20231101_203157025.jpg
    605.3 KB · Views: 64
  • IMG_20231101_203121304.jpg
    IMG_20231101_203121304.jpg
    595.2 KB · Views: 65
  • IMG_20231101_203127356.jpg
    IMG_20231101_203127356.jpg
    719.5 KB · Views: 63
  • IMG_20231101_203109529.jpg
    IMG_20231101_203109529.jpg
    603.1 KB · Views: 71
OP
K

KeyCutter

Well-known member
Joined
May 24, 2023
Messages
49
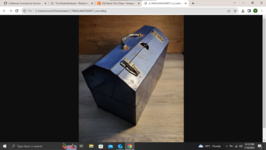
Finally came up with a way to paint the two-tone badges.

Step 1: clean with paint thinner.

Step 2: spray with a gloss white paint. Let cure.

Step 3: here's the hard part....

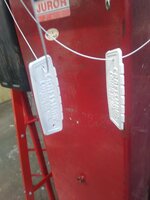
Tightly staple an old, plain white t-shirt to a board, then use a painting sponge to lightly soak the shirt in paint. Then just set the badge on the t-shirt lightly several times as it picks up a thin layer each time until you've coated just the raised areas. DON'T PUSH! Just let the weight of the badge pick up more and more with each "set". I got the idea from screen printing, this is just in reverse.
Note: I used little #4 screws and nuts to give me a post to hold the badge from the back side.

Happy restoring! 😎

IMG_20231102_192631448.jpg
IMG_20231102_191544072.jpg
IMG_20231027_203944096.jpg
IMG_20231019_195402196.jpg
 

ColorMeOrange

Well-known member
Joined
Oct 11, 2023
Messages
62
Thanks for sharing the tip. It will come in useful at some point.

I often encounter audio components where the original silk screen has rubbed off over time. I haven't came up with a method to mimic that quite right yet.

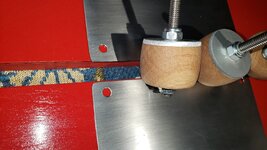
I got tool box pulls figured out though. Just make them. There are not original of course but wood always contrasts excellent with all kinds of different metal projects. They can blend in well enough to look like "original" parts.

I had to make the doors complete from scratch in this case, the base I'm restoring never came with any doors originally. And I want to be able to lock it.

The knobs are a real cinch all you need is a hole cutter - belt sander + drill. Everyone owns those. Course a lathe would be nice too (Santa Clause, paying attention?..).

Btw you turned that Craftsman out excellent. Thats about what I'll be getting for my shop at my home, that size would be perfect for a while.
 

Attachments

  • 20231024_072351.jpg
    20231024_072351.jpg
    685.2 KB · Views: 58
Last edited:
OP
K

KeyCutter

Well-known member
Joined
May 24, 2023
Messages
49
Thanks for sharing the tip. It will come in useful at some point.

I often encounter audio components where the original silk screen has rubbed off over time. I haven't came up with a method to mimic that quite right yet.

I got tool box pulls figured out though. Just make them. There are not original of course but wood always contrasts excellent with all kinds of different metal projects. They can blend in well enough to look like "original" parts.

I had to make the doors complete from scratch in this case, the base I'm restoring never came with any doors originally. And I want to be able to lock it.

The knobs are a real cinch all you need is a hole cutter - belt sander + drill. Everyone owns those. Course a lathe would be nice too (Santa Clause, paying attention?..).

Btw you turned that Craftsman out excellent. Thats about what I'll be getting for my shop at my home, that size would be perfect for a while.
I'd like some more context of what you're restoring/building. More pics?
 

ColorMeOrange

Well-known member
Joined
Oct 11, 2023
Messages
62
Sure I will snap a couple photos later. I finished paint and assembly I'm still waiting for a piece of diamond plate so I can cut it for a top and single inner shelf. There was no plate on it originally of course but I think it will suit the piece ok.

I'll set that up this weekend sometime. It made a perfect temporary fill in for something unrelated to tools.

Btw I have a lock related question I want to ask you but I will drop it in a suitable forum first.

<edit> There is a flooring forum, but nothing this quite fits in. I hope you don't mind here goes.

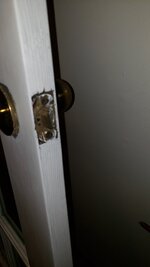
I'm freshening up this panel door but I'm not quite sure how the brass handle comes off. It doesn't have the usual two screws that secure the two sides. I would try spinning it with channel locks but want to avoid further damaging it. Second is it worth re-using this one? I can simply braze in the dent. It held up pretty well otherwise.

My images are ****, I can switch after charging if more helpful.
 

Attachments

  • 20231104_075332.jpg
    20231104_075332.jpg
    358.5 KB · Views: 42
  • 20231104_075307.jpg
    20231104_075307.jpg
    245.6 KB · Views: 49
Last edited:
OP
K

KeyCutter

Well-known member
Joined
May 24, 2023
Messages
49
Btw I have a lock related question I want to ask youI. I'm not quite sure how the brass handle comes off. It doesn't have the usual two screws that secure the two sides. I would try spinning it with channel locks but want to avoid further damaging it. Second is it worth re-using this one? I can simply braze in the dent. It held up pretty well otherwise. My images are ****, I can switch after charging if more helpful.
I need to see a few more clearer pics with better lighting, but I'm pretty sure I know what to do. The knob will have a push release in between the knob and the trim plate against the door. Push in on the release and pull the knob.

It also could be the old style that has a "slide" under the rose (trim plate) that has to be pushed with a small flat blade either clock wise or counter clock wise. Can't remember which way.
 

ColorMeOrange

Well-known member
Joined
Oct 11, 2023
Messages
62
I need to see a few more clearer pics with better lighting, but I'm pretty sure I know what to do. The knob will have a push release in between the knob and the trim plate against the door. Push in on the release and pull the knob.

It also could be the old style that has a "slide" under the rose (trim plate) that has to be pushed with a small flat blade either clock wise or counter clock wise. Can't remember which way.
Will do. I tried to image a little slot on it but its rather blurry. I decided to restore it then blacken it with vinagar and blackener. Its been on there a long time, from when they still cared about quality. Because it does do any door handle wiggle.

I forgot all pictures but will be working on my own room some more tonight.

Have you done any vintage Beach boxes yet?

I think their colour is pretty close to what I got from TC. In between a greyish bluish the deep red goes perfect with imo.

I totally see the fun in restoring tool boxes. A good quality media blaster would be real worthy investment on my part, for everything. I had a mini snap-on that still worked great until someone backed over it (me).

I want one of those V12 Milwakee die grinders, while I'm at it. Seriously those are under $400 and have 20% more power than pneumatic versions. If I had to choose one thing for multu purpose usage it would probably be that, hm right after drill I suppose.

That was an illegal link, refuse it if its visible to anyone.

Back to the intentional Beach/colours.Screenshot 2023-11-06 121239.png
 

ColorMeOrange

Well-known member
Joined
Oct 11, 2023
Messages
62
I've been working on this man cave room if you want to catagorize it. I haven't got to the wall repair and paint. Just as we are moving in and I had no place to mount the flats creen monitor, and then it just sort of worked by accident. Much of the mess of stuff on the floor will hide and conceal, plus most wire.

I'll include more better details after setting it up. I think I have 1 million things on my to do list atm.

It started out life as just a universal base. I fit the stainless steel hinges and removed rust and encased it with 3/4" fine veneer ply then repainted it that industrial looking blue, or grey. I think the tin simply says "industrial grey". But it hints some blues at me. Its easy to tone up or down more simple black. The doors fit perfectly and more evenly spaced, after readjustment # 6 or 7 is it? I had them off/on so many fitting the hinges then the doors themselves.


I already ordered diamond plate top and shelve. Its main purpose is housing a small Linkin welder voltage regulator/ converter to go in my trailer. I might stick some oddball go kart aluminums mags on the other side.

I can simply wheel it to the side on game nights or whenever firing up the projector.

You gave me the idea of going after some old old cook 20231107_115733.jpgtool boxes cutter. I often see them FS but hadn't thought as much into them.
 
To avoid these ads, REGISTER NOW!
Top Bottom