To avoid these ads, REGISTER NOW!

ZMotorsports Shop Projects 2.0

OP
Z

zmotorsports

ALLIANCE MEMBER
Joined
Oct 20, 2009
Messages
21,441
Location
Northern Utah
When the PTS1000 saw was introduced I purchased a large pack of them. So I HAD to sell them, demonstrated it to anyone that I thought might be interested. When I got to my audio install shop the owner was using his old saw to cut a door panel. So I grabbed my demo saw and showed it to him. He wasn’t impressed, said he already had a saw just like that (holding up the one he was using, looking at me like I was stupid!) and that he didn’t have time for me, he was busy! I finally convinced/coerced him to try it out. He plugged it into his airline, put it up to the door panel and pulled the trigger for about 2 seconds and then looked at me and said “I’ll take it!” Literally the easiest sale I ever made in 30 years! I kept one when I retired, it’s sweet!

Yeah, it is by far my favorite one that I have used. I have used a few from coworkers but I think the Snap-on PTS1000 is my favorite followed by the Matco. The thing I like about the Matco is that it has the exhaust ventilation clear back by the connector as it has a short leader hose that came with it.

The Snap-on PTS1000 is just so smooth though it's hard not to like it.

Sterling, did you sell the replacement PTSR1000 that came out afterwards or did you retire before that saw came to market? I have used a coworkers and have been less than impressed. Can't quite put my finger on why. It seems to have a "harder" hit like maybe the stroke is longer or something but I don't care for it as much as its predecessor.
 
To avoid these ads, REGISTER NOW!
OP
Z

zmotorsports

ALLIANCE MEMBER
Joined
Oct 20, 2009
Messages
21,441
Location
Northern Utah
So speaking of Snap-on, I bought this LED light about 5 or 6 years ago. It has been a good light and doesn't seem to eat batteries too quickly.

A few days ago we had a power outage at work, again, and before leaving home heading to work I ran out to the shop to grab a better flashlight than what I have in my office at work. I grabbed my 14v LED light and a couple extra batteries as I knew this was going to be along day.

About an hour and a half into the morning while I was working with the contractor setting up a temporary switchboard, my flashlight went dead. I thought no big deal, I had a couple of batteries in the truck and it was just starting to get light for the morning so I figured I would be fine to swap in another battery. I ran to my truck swapped batteries and still nothing. ****! The LED bulb must have burned out.

I contacted my Snap-on dealer to make sure he had a spare bulb on the truck and he informed me that he didn't and it would have to be sent in for repairs. :headscrat That kind of shocked me so I brought it in this morning to give to him.
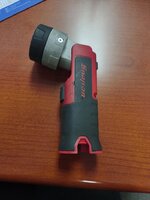
Well he informed me that it is a bit older light and it would be a flat rate of $60 to repair and take a couple weeks. I guess my body language wasn't ideal because he then told me he would sell me a new one of the newer design and with a new warranty for $70, only ten dollars more than the flat rate repair.

I told him I would agree to that but it seemed like a lot just to get a bulb replaced and he informed me that he had never seen one of these bulbs go out and had to actually call customer service to figure out what to do.

He didn't have the light on his truck in red, so he said he'd drop it off to my place over the weekend. He really is a pretty decent dealer and goes above and beyond for me even though I don't buy that many tools these days.
snapon1.jpg

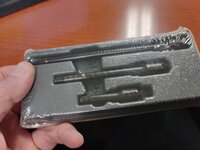
My next purchase was something I had to special order. I have found myself using my 1/4" wobble sockets and impacts much more lately and hate to use my chrome extensions with power tools if at all possible. A couple of weeks ago I asked him if he had impact extensions and all he had were the locking style, which I didn't want. He ordered these for me and they arrived on his stock order a couple of days ago. I ended up negotiating with him and got them for a few bucks off as well as my new flashlight for $65 instead of $70 so I'm a happy camper.
snapon2.jpg

snapon3.jpg
 

Bob Heine

ALLIANCE MEMBER
Joined
Oct 24, 2009
Messages
10,708
Location
Boca Raton, Florida
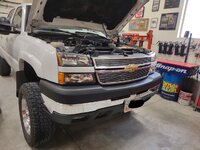
Last night before our winter storm hit Northern Utah, I pulled the truck into the shop in order to commence the facelift on the ole' girl.
shop.jpg
Mike, are you going to replace, polish or clear those headlights? I polished the OEM headlights on the '04 PT Cruiser a number of times and it faded a little faster each time. Made the mistake of buying some Chinese aftermarket units and they hazed and cracked even faster. Luckily I didn't toss the originals. Dug them out, sanded them with 800 and sprayed a couple of coats of SPI Universal Clear on them in February 2023. They still look perfect after almost a year being parked outside in the Florida sun.
 
OP
Z

zmotorsports

ALLIANCE MEMBER
Joined
Oct 20, 2009
Messages
21,441
Location
Northern Utah
With your LED light my guess is that the switch has gone, there's a loose wire or the control board has gone bad. LED lights are super simple and last pretty much forever. If you don't mind paying shipping both ways I can dig into it and see if I can fix it, maybe even upgrade the LED while I'm in there.

I traded the light in on a new one for a few buck more than what it would have cost to have it repaired. I was also going to tear into it and do some troubleshooting but when my dealer made me the offer to exchange it I took it.

Thank you very much for the offer, if I wasn't so busy with other projects I would have dug into myself.

Is that light pictured above the old light?

Dave, yes, that was the old one.

Mike, are you going to replace, polish or clear those headlights? I polished the OEM headlights on the '04 PT Cruiser a number of times and it faded a little faster each time. Made the mistake of buying some Chinese aftermarket units and they hazed and cracked even faster. Luckily I didn't toss the originals. Dug them out, sanded them with 800 and sprayed a couple of coats of SPI Universal Clear on them in February 2023. They still look perfect after almost a year being parked outside in the Florida sun.

I replaced them with some aftermarket Bob. I had polished the OEM's about three times over the 15 years of ownership of the truck and was actually going to try to clear them when I was painting my granson's Radio Flyer. However, they began cracking and I didn't think they would last much longer so I ordered some Eagle Eyes from 1A Auto.
 
Last edited:
OP
Z

zmotorsports

ALLIANCE MEMBER
Joined
Oct 20, 2009
Messages
21,441
Location
Northern Utah
Hope everyone had a good weekend.

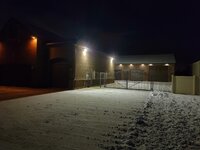
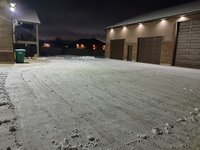
I arrived home Friday night and had to clear snow as it snowed off and on much of the afternoon Friday. I had about 2 inches is all but by the time I work my way around to the back yard that 2 inches turns into about 6 inches of compacted snow by the third time being thrown and is more liken to concrete than snow.

Unfortunately, by the time I did the front yard and was working my way to the back yard it was getting dark and freezing so I had to complete it using my large wall packs mounted on the house for lighting. I am sure glad I installed those a few years ago as they pretty much light up the entire back yard.
friday1.jpg

friday2.jpg

friday3.jpg

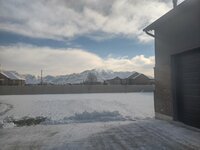
Saturday morning as I headed out to the shop with coffee in hand the skies had cleared and the air was crisp and clean.
sat1.jpg


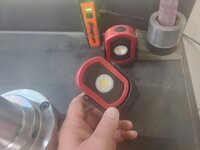
I also thought I'd share another light option as we were discussing my Snap-on light earlier. I have been looking at these smaller magnetic cube style lights from Snap-on a few weeks ago and almost pulled the trigger. However, I discovered that Maxxeon makes them for Snap-on and they can be had for nearly half price under the Cyclops model and then choose your color.

lights.jpg


I've only used them a few times so far but I really like how compact they are and last quite a long time on the lower setting. I think my wife paid just about what the Snap-on dealer wanted for one and got me a 2-pack.
 
OP
Z

zmotorsports

ALLIANCE MEMBER
Joined
Oct 20, 2009
Messages
21,441
Location
Northern Utah
With Saturday looking like an in between day as far as storms I figured I would tackle the facelift on our 2006 Chevrolet Silverado 2500HD so I could clear the boxes of parts off my rolling shelf/cart.

The next few posts will be picture heavy.

I have polished the lights three times in the 15-years in which we have owned the truck and they have turned out great each time but this time the plastic was showing signs of small fractures or hairline cracks in the corners and didn't think they had much time left. Also, to be fair the truck was parked outdoors for the first 10-12 years of its life and has only been parked inside a nice garage for the past 6 years now.

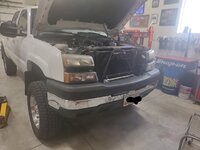
Here is what I started with on Saturday morning.
gm1.jpg

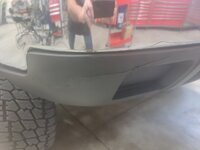
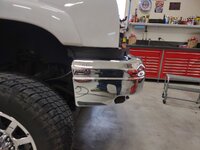
When my wife and I purchased the truck in early 2009 the original owner had impacted the right front corner. I was focused on zeroing out the truck and getting the body back into shape before attacking some of this damage. I hammered the bumper out pretty descent but over time it was starting to show signs of rust starting where the chrome was cracked.
gm2.jpg

Back in early 2009 when I straightened the bumper out, I also popped the lower valance back into position and melted it from the backside to buy me some time. I must admit, I had every intention of replacing the front bumper as soon as I took care of the paint & body work on the truck from the original owner's neglect but the bumper actually looked pretty good and it wasn't as pressing as it was when we first purchased the truck.

Sadly, it has now been 15 years before I finally pulled the trigger and decided to replace the front bumper. I looked at some various options but in the end I went back with OEM bumper bar, cap and lower deflector while they were still available. The OEM parts were only a little more than aftermarket so it was a no-brainer.
gm3.jpg

Grille removed and set out of the way. The bowtie was quite faded and starting to peel.
gm4.jpg

I had purchased a new OEM GM Bowtie a few months back so it will also be replaced.
gm5.jpg

Grille removed and now to remove the lights.
gm6.jpg

While the grille was out of the way I double checked to make sure all of the lines and larger transmission cooler are still in good order. This larger capacity transmission cooler and steel braided flex transmission lines were one of the first mods I did back in 2009 while zeroing out the truck.
gm7.jpg

Lights all removed and set aside.
gm8.jpg

Next comes the bumper removal.
gm9.jpg


gm10.jpg


More pictures to follow...
 
OP
Z

zmotorsports

ALLIANCE MEMBER
Joined
Oct 20, 2009
Messages
21,441
Location
Northern Utah
Continuing on with the facelift.

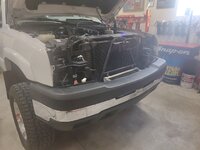
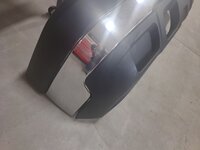
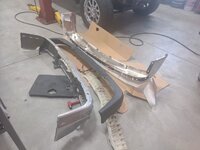
Old bumper removed with the damage evident. Luckily the damage was barely noticeable on the truck which is probably why I wasn't as quick to replace these parts as I should have been. Money was much tighter back then when I purchased the truck and I figured I would replace the bumper when I had the funds down the road but it just didn't make to the high priority list until more recently.
gm11.jpg

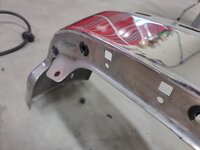
New bumper bar, top cap and lower deflector unboxed, inspected and awaiting assembly.
gm12.jpg

Old bumper coming apart to access the steel brackets that needed to be reused.
gm13.jpg

The passenger side was bent quite severely from the original owner's impact. More than I thought actually. It wasn't until I tried fitting the bracket up to the new bumper that I realized just how bad it was bent. It obviously took the bumper mounting locations with it when the bracket bent but when fitting to the new straight bumper the mounting locations were off by a large amount.
gm14.jpg

Here you can see the lower mounting tab and downward angle at which it rests.
gm15.jpg

And here you can see how flat that mounting tab is on the new bumper. I am fitting the bracket up against the new bumper for about the 10th time after tweaking and straightening the bracket to get everything to sit flat and not have it pull when the fasteners are tightened. I am quite pleased with how this turned out.
gm16.jpg

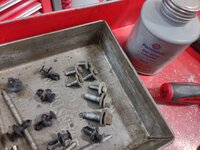
Moving on to hitting the fasteners with the wire wheel on the floor grinder and then apply some anti-seize.
gm17.jpg

Anti-seize is one of my pet peeves, a little goes a long ways. No need to slather it on everything.
gm18.jpg

Just a little around the end and twist the fastener against the brush to apply a thin layer that will prevent corrosion and aid in preservation as well as disassembly in the event it ever needs to come back apart years down the road.
gm19.jpg

gm20.jpg


More pictures to follow....
 
OP
Z

zmotorsports

ALLIANCE MEMBER
Joined
Oct 20, 2009
Messages
21,441
Location
Northern Utah
Continuing on with the facelift.

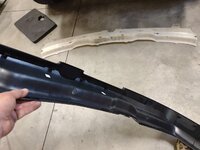
Next came the trial and error fitment of the bumper. With the brackets being bend and needing straightening I figured I would leave the top cap off until I mocked everything up as once the top cap went on it hides the fasteners for adjustment.

Here I am trying to match side to side based on the fenders. Passenger side.
gm21.jpg

And driver side.
gm22.jpg

Next I found a common symmetrical point on the core support to double check the bumper placement side to side. The driver's side measure 17.5".
gm23.jpg

As did the passenger's side.
gm24.jpg

Then the tilt or parallelism could be focused on. This also required some tweaking as the passenger's side outer "wing" bracket was severely bent and required a lot of attention to get it to align with the factory holes.
gm25.jpg

It was a long battle but I won. I was able to get the bolt holes to line up and thread the fasteners in by hand to start them. I can live with that.
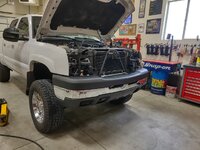
gm26.jpg

Driver's side mounted right up as it was undamaged.
gm27.jpg

Now I could install the top cap and remove the bumper to install the lower deflector.
gm28.jpg

Top cap snapped into place.
gm29.jpg

Lower deflector installed and ready to install the bumper for the last time.
gm30.jpg

The bumper fitment took the majority of my time on Saturday as the lights took all of about 15-minutes to remove and a half hour to install. The other 4+ hours were spent on straightening brackets and assembling the bumper assembly.

More to follow...
 
OP
Z

zmotorsports

ALLIANCE MEMBER
Joined
Oct 20, 2009
Messages
21,441
Location
Northern Utah
Continuing on.

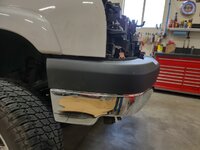
Bumper installed for the last and final time.
gm31.jpg

Then the new Eagle Eye lights installed.
gm32.jpg

As well as the OE style driving/fog lights in which my truck didn't come with originally.
gm33.jpg

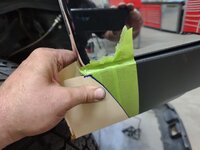
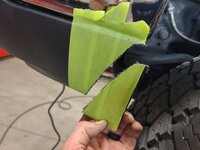
Last order of business was to ensure the tires don't contact the trailing edge of the lower deflector. A little trimming was required so I marked one side and made a template which would allow me to match it identically to the other side.
gm34.jpg

I also installed this OEM rubber flap that is discontinued by GM but I was fortunate to locate a NOS piece online.
gm35.jpg

Other side marked using the template.
gm36.jpg

Out came the Snap-on PTS1000 pneumatic saw again.
gm37.jpg

Cut and ready to debur.
gm38.jpg

Trimmed corners deburred and cleaned using the razor trick again for a nice clean and rolled edge.
gm39.jpg

Front end assembled, new bowtie installed on the grille before being installed and ready to put the engine bay core support cover on.
gm40.jpg


More pics to follow....
 
OP
Z

zmotorsports

ALLIANCE MEMBER
Joined
Oct 20, 2009
Messages
21,441
Location
Northern Utah
Continuing on with the last of the facelift pictures.

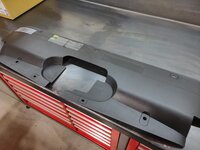
Core support cover being cleaned using ZEP Powerhouse foaming cleaner.
gm41.jpg

Wiped down and ready to install.
gm42.jpg

Installed and ready to close the hood.
gm43.jpg

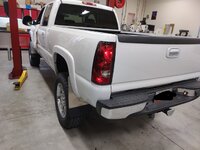
Moving to the rear to replace the taillight assemblies. The originals had some pretty deep scratches from the original owner and I had polished them about 10 years or so ago and then just lived with the ones I couldn't remove. These are a very nice quality aftermarket replica.
gm44.jpg

gm45.jpg

gm46.jpg

Backed out and snapped a few pictures before the next storm settled in.
gm47.jpg

gm48.jpg

Parked in its parking spot in the attached garage.
gm49.jpg

I am pretty pleased with how the front end looks now and wonder why I waited so long to freshen it up.

Thanks for looking.
 
OP
Z

zmotorsports

ALLIANCE MEMBER
Joined
Oct 20, 2009
Messages
21,441
Location
Northern Utah
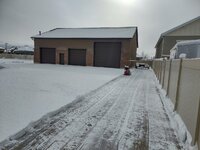
Which now brings us to what we woke up to on Sunday morning. It was just starting to flurry Saturday night when the wife and I went to bed and was still snowing when we awoke Sunday morning. After a few cups of coffee it appeared to be letting up and after the wife fixed me an amazing breakfast it quite snowing by around 10:30 so out I headed to clear snow.

I opened the back door of the garage to find snow levels close to 8 inches.
sunday1.jpg

Just to show I'm not crazy.... :bounce:
sunday1a.jpg

I moved a few feet of the snow away from the back door just to be able to get the snowblower out without packing the snow down.
sunday2.jpg

Damn, that's gonna take a bit to move.
sunday3.jpg

I usually go through one side of shoes about every 3 seasons. However, with all of the snow we had last year I went through one side in just the last season alone. I had flipped the shoes and adjusted the skids during my inspection a couple months ago so it was ready for the winter. I guess it was more ready for snow removal than I was. :unsure:
sunday4.jpg

Out in the center of the back yard and front drive it was a consistent 6 inches deep.
sunday5.jpg

With the front driveway cleared it was time to move to the backyard. This is the part that *****.
sunday6.jpg

I tried something different this time by clearing the area closest to the shop then throwing the area nearest the gate over to the spot I cleared. It really didn't make much difference, it still ***** on the third throw.
sunday7.jpg

By the time I get to this point I am only able to take a swath of about 6 inches and it is liken to concrete at this point.
sunday8.jpg

Finally after 3+ hours of blowing snow I was done and ready to go in the house and relax.
sunday9.jpg

Watching the weather last night it shows snow in the forecast for the next 10-days so I may be buying more fuel here shortly.

I also noticed that the snowblower was bobbling or stumbling every once in a while near the end of yesterday so I think it may have something floating around in the carburetor bowl. I will clean that tonight so it is ready for tomorrow's storm.

Thanks for looking.
 

OutlawDrifter

Well-known member
Joined
Jan 20, 2015
Messages
3,886
Location
KS
Pickup is looking great, Mike!


With the amount of time you're spending moving snow...I'd be giving that lawn tractor snowblower/plow thing a second thought!!!!

You've sent the weather our direction, we had 3"+ on Friday, most was gone by yesterday, but we now have sleet/rain that's turning to snow in the next hour or so, 8-10" predicted...and it'll have ice underneath, yay!
 

XJSuperman

Well-known member
Joined
Jan 26, 2018
Messages
3,088
Location
Central Iowa
I was going to send you a listing so I checked craigslist for Utah and I must say, your selection out there *****. There was literally nothing for older Deere garden tractors. Wyoming wasn't much better.
 
OP
Z

zmotorsports

ALLIANCE MEMBER
Joined
Oct 20, 2009
Messages
21,441
Location
Northern Utah
I was going to send you a listing so I checked craigslist for Utah and I must say, your selection out there *****. There was literally nothing for older Deere garden tractors. Wyoming wasn't much better.

Yeah, I looked off and on over the past summer but nothing popped up.

That being said, I am in a money saving mode currently as I have a couple of expensive projects coming up and none involve snow removal equipment, so I have stopped looking at this point.
 
To avoid these ads, REGISTER NOW!
OP
Z

zmotorsports

ALLIANCE MEMBER
Joined
Oct 20, 2009
Messages
21,441
Location
Northern Utah
Hey Mike!!! We're up a 1/4 inch total for the season so far. And another 1/2 inch coming. Then temps below zero.

You want to buy a Snowmobile?

I'll pass on the sled Pat.

Our temps are still above zero but much colder than it's been the past few weeks. We were high teens overnight and it isn't supposed to hit freezing for the daytime highs all week with snowstorms stacked up every day in the 10-day forecast.
 
OP
Z

zmotorsports

ALLIANCE MEMBER
Joined
Oct 20, 2009
Messages
21,441
Location
Northern Utah
I think you'll like the fog lights. Does your pickup already have wires in the loom to make them OEM?

Thanks. I figured since I was ordering new lower deflector, I may as well order the one with the cutouts and then fill them with OEM fog lights.

I haven't done the control wiring yet. All I've done is run the wiring from the lights up to the fuse/relay panel and wound the loom up. I am hoping at this point the wiring from the dash to the relay is there and all I need to do is install the dash switch and relay but won't know for certain until I get time to pull the dash apart. I bought the OEM switch that has both the bed light and the fog light switch as well as an OE style relay with the intent to keep everything as OE as possible.
 

SilverJimmy

Well-known member
Joined
Apr 14, 2012
Messages
1,643
Location
Prescott/Flagstaff, AZ
Mike, those little magnetic lights are awesome, they were a hit when they first came out! What my customers really liked about them was the magnet base was so strong that when you forgot it stuck to the frame when doing an oil change, when the vehicle came back for its next service the light was still right where you left it! Don’t do that! One your snow removal journey, maybe you need this? I think it’s military surplus, so maybe you can get one cheap?! Lol!
E293FB39-8588-4C5C-9198-10C0B7CBBBED.jpeg
 
OP
Z

zmotorsports

ALLIANCE MEMBER
Joined
Oct 20, 2009
Messages
21,441
Location
Northern Utah
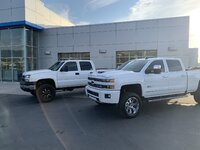
I don’t think gm has made a better looking front end then that truck, the rest have grown on me but my 07 was/is my favorite

Almost twin to your truck

I agree Dave. Although when GM went to the GMT400 back in the late 80's to the new bodystyle and IFS I was pissed. I thought what the hell did GM do???? :headscrat They caved and went away from a solid front axle and to the "new" more rounded bodies compared to the old square bodies. I hated them and more importantly I hated what my brand of choice was doing.

As much as it pains me to say this I even swayed away for a bit. I went as far as bought not one, but two Ford F-250's. The first one was a wrecked 1989 standard cab F-250 with the 351W and C6. I rebuilt it and only had it for less than 4 months. It didn't even make it part way through one snowmobile season I was so disappointed. I had even made a tilt snowmobile trailer and painted it to match just before the snow flew.

That is when the wife found out we were pregnant and I ran across a guy from the local wrecking yard that I had purchased the wrecked truck from. He had just taken possession of a 1988 Ford F-250 extended cab long bed with the 460/C6 powertrain. It was a year older and had some of the factory Ford paint flaking but he liked the rebuild I did on the '89 standard cab so we traded. I remember coming home and telling the wife I had acquired a new truck and she told me we were expecting a baby. I tried to be funny telling her I had a "vision" we were having twins and needed an extended cab but she didn't find the humor in it.

I built that truck from the ground up TRYING to be happy with it. First was to ditch the 3.55 gears and go to 4.10's which helped quite a bit. I then dug deeper and I did a mild cam, roller rockers and even a Vortex supercharger with JBA headers and although everything seemed to help, nothing really made it come to life like I wanted. I then worked a deal with my local Ford dealer for paint as they were going to warranty the failing paint but I didn't want them to actually do the work. They agreed to supply the paint and clear if I were to do the work. Luckily I had a good friend and fellow hot-rodder who worked at the dealership and he vouched for my paint and body capabilities otherwise, I don't think they would have allowed it.

Several years later I found a take-off bed from a forest service truck and converted it do a dual rear wheel to carry our 10.5" camper. I ended up selling that when I wanted to go back to GM. I found a wrecked 1991 3/4-ton Chevy truck and grabbed the 454cid engine and TH400 transmission from it and built both to a little over stock. The transmission I did a wide ratio gear set and some upgraded components for durability. The engine I did cam, Harland Sharp roller rockers, a light port job on the heads and hypereutectic pistons to bump the compression slightly.

Next came the task of finding something to put that powertrain in. We were heavy into racing and the car show scene at this time and my dad's health was starting to decline so I found a clean square body (1986) Chevy Suburban in which to transplant the stump-pulling powertrain into. I loved that vehicle and we owned it for about 13 or so years hauling our enclosed trailer with the street rod and my parents in the summer months and dragging it up the mountains in the winter months snowmobiling. By this time the GMT800 chassis and body came out and it grew on me, even moreso than the GMT400 I came to really like that design after a while. I had been surprised by the durability and longevity of the IFS from GM and especially the nice and comfortable ride, so I was trying to figure out how to get one of those.

THEN, in 2001 they put the Duramax diesel engine in them and I just had to have one. It took me a few years but when the fuel prices jumped to over $5 in 2008/2009 I was able to negotiate on this 2006 for a sweet deal.

I really like this body style and chassis and has become my favorite as well. My son's 2002 is the earlier version of it and I have seen first hand how well they hold up and I feel they will last longer than the newer ones but only time will tell.
 
OP
Z

zmotorsports

ALLIANCE MEMBER
Joined
Oct 20, 2009
Messages
21,441
Location
Northern Utah
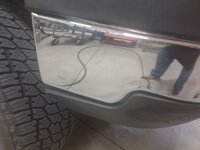
Nice self- portrait.!
I will call this one
"Still Life with Cell Phone"

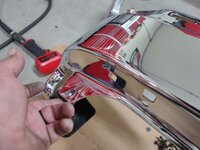
I noticed that as well! Seems like a brand new bumper would reflect things “more pretty”. 😂

Oh you guys are freakin' hiiil-aaar-iiious. You're supposed to be looking at the pretty chrome and not me. I don't know that I even paid that much attention to the picture but leave it to you guys to oust me on it. :rolleyes:
 
OP
Z

zmotorsports

ALLIANCE MEMBER
Joined
Oct 20, 2009
Messages
21,441
Location
Northern Utah
Mike! Quick! Call the cops! Somebody stole your truck! They posted pictures of ii in an unfinished garage! Definitely not at your place!

Lol! Looks great! Still need to know when I can bring my jalopy up for some love!

Not for long Sterling. My wife's nephew who just started his own contracting business has agreed to finish it for me. I had asked him about finishing our attached garage almost two years ago now when he was working for another contractor and doing some finishing work on the side after being newly married. I figured I knew what it was like at that time and I was certain he could use the money and I really didn't want to mess with finishing this one as I had done my last attached garage and complete shop build so I was thinking I'd like to hire this one out. I have been saving up some money for when the time came as I knew he was quite busy. Over the holidays we ran into him at my FIL's and I mentioned that I would really like it to be done before spring this year if at all possible and that's when he mentioned that he and his partner had just started their own company and he'd get me on the schedule. He just text me yesterday to say he would be able to start in a couple of weeks.

Now I have a couple of items I need to address before then but I'm looking forward to having it completed as the spring weather comes around.
 
OP
Z

zmotorsports

ALLIANCE MEMBER
Joined
Oct 20, 2009
Messages
21,441
Location
Northern Utah
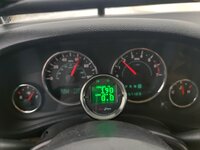
I noticed over the past almost week now that my trims have been looking almost spot on so the last little "tweak" I did to the airflow frequency table did the trick. Yesterday driving home on the interstate I noted that my LTFT's were dead nuts on 0.0. They have been floating between 0.7 and -0.7 for the past few days but most of the drive home at steady freeway speeds they sat right on zero. Can't get much better than that. Even this morning with outside temps in the teens getting on the freeway they were zero to -0.7.
ltft.jpg

During the last half hour or so on Sunday the snowblower started bobbling or stumbling a bit so I figured I had something floating around in the float bowl of the carburetor. Rather than stop with only about a half hour's worth of work remaining I figured I'd push through and park it in the shop to melt off and look at it before the next storm.

Yesterday afternoon I tore into it.
blower1.jpg

And found more than a little debris in the float bowl. Holy ****, there's boulders in there. Not sure how they got there this year. Last year I did a stupid thing and broke my own cardinal rule of never using the last drop of fuel from my fuel jugs but I bought all new fuel containers over the summer and have had zero issues thus far. I used the snowblower once a couple of weeks ago and it ran perfect for the first snowfall of the season and fired on the second or third pull. The first bit of Sunday it ran perfect as well and only starting stumbling a couple times before I finished. I thought it must be a small particle floating in the bowl and every once in a while getting sucked into the jet then falling back out of suspension as it would clean up.
blower2.jpg

I was shocked to find this much **** in the bowl yesterday.
blower3.jpg

I opened the fuel valve and let some run, captured it and dumped it through a paper towel and it was perfectly clean.
blower4.jpg

I then did the same once I connected the fuel line back up to the carburetor and let it flow through the inlet needle and seat. Perfectly clean again.
blower5.jpg

So I reassembled everything, fired it up and went and drove it around the yard for a bit giving it some good bouncing and it ran perfect. Ready for today's large storm that's coming in.
 
OP
Z

zmotorsports

ALLIANCE MEMBER
Joined
Oct 20, 2009
Messages
21,441
Location
Northern Utah
With the snowblower ready to the next storm I figured I had just enough time to knock one quick job off the "to do" list before the wife got home from work.

I guess I have to thank Justin @rattle_snake for this idea that's been bouncing around my head for the past few weeks.

I dug through my scrap metal drawers and found what I thought would work.
holder1.jpg

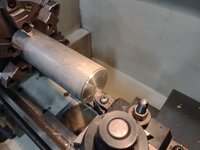
Started with a chunk of 2.5" 6061 aluminum and machined it down to fit inside the crank end of the connecting rod.
holder2.jpg

It is just about a thou larger than the crank end so it will tighten down on the slug nice and tight. I figured this would make the holder somewhat adjustable.
rod3.jpg

Next to the vertical bandsaw to slice off the slug. I am starting to get low on my BoeLube that I've had for quite some time. I use it sparingly even though it works so well.
holder3.jpg

Slug faced off and here is where I deviated from my original plans. I guess it's good to have plans in Jello rather than concrete. My first thought was I would weld the slug to the piece of angle but then I thought I'd look to see if I had any countersunk fasteners which would make this a complete bolt together project.
holder4.jpg

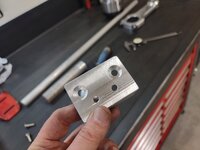
Next I moved to the mill to drill, countersink and face off the aluminum angle that looked like it had been through WWII.
rod6.jpg

Much better.
rod7.jpg

The backside was also countersunk so the fasteners will sit below surface and allow the angle to be firmly mounted to my overhead cabinet.
rod8.jpg

I drilled and tapped a couple of 1/4"-20 holes in the slug.
rod9.jpg

Ready for assembly and mockup on the cabinet to locate the holes.
rod10.jpg


More pictures to follow...
 

Firstram

Well-known member
Joined
May 16, 2017
Messages
1,391
I noticed over the past almost week now that my trims have been looking almost spot on so the last little "tweak" I did to the airflow frequency table did the trick. Yesterday driving home on the interstate I noted that my LTFT's were dead nuts on 0.0. They have been floating between 0.7 and -0.7 for the past few days but most of the drive home at steady freeway speeds they sat right on zero. Can't get much better than that. Even this morning with outside temps in the teens getting on the freeway they were zero to -0.7.
ltft.jpg

During the last half hour or so on Sunday the snowblower started bobbling or stumbling a bit so I figured I had something floating around in the float bowl of the carburetor. Rather than stop with only about a half hour's worth of work remaining I figured I'd push through and park it in the shop to melt off and look at it before the next storm.

Yesterday afternoon I tore into it.
blower1.jpg

And found more than a little debris in the float bowl. Holy ****, there's boulders in there. Not sure how they got there this year. Last year I did a stupid thing and broke my own cardinal rule of never using the last drop of fuel from my fuel jugs but I bought all new fuel containers over the summer and have had zero issues thus far. I used the snowblower once a couple of weeks ago and it ran perfect for the first snowfall of the season and fired on the second or third pull. The first bit of Sunday it ran perfect as well and only starting stumbling a couple times before I finished. I thought it must be a small particle floating in the bowl and every once in a while getting sucked into the jet then falling back out of suspension as it would clean up.
blower2.jpg

I was shocked to find this much **** in the bowl yesterday.
blower3.jpg

I opened the fuel valve and let some run, captured it and dumped it through a paper towel and it was perfectly clean.
blower4.jpg

I then did the same once I connected the fuel line back up to the carburetor and let it flow through the inlet needle and seat. Perfectly clean again.
blower5.jpg

So I reassembled everything, fired it up and went and drove it around the yard for a bit giving it some good bouncing and it ran perfect. Ready for today's large storm that's coming in.
I just went through the same thing with our 10yo Honda mower. Unfortunately my issue is a slightly rusty bowl so it's replacement time. I would like to be able to fix things like this some day and a plating setup is moving up on the list of things to acquire. My list is still longer than the space/time available.
 
OP
Z

zmotorsports

ALLIANCE MEMBER
Joined
Oct 20, 2009
Messages
21,441
Location
Northern Utah
Continuing on with the paper towel holder project.

Slug bolted to the angle bracket after the holes were drilled in the cabinet. I like this version better than my original thought of welding the slug to the angle bracket.
rod11.jpg

Bolted to the cabinet and ready to accept the connecting rod.
rod12.jpg

Next I had to machine an adapter in which to be pressed into the wrist pin side of the connecting rod as I didn't have a piece of tubing the correct size. I made a larger piece that was approx. .001" larger than the wrist pin bore.
rod13.jpg

Then took my longer length of aluminum tubing and stepped the end down slightly for a .001" pressed fit into the piece I machined in the step previous.
rod14.jpg

Before pressing the components together, I chucked it up in the lathe and ran some emery paper and Scotchbrite cloth over the tubing to removed the corrosion.
rod15.jpg

Now the parts can be pressed together.
rod16.jpg

Once pressed together I put back in the lathe and faced off the ends so they look like one piece. This also increased the OD by about half a thou larger. Looking back, I think I should have pressed the pieces together and then machined this end down to the .001 interference fit for the wrist pin end. I guess that's why hindsight is 20/20.
rod17.jpg

To aid in assembly I applied a little pressing lube for the job at hand.
rod18.jpg

This worked perfectly, even though it was a little tighter fit than I initially intended.
rod19.jpg

And the finished product.
rod20.jpg


Thanks for looking and thanks to Justin for the idea.
 
OP
Z

zmotorsports

ALLIANCE MEMBER
Joined
Oct 20, 2009
Messages
21,441
Location
Northern Utah
I just went through the same thing with our 10yo Honda mower. Unfortunately my issue is a slightly rusty bowl so it's replacement time. I would like to be able to fix things like this some day and a plating setup is moving up on the list of things to acquire. My list is still longer than the space/time available.

Yeah, this was just gravel/rocks and not corrosion. The bowl cleaned up like new with just a shot of brake wash. Not sure where the gravel came from but it's gone now.

I know what you mean about having more capabilities but not having the time or space. I would love to have a full size chassis table at times as well as some powder coating capabilities but just not willing to give up the space or dedicate the time to playing with it enough to be proficient at it.
 

humpty

Well-known member
Joined
Dec 4, 2008
Messages
547
Location
Minneapolis, MN
Continuing on with the paper towel holder project.

Slug bolted to the angle bracket after the holes were drilled in the cabinet. I like this version better than my original thought of welding the slug to the angle bracket.
rod11.jpg

Bolted to the cabinet and ready to accept the connecting rod.
rod12.jpg

Next I had to machine an adapter in which to be pressed into the wrist pin side of the connecting rod as I didn't have a piece of tubing the correct size. I made a larger piece that was approx. .001" larger than the wrist pin bore.
rod13.jpg

Then took my longer length of aluminum tubing and stepped the end down slightly for a .001" pressed fit into the piece I machined in the step previous.
rod14.jpg

Before pressing the components together, I chucked it up in the lathe and ran some emery paper and Scotchbrite cloth over the tubing to removed the corrosion.
rod15.jpg

Now the parts can be pressed together.
rod16.jpg

Once pressed together I put back in the lathe and faced off the ends so they look like one piece. This also increased the OD by about half a thou larger. Looking back, I think I should have pressed the pieces together and then machined this end down to the .001 interference fit for the wrist pin end. I guess that's why hindsight is 20/20.
rod17.jpg

To aid in assembly I applied a little pressing lube for the job at hand.
rod18.jpg

This worked perfectly, even though it was a little tighter fit than I initially intended.
rod19.jpg

And the finished product.
rod20.jpg


Thanks for looking and thanks to Justin for the idea.
Why is the paper towel backwards... ;)


beards-good-mullets-bad-design-turnpike.jpg

Truly spectacular holder though, well done!
 
OP
Z

zmotorsports

ALLIANCE MEMBER
Joined
Oct 20, 2009
Messages
21,441
Location
Northern Utah
That is probably the most awesome paper towel holder I have ever seen! Looks great and very one-off.

Thank you. I wish I could take credit for the idea but I got that from Justin, then just tweaked the execusion a bit.


I appreciate the comments and thanks for checking in.


Why is the paper towel backwards... ;)


beards-good-mullets-bad-design-turnpike.jpg

Truly spectacular holder though, well done!

Here we go again.... :oops: I get this same **** from family. :bounce: They come to my house and think it's funny to change all my toiler paper in the bathrooms. There is only one right way and that is fed from the back, NOT over the top. My house, my rules.


On a more serious note though, thanks for the comment. I know it's not necessary tool but it's these little things that help to change the tone of our shops when completed. ;)
 
To avoid these ads, REGISTER NOW!
Top Bottom