To avoid these ads, REGISTER NOW!

ZMotorsports Shop Projects 2.0

Finallygotit

ALLIANCE MEMBER
Joined
Jul 6, 2013
Messages
4,090
Location
Tucson, AZ
Mike, are you planning on leaving the new bed parts in the shop for a bit to outgas? Just saying because we recently painted a bunch of metal yard art and those things are still a bit stinky. Not sure how sensitive you or your wife's nose may be.

:beer:
 
To avoid these ads, REGISTER NOW!
OP
Z

zmotorsports

ALLIANCE MEMBER
Joined
Oct 20, 2009
Messages
21,439
Location
Northern Utah
I’ve taken carriage bolts to my belt grinder and made them into almost a flathead before. I like how they look, not so utilitarian.
CD2CE2C9-2502-47B4-96E6-AA56D769C42A.jpeg
I bet after paint they’d be nearly invisible. Very cool project. Sad to think about, but bed frames used to be built this stout back when real craftsmanship and product longevity were valued.

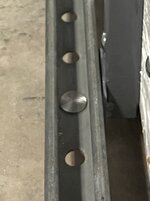
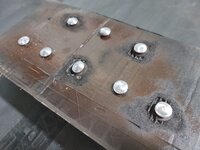
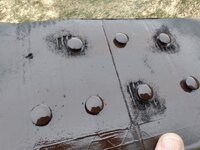
Thanks Sterling, that's all I was going to do was knock the markings off with the disc/belt sander, run them through my blasting cabinet again and repaint. I think that will work perfect to hide them in plain sight. I actually thought the paint would be enough but afterwards I now think the paint highlighted the markings rather than concealed them. :headscrat

As for the bedframe itself, I really can't complain too awfully much about the quality as it is 35 years old. Yes, the wood had split a few years ago where the cross pieces inserted into them, but that was still after 25 or so years. The bedroom set being such good quality and a gift from my parents is what made us want to keep it. The wife loves it and didn't want to replace it which is why we started looking specifically at new frames before she suggested I just make one.

Now I guess I can chalk up another odd item that I can say I fabricated in my shop. :ROFLMAO:
 
OP
Z

zmotorsports

ALLIANCE MEMBER
Joined
Oct 20, 2009
Messages
21,439
Location
Northern Utah
Mike, are you planning on leaving the new bed parts in the shop for a bit to outgas? Just saying because we recently painted a bunch of metal yard art and those things are still a bit stinky. Not sure how sensitive you or your wife's nose may be.

:beer:


Agreed Dan. The paint takes a bit to off gas, which is why the parts are still in the shop. When my wife got home from work last night and came out to the shop she saw it for the first time. Being painted and completed now she wanted to run in and move everything to install it, but I suggested we wait for a few days and give the paint time to off-gas. Maybe this weekend we'll bring it in the house.

And yes, she has a sensitive nose. :bounce:
 
OP
Z

zmotorsports

ALLIANCE MEMBER
Joined
Oct 20, 2009
Messages
21,439
Location
Northern Utah
Mike and @SilverJimmy had either of you considered elevator bolts? Flat head, with minimal under head taper, and available with the square. Harry

Thought about elevator bolts but didn't have anything else to order from McMaster Carr at the time and don't like to place small orders and eat that much freight. Carriage bolts were easier to come by locally and once the bed is assembled with the bedspread none of them will be visible anyways, so even painting the carriage bolts is probably over the top.
 
OP
Z

zmotorsports

ALLIANCE MEMBER
Joined
Oct 20, 2009
Messages
21,439
Location
Northern Utah
I guess I'm confused. Where do the carriage bolts go? Some headboard connection I'm not seeing?

The carriage bolts will go through the wood side rails that are part of the original frame and will secure those side rails to the square tubing that will now support the bed itself. The wood will remain to connect the headboard and footboard.


Will we see the frame completely assembled / setup? Please.


Yes, I can snap a few pictures once it is assembled.

I'm wondering if Mike's wife doesn't use a bed spread, because our our bed, you'd never see those bolts.

Agreed Vincent, with the bedspread none of these will be visible anyways so definitely overkill.
 
OP
Z

zmotorsports

ALLIANCE MEMBER
Joined
Oct 20, 2009
Messages
21,439
Location
Northern Utah
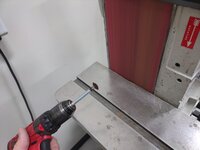
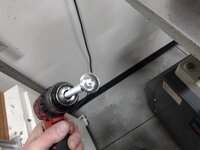
I really should have addressed these from the beginning as it took all of about 3 minutes to knock the markings off all 8 bolts. I could have chucked them up in the lathe and used a form tool to remove the markings, but a drill motor and belt sander made very quick work of it.
frame70.jpg

A few seconds on the belt sander netted excellent smooth finish.
frame71.jpg

Bolts positioned on my high tech fastener painting apparatus. :ROFLMAO:
frame72.jpg

Those look much more gooder.
frame73.jpg

frame74.jpg


Thanks for looking. Should be able to get everything assembled and move on to the next project soon.
 

Monza Harry

Well-known member
Joined
Dec 29, 2018
Messages
1,433
Location
Windsor ON
Ok after further thought and your explanation, what about the threaded inserts for a completely inconspicuous install? Harry
My go to for carriage bolts is the HomeDespot, do they have those elevator bolts there?! Lol!
Jimmy, A quick "Google" search shows Rona [Used to be Lowes Canada] Amazon and some "farm stores" listing them. Locally HD has been thinning the heard as it were. But all that said and done if you are in a town/city of any size, or with an agricultural make up I'm pretty sure you will find a reasonable supplier of these not to mention the regular industialal and on-line supplier avenues.
https://www.rona.ca/en/product/hill...e-thread-elevator-bolt-2-pack-882936-63876259 Harry
 
Last edited:

mike528

Well-known member
Joined
Dec 20, 2014
Messages
503
Location
Shelby county Ohio
anxious to see how the bed frame turns out all mounted up. I need to do something similar with mine but not entirely sure how I want to do it yet. ours has drawers in the footboard and does not use box springs.
 

tarbellb

Well-known member
Joined
Apr 17, 2011
Messages
5,766
Location
Oregon
Nice progress on the bed frame Z, can't wait to see final pics

You mentioned a grease and wax remover solvent, can you show us what you like using?
 
To avoid these ads, REGISTER NOW!

lilscorpion

Well-known member
Joined
Mar 15, 2010
Messages
3,600
Location
Colorado
Mike - really nice bed frame. Gotta admit tho, I joined in in the middle and thought initially you were building some kind of fixture table. 🤣

I built a bed back when my wife and I bought our first house. It was similar- totally overkill. We had it for 15 years and then she got a wild hair and we pitched it in the dumpster at some point...she has much regret for getting rid of it. Things like this are built to last forever. Yours might just last forever x 2.
 

Mr. Roboto

Well-known member
Joined
Dec 11, 2012
Messages
2,161
Location
New Hampshire
Finally got caught up in here again, awesome work as always. I love the bedframe - that is going to be one stout piece that I am sure will not fail you again! Looks like you were able to build it entirely with material you had on hand too, which is another win!

I'm going to have to build one in the not too distant future myself, though it will likely be wood and much less impressive haha. My daughter is in a little mini toddler bed at the moment, but her crib was supposed to be able to convert the front/back rails into a headboard/footboard as she got older. There is (was) a kit you could buy to make the conversion, but it is no longer available as the store we purchased it from went out of business, so I'll be looking to fabricate something as well for that purpose.
 
OP
Z

zmotorsports

ALLIANCE MEMBER
Joined
Oct 20, 2009
Messages
21,439
Location
Northern Utah
I wasn‘t kidding when I said I was stealing your motto. Hope you don’t mind.
IMG_4181.jpeg

You are under the assumption that I have not already planned on doing this

Love, love, love the sign and I received your private message. I am flattered and would be honored to hang one in my shop. Thank you.


Nice progress on the bed frame Z, can't wait to see final pics

You mentioned a grease and wax remover solvent, can you show us what you like using?

Thank you. For years I have used PPG's DX330 Wax & Grease Remover. However, with PPG's prices continuing to go through the roof over the past many years, I started using SPI (Southern Polyurethane Inc.) products about 7 years or so ago and have been quite impressed. I now have been using their Wax & Grease Remover, part # 710, specifically 710-1 for the gallon container. I then use it through a pump style quart pressure sprayer.
 
OP
Z

zmotorsports

ALLIANCE MEMBER
Joined
Oct 20, 2009
Messages
21,439
Location
Northern Utah
I appreciate everyone following along with the bedframe build. The wife and I took off for a few days of R&R as we hadn't taken any time off since October so we needed a short weekend getaway.

After arriving home yesterday around noon, I asked the wife if she minded if we tear the bed apart and install the new frame. It only took about an hour and a half so it went rather smoothly and the fitment was spot on.

After moving the mattress and box spring out of the way the deconstruction of the side rails could begin. Here you can see how two of the previous repairs were addressed. The first was using a piece of 2" wide flat strap bent at an angle to hand on the side of the rail. This was due to the lower support beginning to pull away from the side rail. Further up where the lower wood support was still intact, I merely used a bit longer 1" square tubing to span across rather than the 1x3 wood cross pieces. After removing the cross pieces I had to remove the lower wood support, which in many areas popped right off with a small prybar as the glue was failing.
frame75.jpg

Although it will never be seen, I was actually pretty pleased with the color I chose from the local big box store as it was a nearly identical match.
frame76.jpg

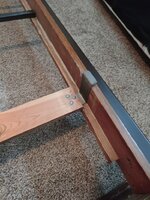
On the far side rail you can see where the lower wood support has been removed and one side of the new frame sitting inside of the rail. I bolted one side of all four crossbars in place.
frame77.jpg

Next, I found out it was too tight of a fit to slide down in between the other rail so I popped the opposite side rail off from the headboard and footboard. These were merely a tapered drop down style of connection point. I then bolted the other side to the crossbars, roughly set the height with the adjustable feet and reinstalled the wood side rail up against the metal frame. It was tight going back on but fit with relative ease.
frame78.jpg

Once I went around with tape measure and bubble level I adjusted each of the four feet to an even distance from the top of the wood side rails, then applied some masking tape to where the 5/16" holes would be drilled to lessen the chances of splintering wood and drilled the holes. I started in the middle of each side, installed a carriage bolt and tightened the nuts then move to the next one and repeated. I only had a few small pieces of wood that needed touching up after completion.
frame79.jpg

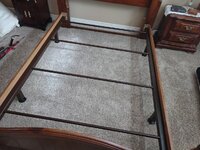
Once the wood side rails were securely fastened to the metal frame I did the fine adjustments by extending the feet to just where the footboard or headboard started to lift up from the carpet, then backed them back off. The goal was to find that exact spot where the new frame feet, the headboard and the footboard were all displaying equal load.
frame80.jpg

Final shot before placing the box spring and mattress on the new frame.
frame81.jpg

With the frame loaded with the box spring and mattress, I discovered that I needed to apply just a little more force to the new feet and lessen the load on the footboard and headboard. Prior there was still a little movement fore and aft but once I added about another 3/4 of a turn extending the feet it made it much more solid yet still maintained contact with the floor of the headboard and footboard.
frame82.jpg


I forgot to take a picture with the bedspread on it but the frame is not visible at all as the spread hangs about 2 inches off the floor is all.

Thanks for following along. That project took a bit longer than I expected and was definitely overkill. But you know the saying, overkill is underrated. ;) That is another project checked off the list.
 
OP
Z

zmotorsports

ALLIANCE MEMBER
Joined
Oct 20, 2009
Messages
21,439
Location
Northern Utah
I'll post some pictures of the weekend getaway that the wife and I took off on late last week. Nothing too special, just wanted to get outside and away from work for a few days to relax. The wife suggested we go to the San Rafael Swell again but with the weather here in northern Utah being ****, I didn't want to take the coach out in it, just to have it get filthy and wash it again when arriving home.

We opted to get a hotel room and stay in Green River. Not my favorite way to travel but it turned out fine. I did miss my coach though.

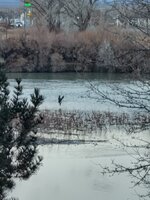
We left Thursday afternoon and encountered heavy rain most of the trip with the exception of a section going over Soldier's Summit where we had a bit of snow, but it wasn't sticking to the roads. We drove out of the foul weather around Price and got to Green River about dusk. As my wife commented about us having a balcony view over the Green River, she noticed a bald eagle sitting on a sandy elevated area in the middle of the river. I was able to get a picture of it before it flew off.
swell1.jpg

Just as it took flight.
swell2.jpg

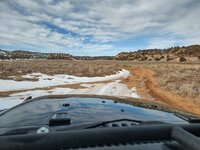
Friday morning we took off and headed 30-miles west right to the middle of the San Rafael Swell. After airing down and taking the main dirt road south a bit, we took a shortcut that we usually take over towards Swasey's Cabin. I was worried when I saw the patches of snow on the north facing slopes and in shaded areas but the ground was frozen still and I was glad we departed as early as we did.
swell3.jpg

Some of the trail was more covered in snow than others as some of these canyons seldom see much sunlight. The skies were slightly overcast but pretty nice weather for the most part.
swell4.jpg

It was quite scenic driving through the cedars and meandering through the canyon working out way up towards Rod's Valley.
swell5.jpg

Once out of the canyon, we were up on the mesa and headed towards McKay Flats to see if we could see the herd of wild horses that we have been fortunate enough to see multiple times throughout our adventures in the area. Many people we've talked to have been to the Swell many times and have never seen the herd of wild horses or wild burros but we've been blessed to have seen them each multiple times in only the four short years we have been going to the Swell.
swell6.jpg

Unfortunately, this trip we got skunked and didn't see the wild horses. I thought for sure we would seeing as how we hadn't seen another soul or vehicle all day. The road was good so we headed down into Red's Canyon and stopped in a wide spot in the road for a lunch break.
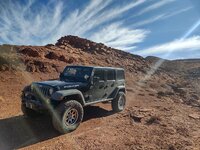
swell7.jpg

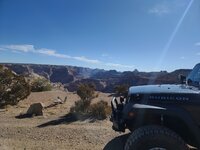
Here was our view for lunch. Not too shabby of a view.
swell8.jpg

As we climbed our way up out of Red's Canyon we came across a fresh rock fall. I got out and walked it and could tell it was fairly recent as there were only a couple of other tire marks somewhat fresh in the dirt and since the last storm the day before and these rocks were on top of those tire marks. I should have gotten a wider shot of the trail but there was just barely enough room on the right side of that big rock in the picture. I originally thought I'd try to squeeze by on the right side but the edge didn't appear to be packed very well and was loose dirt with a long, long way down into the canyon below. To avoid risk I opted to drive over the two larger rocks as they were spaced the perfect distance apart to match the track width of the Jeep so it was a pretty drive up and over them. The only time I put the Jeep in 4lo all weekend actually.
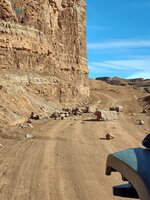
swell9.jpg

They appear to have fallen from the clean spot right above. I'm not a rock hound but I would say with the evening temperatures still getting down into the low 20's the cause was probably water getting into the cracks, freezing and forcing the rocks to split apart.
swell10.jpg


I feel bad because I was obviously not thinking, or more specifically, only thinking of myself. As we got a few miles up the trail I mentioned to my wife that maybe we should have used the winch to pull the couple larger ones out of the way for the next person as this is a common trail and not everyone drives lifted Jeeps through this canyon. We have encountered everything from Subarus to Lexus SUV's driving through here in the past and I don't think they would be able to get around or over the rocks so they would be forced to turn around and backtrack.

I really should have given it more thought and moved a couple of the rocks as it could be a week or so before they get a grader down there.

Stay tuned for more pictures.
 
OP
Z

zmotorsports

ALLIANCE MEMBER
Joined
Oct 20, 2009
Messages
21,439
Location
Northern Utah
Continuing on.

This is where the day kind of went to ****. As we were climbing out of the canyon the temperature was hitting a nice 50~ish degrees.

The canyon road itself was great, however, as we headed north and continued to climb in elevation upwards of 7k feet the ground was thawing and the trail was getting gooey. I don't know if I've mentioned this before, but I HATE mud. Despise it rather and will go out of my way to avoid it as much as possible. We hit a few small sections of gooey slimy road and then hit solid good trail again so we kept motoring on. However, once we got to the intersection we had a decision to make, do we head straight north the 30-miles or so to I-70 or head due west towards Goblin Valley and come out just off Temple Mountain Road. By looking at the area of the intersection it appeared as though the road going straight to I-70 was less traveled and still had a bit to climb before dropping back down to the interstate. However, the road towards Goblin Valley was only about 18-miles according to my tablet and I knew it dropped in elevation within about the next 5 miles and the road exiting Temple Mountain is always a good gravel road. So we opted to head west towards Goblin Valley.

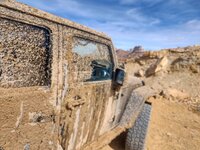
Unfortunately, there were still a few miles of gooey slimy trail to contend with and this was the result of those few miles. I did my best to get off the sides where there were still patches of snow but whichever side of the Jeep was still on the trail got plastered with that ****. It was everywhere, up on the roof, the windshield, hood and all along the sides.
swell11.jpg

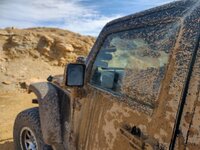
Even the mirrors were plastered.
swell12.jpg

I grabbed a bottled water and cleaned the side mirrors and a spot just big enough on the windows to see the mirrors and figured this would be safe to drive the 45-miles back to Green River, once we popped out near Goblin Valley. At this point at least we were through the gooey mud and had good gravel road for the last 10 miles or so of the trail before hitting pavement and airing back up.
swell13.jpg

swell14.jpg

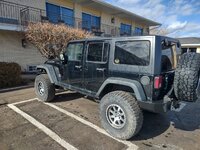
As soon as we pulled into Green River I found the car wash and at least got the big stuff off. Not the greatest wash job but the layers of mud were removed.
swell15.jpg

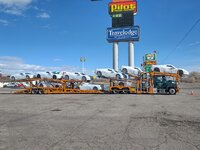
As we headed to dinner we spotted this hauler full of new Vettes staying at the hotel across the street. Pretty cool sight and not one we see very often.
swell16.jpg

Then we hit Ray's for dinner. They are known for their burgers but I think their steaks are pretty awesome as well. And their homemade fries are fantastic. My wife says their teriyaki chicken is the best she's ever had so this is a standard stop for us when in the area.
swell17.jpg

Saturday morning we opted to stay to the lower elevations. We drove about 20-miles north of Green River on Highway 191 to the Green River Cutoff. Here we stopped to air down.
swell18.jpg

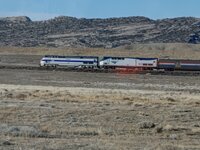
Just as we finished airing down this train blasted past us.
swell19.jpg

It's not too often we get to see an Amtrak train out in the middle of nowhere either.
swell20.jpg


Stay tuned for more pictures.
 
OP
Z

zmotorsports

ALLIANCE MEMBER
Joined
Oct 20, 2009
Messages
21,439
Location
Northern Utah
As we headed towards the Wedge we encountered more pronghorn than we have ever seen in the area before, and they were pretty close. They are generally an easily spooked species that we don't get very close to but on several occasions on Saturday we found ourselves within 50-yards of more than a dozen at a time. I can only assume as this time of year with so few of visitors to the area and our Jeep is actually not very loud that we must have caught them by surprise on more than one occasion. We would round a curve and there would be another small herd of them, several times right on the trail. They would spook when they saw us but it was obvious they didn't hear us until we were right on top of them. It was pretty spectacular actually. We also came across a pretty broad expanse of holes where we saw hundreds of prairie dogs sticking their heads out of their holes. Another sight we don't get to see even though we have traveled that section of road multiple times.

We finally saw our first other vehicle in the area as we neared the Wedge turnoff. They were just leaving the area as we were turning towards the Wedge Overlook.
swell21.jpg

swell22.jpg

We didn't know how to act having the entire place to ourselves. We have a spot where we generally pull off for lunch and as we passed it we opted to see if the overlook was occupied. Generally there are too many people out at the actual overlook so we stop further away at another spot we like but this time we drove right to the overlook parking area and walked out onto the overlook.
swell23.jpg

The Grand Canyon as impressive as it is doesn't have anything on the Wedge Overlook. I'll take this over the Grand Canyon anyday.
swell24.jpg

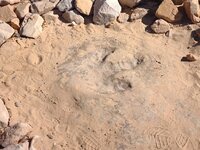
Once we started down Buckhorn Wash heading back towards I-70 we came across the dinosaur track trailhead. This is another sight that we have not been able to see in the past due to the crowds that stop here, and us not being one for crowds, we generally drive on past. However, with no one around we parked the Jeep and took the short hike up to see the dinosaur track.
swell25.jpg

I have to admit, it was worth the wait. Pretty definitive print and cool to see.
swell26.jpg

Yesterday morning we packed up and as we headed home we got right back into another winter storm within about 50-miles of leaving Green River.
swell27.jpg

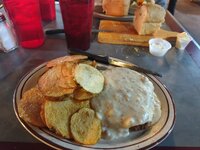
We stopped at a place called the Cowboy Kitchen in the big metropolis of Wellington, UT. If you like chicken fried steak, this is the place to stop. Fantastic chicken fried steak and their ranch potatoes are not too shabby either. My wife had the chicken noodle soup which had homemade noodles and was also pretty tasty. Their hot homemade bread and garlic butter are to die for.
swell28.jpg

Thanks for looking. Pretty nice trip for a weekend getaway.
 

csp

Well-known member
Joined
Mar 23, 2010
Messages
5,720
Location
Franktown, CO
Too funny, the mention of Green River made me think of Ray's Diner and as I scroll down, there it is, a photo of a burger at Ray's. Yum!!!

Last time I was there the woman cooking on the flat top had a cigarette in her mouth with about an inch of ashes delicately hanging on.
 
OP
Z

zmotorsports

ALLIANCE MEMBER
Joined
Oct 20, 2009
Messages
21,439
Location
Northern Utah
Great photos as usual, you sure live near some beautiful scenery. Thanks for sharing those. 👌

Thanks. Yes, we are very blessed to have chosen to live where we do. We have traveled around much of the western U.S. and although there are many areas we enjoy visiting, we still love coming back home.

Nightmares about mud?

I think I may have had nightmares that night because I know even as much time and $$ as I spent at the carwash, I'm sure I didn't get it all. :mad:


Too funny, the mention of Green River made me think of Ray's Diner and as I scroll down, there it is, a photo of a burger at Ray's. Yum!!!

Last time I was there the woman cooking on the flat top had a cigarette in her mouth with about an inch of ashes delicately hanging on.

Yeah, Ray's Tavern is a must stop for us whenever we're in the area.

Funny story about the first time we tried Ray's.

Although Green River has been our stopover spot for the night for the past 17 years as we've traveled through on our annual Ouray, CO trips, we had always just walked next door from the campground to the Tamarisk cafe for dinner after arriving. It wasn't until about 4 or 5 years ago when we started going to the San Rafael Swell that someone had mentioned the fantastic burgers at Ray's Tavern. The wife and I were all in as some of the best places we have found to eat as we've traveled have been local pubs and breweries so we were game to give Ray's a try.

When we came off the trail that first day we arrived and there were quite a few cars outside the little hole in the wall tavern. There are only a few tables and they were occupied and my wife said "I don't mind sitting at the bar". So we moseyed up to the bar and sat at the far end. A gentleman came by and without much enthusiasm or charm, pointed over his left shoulder and said "the menu is above the bar", which it was, written on a whiteboard. Me being the conversationalist that I am simply asked "I've heard you guys are supposed to have a pretty good burger" hoping he would go into detail explaining it and opening the floor for some conversation. NOPE! He simply pointed over his other shoulder to a placard that stated "Ray's, Voted Best Burger in Utah" and there were multiples of these placards.

Okay then, I guess that speaks for itself. :rolleyes: I then said "I guess I'll have the burger". :ROFLMAO:

We've gone back too many time to count since and have even gotten hooked on their steaks, which are just as good as their burgers, if not better. And their fries are amazing. I think the gentleman we spoke to on that initial visit is one of the owners because he is there each time and even recognizes us now, even though we only in the Green River area about 4 times a year.


One of my favorite places on a trip to California was going through the green river area. Stunning scenery, even though we stayed on the highway.

Yes, the area is divided into two sections, the Swell and the Reef. Both are very scenic in their own way and have a very diverse landscape. I have read that throughout the late 60's the area was booming due to the missile launch complex and people would come from all over to watch them launch the test missiles. It's not much to look at now and is actually kind of sad driving through and seeing some of the building deteriorating and boarded up but it has a pretty rich history.

We have noticed over the past couple of years there has been some new construction such as a new UDOT maintenance facility, new fire department, two new hotels and a brand new huge Maverick fuel and convenience store which just opened last year.

There is a cool old gas station with 3-bay service area that I drool over when driving through the area and think how cool it would be to restore that place and turn it into a full service shop. The building and shop are just cool looking is all.
 
OP
Z

zmotorsports

ALLIANCE MEMBER
Joined
Oct 20, 2009
Messages
21,439
Location
Northern Utah
bed frame turned out nice. I was wondering what you plans were for head and foot boards. Now I see.
Nice work

Thanks. I'm sorry if I didn't convey what my plan was clearly enough. I had it in my head how I wanted to approach this project, but I may not have communicated it clearly enough or conceptually.
 

ntsqd

Well-known member
Joined
Jan 22, 2005
Messages
986
Location
Lower left coast
Pretty much all of the coaches I've seen and worked on use a standard size 14x14 vent. However, most of the mid to upper tier ones seem to use the fantastic vents which have rain sensors, wind sensors, etc. for protecting them. I have installed the Maxxair covers on all of mine as it allows the vents to be open slightly during travel and create a nice venturi affect drawing from the coach, pulling warm air out and cooler air in. The Maxxair vent covers come in white or smoke but I painted mine to match the coach which also provides some better UV protection.
I wanted to come back to this to thank you again. The Maxxair vent is so superior to the remaining existing vent that I'll be replacing it too. I used Dicor 501LSW-1 to seal it to the roof; and less than 24 hours later we got hit with a serious storm. Not a drop! I'd have preferred that it had longer to cure than that, but the camper sits outside and the temporary cover (doubled trash bag held down with Gorilla Tape) wasn't going to make it through that storm.
 
OP
Z

zmotorsports

ALLIANCE MEMBER
Joined
Oct 20, 2009
Messages
21,439
Location
Northern Utah
I wanted to come back to this to thank you again. The Maxxair vent is so superior to the remaining existing vent that I'll be replacing it too. I used Dicor 501LSW-1 to seal it to the roof; and less than 24 hours later we got hit with a serious storm. Not a drop! I'd have preferred that it had longer to cure than that, but the camper sits outside and the temporary cover (doubled trash bag held down with Gorilla Tape) wasn't going to make it through that storm.

Glad to hear that worked out for you. I've had the Maxxair covers on all three of our coaches and agree, they are so superior to just having the vent cover exposed.
 
OP
Z

zmotorsports

ALLIANCE MEMBER
Joined
Oct 20, 2009
Messages
21,439
Location
Northern Utah
Looks like a very lovely weekend away.

The bed frame looks lit should last the rest of your life time with it. Excellent work as always

Thanks Dave. Yeah, it was a nice weekend, other two things, the mud and I missed my coach. I don't like traveling and staying in hotels, at all.

The bedframe is rock solid. Now after multiple nights I can't believe I put up with the old one for as long as I did.

As the wife and I were sitting down to dinner last night she mentioned to me that I needed to get back to work out in the shop before I start tearing in and remodeling the house. :ROFLMAO: I don't know what she meant. :headscrat


In all seriousness though, I have to admit that I don't function well in chaos. Right now the attached garage is chaotic which is making the shop chaotic as all of the OPE as well as other things that generally go in the house garage are stuffed in the shop. It is really f**king with my head when I walk in and see the snowblower, lawnmowers, ladders and vehicles all stuffed in the shop.

I have tried to quiet my mind down because there are days I feel like I have come so far over the past few years but other days I am ready to rip my face off and scream at the top of my lungs. Granted, this is nowhere near as bad as after we moved and not having a shop for 8 months and for the several months before that of closing up the old one, but close. I have to keep telling myself this is nothing, this is nothing, but my head is not believing it. :cautious:

Real first world problems, right. :rolleyes:

Oh well, I keep telling myself that by springtime, when the weather is such that I am ready to start working with the shop doors open and outside temps are pleasant that the garage will be done, we will be happy with it and the shop will be back in order and clutter free.
 
To avoid these ads, REGISTER NOW!
Top Bottom