To avoid these ads, REGISTER NOW!

ZMotorsports Shop Projects 2.0

To avoid these ads, REGISTER NOW!
OP
Z

zmotorsports

ALLIANCE MEMBER
Joined
Oct 20, 2009
Messages
21,437
Location
Northern Utah
Mike, in a few weeks or a month this will be nothing but a memory and you will appreciate the aggravation.... :beer:

Agreed Mark. My gut keeps trying to convince my head of that. I know I wasn't easy to live with during the move and the shop build 7 years ago, so I keep telling myself this is nothing and playing it off to the wife. However, last night I think she was on to the fact that it's getting to me. :dunno:
 

Bodj Built

Well-known member
Joined
Feb 3, 2016
Messages
1,167
Location
Moorpark, CA
I know I'm guilty of exactly what you're feeling. For a while my shop was a mess. I had the truck torn apart, not driving for a few months, no offroad adventures, working my day job, working on customer trucks after work, working on house projects after that, writing my thesis for my masters, trips to see her family or her family coming out to visit, weekend events with my family that couldn't be missed... everything was adding up. I hid it as long as I could, so my wife kept suggesting new house projects, further inducing more stress. I don't have an anxiety disorder, but I definitely felt like I did at times where I just shut down and sat still because I didn't know where to start. Eventually I had to tell her that I'm in over my head and I needed to slow down. I was trying to fit 48 hours of stuff into 24 hour days. It's gotten better, but still working on time management and making time to clean/organize, as that's a major stress inducer for myself as well.
 

PugetDude

ALLIANCE MEMBER
Joined
Mar 13, 2013
Messages
22,423
Location
Superstition Mountains, AZ
Thanks Dave. Yeah, it was a nice weekend, other two things, the mud and I missed my coach. I don't like traveling and staying in hotels, at all.

The bedframe is rock solid. Now after multiple nights I can't believe I put up with the old one for as long as I did.

As the wife and I were sitting down to dinner last night she mentioned to me that I needed to get back to work out in the shop before I start tearing in and remodeling the house. :ROFLMAO: I don't know what she meant. :headscrat


In all seriousness though, I have to admit that I don't function well in chaos. Right now the attached garage is chaotic which is making the shop chaotic as all of the OPE as well as other things that generally go in the house garage are stuffed in the shop. It is really f**king with my head when I walk in and see the snowblower, lawnmowers, ladders and vehicles all stuffed in the shop.

I have tried to quiet my mind down because there are days I feel like I have come so far over the past few years but other days I am ready to rip my face off and scream at the top of my lungs. Granted, this is nowhere near as bad as after we moved and not having a shop for 8 months and for the several months before that of closing up the old one, but close. I have to keep telling myself this is nothing, this is nothing, but my head is not believing it. :cautious:

Real first world problems, right. :rolleyes:

Oh well, I keep telling myself that by springtime, when the weather is such that I am ready to start working with the shop doors open and outside temps are pleasant that the garage will be done, we will be happy with it and the shop will be back in order and clutter free.

Drywall mud is still mud, whether slathered on a wall or the side of your jeep.
That's what is discombobulating you.
Free psychotherapy. You can trust me -I'm a professional; ordained online to do my niece's wedding. 🤣
 
OP
Z

zmotorsports

ALLIANCE MEMBER
Joined
Oct 20, 2009
Messages
21,437
Location
Northern Utah
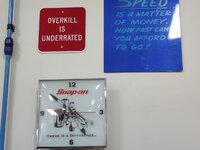
Nice clock Mike. Is it new or a vintage piece?
I should send you a GIANT Ford sign to hang with the others.
:)

Thanks Justin. The Snap-on sign is older, I was able to located a NOS one about a year plus ago after looking for many years. My good friend and mentor had one just like it and I always liked seeing it in his garage when I visited, so I have been on the hunt for one for several years. They are kind of hard to find in good condition, let alone new.

As for the Ford sign, I had a few of them back when I uh, drove a Ford (said with tongue in cheek). However, I gave them away.
 
OP
Z

zmotorsports

ALLIANCE MEMBER
Joined
Oct 20, 2009
Messages
21,437
Location
Northern Utah
Hope everyone had a great weekend. We had amazing weather here for a few days after a very wet week of heavy to moderate rain.

Saturday I grabbed my morning coffee and headed to the shop to see if I could be productive, even with the clutter.

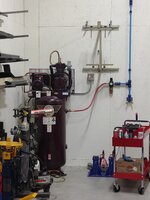
First order of business was to service the air compressor. Drain and fill of pump oil.
comp1.jpg

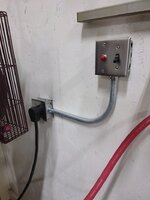
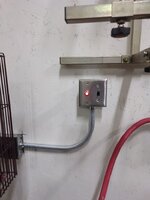
I don't think I showed this but a while ago I added a switched motor starter with pilot light for my air compressor. I have the motor starter control the plug. I thought I had thought out every conceivable angle when I built this shop but I missed one detail. Had I been thinking better upon building the shop I may have done things a bit difference with the air compressor outlet but this ended up working very well. I am already in the habit of shutting off the ball valve each evening before closing up the shop, so it's not a big deal to hit the switch while I'm right there.
comp2.jpg

comp3.jpg

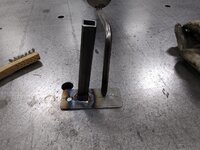
Next item on the list before a deep cleaning of the shop was to build a small hanger to hang my EMT benders on in the RV/storage bay. I don't use these benders much these days but I have used them a bit on the garage and I hated having them just standing in the corner. I grabbed a couple small drops.
emt1.jpg

And fabricated a simple hanger.
emt2.jpg

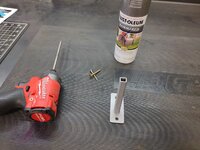
Bead blasted it.
emt3.jpg

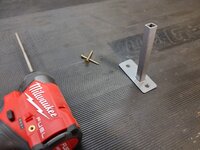
And hit it with the hammered gray paint that I've painted much of the small bracketry in the shop with.
emt4.jpg

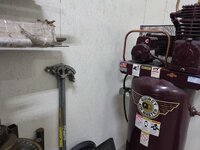
Mounted it on the wall in the storage bay near the air compressor.
emt5.jpg


Thanks for looking.
 
OP
Z

zmotorsports

ALLIANCE MEMBER
Joined
Oct 20, 2009
Messages
21,437
Location
Northern Utah
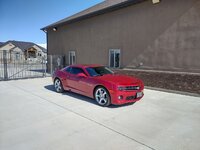
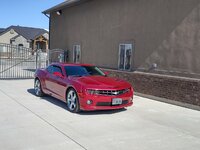
The wife wanted to go for a drive and I wasn't willing to dig into the next job yet so I backed the car out of the shop on such a nice sunny day. This is the first time the Camaro has seen the light of day for 4-months. Removed the cover, gave her a wipe down with the California Duster and some Meguiar's Final Inspection and backed it out near the gate so I could blow the shop out.
car1.jpg

car2.jpg

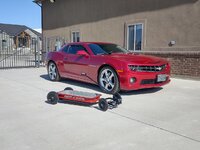
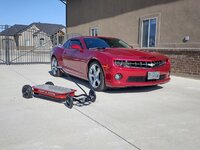
Then I had to grab my grandson's ride and take a couple of pictures our hot rods together.
car3.jpg

car4.jpg

After giving the benches a wipe down, the floor a good sweeping I blew opened up the shop doors and blew the shop out. It was nice having the shop doors open being mid-50's in the early afternoon.
feb1.jpg

feb2.jpg


Thanks for looking.
 
OP
Z

zmotorsports

ALLIANCE MEMBER
Joined
Oct 20, 2009
Messages
21,437
Location
Northern Utah
Nice work on the conduit bender hanger! I need to do the same thing.


Thanks Graham. Like many of these small projects, I should do them much sooner rather than later, as I only seem to find myself addressing them after years of putting up with the alternative. It would be so nice to have done it sooner and just be able to walk to these items and grab them. I'm sure that would be much more of a soothing thought when needed.
 
OP
Z

zmotorsports

ALLIANCE MEMBER
Joined
Oct 20, 2009
Messages
21,437
Location
Northern Utah
One of the best feelings is when you can open up the shop doors on a freak warm winter day and blow out all the filth! I am overdue for this, as well as a good floor mopping. I just have not had the opportunity for a while.

Agreed. Even aside from blowing the shop out, for the majority of the year I am able to work with the shop doors open which is much more preferred to having to close them due to ambient temps. Generally speaking, I am able to open them up at least on weekends and for a bit in the afternoons starting mid to late March (most years) and can keep that up until usually late November. I love hearing the birds outside in the backyard, the neighbors mowing their lawns and even the neighbor kids playing, usually. Great sounds much of the time.
 

Bob Heine

ALLIANCE MEMBER
Joined
Oct 24, 2009
Messages
10,707
Location
Boca Raton, Florida
Then I had to grab my grandson's ride and take a couple of pictures our hot rods together.
car3.jpg
Mike, your grandson is too young right now but at some point you could get a static cling vinyl Radio Flyer signature for the Camaro's rocker panels. No adhesive, just static cling.
 
OP
Z

zmotorsports

ALLIANCE MEMBER
Joined
Oct 20, 2009
Messages
21,437
Location
Northern Utah
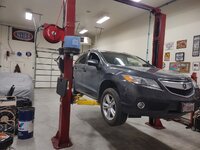
Last night my son came by to do some routine service on the latest addition to his fleet.

They sold our DIL's 2018 Subaru Crosstrek a few months ago and purchased a very nice and clean 2015 Acura RDX with relatively low miles that appears to be in excellent condition.

I supervised while my son commenced the work.
rdx1.jpg

Here we are flushing the brake system with fresh brake fluid. It actually didn't look terrible, but it's nice to have a known baseline going forward.
rdx2.jpg


Also, besides giving the suspension components and putting eyes on brakes, steering, exhaust, wiring, etc. to make sure everything looked to be in good condition, we included was an engine oil and filter change, tire rotation in which he found a nail. I will stop and get that taken care of today while he stops by and picks up some TC oil and rear diff. fluid. We also drained the transmission and with 80k miles, it didn't look too terrible but a little darker than I like so we will be performing a multiple drain and fill process to get as much as the original fluid out as we can then replace the transmission filter.

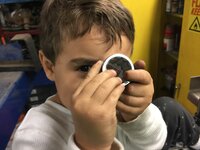
Also, while my son and I were working on his car, my DIL and grandson were out in the shop watching. I have to say, watching that little guy look on with such curiosity is such an awesome feeling. He watched his dad intently and wanted to be right next where he was working so he could take it all in. We put some earmuffs on him while my son zipped the lugnuts off each wheel and he just sat there with the gears turning trying to figure out what was going on. He wouldn't take his eyes off what his dad was doing.

One moment I thought especially nice was when my DIL was holding him and going through the toolbox drawers. He was so intrigued with everything he was seeing and just wanted to touch everything. My DIL asked if it was ok, and I said there was nothing he could hurt and he could play with anything he wanted. Although my son had a shocked look like "when did that happen?" Not sure what that was all about. :headscrat

When I was talking with my grandson he was just so enthralled with everything he was taking in and in that sweet grandpa voice I asked him "are you going to let me show you how to use all these tools one day?" My sweet daughter-in-law didn't even hesitate and started nodding her head enthusiastically. That made my night.

I hope to be able to spend many a nights and weekends having my son and grandson join me in the shop in the coming years.

Oh, I also told my grandson that when the weather gets nice he can run around all over the grass. Again, my son had a shocked look of amazement and when did that happen? :dunno:
 
To avoid these ads, REGISTER NOW!

LXCam

ALLIANCE MEMBER
Joined
Apr 23, 2013
Messages
19,172
Location
AZ
I’m certain I’ve posted this before in your thread Mike. But just standing there supporting the GB and letting him make a mess of a drawer while he’s trying to figure out what’s what….well it doesn’t get much better

IMG_7005.jpeg
IMG_7006.jpeg
 
OP
Z

zmotorsports

ALLIANCE MEMBER
Joined
Oct 20, 2009
Messages
21,437
Location
Northern Utah
I’m certain I’ve posted this before in your thread Mike. But just standing there supporting the GB and letting him make a mess of a drawer while he’s trying to figure out what’s what….well it doesn’t get much better

OK Cam, playing in the drawers is one thing, but things have to go back in the right place. :ROFLMAO: Otherwise it's just chaos and pandemonium, and we can't have that. I may have gotten soft as a new grandpa, but I haven't lost all my faculties, yet. :beer:
 
Last edited:

LXCam

ALLIANCE MEMBER
Joined
Apr 23, 2013
Messages
19,172
Location
AZ
OK Cam, playing the drawers is one thing, but things have to go back in the right place. :ROFLMAO: Otherwise it's just chaos and pandemonium, and we can't have that. I may have gotten soft as a new grandpa, but I haven't lost all my faculties, yet. :beer:
No doubt there. And don’t think you’re the only guy with so much stuff that if it isn’t back exactly where it’s supposed to be, that drawer ain’t closing 😉
 
OP
Z

zmotorsports

ALLIANCE MEMBER
Joined
Oct 20, 2009
Messages
21,437
Location
Northern Utah
No doubt there. And don’t think you’re the only guy with so much stuff that if it isn’t back exactly where it’s supposed to be, that drawer ain’t closing 😉

Funny, my son will sometimes stand there with a tool in hand looking at an open drawer and look over at me and ask "how does this go in there?" He knows it's like playing Tetris, otherwise the drawer isn't closing. :ROFLMAO:
 
OP
Z

zmotorsports

ALLIANCE MEMBER
Joined
Oct 20, 2009
Messages
21,437
Location
Northern Utah
I hadn't been paying attention but I just noticed this morning that my Shop Project 2.0 thread has now officially surpassed my Home and Shop build thread in terms of views.

Kind of cool and I have all of you to thank for taking the time to view them, comment on them and follow along.


Last night my son and I were able to complete the work on his wife's 2015 Acura RDX. He installed the tire that was repaired yesterday due to a nail. We also drained the rear differential and refilled and the transfer case which in Acura's terms calls the Transfer Unit. Either way in an AWD drive, it still transfers the power to the rear of the vehicle.

Lastly, as we drained the transmission fluid the night before it looked just a bit more brown and had a "not so fresh" smell compared to what I like to see. Nothing alarming, but I felt like it would be beneficial to do a back to back to back fluid dump and fill routine before we replace the external transmission filter. Each transmission drain we get 4 qts. out and replace with 4 qts. of new ATF-DW1 Honda/Acura ATF.

We drove the car around our short test loop (4-miles), then racked it again, drained and filled the transmission, then drove the long test loop (8-miles) and racked the car one last time to drain and refill the transmission. At the last time we also pulled the battery, battery tray and inner fender access panel to replace the external transmission filter with an OEM filter.

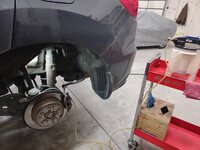
Car racked for the last transmission drain/fill and filter replacement.
rdx3.jpg

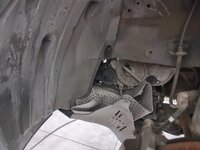
You can see the external transmission filter mounted just below the transmission solenoids. This is after battery and battery tray have been removed.
rdx4.jpg

We stuff an absorbent pad under the filter to catch any oil and keep it off the chassis and components.
rdx5.jpg

New filter installed. Not much fluid spilled out and what did was caught by the absorbent pad.
rdx6.jpg


I also learned something new about the Acura's yesterday that I didn't know before. The Acura's require a radio code to be inserted any time the battery is disconnected. On my wife's 2013 TL, there was a separate paper in the owner's manual that had this code on it and each time I disconnect the battery, I need to reinsert this code into the radio/NAV system upon powering up the first time. I believe this was for theft deterent.

My son and I spent way too much time the other night looking for this code in his car as I didn't feel comfortable removing the battery until we had that code in hand. After not being able to locate it in any of his paperwork I called the local Acura dealer yesterday that I have used to purchase parts for my wife's and got ahold of a parts guy who was very helpful. I had the VIN # and asked if there was any way he could look up this radio code for me. After asking me the year and I informed him it was a 2015 RDX, he mentioned that Acura quit using radio codes after the 2014 model years. The reasoning was that the dealers were complaining that they were spending way too much time dealing with radio codes for customers and it was non-value added labor as well as non-profitable. The manufacturer at least listened, and in 2015 model years and newer this code is no longer required.

To resync the radio/NAV system to the car after a battery disconnect you simply hold the radio power button down for 3-seconds on initial power up and it automatically resyncs to the car.

Just thought I'd share that in case anyone was interested, and maybe others already knew that but it was the first time I had encountered it.

Thanks for looking.
 
OP
Z

zmotorsports

ALLIANCE MEMBER
Joined
Oct 20, 2009
Messages
21,437
Location
Northern Utah
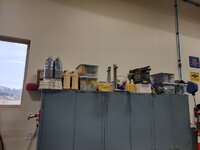
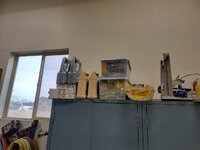
I have been frustrated with how I have let the area above my cabinets get cluttered over the past few years so yesterday I stopped by my local big box store and picked up a few plastic storage totes for a few items.


bins1.jpg

I combined my paint cutting & buffing supplies into two totes. Shifted my motorcyclce wheel trueing stand/balancer a bit and made room for the two gallons of Meguiar's Final Inspection (34) quick detailer next to the totes.
bins2.jpg

I then removed the convoluted wire casing, nylon split loom and wiring heat protection from the one cupboard and combined them into a few totes. I still need to pick up one more tote as the nylon split loom tote is over-filled and the lid won't close. I think I will pick up one more tote for the 3/4" nylon split loom as that has quickly become my new favorite product/material for protecting wire looms. I still need to figure out somewhere to put the silicone heater hose remnants where they are out of sight yet easily accessible. It's not something I use very often but I don't like the looks of them where they are at.
bins3.jpg

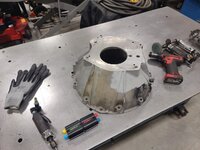
I then had a small welding job come into the shop last night. A gentleman heard I could weld aluminum and brought me a bell housing from an early 80's Jeep J20 pickup project he is working on with his son.
bellhousing1.jpg

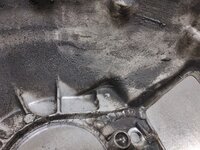
I wish he would have cleaned it a bit before he brought it to me as I hate charging for cleaning time, but I won't work on something covered in grease either. Especially a welding project.
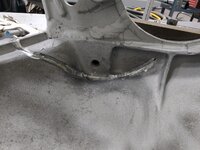
bellhousing2.jpg

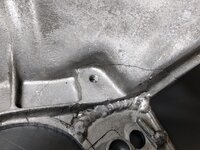
Looks like it was welded once before and the new crack is just above the old starting from the clutch fork opening.
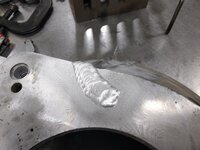
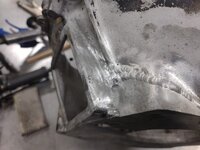
bellhousing3.jpg


It doesn't look to be a very bad job. Just have to give it a bath in the solvent tank first.
 

OutlawDrifter

Well-known member
Joined
Jan 20, 2015
Messages
3,885
Location
KS
Always blows my mind when people bring dirty stuff in for work. Hell, I even wash my vehicles when I take them to my guy (generally for alignment or tires, but the only dude that touches my stuff other than me).

That '55 Chevy I worked on was a trash heap inside. Left my shop much cleaner than it arrived for sure.
 
OP
Z

zmotorsports

ALLIANCE MEMBER
Joined
Oct 20, 2009
Messages
21,437
Location
Northern Utah
Yeah, I don't get that either Marc. When I agreed to do it he said he and his son were installing it when they noticed the crack. I didn't think anything of it at the time but when I actually laid eyes on it my first thought was "holy ****, you were installing that grimey thing into a project truck?"

Oh well, I'm charging him for cleaning time. Won't be much, probably 10 minutes or so but I'm adding it to the total time of the repair.
 

ntsqd

Well-known member
Joined
Jan 22, 2005
Messages
986
Location
Lower left coast
I've done more than my share of welding on aluminum castings, mostly Sprint Car cylinder heads. I now insist on them being hot tanked before they come to me. Cleaning all of the junk, grime and in the case of cylinder heads, coolant out of a crack like that won't happen in a solvent tank. Solvent cleaned isn't good enough. Hot tanking isn't always either, but it's about as good as it's going to get.
Unless you're planning on V-ing it out to the point where you borderline need a backing plate?
 
OP
Z

zmotorsports

ALLIANCE MEMBER
Joined
Oct 20, 2009
Messages
21,437
Location
Northern Utah
I've done more than my share of welding on aluminum castings, mostly Sprint Car cylinder heads. I now insist on them being hot tanked before they come to me. Cleaning all of the junk, grime and in the case of cylinder heads, coolant out of a crack like that won't happen in a solvent tank. Solvent cleaned isn't good enough. Hot tanking isn't always either, but it's about as good as it's going to get.
Unless you're planning on V-ing it out to the point where you borderline need a backing plate?

Although a hot tank would be nice, I've never gone to that extent on any cast aluminum repairs that I've done in the past. I've done a lot of 2-stoke engine cases over the years and made do with cleaning as thoroughly as I can with what I have.
 

LXCam

ALLIANCE MEMBER
Joined
Apr 23, 2013
Messages
19,172
Location
AZ
Always blows my mind when people bring dirty stuff in for work. Hell, I even wash my vehicles when I take them to my guy (generally for alignment or tires, but the only dude that touches my stuff other than me).

That '55 Chevy I worked on was a trash heap inside. Left my shop much cleaner than it arrived for sure.
I’m the same way. My wife on the other hand just can’t grasp the reasoning behind it when she takes her rides in for whatever.

She also never understood why everything was spit shined (boats, dirt bikes, etc) before they went on a road trip.

That one’s a little tuff’r to defend 😁
 

ntsqd

Well-known member
Joined
Jan 22, 2005
Messages
986
Location
Lower left coast
I didn't do the hot tanking myself, I had the customer get it done before I'd work on their part(s).

I found that coolant was the worst for permeating the metal. Even after a hot tanking and thorough rinsing when I started to put the back-ground heat into a cylinder head I'd start smelling hot coolant.

If that crack hasn't been flexing much then it may be fairly clean down inside it.
 
OP
Z

zmotorsports

ALLIANCE MEMBER
Joined
Oct 20, 2009
Messages
21,437
Location
Northern Utah
I’m the same way. My wife on the other hand just can’t grasp the reasoning behind it when she takes her rides in for whatever.

She also never understood why everything was spit shined (boats, dirt bikes, etc) before they went on a road trip.

That one’s a little tuff’r to defend 😁

When you mention about the road trips Cam, I remember when I had to store our coach outside at our last place, I would wash it when we returned from a trip, then wash it again the night before we left on a trip. Sometimes that was after dark with a flashlight.

The street rod and/or sand toys would get cleaned as they came out of the trailer, one by one. Into the shop for any needed repairs and/or maintenance then a couple days before leaving for a trip everything would get a wipe down with Meguiar's Final Inspection as it was loaded into the trailer and strapped down, again, one by one.

Holy ****, that wore me out just thinking about it and typing it. :rolleyes: I wonder how many hours I have spent just cleaning **** before and after trips. :unsure: But hey, it usually looked good running down the highway getting to wherever we were going. :3gears: That is until that one rain drop hit the windshield before we go to our destination. 🤬 I don't know why but there were times that damn near ruined my trip. :wtf: Oh, if I could have those times back and be a better person, husband and father. I can't even imagine the hell I put my family through just trying to go on a "fun" family trip because of my OCD. :(
 

ntsqd

Well-known member
Joined
Jan 22, 2005
Messages
986
Location
Lower left coast
Last Sprint Car cyl head that I welded back together was in about 2010. The washer used then was a caustic hot high pressure sprayer rather than an actual immersion tank. Sort of a dish-washer on steroids. It worked well enough, but it didn't ever get all of the coolant out of the metal.
 
OP
Z

zmotorsports

ALLIANCE MEMBER
Joined
Oct 20, 2009
Messages
21,437
Location
Northern Utah
Thought I'd post up some rather lengthy posts pertaining to the Jeep J20 bellhousing repair that I did over the weekend and how I usually go about such a repair. Maybe this will help those that don't have the luxury of a hot tank setup.


Turned out to be a pretty easy welding job, but quickly changed into a more in-depth repair after the welding was completed.

Starting with a dip in the solvent tank.
bh1.jpg

Once the grease and grime were removed it was evident that this bellhousing had been repaired at least twice before, or once but in two different locations. After I sent some pictures to the owner and a phone call requesting permission to proceed with no guarantee (but high confidence), I was given the go ahead to perform the repair.
bh2.jpg

One of the previous welds and the current crack.
bh3.jpg

Tools at the ready and glad I decided to use my die and penetrant to determine the end of the crack as it was well up into the transmission mating surface and about an inch further than originally thought. Also put the bell housing in the media blasting cabinet to clean the area immediately around where the repair will be performed.
bh4.jpg

Stop drilled a hole at the end of the crack.
bh5.jpg

Inside was V'd out using a rotary bit coated with tube wax.
bh6.jpg

Then a thorough cleaning with acetone and wire brush. If you look closely, you can also see the slight discoloration from the acetone noting some heat would be required to bake the area clean.
bh7.jpg

I've been using 4943 TIG rod for the past couple of years now and have really come to like this rod. Stronger than standard 4043 yet with a bit more silicone so it wets out nicely and flows well, actually a bit better than 5356 on cast.
bh8.jpg

With the welder setup and at the ready I hit the area with a small torch. This not only preheats but also bakes out some of the last bits of residue from the oil/grease and solvent. Cast aluminum is dirty enough by nature but this at least aids in removing as much as the exterior contaminants as possible.
bh9.jpg

I shoot for around 250-350 degree to cook as much **** out as possible and preheat the parts, mainly in the thicker areas.
bh10.jpg


Stay tuned for more.
 
Last edited:
OP
Z

zmotorsports

ALLIANCE MEMBER
Joined
Oct 20, 2009
Messages
21,437
Location
Northern Utah
Continuing on.


Here is the commencement of the weld. You can see the small pop marks from the impurities from the casting coming out while the puddle is molten. The trick with welding cast aluminum is not to just light up, and get to dipping rod. You won't get a pretty weld with most cast aluminum. What you are actually trying to do is heat the aluminum with the arc and get the dirt and **** from the casting to float to the top of the molten puddle. Then you kind of push the puddle forward while trying to keep that **** floating on the surface and just push it forward. Almost think of it as brazing rather than trying to get all of the parent material molten. Then wire wheel or brush the black soot which are the contaminants, and rinse and repeat.
bh11.jpg

Here I actually bathed the arc over the crack without adding filler and without actually getting a molten puddle to form. I am just trying to use the cleaning action of the AC arc to draw out whatever I can from the casting. Then wire brush it away and then go back in with the arc and begin welding.
bh12.jpg

You can see here that the majority of the weld bead is porosity free and the toes have actually wet in fairly well. This is the result of getting the **** from the casting to float and then mechanically removing it with a stainless steel brush or wheel before proceeding. There are still a couple of small pop marks but much less than had I just started the arc and tried to pound filler rod into the groove.
bh13.jpg

This shot better reveals the black impurities that have been forced out ahead of the puddle and can then be brushed away. I also used a relatively low balance to use the cleaning action of the AC wave.
bh14.jpg

Same weld bead after a quick hit with the wire brush.
bh15.jpg

With the transmission mounting face area welded, I can focus my attention on the area back towards the clutch fork opening, but more cleaning will be necessary before proceeding.
bh16.jpg

Good place to stop for the night.
bh17.jpg

Because I had visitors. My grandson likes all things that make noises, especially motors. He loves it when his mother sits outside with him while my son blows the snow off the driveway. He saw the riding mower and couldn't take his eyes off of it so my son sat on it with him and he was living his best life. The little stink watches his daddy and has to do exactly what he does. My son grabbed the levers and pushed/pulled them and that was all it took for my grandson to have to give them a try.
bh18.jpg


Stay tuned for more.
 
Last edited:
OP
Z

zmotorsports

ALLIANCE MEMBER
Joined
Oct 20, 2009
Messages
21,437
Location
Northern Utah
This brings me to Saturday morning.

Out to the shop with coffee in hand to continue where Ieft off the night before.

For starters, on Saturday mornings when powering on the air compressor and opening the ball valve, I drain the tank into a gallon jug I keep next to it on the floor.
bh21.jpg

I then heated up the next area to be welded. This area was quite thick being a mounting point for the transmission, so a bit more heat was required.
bh22.jpg

But this area welded out very nicely. You can see the cleaning zone along the weld bead and how well the toes wet in. The small amount of impurities were pushed out at the end as they had been floating along on the surface of the molten puddle. Also note the very small amount of pop marks from impurities forcing their way out along this area. More than likely because they had been pulled out on the inside of the crack so when I V'd this side out I actually hit good aluminum that was deposited from the backside.
bh23.jpg

I built this area up a bit knowing I was going to have to file it down. At this point I actually decided that rather than filing the bead down that I would just clamp it to the milling machine table and know it down flush with an end mill.
bh24.jpg

I did remove some of the bead profile along the clutch fork opening as this area usually has a boot or bellows around the perimeter and I wanted it to be able to close up the opening.
bh25.jpg

Then the radius filed slightly.
bh26.jpg

One last shot of the exterior of the bell housing up to the transmission mating surface.
bh27.jpg

Clamped to the mill table and ready to machine down the weld bead to flush.
bh28.jpg

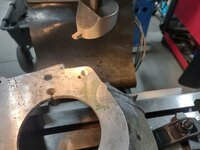
First pass seemed to take it down evenly. Rather than use an end mill I opted to grind a tool steel blank to be used in my large flycutter head as this should produce a slightly nicer finish.
bh29.jpg

It was after this pass that I knew something was amiss. I noticed that the bead profile was taken down to flush on one side of the bead but still stood proud on the other. This had me concerned.
bh30.jpg


Stay tuned for more.
 
Last edited:
To avoid these ads, REGISTER NOW!
Top Bottom