To avoid these ads, REGISTER NOW!

What did you do "IN" your garage today?

kaymccampbell

Well-known member
Joined
Feb 27, 2015
Messages
29,627
Location
Upstate New York
Now that everything is in its proper place, you'll never find anything you're looking for...........lol.
Not at all. You can't imagine the mental relief cleaning up and organizing has given me. Now it's all where I think it's supposed to be.

One more day of sorting through things, and I'm done. The shop will no longer be at saturation.
 
To avoid these ads, REGISTER NOW!

rayra

Well-known member
Joined
Dec 1, 2014
Messages
4,724
Location
Escaped from Los Angeles
I am going to make a beefy 48v pack out of one 140v bank to power a 3000w electric motor package with controller, gauges, and throttle setup I got super cheap, still not sure if its going on a 60's Kawasaki Coyote mini bike, 60's Honda S90, or some sort of Honda Odyssey type contraption made out of an old four wheeler. I might use the rest of the cells for smaller packs for the various electric scooters I have, and/or maybe a couple car jump packs. Not sure.

Friend of mine has a salvage yard and is scared of batteries so I can get hybrid packs for free from his wrecked cars. He has a couple of wrecked Prius waiting for me to get the packs out of now. Thinking making a big power wall type setup for my house at some point.

Excellent! That is my kind of screwing around! I'd love to build a big power bank / backup UPS at home, for lots of things.

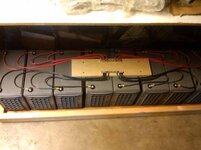
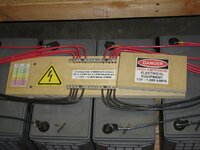
15!!yrs ago I picked up a free batch of Deka UPS batteries from a contact at George AFB. Guy was their Armed Forces Network Disaster Prep guy, they had two massive banks of these batteries as a fail-over system and every 2yrs each bank was got rid of and replaced. They were paying companies to take away dispose these batteries. Well this guy got permission to give them away, then advertised their availability on a Prepper subforum and they got gobbled up in a hurry. I got 8, in excellent condition. I wired them up and got them on a tender but never brouht my bigger plans to fruition and ultimately they went to a HAM club for a mountain top (re)transmitter.

I'd LOVE the try it again, as part of my broader plans for electrical upgrades to this suburban house. But I've got a lot to do here before I can indulge in that.
 

Attachments

  • battery wiring production 4 090920.jpg
    battery wiring production 4 090920.jpg
    27.9 KB · Views: 59
  • batterybuslabeling.jpg
    batterybuslabeling.jpg
    124 KB · Views: 37
  • batterybank100113.jpg
    batterybank100113.jpg
    23.3 KB · Views: 45

Jswain

Well-known member
Joined
Apr 26, 2013
Messages
2,466
Location
Calgary, AB
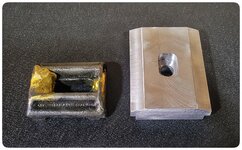
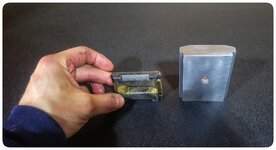
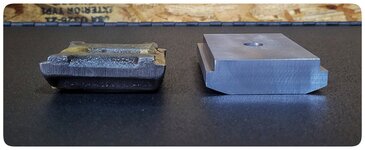
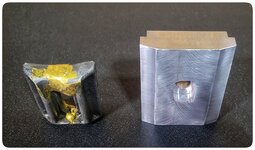
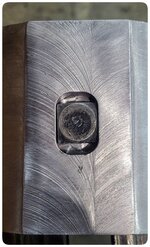
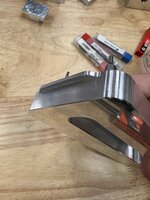
Made a new tailstock clamp for the South bend. OG one was previously brazed together and was slipping pretty good when I was drilling the holes for my levelling feet so cut some more plate out and spent some time twiddling this out of it.

About 1" longer so should provide better clamping force, glides along nicely under the tailstock
 

Attachments

  • 1000006103-01.jpeg
    1000006103-01.jpeg
    1.2 MB · Views: 43
  • 1000006104-01.jpeg
    1000006104-01.jpeg
    567.2 KB · Views: 34
  • 1000006105-01.jpeg
    1000006105-01.jpeg
    435.3 KB · Views: 32
  • 1000006106-01.jpeg
    1000006106-01.jpeg
    1.1 MB · Views: 32
  • 1000006107-01.jpeg
    1000006107-01.jpeg
    750.1 KB · Views: 34
  • 1000006109-01.jpeg
    1000006109-01.jpeg
    1.6 MB · Views: 42

rayra

Well-known member
Joined
Dec 1, 2014
Messages
4,724
Location
Escaped from Los Angeles
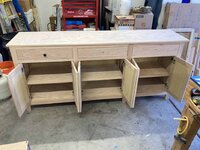
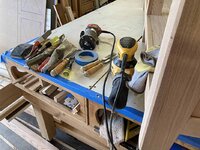
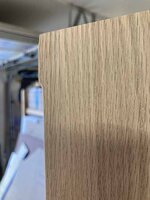
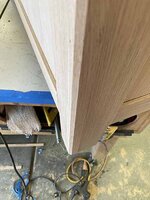
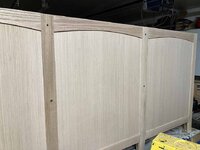
Almost done with the edge beveling and finish sanding on the dining hutch lower cabinet project. I ran a trim router around all the exterior edges and put a very small bevel to break all the sharp edges of the openings and corners. Then went back with a much bigger / deeper bit setting and am putting a more pronounced bevel of the four outer corners of the cabinet and on all the feets. I'm also taking a razor saw / chisels / sanding block to all the interior corners where a spinning router bit can't cut a square corner.
And at the top of the cabinet body, I almost forgot I intend to attach some trim molding undergirding the countertop. I'll fit the molding later today, but won't install it until the piece is done and installed.

Probably take another couple hours to complete the bevel detailing and sanding of the cabinet body, all the rest of the pieces are done and waiting for final blow-off of the entire garage and tack rags, before staining. which I hope to commence tomorrow after lunch.
 

Attachments

  • dining hutch 94 shelves.jpg
    dining hutch 94 shelves.jpg
    85.2 KB · Views: 37
  • dining hutch 95 edge bevels.jpg
    dining hutch 95 edge bevels.jpg
    121.4 KB · Views: 31
  • dining hutch 96 edge bevels.jpg
    dining hutch 96 edge bevels.jpg
    48.5 KB · Views: 28
  • dining hutch 97 edge bevels.jpg
    dining hutch 97 edge bevels.jpg
    46.6 KB · Views: 27
  • dining hutch 98 edge bevels.jpg
    dining hutch 98 edge bevels.jpg
    54.3 KB · Views: 28

WildBill

ALLIANCE MEMBER
Joined
Aug 20, 2021
Messages
2,030
Location
PNW
Excellent! That is my kind of screwing around! I'd love to build a big power bank / backup UPS at home, for lots of things.

15!!yrs ago I picked up a free batch of Deka UPS batteries from a contact at George AFB. Guy was their Armed Forces Network Disaster Prep guy, they had two massive banks of these batteries as a fail-over system and every 2yrs each bank was got rid of and replaced. They were paying companies to take away dispose these batteries. Well this guy got permission to give them away, then advertised their availability on a Prepper subforum and they got gobbled up in a hurry. I got 8, in excellent condition. I wired them up and got them on a tender but never brouht my bigger plans to fruition and ultimately they went to a HAM club for a mountain top (re)transmitter.

I'd LOVE the try it again, as part of my broader plans for electrical upgrades to this suburban house. But I've got a lot to do here before I can indulge in that.
I would be all over those batteries, what a cool find. I am starting to plan a big setup for my house based on Prius packs as I can get lots of those free. I also have a whole 280v electric car conversion kit with everything but batteries designed for a geo metro, but a pretty universal kit. Thinking about making my Porsche 914 electric, but not doing anything permanent to it. The whole ICE drivetrain drops out in about 15 mins with four mounts, quick fuel disconnect, some axle bolts, and one harness plug, could have an electric setup pop in the same way.
 

Magnum440d100

Well-known member
Joined
Dec 2, 2018
Messages
3,581
Location
Indiana
Lots. Just not all in MY garage Lmao

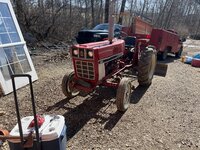
Got the international carb installed. IMG_3350.jpeg


Worked well enough we were able to move it around. Bossman scraped his driveway to fill in low spots and such.
IMG_3349.jpeg

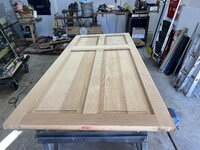
Have an opening we are going to retrofit/rebuild for a customer. Gettin the door sanded and cracks repaired IMG_3351.jpeg


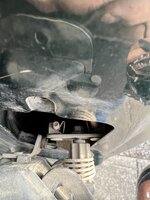
Got late, called it a day. Then in MY shop, looking for my glass cutter, I needed the drivers rear door on my truck to open (I was thinking the cutter/pouch was under the rear seat there). Pulled it apart to just pull the rods, and found a loose bolt. All is well now. Still didn’t find my (oil) glass cutter. Found my Diamond tip though. So there’s THAT. IMG_3353.jpeg
 

Old Man Roger

Well-known member
Joined
Apr 6, 2017
Messages
17,907
Location
Palm Coast Florida
Almost done with the edge beveling and finish sanding on the dining hutch lower cabinet project. I ran a trim router around all the exterior edges and put a very small bevel to break all the sharp edges of the openings and corners. Then went back with a much bigger / deeper bit setting and am putting a more pronounced bevel of the four outer corners of the cabinet and on all the feets. I'm also taking a razor saw / chisels / sanding block to all the interior corners where a spinning router bit can't cut a square corner.
And at the top of the cabinet body, I almost forgot I intend to attach some trim molding undergirding the countertop. I'll fit the molding later today, but won't install it until the piece is done and installed.

Probably take another couple hours to complete the bevel detailing and sanding of the cabinet body, all the rest of the pieces are done and waiting for final blow-off of the entire garage and tack rags, before staining. which I hope to commence tomorrow after lunch.
I’ve been watching your progress, and even if I had your skill, you’ve convinced me I’m way too lazy to ever be a cabinet maker..lol
 

Bob Heine

ALLIANCE MEMBER
Joined
Oct 24, 2009
Messages
10,709
Location
Boca Raton, Florida
The 50 year old version of myself would have muscled it up there.
@GrayFlattop, I know exactly what you are going through. The 36-year old wooden attic ladder in the garage was making louder creaking noises than my body was. The guys who took it down to fit a new air handler in the attic put it back in with way fewer [drywall] screws than it had originally and decided shims were a waste of time. Bought a new aluminum ladder just like the one I installed in 2001 (when I was 56) in another section of the garage. I was still game to put this one up but all the busybodies around me said no. This past Sunday our son (60) and his oldest son (32) came over and did the install. They were finished in 90 minutes.

My wife congratulated them and suggested they take down the last half of the tree I've been taking down over the winter. They used my Wen 16" electric and Milwaukee M12 Hatchet 6" chainsaws to take the tree down and cut it up. Carried the trunk pieces and branches out to the curb. Another 90 minute project and they were on their way to one of their remodeling jobs before noon. I have a Poulan 20" gas chainsaw but didn't even get it out. I'm absolutely certain that would have been a two-day project to get it running.
 

rayra

Well-known member
Joined
Dec 1, 2014
Messages
4,724
Location
Escaped from Los Angeles
I’ve been watching your progress, and even if I had your skill, you’ve convinced me I’m way too lazy to ever be a cabinet maker..lol
So am I! I'm more of a design / problem solver / 'Creative' kind of guy. Once the real drudgery kicks in I'm over it and ready to move on to something else. But there's this giant hunk of unfinished furniture clogging up my garage. 'Shikata ga nai'. So I'm working hard to get it over with. The completion of my projects is usually anticlimactic for me. I'm usually already working on two other things.

It's a bad habit, I cannot recommend. If I could afford to pay someone else to do it - or increasingly, even FIND someone else to do it - I probably would.
I grew up with more Time than Money and by necessity learned how to do a lot of things. Then when I made good Money, I had no Time. Now I'm back to more Time than Money.

/there's an epitaph in there somewhere, something like 'He finally ran out of Time and Money.'


/
All the beveling and sanding is done. Stopped for dinner and heading back out there to finish adding (4) threaded inserts to the back of the cabinet body. (2) centered vertically on each of the middle 'hoops'. They'll be the lower attachment points for the upright struts that will tie the upper and lower cabinets together.
Trying to get the lower cabinet stained and finished so it is drying off in the garage next week while I go to a raft of medical appts. Then we can move it into the house and I can try to whip out the upper cabinet in the middle of March. The other matching buffet is going to have to wait until May.
 

Attachments

  • dining hutch 99 edge bevels.jpg
    dining hutch 99 edge bevels.jpg
    71.2 KB · Views: 49
  • dining hutch 100 thread inserts.jpg
    dining hutch 100 thread inserts.jpg
    81.6 KB · Views: 32
  • dining hutch 101 thread inserts.jpg
    dining hutch 101 thread inserts.jpg
    76.6 KB · Views: 30
  • dining hutch 102 thread inserts.jpg
    dining hutch 102 thread inserts.jpg
    94.6 KB · Views: 27
  • dining hutch 103 thread inserts.jpg
    dining hutch 103 thread inserts.jpg
    74.2 KB · Views: 26

rharman

Well-known member
Joined
Apr 22, 2012
Messages
8,920
Location
SoCal
Saturday's project...

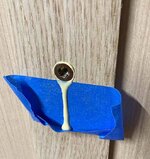
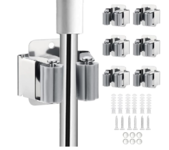
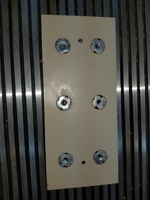
My wife wanted 3 of these broom clips installed in the rebuilt closet. The space is pretty tight and it would be really tough to get 3 of them lined up square and properly spaced.

1709008719568.png
Took a 7"x3" piece of matching almond melamine in 1/4" thickness.
Drilled 8 holes and recessed them. 2 recesses on the front for mounting screws. The mounting screws will be covered by the clips

1709008700200.png
The 6 recesses on the back are for 8-32 tee nuts to hold the clips.

20240224_120921_resized.jpg
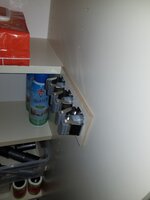
8-32 tee nuts glued in to hold the clips. I had to grind a bit of length from the shank a bit so they would be just below the front surface.

1709008686745.png
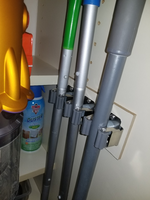
Mounted in place with 3/4" truss head screws to mount and some 1/4" stainless steel machine screws for the clips.
Easy to get the whole assembly level.

20240224_125318_resized.jpg
In use...

1709008664355.png
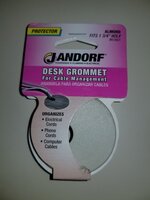
Also got the other 1-3/4" grommet I needed for the power cord.

1709008821155.jpeg
This blew me away. Look closely - Made in USA. Quite a surprise.

20240222_113357_resized.jpg
 

bugnut

ALLIANCE MEMBER
Joined
Jul 14, 2012
Messages
4,010
Location
Central Ohio
Shuffled storage totes, put shoe boxes into a storage tote and rearranged.
Spent a couple hours removing a single broke bolt from a VW head on the motor for the baja project. Tried welding-didn't work, drilled and tried EZ out no luck, then just drilled and tapped back to the correct size. I guess it'll work for holding tin in place.
 

DGersic

Well-known member
Joined
Mar 12, 2017
Messages
6,386
Location
DeKalb, IL
Took advantage of the weather (75* and sunny, in northern Illinois in February) to clean off the tools and cart that have been piling up in my living room while working on the remodel project. Restacked everything on the cart, and wheeled it in to the garage.

Final sanding was last night. Next up is prep and primer, then paint. Working on that today. Wanted to be done by the end of February, but won’t quite make that due to o problems that needed to be dealt with.
 

Snip

Well-known member
Joined
Jan 9, 2011
Messages
446
Location
Crossville, Tennessee
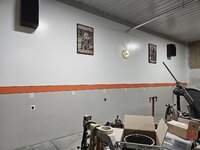
Yesterday I finished up the north wall in the shop. Painted the gray border at the top, touched up the orange where the black bled under the tape. Hung the clock, framed posters and carried those heavy *** MCS speakers from the 80's up the ladder. Started the clean up and put tools and supplies away. Only thing left is to mop up the last of the drywall dust and put on some baseboard, thinking some of that gray vinyl 4 or 6" self adhesive stuff ? By no means is the finishing or painting professional but It's only a one man crew, me, but its done. I'm not sure what the going rate per sheet ( I'm betting 14' tall increases the cost over a 8' wall) here is for hanging and finishing drywall is but I saved that. Only about 145' of wall left. Plenty of time/wall to hone my skill set.
The black line looks wavy and grainy in the picture but it did come out pretty true, straight and with sharp edges.
20240226_182401.jpg
 
Last edited:

GrayFlattop

Well-known member
Joined
Jan 18, 2018
Messages
1,051
Location
Chicago
Not at all. You can't imagine the mental relief cleaning up and organizing has given me. Now it's all where I think it's supposed to be.

One more day of sorting through things, and I'm done. The shop will no longer be at saturation.
I get it. On Sunday, I spent way too much time looking for some washers that I KNEW I had, but things are still in disarray in my efforts to bring order. The painful part is because there is just too much stuff in too small of a space. Started making a pile to recycle and pitch, and while that made me feel better, I still could not find the washers in the garage, so I went to the basement shop and found a substitute right away.

I applaud your efforts and your results for restoring order to your shop.
 

GrayFlattop

Well-known member
Joined
Jan 18, 2018
Messages
1,051
Location
Chicago
And we were ALL wrong! :ROFLMAO:

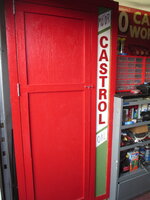
Started working on the Castrol Motor Oil sign today. Not finished yet as I still have to letter the words 'motor' and 'oil' in black paint and then outline the green with a black pinstripe. Shown right now is just a basic black marker outline to see how I want the letters to look.

I originally painted the large wood CASTROL letters green but after some color sketches on paper, I went with red CASTROL letters and a green border with a white panel and black motor/oil letters which are all the colors of Castrol Oil. I'll get back to it soon sometime later this week. Meanwhile I want to paint the old wood cabinet I got for free for the office. 1708987239414.jpeg1708987206338.jpeg

Too funny - for the life of me, I couldn't quite figure it out. I kept coming up with "scrotal", LOL. I'm certainly not one to judge, but I thought that you were putting forth a lot of effort to come up with a sign that said "scrotal". At least you would have used "proper" terminology as opposed to slang...
 

niget2002

Well-known member
Joined
Oct 2, 2012
Messages
11,265
Location
Josephine, TX
Ran out before work. Tapped off the hull of the kayak and set the deck in place on the forms. Everything is all ready for glassing the deck this weekend. I just have to find time to do it. Son's soccer screwed up Saturday by having his first game scheduled for 1:15pm. And it's in the next town over. So that knocks out about 3 hours of the middle of the day.

I'll probably try to glass the deck Sunday when we get home from church. We usually get home around 1pm. If I can start glassing before 2pm, I should be able to get 3 coats of epoxy on by 9pm. 1 to wet out the weave and two fill coats... assuming 3 hours to 'tacky' between each coat.
 
To avoid these ads, REGISTER NOW!

Motorman55

Well-known member
Joined
Apr 10, 2016
Messages
2,652
Location
South Jersey
Yesterday I finished up the north wall in the shop. Painted the gray border at the top, touched up the orange where the black bled under the tape. Hung the clock, framed posters and carried those heavy *** MCS speakers from the 80's up the ladder. Started the clean up and put tools and supplies away. Only thing left is to mop up the last of the drywall dust and put on some baseboard, thinking some of that gray vinyl 4 or 6" self adhesive stuff ? By no means is the finishing or painting professional but It's only a one man crew, me, but its done. I'm not sure what the going rate per sheet ( I'm betting 14' tall increases the cost over a 8' wall) here is for hanging and finishing drywall is but I saved that. Only about 145" of wall left. Plenty of time/wall to hone my skill set.
The black line looks wavy and grainy in the picture but it did come out pretty true, straight and with sharp edges.
20240226_182401.jpg
Looks great. Nice Harley colors.
 

DGersic

Well-known member
Joined
Mar 12, 2017
Messages
6,386
Location
DeKalb, IL
Only thing left is to mop up the last of the drywall dust and put on some baseboard, thinking some of that gray vinyl 4 or 6" self adhesive stuff ?

I used a roll of black vinyl baseboard in my garage. Love it. Not self adhesive, had to be glued with construction adhesive, but that wasn’t hard. Used a wallpaper seam roller to make sure it was stuck to the wall.
 

Snip's

Well-known member
Joined
Apr 29, 2017
Messages
1,867
Location
Ohio
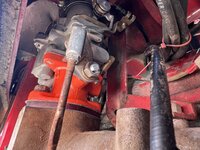
Worked on my wife's 2017 Ford Explorer today... 76K miles
Last year I attempted to change the rear differential fluid but just couldn't manage to get the fill plug out... Doesn't have a drain plug...
It does have a vent on top of the casting, but decided not to try and fill it through that fitting...
The drain plug gave up and I was able to remove the plug using the anvil on a 3/8" ratchet...
I used my HF vacuum sucker that runs off my compressor... Worked great...
The drain plug has a magnet but the end that should have been wet was dry...
Manual says it takes 1 liter to fill and about 1/2 liter came out... Probably 7/8 liter of fluid went back in...
Strange thing... No sign of leakage anywhere around the differential... Is FORD skimping on the factory fill??? IDK

I fished the suction hose down and around inside the case while the HF Holt fluid Extractor did its thing... This tool made the job easy...
IMG_3564.jpg

After filling until some fluid just started to drip out of the hole, the plug got a coating of Permatex high temp thread sealant...
FINI...
IMG_3565.jpg
I'm curious about the low fluid level...
 

red61cj5

Well-known member
Joined
Mar 31, 2016
Messages
3,756
Location
West Virginia
Wire wheeled, then etch primed my old (1996 at Home Depot for 99$) diamond plate truck toolbox. Decided I want a toolbox on my new to me truck. Was just going to paint it black, but am now fighting the urge to go body color. Which would be inferno orange. Too much?
 

rayra

Well-known member
Joined
Dec 1, 2014
Messages
4,724
Location
Escaped from Los Angeles
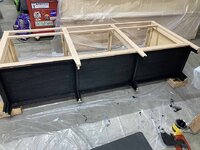
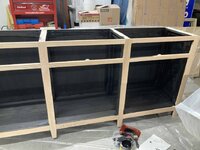
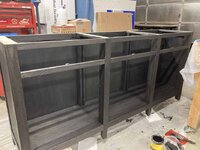
It's FAR too late now, but I'm feeling kinda ambivalent about staining it black. I put a lot of work and cost into making the piece in oak and trying to have a nice woodgrain finish. And I've just obliterated it.

Anyway, black is provisionally 'done'. Minwax semi-transparent 'True Black'. I might make a 2nd application on the exterior surfaces tomorrow morning. Dunno.
The countertop and three interior shelves are still nekkid. Probably getting hit 2x with 'Provincial'.

Probably using a wipe-on satin poly as a topcoat.
 

Attachments

  • dining hutch 105 staining.jpg
    dining hutch 105 staining.jpg
    101.8 KB · Views: 45
  • dining hutch 106 staining.jpg
    dining hutch 106 staining.jpg
    74.4 KB · Views: 37
  • dining hutch 107 staining.jpg
    dining hutch 107 staining.jpg
    74.9 KB · Views: 25
  • dining hutch 108 staining.jpg
    dining hutch 108 staining.jpg
    106.8 KB · Views: 29
  • dining hutch 109 staining.jpg
    dining hutch 109 staining.jpg
    131.7 KB · Views: 70

PWC Repair

Well-known member
Joined
Dec 27, 2012
Messages
3,194
Location
Arkansas
It's FAR too late now, but I'm feeling kinda ambivalent about staining it black. I put a lot of work and cost into making the piece in oak and trying to have a nice woodgrain finish. And I've just obliterated it.

Anyway, black is provisionally 'done'. Minwax semi-transparent 'True Black'. I might make a 2nd application on the exterior surfaces tomorrow morning. Dunno.
The countertop and three interior shelves are still nekkid. Probably getting hit 2x with 'Provincial'.

Probably using a wipe-on satin poly as a topcoat.
I think it looks great. And I'm sure the grain will be a bit more pronounced after poly.
 

Wiz02

Well-known member
Joined
Jul 13, 2007
Messages
2,399
Location
Southeastern PA
It's FAR too late now, but I'm feeling kinda ambivalent about staining it black. I put a lot of work and cost into making the piece in oak and trying to have a nice woodgrain finish. And I've just obliterated it.

Anyway, black is provisionally 'done'. Minwax semi-transparent 'True Black'. I might make a 2nd application on the exterior surfaces tomorrow morning. Dunno.
The countertop and three interior shelves are still nekkid. Probably getting hit 2x with 'Provincial'.

Probably using a wipe-on satin poly as a topcoat.
I have been enjoying watching your build and was a bit disappointed that you chose a stain that hid most of the grain, but I figured that you didn't need any criticism from the peanut gallery.

No point in second guessing yourself, I am sure that the final result will be great and well worth all of your work.
 

PWC Repair

Well-known member
Joined
Dec 27, 2012
Messages
3,194
Location
Arkansas
Is it that rare of a block? Not sure I'd put hat effort into a freeze cracked block.
Not really. It IS a high nickel 4 bolt main that's still std bore size though, and with hardly any core shift to boot! Mostly just thinking I don't mind paying the machine shop if it worked. And if not......then I paid for my schooling of how NOT to weld cast iron lol!
 

Old Man Roger

Well-known member
Joined
Apr 6, 2017
Messages
17,907
Location
Palm Coast Florida
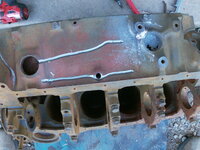
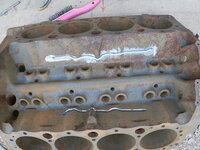
I practiced some cast iron braze-welding on a freeze cracked 350 block.

Are you going to try to run it?

I'm going to send it to the machine shop and get it baked and shot peened first. It all looks ok..........but it might spider into 20 more cracks, who knows?

Is it that rare of a block? Not sure I'd put hat effort into a freeze cracked block.

Not really. It IS a high nickel 4 bolt main that's still std bore size though, and with hardly any core shift to boot! Mostly just thinking I don't mind paying the machine shop if it worked. And if not......then I paid for my schooling of how NOT to weld cast iron lol!
I was going to say that 350 blocks are a dime a dozen, but everyone else kind of beat me to it.

I get the idea of wanting a high nickel content, but that one is already cracked. Doesn’t that kind of defeat the point of having it?

All that being said, I can’t count how many times I’ve spent more time and money repairing something that I could have replaces easier and cheaper..lol
 
To avoid these ads, REGISTER NOW!
Top Bottom