To avoid these ads, REGISTER NOW!

ZMotorsports Shop Projects 2.0

OP
Z

zmotorsports

ALLIANCE MEMBER
Joined
Oct 20, 2009
Messages
21,496
Location
Northern Utah
What are cross fire’s Mike?

Cam, Crossfire's are similar to the old Cat Eyes which go on dual wheel setups. These are devices that keep the tire pressures equalized between inner and outer duals. They also have a valve inside that snaps closed in the event of a blowout or if the tire pressure drops below a certain level to signify one of them is going flat so they don't both lose air pressure.

As I'm sure you know, on a dual tire setup it is imperative that both tires have the EXACT same circumference as they are bolted together at an axle end. If one tire for example, is even 5/16" difference in total tire circumference then the smaller tire in a dual setup will be dragged along. That 5/16" equates to approx. 13' per mile that it is being dragged, or 346 miles in 100k miles. As I'm sure you are also aware, that the inner duals always run the hottest as they are closer to the brake setups as well as have less air passing by for cooling. A mere 5 PSI pressure difference between an inner and outer dual can equate to 5/16" given in the example above.

So you can see that having the tire pressures equal is paramount in providing the tires the best chance for longevity as well as efficiency rolling down the highway.

The Crossfire's provide that benefit of keeping the tire pressures equalized. They are available in various pressures from 80 up to 120 PSI and should be matched to the correct tire pressure required based on the tire manufacturers' weight vs. tire pressure charts. I have ran these on all three of our coaches over the past 32 years of RV'ing. The first set I used Cat Eyes on our 19.5" tires/wheels on our 30' gasser then in 2000 when we purchased our first diesel pusher, a 38' Beaver Contessa, I bought the Balance Masters and Crossfire setups. I let the Crossfires go with the Beaver when we sold it as they required a different pressure than our current coach so I bought new ones to match the weight vs. pressure we required but I took the Balance Masters from the last coach and installed them on our Dynasty. I did have to replace the tag and drive axle Balance Masters over the years but the fronts have been in service for 24 years now between our current and last coach.
 
To avoid these ads, REGISTER NOW!
OP
Z

zmotorsports

ALLIANCE MEMBER
Joined
Oct 20, 2009
Messages
21,496
Location
Northern Utah
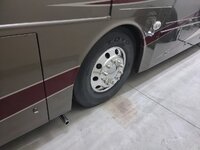
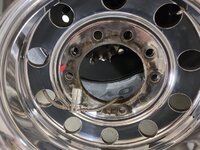
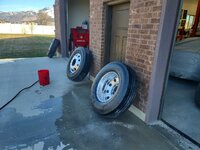
Tires/wheels being washed to get rid of the splatter from the polish and lube used for mounting.

tires46.jpg

Steer tires installed and torqued to spec.
tires45.jpg

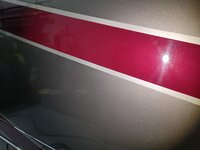
I have also been dreading addressing the water spots on our paint over the past few months. Last year we were in a campground and their sprinklers were going during a windstorm. The result was water spots on our coach's paint. Upon returning home and washed, I could not get them all off, even using a mixture of vinegar and water although that did work well on some of the more stubborn spots.

Here with the sun gun you can see some of the faint water spots which are slightly more visible in the maroon than the pewter, although they are present there as well.
paint1.jpg

Here is after a few passes with some polish. Water spots gone and shine nice and deep.
paint2.jpg

Looks like I'll be giving the entire coach a thorough polish once I get it sitting back on the tires/wheels. Not looking forward to that as there is a lot of real estate to polish. :oops:
paint3.jpg

We've had fairly nice weather here along the Wasatch Front for the past week or so. I pulled our deck furniture out of the basement last week, blew it off, wiped it down and put it on the deck so the wife and I could start enjoying the deck this spring. Saturday afternoon as I was about to close up the shop we sat on the deck and watched a thunderstorm roll into the valley.
storm1.jpg

storm2.jpg


I also mowed my lawn for the first time last week. It felt good to clear my head and mow my lawn for the first time of the season. Now just awaiting it to green up in the center areas, which should be soon as we had it fertilized last week then the rain all weekend really helped.

Thanks for looking.
 

ScepterToad

Well-known member
Joined
Nov 9, 2023
Messages
346
Mike do you run a TPMS in addition to the crossfire? Also, I assume the PSI rating is only to indicate fluctuations outside of that? So, a 100 would show the different flag at 90 and 110? (and therefore the 100 psi is not the limit of the device as the tires potentially would go over 10psi on the plus side on a long trip/in the heat/etc.)

EDIT: Also, great "barring tool" for the balancer! Super cool!
 
OP
Z

zmotorsports

ALLIANCE MEMBER
Joined
Oct 20, 2009
Messages
21,496
Location
Northern Utah
Mike do you run a TPMS in addition to the crossfire? Also, I assume the PSI rating is only to indicate fluctuations outside of that? So, a 100 would show the different flag at 90 and 110? (and therefore the 100 psi is not the limit of the device as the tires potentially would go over 10psi on the plus side on a long trip/in the heat/etc.)

EDIT: Also, great "barring tool" for the balancer! Super cool!

Keith, I do not run a TPMS system. I check my pressures before traveling each day and do a walk around whenever we stop for either lunch or fuel.

Yes, the center ball of the Crossfire flips to red when over-pressure and black when under-pressure.

Thanks.
 
OP
Z

zmotorsports

ALLIANCE MEMBER
Joined
Oct 20, 2009
Messages
21,496
Location
Northern Utah
I honestly didn’t know such magic existed Mike. I’ve had a few dually’s and just kept them in check the ole fashioned way. I knew about crossovers but never ran them being concerned that if one went flat, I’m dead on both.

Once again thanks for the education.

Happy to help Cam. I didn't run them on my dually Ford many, many moons ago but that was before I really put much thought into dual tire setups in any more terms than overall load carrying capabilities. After going through some training seminars from both Bridgestone and Michelin at work back in the late 90's is when I became familiar with them and started using them to address tire circumference by varying pressures.
 
OP
Z

zmotorsports

ALLIANCE MEMBER
Joined
Oct 20, 2009
Messages
21,496
Location
Northern Utah
I didn't get nearly as much accomplished last night as I had hoped. Seems like everything these days takes me twice as long as I think it should in my head. :headscrat Not sure if it's me not being realistic with myself or if I am just that slow. While I feel I've slowed down a bit over the past few years, I don't think I've slowed that much. :unsure:

The weather has been mixed here the past few days so I left work driving home in dark clouds and arrived home with sun shining and a slight breeze, but cold as it only got into the low 40's yesterday. Cranked up the heater in the shop and went to work polishing the center caps for the drive and tag axles.

These have a few scratches but overall still shine up pretty well for 22+ year old stainless steel center caps.
wheelinstall1.jpg

wheelinstall2.jpg

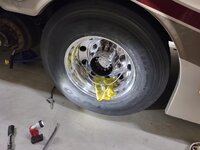
I then went into the RV bay to start installing tires/wheels on the drive axle. First the inner duals then the Balance Masters followed by the Crossfire connection for the inner dual. I have found it easier to install the Crossfire before the outer dual placed on the studs and hub. I get the outer dual close and ready to raise up onto the studs and hub with the hose for the Crossfire aligned with the inner duals valve stem and then the outer tires valve stem 180-degrees across from it. This allows me to thread the hose on as well as get a 1/2" wrench in between the Balance Master and valve stem to tighten the fitting.
wheelinstall3.jpg

I loop the Crossfire hose for the outer tire through the center to keep the hose and valve assembly from scratching or dinging the freshly polished outer wheel.
wheelinstall4.jpg

Then as the outer tire/wheel is going into position, I place a towel in the wheel to protect the finish. Here the outer tire/wheels is installed, the center cap is installed, the Crossfire is connected and ready to secure to the center cap and all lug nuts are torqued to 450 ft/lbs. All that is remaining is to clean the stainless steel lug nut caps, secure the Crossfire to the center cap and install the outer hat on the center cap. Then I can move on to the tag axle which goes much faster.
wheelinstall5.jpg

As I was working in the RV bay I heard several claps of thunder then what I assumed was hail pummeling the shop doors. I looked outside and it was dark as night with hail coming in directly from the north. The grass was white and hail was piling up at the corners of the door openings. I closed the man door and went about my work in the RV bay. About a half hour later the wife let me know she was home so I locked up the shop and as I was leaving the shop heading for the house the sun was shining with blue sky and almost all of the hail was melted.

Holy ****, like I said before, if you don't like the weather in northern Utah, just wait a few minutes. :ROFLMAO:
utah1.jpg

utah2.jpg

utah3.jpg


Thanks for looking.
 
OP
Z

zmotorsports

ALLIANCE MEMBER
Joined
Oct 20, 2009
Messages
21,496
Location
Northern Utah
Last night had a repeat in terms of weather of the night before. Dark skies followed by winds and hail that lasted about a half hour, then blue skies and calm. Ahh, spring in Utah. :ROFLMAO:

ut1.jpg


ut2.jpg

ut3.jpg

ut4.jpg


ut6.jpg

ut7.jpg

ut8.jpg


Weather predicts much of the same all through Monday of next week with today being the best of the next 6.
 
OP
Z

zmotorsports

ALLIANCE MEMBER
Joined
Oct 20, 2009
Messages
21,496
Location
Northern Utah
I was able to get the coach tire project completed and got her sitting back down on the tires and suspension last night.


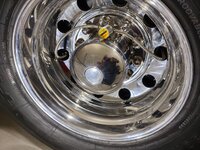
After cleaning the lugnut covers and installing as well as the cap/cover for the center cap and Crossfire bolted in place I noticed that I was a little low on tire pressure. I figured I would be as I lost a little while connecting the hoses the night before and positioning the valve in place to keep the hoses from rubbing on the polished wheels. Here you can see the center is BLACK.
wheelinstall6.jpg

At about 5 PSI below the rated pressure.
wheelinstall7.jpg

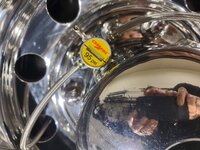
Once aired up to the proper 95 PSI the center is YELLOW and marks align.
wheelinstall8.jpg

Moving on to the tag axle, I installed the Balance Masters then rolled the tire/wheel into position and lifted up with a prybar onto the hub and studs.
wheelinstall9.jpg

While hand starting the lugnuts I place a towel in the wheel just in case I drop one. Hate to ding or scratch a wheel after all that work polishing them.
wheelinstall10.jpg

Tag wheels torqued to 450 ft/lbs. and lugnut covers installed as well as the coach fired up, suspension aired up and jacks stands pulled from the chassis. She's sitting back on the suspension and her tires again.
wheelinstall11.jpg

Other than some paint detailing and a few other odds & ends, she's ready for travel.
wheelinstall12.jpg


Thanks for looking.
 
OP
Z

zmotorsports

ALLIANCE MEMBER
Joined
Oct 20, 2009
Messages
21,496
Location
Northern Utah
I hope everyone had a great Easter weekend.

I didn't work in the shop this past weekend as my wife's birthday was Friday and we had a hell of a week, so we just relaxed, plus it rained the entire weekend and it was nice to enjoy some one-on-one time with the wife for a couple of days and closed it out with a nice Easter dinner.

Friday night before the wife arrived home from work, I did finish up one task on the truck that I haven't made time to complete. I finally pulled the fuse panel apart under the hood, grabbed the wiring schematics and connected the fog lights.

I had to order some pin connectors for the GM fuse panel and although they showed up a couple of weeks ago, I didn't make the time to complete this task until Friday night. The goal for this project was to make it all OEM, from the dash switch, to the relay and fuse in the underhood panel. This wire that I'm pointing to is the one that I had to add from the fog lights. I cut the wire to length, crimped the new connector onto the wire, pulled the C4 connector from the fuse panel and inserted the pin into the block before reinstalling. Then zip-tied the wiring to match the OEM.
fog1.jpg

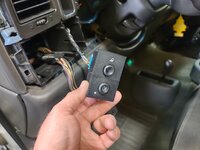
Here is the new OEM style dash switch. The original switch in my truck only had the rear bed light switch on top. The upper model GMT800 trucks came with this switch that had the fog light switch under the bed cargo light switch. Dash apart, old switch removed and new one connected. I then did a quick check to confirm the wiring was intact from the factory from the switch to the fuse panel under the hood. It was in fact in place.
fog2.jpg

Wiring routed to allow the panel to sit back in factory location without binding.
fog3.jpg

Another quick check with the PowerProbe revealed that the relay pins are in the correct locations so the relay can be installed.
fog4.jpg

Fog lamp fuse and relay installed and all looks OEM and performs as OEM.
fog5.jpg

Lighting looks OEM.
fog6.jpg

Saturday night the wife wanted dinner from Maddox Ranch House which is one of our favorite restaurants in the area. She didn't realize that I had already made reservations earlier in the week and I just told her I was taking her to dinner. Maddox is located in the small town of Perry, which is about 15 miles north of us right on Highway 89 and there is a private elk heard on the way there so we took the long way to see the elk. We went and had a very nice dinner to celebrate her birthday, then yesterday the kids and grandson came over in the afternoon to have a nice Easter dinner. The wife made a roast, ham, potatoes and her rolls. It rained the entire day so our DIL put easter eggs around the house so the little guy could crawl around and find them.

My son then wanted to take his son out to the shop and show him the new project or build I have in the shop with his name on it. I guess he wanted to show him the "before" version. He just had his first birthday a little over a week ago and is growing like crazy and fascinated with cars and anything that sounds like a car. He points to all of the vehicles and says "car" in such a quiet and sweet voice but can't seem to take his eyes off anything that resembles a car or truck.

He also HAS to do everything his dad does. IF my son pats on the spare tire of the Jeep, he has to lean over and do the same thing. He likes it when my son honks the horn on the vehicles so my son let him play in our truck for a few minutes.


drive2.jpg

My DIL had an entire car theme for his First Birthday. It was at my son's mother-in-law's home. My DIL is so clever that way and such a good mother. She made race themed cake, cookies, cupcakes and even covered juice boxes and waters with race themed labels.
maxbday1.jpg

My son let him play in the car that has lasted through many grandkids.
maxbday4.jpg

As well as a bike the whole time my grandson making car noises.
maxbday5.jpg

Hard to believe the little guy is a year old already.
 
OP
Z

zmotorsports

ALLIANCE MEMBER
Joined
Oct 20, 2009
Messages
21,496
Location
Northern Utah
So, do you ever have a job that you complete, yet when you are done your mind starts playing tricks on you, even though your gut says the head is freakin' nuts?


Yeah, well I addressed mine last night.

A couple of months ago I ran the overhead on my Cummins ISL engine in our 2003 Monaco Dynasty motorcoach. It went smooth and had no issues. It was really no different than any other engine I had adjusted valves on other than access was not the greatest having to be done through the closet floor in the rear bedroom of the coach while more or less standing on my head.

I think I mentioned when I posted pictures of the process here in my thread as well as in the video I did for my YouTube channel that every valve was on the tight side of the spec's and needed to be adjusted even though they were technically "within specification".

Well ever since firing the coach up that initial time I felt like it had a slightly louder valvetrain noise while standing at the rear of the coach with the engine hatch open. Nothing terrible or clanging or banging about or anything like that, just a slightly more audible "ticking" from the valve train. I haven't driven the coach yet because I ran the overhead just as I was putting her to bed for the winter, but each time I fire it while I've been performing some routine maintenance, my mind starts playing tricks on me even though my gut says that it is because the valves were tight before and now they have a few thousandths more clearance.

With our RV'ing season soon to commence I keep going over it in my head and I couldn't take it any longer so last night my head won out over my gut and I decided to pull it back apart and check everything. My mind kept saying "well you were video recording the process so maybe you missed tightening one of the jam nuts or used the exhaust feeler gauge for an intake". Even though my gut said that's bull$hit as I did the job like every other job I do and marked things as I went along and made sure I didn't paint mark them until everything is double checked and torqued. Well to prove my gut right, my mind said just pull it back apart and triple check everything.

I pulled the ductwork, the intake elbow and removed the valve cover then double checked the Jacobs compression brake adjustments before removing it to get to the valves. They were all at .090" clearance. I didn't want to have to remove the valve riser block as I stuck it down to the head with sealant but the rubber gasket for the valve cover came right off and I was able to reuse.

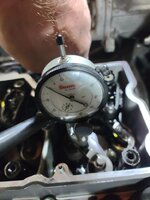
With the Jake Brake out of the way and access with feeler gauges a bit more cumbersome due to the riser block I grabbed a dial indicator and moved through each rocker following the same sequence as when I adjusted them.

oh1.jpg

Dial indicator set up on intakes and zero'd out.
oh2.jpg

Then rocked back and forth and measured .012" on each. Exactly where I set them up.
oh3.jpg

Exhausts were checked in the same manner. Zero'd out at one extreme on the rocker with the dial indicator directly in line with the valves.
oh4.jpg

And each exhaust valve measured .022". Exactly where they were set up.
oh5.jpg

Jacobs compression brake back on and adjustments were checked again. All at .090" as per factory spec.
oh6.jpg

All lock nuts were gone over with the torque wrench to triple check as well as the Jake Brake was torqued again before the valve cover installed and torque in place.

With everything back in place, ductworks reinstalled, closet put back together and I was just cleaning and putting tools away when the wife came home. She asked what I had done and I told her I just wasted an entire afternoon and evening going through a job that was fine so basically "that was a complete waste of time". :rolleyes:
 
OP
Z

zmotorsports

ALLIANCE MEMBER
Joined
Oct 20, 2009
Messages
21,496
Location
Northern Utah
Better to put the mind at ease than drive on "high alert" for a season.

You're going to be so damn good at this, it will look like a pit stop in NASCAR ;)

Better safe than sorry.

Agreed. Tearing back into it last night was the only way I could put my mind to ease and for my gut to tell my mind it's f**king crazy. Which I already knew so that is no surprise. :unsure:
 

aka Larry

Well-known member
Joined
May 2, 2012
Messages
8,103
Location
Eastern, NC
Kind of reminds me of when we put the new (used) engine in out race car over the holidays. It fired right up, but barely ran. I was in the car so I told my teammate "check the firing order", but he refused because he just knew it was right. Our other teammate was not convinced, so he checked behind him and sure enough two of the plug wires were swapped. Ran perfect after that! The reason I knew is this isn't the first time we've had that same issue, even though the wires are numbered!

Never hurts to double check!
 

SilverJimmy

Well-known member
Joined
Apr 14, 2012
Messages
1,696
Location
Prescott/Flagstaff, AZ
Sorry Mike, but I do, in the very best “Overkill is Underrated“ tradition have to ask. After you went to the trouble to set up you dial indicator perfectly to measure the lash at every rockerarm, did you roll the engine over completely to verify camshaft lift and lobe condition, checking for any potential camshaft wear? I ask because I have never thought to use a dial indicator to check valve lash, and then realized I could also make sure my camshaft isn’t going flat like they seem to do these days! Like always, I just learned something cool and valuable, Thanks Mike!
 
OP
Z

zmotorsports

ALLIANCE MEMBER
Joined
Oct 20, 2009
Messages
21,496
Location
Northern Utah
Sorry Mike, but I do, in the very best “Overkill is Underrated“ tradition have to ask. After you went to the trouble to set up you dial indicator perfectly to measure the lash at every rockerarm, did you roll the engine over completely to verify camshaft lift and lobe condition, checking for any potential camshaft wear? I ask because I have never thought to use a dial indicator to check valve lash, and then realized I could also make sure my camshaft isn’t going flat like they seem to do these days! Like always, I just learned something cool and valuable, Thanks Mike!


You got me Sterling. I didn't go to that measure. I merely setup the dial indicator on each rocker arm and verified the lash as I went through the sequence just as though I did when adjusting them a few months ago using a feeler gauge to set them. The dial indicator was just easier and another check to confirm is all.

To be honest I don't know of anyone who would go through the extreme you mentioned if it is running perfectly and they are just in there doing a routine valve adjustment. Maybe if there were issues prior and needing to verify everything was ok but not for routine maintenance, or maybe even if there are known issues but not for a generic valve adjustment procedure.
 

Fixr

Well-known member
Joined
Dec 23, 2012
Messages
9,710
Location
SW VA
Sorry Mike, but I do, in the very best “Overkill is Underrated“ tradition have to ask. After you went to the trouble to set up you dial indicator perfectly to measure the lash at every rockerarm, did you roll the engine over completely to verify camshaft lift and lobe condition, checking for any potential camshaft wear? I ask because I have never thought to use a dial indicator to check valve lash, and then realized I could also make sure my camshaft isn’t going flat like they seem to do these days! Like always, I just learned something cool and valuable, Thanks Mike!
Oh, now you've gone and done it!
 
To avoid these ads, REGISTER NOW!

SilverJimmy

Well-known member
Joined
Apr 14, 2012
Messages
1,696
Location
Prescott/Flagstaff, AZ
You are correct, it is something that I wouldn’t do unless I was chasing an issue. And now I’ve been shown the way! I’m sure if you had found any discrepancies in the lash your thorough and methodical inspection practices would have pinpointed the cause and also the remedy required.
 

ScepterToad

Well-known member
Joined
Nov 9, 2023
Messages
346
I tell you what, better safe than sorry. I've eaten my own words several time in the last few weeks and it's really bothering me. I seem to be the "go-to" for the family (and friends) for fixing stuff. And I mean everything. No sure what happened recently, but I typically pride myself in getting things done for folks the right way and the first time. Several incidents have humbled me recently, so I'll be watching closer from now on.

1. We have an old home and the bathroom is in need of remodel. I've been putting it off for a while. The tub faucet was a bit leaky and I was absolutely convinced it was the old brass stem style that I would have had to tear apart, take to a commercial plumbing shop, and get the right one for replacement. And to top it off, there's no shutoffs for those pipes so the whole house has to be shut down. Not a project I wanted to do. Last week, the hot side stopped putting out water. I figured I'd have to replace the whole thing and that would be easier. Cut a hole in the wall (plaster) from the back side, and the dang faucet body was bedded in the plaster from the other wall, and to make matters worse, there was a stud there notched for the cold side. So, then I got smart and pulled the stems. $2 worth of seats later, I'm back in business. With a hole in the wall needing repair.

2. Buddy's truck, '17 Ram Cummins, heat not great. Warm, but not great. Pulled the heater core lines, flushed, got it working great, back together. He's with me on this trip with his 5er, and we got here and the next day he went to go somewhere and the dash lit up with warnings. Coolant level low. Popped the hood and somehow I forgot to put the dang cap back on the coolant tank after a routine check before the trip. Somehow he drove from Cincinnati to Destin and nothing bad happened. Cap sitting right there on the battery.

3. On the coach, I saw the hose plumbed into the intake pipe for the turbo and thought is was a crankcase vent back in the turbo. I don't like crankcase gasses going back in the motor, so I cut the dang thing and capped the intake pipe (this is post filter). Didn't notice it on startup when I did the work, but that hose is actually the intake port for the engine air compressor. Went to leave on this trip, was on time and relaxed, weird noise on startup as the compressor was sucking in air. Not happy and had to be fixed before we left. Had to do a temporary repair to get on the road and that hose will have to be replaced. I'm sure it's gonna be real fun getting to the compressor.


Sorry to junk up your thread with my stories, but I'm finding it important the older I get to make sure I stay humble and check my work and not assume that I know what I'm talking about. I have a lot of experience doing a lot of different stuff, but I sure as heck don't know everything and life just taught me that lesson the hard way.

These machines that we maintain and rely on to get us where we're going to spend the little time we have on this planet doing what we love require the top level of diligence, which you clearly do. Kudos to tearing back into it for absolute verification that the job was done right the first time. I don't see it as a waste at all.
 
OP
Z

zmotorsports

ALLIANCE MEMBER
Joined
Oct 20, 2009
Messages
21,496
Location
Northern Utah
Thanks Keith. Yeah, I've noticed the older I get the more my mind starts playing tricks on me and I start questioning myself. I have always done things like put a piece of tape over an oil fill or differential noting "no oil" or on the toolcart with the tools a big piece of tape noting where I left off the day before so I could pick right up the next evening. I've never had an issue but I noticed recently I started wondering if I forgot to leave the tape note. :ROFLMAO:
 
OP
Z

zmotorsports

ALLIANCE MEMBER
Joined
Oct 20, 2009
Messages
21,496
Location
Northern Utah
Continuing on with coach maintenance, and I'm sorry for those who are uninterested in RV repairs.

With the coach's chassis maintenance completed, it's time to move on to the genny to perform some routine maintenance.

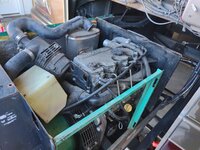
Our 10kw Onan QD now has just over 3000 hours on it and to keep her in proper running condition there are a few maintenance items that I need to address. Now in the RV world 3000 hours is a TON of hours. Most diesel pushers I've seen and know of from fellow RV'ers have low hours on their gensets. Most well under 500 and a few even under 100 hours as they don't use them much at all due to always having shore power when they stop. Granted that is the way we mainly travel now and accumulate very low hours annually ourselves but it wasn't always like that. These generators can go for thousands and thousands of hours when properly maintained. Our last coach, 1991 Beaver, had about 5000 hours on the 7500 watt generator when we sold it and my aunt/uncle's Beaver had nearly 12k hours when they sold it. I was fortunate enough to be able to keep those running by keeping up on the routine maintenance so I am trying to keep this one going as well.

When we purchased the coach 17 years ago it already had 1200 hours to the original owners used the generator quite a lot in the first almost 5 years they owned it. We put a couple hundred hours a year on when we were racing, duning and sledding as it was our home away from home for all of our motorsports activities. However, in the last 9 or so years we have only put slightly more than 100 hours on it. Other than routine oil and filter intervals and a few minor issues it has purred right along but I thought I'd take some time to do another valve clearance check, replace another cooling system V-belt and fuel filter. The first valve check I did was around 1200 hours when we purchased the coach and it was within specification. The next one was at 2000 hours and it was ever so slightly off being about a thou. tight so I adjusted them back to the .008" clearance. This time it was spot on again requiring no action other than a check and another rocker cover gasket as it goes back together.

Generator is on a hydraulic slide which makes it much nicer. Our last coach the genset was under the couch on the driver's (curb) side and didn't come out easily.
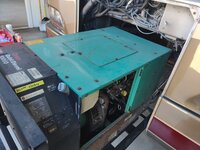
onan1.jpg

onan2.jpg

Top cover off, side and rear covers removed to gain access to the V-belt on the blower fan. This is better accessed from under the coach once the covers are removed.
onan3.jpg

Blower housing now accessible for removal.
onan4.jpg

Aluminum blower fan removed and I can see the V-belt. Belt actually looks good but figured I'm this far and the new one was only $15 and sitting on the bench so may as well replace it.
onan5.jpg

Old one still has the markings on it.
onan6.jpg

And the backside looks almost new.
onan7.jpg

New belt ready to be installed.
onan8.jpg

Aluminum blower fan installed. I noted I had a very slight rub mark on the blower fan so I installed some .050" washers on the studs for the plastic housing to keep it off the fan.
onan9.jpg

More to come.
 
OP
Z

zmotorsports

ALLIANCE MEMBER
Joined
Oct 20, 2009
Messages
21,496
Location
Northern Utah
Continuing on with the generator maintenance.

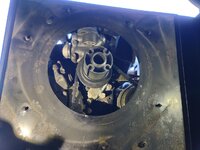
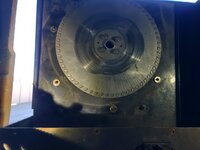
I opted to not reassemble the blower housing yet as it makes it easy to bar the engine over while checking valves as the timing marks and crankshaft are nearly unreachable in this unit with it still in the coach.

I moved on to replace the fuel filter. Again, the belt and fuel filter are just over 9-years old but barely have 100+ hours on them.

I knew back in the late fall when I was putting the coach to bed that I was planning on this maintenance path come spring but had I been thinking I would have at least replaced the fuel filter while the oil filter was off because access would have been much easier. It's doable with the oil filter in place but SO much easier with it out of the way.

I stuffed an absorbent pad under the filter to catch fuel from the filter and lines upon disconnecting.
onan11.jpg

New filter ready to go in.
onan12.jpg

New filter installed and connected.
onan13.jpg

Some diesel fuel spilled so as I was pulling the absorbent pad out I gave the bottom of the cabinet a good cleaning.
onan14.jpg
Now up to the top of the engine to remove the rocker cover.
onan15.jpg

I'm very pleased with how clean the inside of this engine is still looking with 3k plus hours on it. Looks like new inside.
onan16.jpg

Rolling through the valves I found them all right @ .008" and spot on specification. No adjustments necessary this time so a new gasket will go on and I can start putting things back together.
onan17.jpg


Thanks for looking.
 

SilverJimmy

Well-known member
Joined
Apr 14, 2012
Messages
1,696
Location
Prescott/Flagstaff, AZ
I was told by my favorite diesel shop manager that when going by an hour meter to keep track of an engine, that it was accepted that every hour was equal to approximately 45 miles of driving. So with that thinking you’ve got over 135K on that genset, pretty clean for that many miles! As a side note, he was explaining this methodology to me because I was upset that I was having to have my tool truck engine overhauled even though it “only” had 264,000 miles on it. He pointed to the hour meter with 34,738 hours and told me to “do the math”!!! I only drove a bit over 300 miles a week, but that truck got started at 7:00 AM every day and shut down around 7:00 PM 5 days a week for over 15 years!
 
OP
Z

zmotorsports

ALLIANCE MEMBER
Joined
Oct 20, 2009
Messages
21,496
Location
Northern Utah
I was told by my favorite diesel shop manager that when going by an hour meter to keep track of an engine, that it was accepted that every hour was equal to approximately 45 miles of driving. So with that thinking you’ve got over 135K on that genset, pretty clean for that many miles! As a side note, he was explaining this methodology to me because I was upset that I was having to have my tool truck engine overhauled even though it “only” had 264,000 miles on it. He pointed to the hour meter with 34,738 hours and told me to “do the math”!!! I only drove a bit over 300 miles a week, but that truck got started at 7:00 AM every day and shut down around 7:00 PM 5 days a week for over 15 years!

I heard that same thing from a Cummins/Onan tech about 10 years ago while attending a seminar at an RV rally. I have always stuck to the oil change at 100 hours which would be about 4500 miles so that would make sense. Onan actually calls out for a bit more than that at 150 on some diesel gensets and as much as 250 hours on some of the newer ones. I like my 100 hour intervals and have always used that. Back when we were racing and putting a lot of hours on it that was twice a year and now every couple of years I change it even though I am well under on hours. I just change the genny when I service the chassis engine so way, way overkill as that is probably 10-15 hours roughly these past several years.

I see you’re using the new feeler blades, how are you liking them? I showed them to a friend of mine, he bought a green set. Then we did a trade to make them a little bit better.
D6DDA93F-9089-403D-868D-8B41A14B50D2.jpeg
Red for Exhaust, Green for Intake. How they should come from the factory!

Sterling, I wish I could have purchased mine in a configuration like that. I really like them however and enjoy using them. Definitely came at a high price compared to a standard feeler gauge that does the same thing but they sure feel good in your hand. ;)
 
OP
Z

zmotorsports

ALLIANCE MEMBER
Joined
Oct 20, 2009
Messages
21,496
Location
Northern Utah
Mike, your dealer can order you green handles for your set. I would have gladly swapped you those handles and then convinced the next guy that the mismatched set on my truck was actually the “Hot” setup!

Nah, I'm good. Unfortunately, I am almost certain having mismatched handles in my drawer will mess with me more so than having to pay close attention to the feeler gauges when using.
 

Bob Heine

ALLIANCE MEMBER
Joined
Oct 24, 2009
Messages
10,709
Location
Boca Raton, Florida
Continuing on with coach maintenance, and I'm sorry for those who are uninterested in RV repairs.
Mike, for those of us who don't own an RV, your posts remind us it's a luxury that takes work (or money) beyond just buying and driving it. Much like the boats I've owned, it's a reminder you have to pay to play. I've turned that page and do more paying and playing with the grandkids and great grandkids. I have several vroom vroom ones to play with.
 
OP
Z

zmotorsports

ALLIANCE MEMBER
Joined
Oct 20, 2009
Messages
21,496
Location
Northern Utah
Mike, for those of us who don't own an RV, your posts remind us it's a luxury that takes work (or money) beyond just buying and driving it. Much like the boats I've owned, it's a reminder you have to pay to play. I've turned that page and do more paying and playing with the grandkids and great grandkids. I have several vroom vroom ones to play with.


Good comment Bob. Unfortunately, I know someday I'll be hanging up the keys for the coach but until then I plan on driving the hell out of it and racking up the miles. I know some try to keep the miles low but I am of the opposite philosophy as I want to rack up as many miles as I can because that means that my wife and I have been to a lot of places and made a lot of memories. Playing with the grandson is just the cherry on top of life right now. I'm sure there will be more collaborative "shop projects" once he gets a few years old. ;)

My son and DIL stopped by last night while I was working on the coach and my son took his son for a spin around the yard in his custom wagon and to see the smile on his face and see him get excited when my son rolled it out of the shop was priceless.
maxwagon.jpg


The little guy sure likes anything with wheels and especially a motor. He will break his neck looking around when a loud car drives by or a tool in the shop makes a noise.
 
OP
Z

zmotorsports

ALLIANCE MEMBER
Joined
Oct 20, 2009
Messages
21,496
Location
Northern Utah
I was able to finish up the generator maintenance last night and stuck it back inside the front of the coach so mechanically she's ready to go for the RV season.

New rocker cover gasket at the ready.
onan18.jpg

With the rocker cover cleaned and the old gasket removed it was time to install the new gasket. I am still impressed with how clean the inside of this engine looks with over 3k hours on it.
onan19.jpg

New gasket in the groove and tabs locked in and ready for installation.
onan20.jpg

Rocker cover installed and torqued to spec.
onan21.jpg

Before putting the covers back on I removed the spark arrestor plug and fired the genny up and put a load on it.
onan22.jpg


Finally, the spark arrestor plug was reinstalled, fluids double checked and all of the covers were reinstalled.

Thanks for looking.
 

ntsqd

Well-known member
Joined
Jan 22, 2005
Messages
1,003
Location
Lower left coast
I was more or less Apprenticed by my maternal grandfather during the full summers that I spent with my grandparents in Central Oregon through all of my school years. He started out as a field repairman for Burroughs Business Machines and then he worked for Los Angles County in the same field eventually becoming the Field Super for both employers. After retiring and moving to Central OR he built a house as well as built and repaired vehicles and farm equipment. There was always some part of the current project for me to work on that was not just make-work, no matter my age or skill-set.

I still have no idea how he did that. Must have been something that he learned from managing people.
 
OP
Z

zmotorsports

ALLIANCE MEMBER
Joined
Oct 20, 2009
Messages
21,496
Location
Northern Utah
On a side note, I have somewhat of a confession to make. Many will want to sit down for this one if you've followed my thread for any length of time and know how I feel about battery powered tools.

I almost hate to admit this; now while I am not "all in" on the battery powered scene, I can attest that over the past couple of months I have used the few battery powered tools I have much more than I have in the past.

It all started with the structural upgrades I did on the landing in the house garage before I handed it off to my nephew. I started out using my Milwaukee M18 powered drill motor and although for small jobs it works okay as a driver, I realized that for anything more than a few screws it really isn't the right tool for the job. I also knew that I wouldn't be using it long term for driving construction screws so I did a bit of research into what I could use for the construction portion then continue using in the shop. I figured a nice bit driver would serve dual purpose, so I purchased a 12V Fuel impact bit driver. I figured after getting the garage completed, I could use it for small tasks such as underhood fasteners, clamps, etc.

I have been quite impressed with the power and especially battery life on this little tool. After finishing up my small portion of the garage work, I have been using this bit driver as well as a few of my other battery powered tools during much of the chassis maintenance work on the coach. It has been nice not having to drag an air hose into the coach from the rear engine bay to be used from the bedroom closet and even when working under the coach not having an air hose catch around me while moving about under the coach. The last couple of nights I have used the small Fuel bit driver to remove and then reinstall all of the 6mm flange bolts (10mm head) surrounding the Onan generator cover on our coach. I think there were probably 40+ fasteners that this little tool removed and then reinstalled all on a single battery and it really made the work go quickly. There were a few that due to space constraints that the little bit driver wouldn't fit into, so I used my Snap-on 1/4" extended reach ratchet and that was also a joy to use. I haven't used my cordless tools much as I have always preferred air tools but the few tools I used on these tasks I have to admit, they have gone well. I still had to use air tools for some of the jobs, but the vast majority of the work over the past couple of months have been completed with my cordless tools.

While I don't see myself buying any more at this time, I must admit I see myself using the ones I have a bit more in the future.
 

Bodj Built

Well-known member
Joined
Feb 3, 2016
Messages
1,167
Location
Moorpark, CA
My dad was a master tech from the early 80s through the 90s and has always used air tools. The high pitched scream of the air impact guns after breaking a fastener loose are dear memories to me, but I never cared for using them. One air line for many tools is a pain, and having the whip hanging off the tool is cumbersome. While I have a nice air setup in my garage, I only use it for the plasma table and a handful of tools (air hammer, needle scaler, air file, air chuck...), but I must have 15-20 Milwaukee cordless tools at this point, and I love them all. The nostalgia isn't there, but it's made working on vehicles and the house so much more enjoyable.
 

mike528

Well-known member
Joined
Dec 20, 2014
Messages
503
Location
Shelby county Ohio
if you ever get a chance to play with the m12 right angle die grinder... not a replacement for heavy use but for a little part cleanup or just need to trim something that is hard to get an air line to, I have one at work and home and its just so damn handy, and it will impress you the power it has with a grinding burr on 1/2" plate. I have the gen 1 m12 fuel drill and driver combo, when we re sided my house the contractors where picking on me for my cute little drill while they where running their m18 fuels with the 5.0 batteries. since the screws werent going all the way tight to let the siding expand we werent working them that hard. my m12 4.0 battery was keeping up with their drills at 2-3x the weight. The owner borrowed it to put up a couple pieces and came back with a new one the next day.
 
OP
Z

zmotorsports

ALLIANCE MEMBER
Joined
Oct 20, 2009
Messages
21,496
Location
Northern Utah
My dad was a master tech from the early 80s through the 90s and has always used air tools. The high pitched scream of the air impact guns after breaking a fastener loose are dear memories to me, but I never cared for using them. One air line for many tools is a pain, and having the whip hanging off the tool is cumbersome. While I have a nice air setup in my garage, I only use it for the plasma table and a handful of tools (air hammer, needle scaler, air file, air chuck...), but I must have 15-20 Milwaukee cordless tools at this point, and I love them all. The nostalgia isn't there, but it's made working on vehicles and the house so much more enjoyable.

if you ever get a chance to play with the m12 right angle die grinder... not a replacement for heavy use but for a little part cleanup or just need to trim something that is hard to get an air line to, I have one at work and home and its just so damn handy, and it will impress you the power it has with a grinding burr on 1/2" plate. I have the gen 1 m12 fuel drill and driver combo, when we re sided my house the contractors where picking on me for my cute little drill while they where running their m18 fuels with the 5.0 batteries. since the screws werent going all the way tight to let the siding expand we werent working them that hard. my m12 4.0 battery was keeping up with their drills at 2-3x the weight. The owner borrowed it to put up a couple pieces and came back with a new one the next day.


I am still very partial to my air tools and I don't see that changing, I use air in my shop daily but for some tasks. However, I have to admit that the cordless tools have their place.

I can't bring myself to buying any more than I have but will continue to use those in my toolbox, as well as my plethora of air tools.
 
To avoid these ads, REGISTER NOW!
Top Bottom