To avoid these ads, REGISTER NOW!

What did you do "IN" your garage today?

Motorman55

Well-known member
Joined
Apr 10, 2016
Messages
2,646
Location
South Jersey
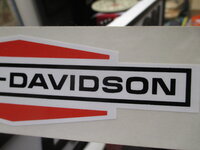
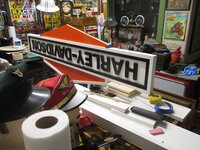
Today I started Step 3. Despite the 96+ heat & humidity outside and a couple of mishaps, like dropping my portable miter saw and breaking off one of the legs, belt sander schredding its last belt, realizing I gave away my old circular saw ( when I didn't find it in the last place I looked ) and haven't bought the new one yet, I somehow still managed to cut out the arrows with a cheap HF jig saw and sand the top edges of the cut smooth with a cheap HF hand held belt sander.

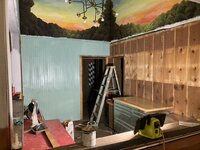
Here's one of the arrows dry fitted with the top trim. I'll trim the ends to size and add the small vertical pieces to match the design of the decal. Meanwhile I picked up some orange paint at HD with some chain and hooks, etc to hang the sign from the ceiling when its done.1721095789959.jpeg1721095766622.jpeg1721095731162.jpeg
Wednesday morning....Just a quick pic of the top arrow sitting on the main sign. Waiting for the orange paint to dry before I attached the final top white trim boards. 1721249239775.jpeg
 
To avoid these ads, REGISTER NOW!

Copymutt

Well-known member
Joined
Sep 3, 2016
Messages
3,402
Location
Colorado
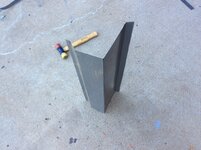
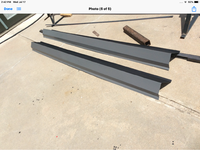
Wrapped up bending 8’ lengths of sheet metal for metal roof trim. An obsolete style that left me with a mismatch after roofers departed.
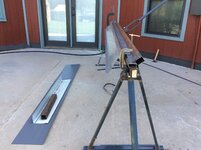
Starting point was one of two huge steel saw horses I made last summer to support the bed of my pick up after removal for the paint job.
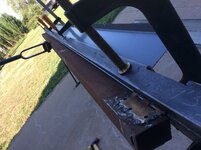
Being 9’ long & fairly stout the addition of a 2nd beam, some hinges, a clamp bar & lever handle got the job done. Two issues. Cant quite get a full 90* bend so a little prodding after the bend with a bfh & a length of 2x4 got the 90. Secondly as this homemade is no wheres as solid as a shop 10 ton brake the pivoting bar tends to flex somewhat near the center. Got around that by limiting its arc with clamps. A left over length of W valley flashing slit in half was the material. Didn't gauge it but it was thicker than 26 gauge.
End product looks pretty close to the 1980 factory trim including folded edges.
I earmarked the hundreds the sheet metal shop wanted for beer.
First pic is sample of profile needed. Last pic is final result
IMG_3259.jpegIMG_3260.jpegIMG_3258.jpegIMG_3257.jpegFED4D68F-B273-4CBA-8E2C-B29274AC875A.png
 

Snip's

Well-known member
Joined
Apr 29, 2017
Messages
1,863
Location
Ohio
Working in the garage, using Simple Green to strip house paint the previous owner used to paint the 1940's lights on either side of the front entrance to my house... I used a magnet to try and determine if the metal was steel... After stripping, it turns out they are made from copper. The small floret I polished is made from brass...

IMG_3951.jpg
 

rcktpwrd

Well-known member
Joined
Mar 5, 2008
Messages
1,097
Location
Raleigh, NC
Putting the wife's truck back together and running into fun times! Had the hood and cowl trim off to get the windshield replaced. Now the hood doesn't want to fit in place correctly! There is very little adjustment in the bolts that hold the hood to the hinges, and it fit pretty decently before.
I did trim a small section on the back edge of the hood to stop it from hitting/catching on the cowl. Old cowl was broken from this.
IMG_7089.jpg

IMG_7091.jpg
Dremel and 60 grit sanding drum made quick work of it!

IMG_7087.jpg
 

Bessy

Well-known member
Joined
Dec 18, 2012
Messages
995
Location
Ontario, Canada
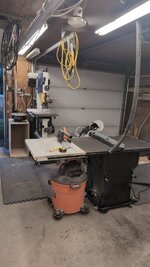
Slowly, but surely this will become a functional shop! The cabinet that the scroll saw sits on -which was originally for the drill press (though I screwed up my dimensions) will eventually go back on casters. For now I'm just trying to eyeball how everything is going to fit, and I kindof like the scroll saw where it is as it's otherwise dead space. I really haven't used it much, but it fits the space well.
 

Attachments

  • IMG-20240717-WA0004.jpeg
    IMG-20240717-WA0004.jpeg
    488 KB · Views: 38

Magnum440d100

Well-known member
Joined
Dec 2, 2018
Messages
3,581
Location
Indiana
Nothin much in the main garage in a while. Been working mostly in the pole barn.

But today, I crushed some cans with the wall mounted can crusher to get them out of the house, then my ADHD kicked in, and I put tools away that were on the bench to make room to assemble the Lincoln carb. Eventually. Maybe.

Totally forgot that I was in there to crush the cans because I was cleaning the kitchen lmao. Whoops.
 

Motorman55

Well-known member
Joined
Apr 10, 2016
Messages
2,646
Location
South Jersey
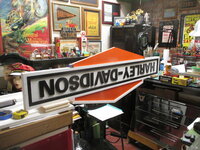
Wednesday morning....Just a quick pic of the top arrow sitting on the main sign. Waiting for the orange paint to dry before I attached the final top white trim boards. 1721249239775.jpeg
Tonight I was able to finish the top arrow section. Next thing is to flip it and set it on some supports so I can work to finsh the bottom arrow. After that its just a matter of drilling and installing the eye lags so I can hang it from the ceiling. 1721271879519.jpeg
 

kaymccampbell

Well-known member
Joined
Feb 27, 2015
Messages
29,595
Location
Upstate New York
Putting the wife's truck back together and running into fun times! Had the hood and cowl trim off to get the windshield replaced. Now the hood doesn't want to fit in place correctly! There is very little adjustment in the bolts that hold the hood to the hinges, and it fit pretty decently before.
I did trim a small section on the back edge of the hood to stop it from hitting/catching on the cowl. Old cowl was broken from this.
IMG_7089.jpg

IMG_7091.jpg
Dremel and 60 grit sanding drum made quick work of it!

IMG_7087.jpg
Next time, drill 2 holes and drive self tapping screws into the hinges on each place they attach. Pull the screws and then unbolt things. When you go to put it together, you drive the screws into their old holes and there's your perfectly aligned hood.
 

afinepoint

Well-known member
Joined
Jul 16, 2024
Messages
198
i searched before posting, and didn't find a thread like this soooo.......


today, i cleaned up some junk that was in my way. i replaced a bad light fixture, fixed up a tiller, and cleaned up a few things.

how bout you?
Planed a sticking door edge. First time using a power hand planer. Sanding is now forever a thing of the past.
 

Prospecter

Well-known member
Joined
May 16, 2015
Messages
2,440
Location
Maine
Slowly, but surely this will become a functional shop! The cabinet that the scroll saw sits on -which was originally for the drill press (though I screwed up my dimensions) will eventually go back on casters. For now I'm just trying to eyeball how everything is going to fit, and I kindof like the scroll saw where it is as it's otherwise dead space. I really haven't used it much, but it fits the space well.
That's the way to do it. Arranging the first 95% is easy. It's the final 5% that's hard.
 
To avoid these ads, REGISTER NOW!

Skyman

Well-known member
Joined
Nov 9, 2021
Messages
1,214
Location
Central Maryland
Putting the wife's truck back together and running into fun times! Had the hood and cowl trim off to get the windshield replaced. Now the hood doesn't want to fit in place correctly! There is very little adjustment in the bolts that hold the hood to the hinges, and it fit pretty decently before.
I did trim a small section on the back edge of the hood to stop it from hitting/catching on the cowl. Old cowl was broken from this.


Dremel and 60 grit sanding drum made quick work of it!

IMG_7087.jpg

You yanked the hood only for the glass replacement, or so that you could trim it? I'm also puzzled as to why it was making contact with the cowl?
 

daoldguy

New member
Joined
Jul 18, 2024
Messages
4
Finally got a little start on putting in a personnel door, in my pole blding shop. At least I got the wall area/spot cleaned of hanging tools. Taken 3 years to get that far. Next is see if I have the supplies ! For the framing, do I need 2x6 or 2x8 ??? The door is an ready to set assy. Thanks.
 

welder4956

Well-known member
Joined
Apr 8, 2010
Messages
3,072
Location
Birmingham, AL USA
Cut up a couple of pressure treated 2 x 4s to repair one of the wife's garden trellises that was smashed by a tree a few days ago. Fortunately the tree fell down the center and only broke the cross bars at the top and bottom. Unscrewed the broken pieced, screwed the new ones in place and moved it back to the garden.

Also had a crate delivered and had to position it on a dolly and move it inside:

20240718_144546.jpg

20240718_145043.jpg
 

kaymccampbell

Well-known member
Joined
Feb 27, 2015
Messages
29,595
Location
Upstate New York
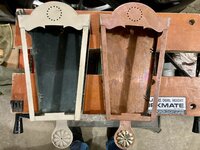
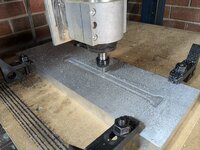
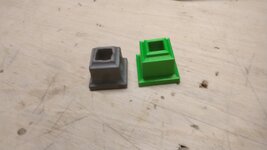
Updated my CAD cutting tools. Added draft to my railing pediment original for casting. Sliced it. Printed it. Wrote some maintenance scripts. Serviced the foam cannon. Took the big stepladder out n in. Moved a bunch of idea images n scripts onto the shoptop.
IMG_20240718_185332.jpg
 
Last edited:

Wrench97

Well-known member
Joined
Jun 23, 2018
Messages
12,145
Location
Southeastern Pa
Concrete blocks under a car scare me.
I did that once, a long time ago.
I was swapping rears from a 65 Tempest to a buddies 65 Chevelle his car was in the garage on the jack stands and I had the tempest outside in the stone and screens lot on cinder blocks as I pulled on the breaker bar to loosen the trailing arm bolts I kicked the block and it broke leaving me stuck under the car mostly in the trans tunnel of course my two buddies in the garage with the radio on heard nothing and finally came looking for me about 20 minutes later..............jack the car up I crawled out and learned to drink beer that night..
 

BuyMyGarage

Well-known member
Joined
Aug 13, 2021
Messages
143
Location
MIchigan
I think this counts, Deere 1070 Tractor dead in the field for last 2 days. Ground wire from battery to frame corroded at the battery, and the frame itself rusty. Sanded frame, replaced wire, used dialectric on frame and battery. Did same thing 3 years, tractor lives in garage, so, not sure why it happens.
 

Motorman55

Well-known member
Joined
Apr 10, 2016
Messages
2,646
Location
South Jersey
Putting the wife's truck back together and running into fun times! Had the hood and cowl trim off to get the windshield replaced. Now the hood doesn't want to fit in place correctly! There is very little adjustment in the bolts that hold the hood to the hinges, and it fit pretty decently before.
I did trim a small section on the back edge of the hood to stop it from hitting/catching on the cowl. Old cowl was broken from this.
IMG_7089.jpg

IMG_7091.jpg
Dremel and 60 grit sanding drum made quick work of it!

IMG_7087.jpg
What year and model is your truck?
 

Motorman55

Well-known member
Joined
Apr 10, 2016
Messages
2,646
Location
South Jersey
Tonight I was able to finish the top arrow section. Next thing is to flip it and set it on some supports so I can work to finsh the bottom arrow. After that its just a matter of drilling and installing the eye lags so I can hang it from the ceiling. 1721271879519.jpeg
Found a spot to flip the sign over and set it on. Started working on the bottom arrow. Painted it orange, cut the white trim to size. Just have to wait for the paint to dry, then I'll glue and nail the white trim on. I'll get that done tomorrow. Almost done.1721370921371.jpeg 1721350684963.jpeg
 
Last edited:

rcktpwrd

Well-known member
Joined
Mar 5, 2008
Messages
1,097
Location
Raleigh, NC
Next time, drill 2 holes and drive self tapping screws into the hinges on each place they attach. Pull the screws and then unbolt things. When you go to put it together, you drive the screws into their old holes and there's your perfectly aligned hood.
We have had the hood off before and had no issues reinstalling it. The holes have very little adjustment available. Not sure what changed aside from painting the hinges...
You yanked the hood only for the glass replacement, or so that you could trim it? I'm also puzzled as to why it was making contact with the cowl?
Yes, it's an aftermarket fiberglass cowl induction hood, it covers one of the wiper arms so it cannot be lifted to unlock the clip to remove the arm. Wipers need to come off to take the cowl trim off for glass replacement. Hood has been on the truck a very long time and was not really fitted properly, so I'm trying to make it work better.

For hood realignment I always outlined the bolt head positions on the hinge before removing or adjusting. Then I had a comeback point.
I repainted the hinges so that wouldn't have worked.

What year and model is your truck?

Wife's truck, 1990 454SS
 

Motorman55

Well-known member
Joined
Apr 10, 2016
Messages
2,646
Location
South Jersey
We have had the hood off before and had no issues reinstalling it. The holes have very little adjustment available. Not sure what changed aside from painting the hinges...

Yes, it's an aftermarket fiberglass cowl induction hood, it covers one of the wiper arms so it cannot be lifted to unlock the clip to remove the arm. Wipers need to come off to take the cowl trim off for glass replacement. Hood has been on the truck a very long time and was not really fitted properly, so I'm trying to make it work better.


I repainted the hinges so that wouldn't have worked.


Wife's truck, 1990 454SS
That's what I thought. Super clean truck. Wish my 94 shortbed was as nice.
 

vwpieces

Well-known member
Joined
Apr 28, 2020
Messages
5,925
Location
Hills, PA
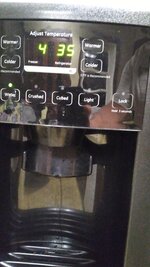
Fought the fridge and WON!
Didnt loose anything.
Freezer temp climbing by the day, fudge pops getting soft and we can't have that. Thought it was the usual suspect, defrost heater. Nope. Replaced heater enough to keep one on hand.
Charge was on the high side and I guess it took to really hot days for it to kick out. After messing with it for 2 days with some time between attempts. Yesterday started from scratch. Comlete vacuum and charge by weight. Yeah I have small cans and a postal scale. :rolleyes:
Close enough cause It worked.

20240719_012424.jpg

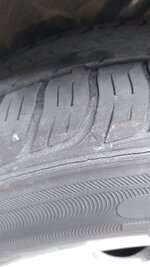
Also got some cheap $42ea tires for the DD beater 81 Rabbit. Mounted on the Horrible Freight Emanuel tire changer.
Old set 0507 date code and used up. Fronts have some tread left, pic rears. It was time.
20240716_143403.jpg
20240718_115905.jpg
20240718_153045.jpg
 
Last edited:

Prospecter

Well-known member
Joined
May 16, 2015
Messages
2,440
Location
Maine
I think this counts, Deere 1070 Tractor dead in the field for last 2 days. Ground wire from battery to frame corroded at the battery, and the frame itself rusty. Sanded frame, replaced wire, used dialectric on frame and battery. Did same thing 3 years, tractor lives in garage, so, not sure why it happens.
Oddly enough, my JD 790 does that too. . . and left me stuck this week in the field. I was luckier though. A little jiggling of the cable and I limped back to the shop.
 

Brent T

Well-known member
Joined
Sep 29, 2018
Messages
459
Location
Arizona, USA
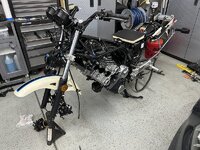
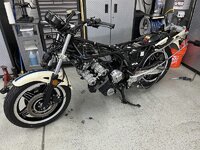
Got the wheels back on the CBX with new tires installed. Replaced spark plugs and re-installed valve cover after checking all 24 valve clearances. Installed replacement front brake caliper (old one leaky), bled front brakes. It's nice to finally be putting things back together instead of tearing it further apart. I'm ready to be done with this project and move on to something else.

53866597037_a8e171e767_c.jpg
53867920715_c14e268a0a_c.jpg
53867859489_20425cf1b2_c.jpg
53866597042_1f150fedab_c.jpg
 
To avoid these ads, REGISTER NOW!
Top Bottom