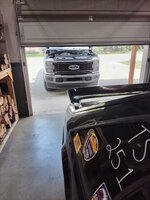
Just outside since all the boys are full. Oil change in the truck.


I hate that mad dash halfway through a pour. I always buy double the Portland, so I don't get caught.Made formwork from some scrap timber for a concrete slab for the new hot water system, got it setup up and leveled, mixed some concrete, realised I didn't have enough and did the 20 min dash back to the store for more, got it done

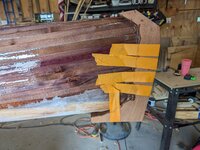
Cleaning out your closets is alway therapeutic.Trying to figure out where to start....
Realizing my "want to do hobbies" are accumulating dust as my time and energy are limited.
Do I keep the clutter or start selling off to help free the mind, as it would all be sold should be opt to pack up and move?
---leaning towards accepting reality and starting the sell-off // purge.



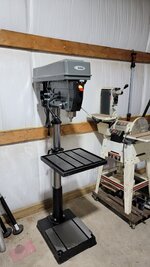
What's the machine in the first with your truck ?Started building a light bar for my truck. The desert roads out here have no street lights and it’s pitch black. These two Auxbeam 9 inch spots will definitely help light the way.
This made me smile, sounds like a typical day hereSome sketchy things probably happened
That’s a tubing bender.What's the machine in the first with your truck ?
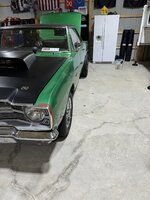
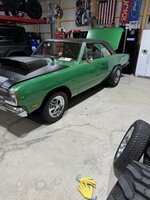
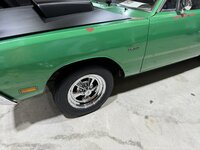
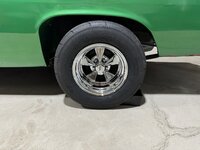

I had those on a few cars back in the 80'sGot the new wheels and tires on the Dart...................I love the old-school Cragars much better than the aluminum slots I had on there.
I just realized this morning that I should have pulled the Mustang out of the garage..... I need to rotate the tires.Just outside since all the boys are full. Oil change in the truck.

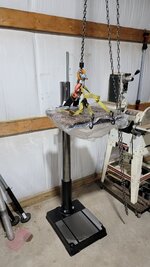
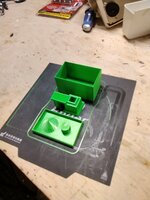
Correct. That's the 3D printed master, that casts the plaster, that casts the aluminum.Kay, that's printed right? Not what you were casting the other day?
That’s my hydraulic tube bender.What's the machine in the first with your truck ?
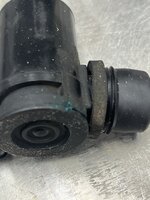
That’s my hydraulic tube bender.
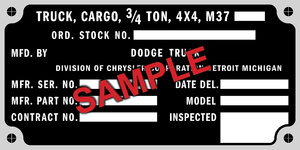

Very impressive!The original ID data plate for my 1954 Dodge M37 was missing, so I decided to create a replica etched-aluminum data plate from scratch. I used Adobe InDesign to create what I think is a pretty accurate facsimile (below) of the original ID data plate design that is appropriate for my truck.
I based the above design on a number of photos of original data plates found on 1954 models, all of which were beat up or corroded to varying degrees, but they still worked as models for me to work from.
There were several steps involved in creating a new etched-aluminum data plate.
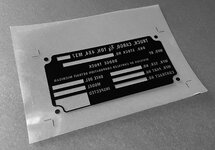
First, I printed a mirror image of the design on a special kind of inkjet film that is used for screen printing. These sheets have a slightly frosted coating on one side, which apparently allows them to accept more ink than an ordinary transparency film. I maxed out the CMYK channels for the black areas in InDesign and set the ink density higher in the printer control app in order to achieve pretty decent opacity.
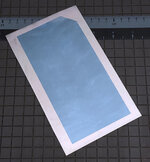
I then adhered a sheet of photoresist film to a carefully cleaned aluminum sheet, working under subdued incandescent light (the film is UV sensitive). It's hard to apply this stuff without trapping bubbles. There is a 'floating it on' technique for doing it with water, but I tried it and didn't like that method, as I found it too time-consuming, so I just refined my pressing and rolling technique on a few practice pieces until I managed to adhere some sheets without bubbles. Here's one of them:
I placed the printed film image emulsion side down on the photoresist film, placed a sheet of plain window glass (not sun-blocking glass) over it, with a piece of foam rubber behind it to keep it pressed tightly against the glass, and exposed it to direct noon sunlight for about 30 seconds.
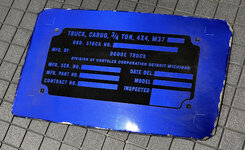
After exposure I removed the thin plastic protective layer from the photoresist film and 'developed' the photoresist in a mild solution of washing soda, which removed the unexposed (unhardened) portions of the photoresist. I then etched the aluminum with an acid solution (I'm still working on figuring out the optimum formulation, so I won't list it here yet). I had a few trial and error (mostly error) runs before I got a couple of decent results. Here's one:
Next, I chemically darkened the etched area with Aluminum Black from Birchwood Casey.
Soaking the plate in acetone for a few minutes loosened the photoresist and allowed it to be brushed off easily with a soft brush. I then trimmed the edges to the cut lines with a shear.
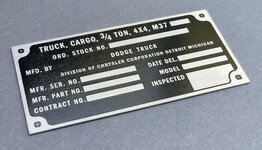
Here's the end result so far. You can see some reflection from the protective satin coat that I sprayed on, but the background is actually a nice solid black.
The etching leaves the letters slightly raised, like the original data plates. I think I'll punch the rivet holes with my Roper-Whitney punch instead of drilling them. I plan to use a 3/32" number and letter punch set to add the serial number and other data. I'll probably make a couple of extra plates in case I mess things up when I'm punching the data onto the plate. In hindsight, I probably should have waited to spray the protective coating on until after I punch the data onto the plate. I suppose I can just dissolve the coating and then re-spray it after punching.
There are a lot of variables involved, and it took about eight attempts before I got a couple of plates that I was satisfied with. I'm sure that with practice I could streamline the process and improve my success rate, but that can wait. On to other tasks...
By the way, the ID plate is mounted on the glove compartment door, which isn't exactly a secure location, as the door is easily removed, but the vehicle's serial number is also stamped permanently in large characters on the frame of the vehicle, so the serial number on this little plate is basically just for convenience.

The original ID data plate for my 1954 Dodge M37 was missing, so I decided to create a replica etched-aluminum data plate from scratch. I used Adobe InDesign to create what I think is a pretty accurate facsimile (below) of the original ID data plate design that is appropriate for my truck.
I based the above design on a number of photos of original data plates found on 1954 models, all of which were beat up or corroded to varying degrees, but they still worked as models for me to work from.
There were several steps involved in creating a new etched-aluminum data plate.
First, I printed a mirror image of the design on a special kind of inkjet film that is used for screen printing. These sheets have a slightly frosted coating on one side, which apparently allows them to accept more ink than an ordinary transparency film. I maxed out the CMYK channels for the black areas in InDesign and set the ink density higher in the printer control app in order to achieve pretty decent opacity.
I then adhered a sheet of photoresist film to a carefully cleaned aluminum sheet, working under subdued incandescent light (the film is UV sensitive). It's hard to apply this stuff without trapping bubbles. There is a 'floating it on' technique for doing it with water, but I tried it and didn't like that method, as I found it too time-consuming, so I just refined my pressing and rolling technique on a few practice pieces until I managed to adhere some sheets without bubbles. Here's one of them:
I placed the printed film image emulsion side down on the photoresist film, placed a sheet of plain window glass (not sun-blocking glass) over it, with a piece of foam rubber behind it to keep it pressed tightly against the glass, and exposed it to direct noon sunlight for about 30 seconds.
After exposure I removed the thin plastic protective layer from the photoresist film and 'developed' the photoresist in a mild solution of washing soda, which removed the unexposed (unhardened) portions of the photoresist. I then etched the aluminum with an acid solution (I'm still working on figuring out the optimum formulation, so I won't list it here yet). I had a few trial and error (mostly error) runs before I got a couple of decent results. Here's one:
Next, I chemically darkened the etched area with Aluminum Black from Birchwood Casey.
Soaking the plate in acetone for a few minutes loosened the photoresist and allowed it to be brushed off easily with a soft brush. I then trimmed the edges to the cut lines with a shear.
Here's the end result so far. You can see some reflection from the protective satin coat that I sprayed on, but the background is actually a nice solid black.
The etching leaves the letters slightly raised, like the original data plates. I think I'll punch the rivet holes with my Roper-Whitney punch instead of drilling them. I plan to use a 3/32" number and letter punch set to add the serial number and other data. I'll probably make a couple of extra plates in case I mess things up when I'm punching the data onto the plate. In hindsight, I probably should have waited to spray the protective coating on until after I punch the data onto the plate. I suppose I can just dissolve the coating and then re-spray it after punching.
There are a lot of variables involved, and it took about eight attempts before I got a couple of plates that I was satisfied with. I'm sure that with practice I could streamline the process and improve my success rate, but that can wait. On to other tasks...
By the way, the ID plate is mounted on the glove compartment door, which isn't exactly a secure location, as the door is easily removed, but the vehicle's serial number is also stamped permanently in large characters on the frame of the vehicle, so the serial number on this little plate is basically just for convenience.


You can see a few pictures HERE, where I started posting my recent progress on the Steel Soldiers forum. You may see some overlap with some of my posts on the GJ forum.We're gonna need to see some pictures of that M37...
Not in the garage but my work area at the station.
I needed a 10' cord for the trailer. I bought a 25' 12ga and a pair of ends. Now I have a 10' and 15'.
She's controlling the rise of the machines!So you’re melting the hard drives?


