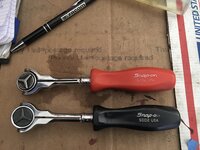
I have a strong preference in ratchets. Snap-On Dual 80s with quick release, flex head, long handle with hard handle. However Snap-On doesn't sell this configuration(hard handles with QR)
I have two 1/4" versions if this, one with the "long" handle and another "extra long". I've obtained these buy swapping handles from non-QR ratchets to QR ratchets.
I wanted a 3/8" version and since I couldn't find any good options on Ebay for a handle swap I decided I would get a soft grip handle version and swap a screwdriver hard handle on, I can't take credit for this, I saw this here on the forum.
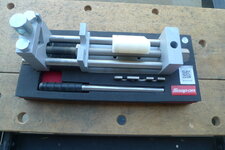
Here's what we have, my desired 3/8'' ratchet with soft grip and the screwdriver hard handle(PN SDD6R1RR)

I'm glad I'm swapping this soft handle out, the misalignment of the handle would drive me nuts, Snap-On QC at it's finest...
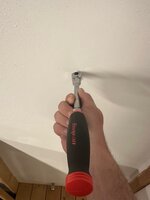
From what I read if you soak the soft handle in hot water for a few minutes you can pull the grip off easily, this was not the case for me. I soaked it in boiling water for min and really struggled to get it off. Since I didn't care about saving it I just used a big pair of pliers and it still took quite a bit of manhandling and some choice words.
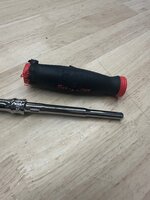
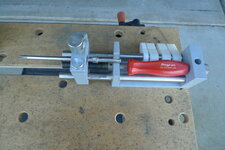
Next I wrote down measurements of the ODs on the shaft, made a schematic, then I started drilling. Luckily using drills from a standard index I had a bit that was 0.003-0.005" smaller than both ODs on the ends and only 0.002" bigger than the one in the middle. This was absolutely ideal.
The upset where the grip meets the hanldle is bevelled a bit so I chamfered the hard handle to match so it should seat nice and flush.
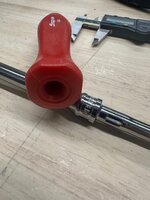
After ensuring the alignment was perfect a few times I used a deadblow to hammer the hard handle on. With the 0.003 - 0.005" interference fit it went on perfect, took about 20-25 blows with a medium sized deadblow to seat it.
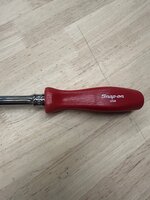

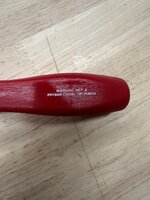
Perhaps my favourite part, since I used the screwdriver handle, my ratchet now has a warning not to use it as a prybar, chisel or punch on the back.
With the two 1/4" ratchets.

I have two 1/4" versions if this, one with the "long" handle and another "extra long". I've obtained these buy swapping handles from non-QR ratchets to QR ratchets.
I wanted a 3/8" version and since I couldn't find any good options on Ebay for a handle swap I decided I would get a soft grip handle version and swap a screwdriver hard handle on, I can't take credit for this, I saw this here on the forum.
Here's what we have, my desired 3/8'' ratchet with soft grip and the screwdriver hard handle(PN SDD6R1RR)
I'm glad I'm swapping this soft handle out, the misalignment of the handle would drive me nuts, Snap-On QC at it's finest...
From what I read if you soak the soft handle in hot water for a few minutes you can pull the grip off easily, this was not the case for me. I soaked it in boiling water for min and really struggled to get it off. Since I didn't care about saving it I just used a big pair of pliers and it still took quite a bit of manhandling and some choice words.
Next I wrote down measurements of the ODs on the shaft, made a schematic, then I started drilling. Luckily using drills from a standard index I had a bit that was 0.003-0.005" smaller than both ODs on the ends and only 0.002" bigger than the one in the middle. This was absolutely ideal.
The upset where the grip meets the hanldle is bevelled a bit so I chamfered the hard handle to match so it should seat nice and flush.
After ensuring the alignment was perfect a few times I used a deadblow to hammer the hard handle on. With the 0.003 - 0.005" interference fit it went on perfect, took about 20-25 blows with a medium sized deadblow to seat it.
Perhaps my favourite part, since I used the screwdriver handle, my ratchet now has a warning not to use it as a prybar, chisel or punch on the back.
With the two 1/4" ratchets.