To avoid these ads, REGISTER NOW!

How far down are pipes in a foundation?

chris142

Well-known member
Joined
Dec 19, 2011
Messages
6,533
Location
apple valley,ca
We have had nothing but trouble doing our subfloor repair. I am flat out terrible when it comes to doing house repairs.

We hired a guy and he screwed up. We hired another to fix his goof. We are trying to put a laminate floor down. Ruined $500 worth of flooring so far.

Now im trying to put down the threshold down between the new flooring and the old carpet. I am $2k into this and my kid still cant use her bedroom.

Drilling a hole for the screws and I hit metal. I need to drill another 1/2 inch or so for the anchors but dont want to drill into my water pipe if thats what im hitting.

Would a pipe be just below the surface of the slab?

Thoughts?
 
To avoid these ads, REGISTER NOW!
OP
C

chris142

Well-known member
Joined
Dec 19, 2011
Messages
6,533
Location
apple valley,ca
Trying to cover up this gap until I can afford to do the room with the carpet.The room with the new floring was a porch originally.
 

Attachments

  • IMG_20240922_033953157.jpg
    IMG_20240922_033953157.jpg
    513.8 KB · Views: 51
OP
C

chris142

Well-known member
Joined
Dec 19, 2011
Messages
6,533
Location
apple valley,ca
what kind of drill and bit are you using?

are you sure its not a rock?
a hard rock will stop a non-hammer drill.

add a picture of your threshold.
you might be able to glue it down.
Im using my milwaukee m18 and the bit that came with the little anchors. Was drilling fine then stopped and started squeeking.
 
To avoid these ads, REGISTER NOW!

snickers muncher

Well-known member
Joined
Feb 19, 2018
Messages
945
Location
Northeast GA
Will you have to take it back up when you do the next room? I'd warm it with a heat gun, add a few spots of hot melt glue, and quickly stick it down. That way when you need to remove it you can smack it with a hammer to free it and then reuse it.
 

PCustoms

Well-known member
Joined
Jul 23, 2011
Messages
23,457
Location
VT
Will you have to take it back up when you do the next room? I'd warm it with a heat gun, add a few spots of hot melt glue, and quickly stick it down. That way when you need to remove it you can smack it with a hammer to free it and then reuse it.
Double sided carpet tape would be an option if it needs to be re-used later
 

PCustoms

Well-known member
Joined
Jul 23, 2011
Messages
23,457
Location
VT
A new one is only $30
Then I'd grab whatever caulk sealant or construction adhesive I had on hand and put it down with that.

The vinyl plank trim piece at the top of my stairs has been down with sealant (OSI quad I bet) for 4 years now and hasn't moved. It didn't have a hidden clip or obvious way to use screws without making it look like **** so I assumed it was intended to be glued.
 
OP
C

chris142

Well-known member
Joined
Dec 19, 2011
Messages
6,533
Location
apple valley,ca
Then I'd grab whatever caulk sealant or construction adhesive I had on hand and put it down with that.

The vinyl plank trim piece at the top of my stairs has been down with sealant (OSI quad I bet) for 4 years now and hasn't moved. It didn't have a hidden clip or obvious way to use screws without making it look like **** so I assumed it was intended to be glued.
Thanks. Mine came with screws. I will go to ace in an hour or so when they open
 

LOW1

Well-known member
Joined
Jul 20, 2018
Messages
2,655
Location
ontario
Agree with the glue. And maybe “toenail” in a small finish nail or screw or two at an angle from the top or side of the trim piece into each door jamb. (Not the floor).
 

Fav Onefour

Well-known member
Joined
Jul 14, 2022
Messages
721
Location
MN cold and hot
Im using my milwaukee m18 and the bit that came with the little anchors. Was drilling fine then stopped and started squeeking.
Are you talking about a hammer drill?
Concrete will eat those bits in a hurry. It will happen faster without hammer setting.

@chris142 , I'm curious about the picture and want to clarify. Am I seeing a gaps under the flooring along that edge? I've dealt with various types of laminate flooring. They don't hold up well if there is movement. Those thresholds fall into the same category.

Try doing an experiment. Lay the threshold in place without fasteners. Hold it in place by standing on the thing. Try pushing down on sections of the flooring and threshold. If you can visibly compress those down it changes the game.
It looks like you may try doing the threshold with carpet under one side? That will add to the challenge of getting it to sit solid. If the threshold is sitting on the carpet it will move too much. You could spend all day drilling holes, but it won't last.

Sounds like the plan is to do this as a temporary repair. How temporary are we talking? At the very least, I'd make sure the flooring and threshold sit solid. That will help save your flooring for the next step.
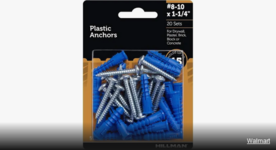
One last tip after you get it to sit solid. Use nylon-plastic anchors to hold the screws.
1727020761041.png
Picture is for reference. There is a huge variety of those anchors. Use some with collars. Find the correct anchor size for the screws you want to use. The anchors will allow you to remove the screws for your next step. The collar versions also make it easier to pry out a damaged anchor and replace it on the next go around.
 
OP
C

chris142

Well-known member
Joined
Dec 19, 2011
Messages
6,533
Location
apple valley,ca
Are you talking about a hammer drill?
Concrete will eat those bits in a hurry. It will happen faster without hammer setting.

@chris142 , I'm curious about the picture and want to clarify. Am I seeing a gaps under the flooring along that edge? I've dealt with various types of laminate flooring. They don't hold up well if there is movement. Those thresholds fall into the same category.

Try doing an experiment. Lay the threshold in place without fasteners. Hold it in place by standing on the thing. Try pushing down on sections of the flooring and threshold. If you can visibly compress those down it changes the game.
It looks like you may try doing the threshold with carpet under one side? That will add to the challenge of getting it to sit solid. If the threshold is sitting on the carpet it will move too much. You could spend all day drilling holes, but it won't last.

Sounds like the plan is to do this as a temporary repair. How temporary are we talking? At the very least, I'd make sure the flooring and threshold sit solid. That will help save your flooring for the next step.
One last tip after you get it to sit solid. Use nylon-plastic anchors to hold the screws.
1727020761041.png
Picture is for reference. There is a huge variety of those anchors. Use some with collars. Find the correct anchor size for the screws you want to use. The anchors will allow you to remove the screws for your next step. The collar versions also make it easier to pry out a damaged anchor and replace it on the next go around.
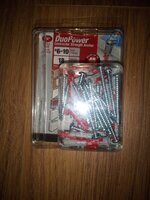
I bought anchors simmiliar to those last night but ones designed for cement,bricks etc. They came with the proper drill bit. That is why I was trying to drill holes..to put them in the cement to hold the threshold down.

I only have a milwaukee drill..... I don't know what A hammer drill is so off to google I go.

I ended up @ Lowes as Ace opens too late and I wanted to get on this the sooner the better. I got some Liquid nails stuff there .I put enough to reach the cement slab in the gap and didnt just glue it to the carpet

As far as tempory time. Hopefully a couple years or less.

EDIt: I don't have a hammer drill. First I have heard of one As I don't do house stuff because it becomes a disaster every time I do as you can see.

The instructions for the anchors do not mention a hammer drill.
 

Attachments

  • IMG_20240922_101650944.jpg
    IMG_20240922_101650944.jpg
    683.8 KB · Views: 26
  • IMG_20240922_101641191.jpg
    IMG_20240922_101641191.jpg
    807.7 KB · Views: 20
  • IMG_20240922_100250385.jpg
    IMG_20240922_100250385.jpg
    526.7 KB · Views: 20
  • IMG_20240922_102127666.jpg
    IMG_20240922_102127666.jpg
    1.1 MB · Views: 30
To avoid these ads, REGISTER NOW!
Top Bottom