To avoid these ads, REGISTER NOW!

What did you do "IN" your garage today?

bugnut

ALLIANCE MEMBER
Joined
Jul 14, 2012
Messages
3,995
Location
Central Ohio
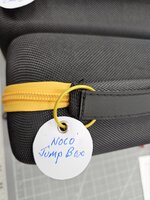
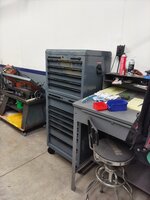
Wanted to be able to store my NOCO jumper and battery chargers so I can just grab them. Decided I need to do the same with the backup camera , repurposed for trailer watching. Purchased an additional case after insuring everybody would fit. Today was label day. Put labels on the cases, put labels on the storage drawers.
 

Attachments

  • 20240927_101804.jpg
    20240927_101804.jpg
    1,000.2 KB · Views: 66
  • 20240927_101815.jpg
    20240927_101815.jpg
    685.8 KB · Views: 39
  • 20240927_101817.jpg
    20240927_101817.jpg
    959.2 KB · Views: 32
  • 20240927_101819.jpg
    20240927_101819.jpg
    859.5 KB · Views: 34
To avoid these ads, REGISTER NOW!

GirchyGirchy

Well-known member
Joined
Nov 14, 2011
Messages
9,948
Location
Central Indiana
Better 2k too early than 2k too late. Consider this a crank case flush!
It's all about perception! :D

Later, I cut some pool noodles for the new truck (they go on the top of the tailgate, under the kayaks) and drug some cardboard over to peek at the U-joints...it's still vibrating at 70+, after the new tires. All of the joints look fine but the carrier bearing seems a little floppy. I think I'll give that a shot.

Unfortunately, it looks like there's several leaks going on, including the transfer case. I'll clean it up so I can monitor, then probably take it to the mechanic...no way/desire to pull an engine, trans, or x-case. It's had the rear main replaced twice but it's never stopped leaking, so I wonder if the old mechanic didn't loosen the rear main bearing while installing or what. Might end up being both mains, plus x-case input and rear output seals.
 

02Xterra

Well-known member
Joined
Oct 1, 2015
Messages
525
Location
Lynchburg, Va
Spent most of yesterday in the garage, did a few things:
- Unbolted the winch from the old winch plate and rotated the clutch side in preparation for mounting it to the new bumper. It'll be in a different orientation so I needed to have access to the disengage lever
- Finally reassembled the Athol 624 that I painted. Wasn't completely happy with how my paint job turned out, but it'll be alright for now. BLO on the bare steel parts.
1000234646.jpg

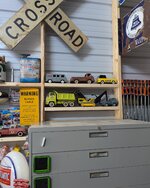
- Picked up a 12' 2x6 from HD and cut a few more shelves to display a couple toys I've acquired
1000234650.jpg

- Mounted a fire extinguisher to one of my storage racks
1000234654.jpg

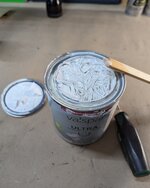
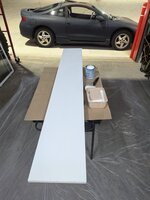
Got a message from my wife's aunt Friday night that a section of her closet had come off the wall; the mounting clips all broke so down came the wire shelf lol. Took a look at it and then headed to Lowes to buy some brackets, a 6' closet rod, and a 1x12 board for a more solid replacement. Ended up with a pre-primed board, so it just needed a quick coat of flat white. Trip #2 to Lowe's was for a 4" roller handle, drop cloth, and a catch pan after lunch. Trip #3 to Lowe's before dinner netted a quart of fresh paint as the quart I had was no longer good.. should have checked that before 😑
1000234651.jpg

1000234652.jpg

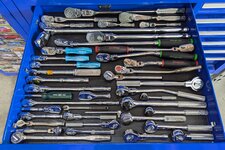
All in all, a very productive day! Also spent some time recognizing my ratchet drawer a bit
1000234644.jpg
 

Jgaz

Well-known member
Joined
Dec 16, 2016
Messages
1,705
Location
AZ
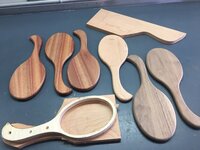
fiddled around with a bandsaw box and waiting for glue to dry decided to make some push paddles for using at the jointer, I have a template for the handles so it was a job for the flush trim bit at the router, went ok until I ran the wood the wrong way and nearly blew the thing out of my hand, damn thing scares me coz I'm not real good at grain direction reading, got 'em done and added some adhesive backed sandpaper to them
push paddles.jpg
push paddles adhesive.jpg
blow out.jpg
@oldman_pottering
I struggle with the same issue when make a run of these hand mirrors from time to time.
The curved section at the bottom of the handle is especially troublesome when template routing.
IMG_0068_Original.jpeg
I can usually mange by paying strict attention but sometimes if the wood has a very figured grain the tearout is still a problem.

This is a template guide that I made for use at the bandsaw. If it’s set up right and the blade is in good condition I’m able to trim very close to the template with no danger of tearout.
You can see the waste cutoff to the right of the mirror blank.
IMG_0077_Original.jpeg
I will then clean up the edge using a drum sander with a top bearing.

Just something I’ve tried to keep from scarring the **** outta myself when the bit grabs.

I loved your bandsaw box as well as your comment about being ”as artistic as a brick”. I can so relate to that description
 

Rudy1818

Active member
Joined
Jan 3, 2024
Messages
36
Rainy and gross weekend here so I didn't get to do much driving. Instead I put Aquapel on 8 of the cars (Ferrari is getting its engine major at the moment) which required some deep cleaning/polishing on my wife's Defender which had some very stubborn hard water spots. I also took the occasion to clean the inside glass on several of the cars that needed it. And finally since my old Griot's random orbital buffer wasn't working well and I ended up getting a cordless Dewalt one (great tool!) to do the Defender windshield, I corrected some stubborn bird poop etch marks in the M Roadster's clear coat which the polisher did short work of - now looks like new. Oh and finally I refoamed some speakers in the M5 that had fallen apart over 34 years and now sound pretty good again. At some point I need to tackle the headunit wiring in that car (it doesn't turn on with power or hold states unlike one of my other cars with the same Blaupunkt Bremen HU that does). If I still have some energy later this afternoon, I'll change the oil/filter on the Vantage but I'm giving that a <50% probability at this point. Maybe I'll do that next weekend.
 

Bessy

Well-known member
Joined
Dec 18, 2012
Messages
995
Location
Ontario, Canada
There were a few other ugly hiccups (thankfully on the back side of the door, so they're not visible), but the door is in and it operates nicely. Now to figure out trim that I hadn't necessarily planned on...
A resolution for everyone here, it turned out not half bad, remembering that this is a shop after all.

I managed to find some 1×3 pine in the back shed that was perfect for trimming out the door. I even mounted up a power bar temporarily to run chargers for all of the batteries I've consumed over the last few weeks. Everything got charged up and ready to go today. I still have plans for french cleats on this wall from about 5' up to the top.
 

rcktpwrd

Well-known member
Joined
Mar 5, 2008
Messages
1,101
Location
Raleigh, NC
Installed new front rotors and pads on the wife's wagon, also repacked the wheel bearings. Was going to change the calipers as well but after getting the first one on I found out I have the wrong pads to go with the new calipers I have, so I reused the existing calipers.

There are several caliper/pad combinations for the Caprice sedan/wagon/Impala/police cars and they all fit all vehicles. I will order a set of pads that go with the new calipers and swap them out at some point. I wasn't able to find any in stock locally.
 

KwikFab

Well-known member
Joined
Jul 27, 2024
Messages
1,221
Location
Central Valley, CA
Haven't done much of anything lately until today.

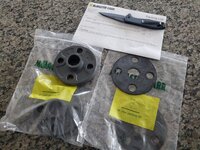
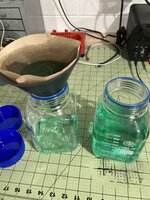
To start, I got a few parts together for putting together a drain and refill system for my CNC table.

20240925_141941.jpg

20240926_160958.jpg

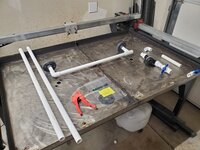
And here's a mock-up. I need to buy a transfer pump and wait for my stainless hardware to arrive so I can mount the flanges and glue everything together.

Water from the table will drain through 3/4" PVC into the reservoir below, but only after it runs through an in-line filter I've got in place.

The threaded plug at the bottom of the reservoir will receive a 1/2" barb where I'll run a soft line to a transfer pump, and the outlet of that pump will go up the second ball valve to act as a means of refilling my table.

20240929_141758.jpg

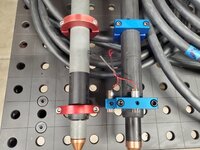
Another item that showed up was a torch mount from Beck's Armory. When I got the mount, I quickly saw what an improvement the clamp-style is on this versus my factory one.

Rather than creating pressure points with it's V-style clamp, the new mount is sized for specific torches.

20240927_090652.jpg

20240929_121810.jpg

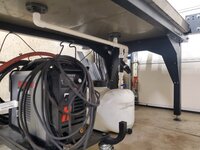
Last but not least, I cleaned up the garage as best as I could.

20240929_141736.jpg

20240929_141910.jpg

Before today, you could barely walk through as I had boxes and hardware everywhere since I had disassembled my plasma table and squared everything up all over again.

One of the fabbed up bumpers gets picked up in a few weeks, the air compressor will go back to its respective spot, and hopefully my Z-axis assembly should arrive. I was running into a small binding issue and when I asked about what parts to order for rebuilding it, Langmuir opted to extend my warranty and send me a complete new one.

The old one.

20240928_122354.jpg
 

zcar751

Well-known member
Joined
Apr 15, 2013
Messages
837
Location
Knoxville, TN
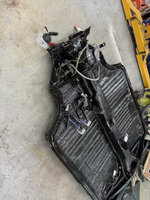
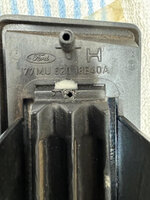
Well yesterday and today I worked on the brake lines for the Puma and the climate controls and several other items as I start putting things together. Funny thing is the running components and pan are straight off the VW assembly line then Puma would modify them for the GTI/GTC before installing the body. They also sourced parts for the GTB from GM. I knew they sourced door latches from Alfa, but as I was working on the climate control panel, I saw the word Ford, interesting. Also did some repairs to the defrost ducting for the dash 40-year-old ABS seems to be a little brittle. Not sure if they expected these cars to be around this long.

Brake lines installed.jpgClimate Control 1.jpgClimate Control.jpgClimate Control 2.jpg
 

oldman_pottering

Well-known member
Joined
Jun 3, 2024
Messages
421
Location
Tinonee, NSW Australia
@oldman_pottering
I struggle with the same issue when make a run of these hand mirrors from time to time.
The curved section at the bottom of the handle is especially troublesome when template routing.
IMG_0068_Original.jpeg
I can usually mange by paying strict attention but sometimes if the wood has a very figured grain the tearout is still a problem.

This is a template guide that I made for use at the bandsaw. If it’s set up right and the blade is in good condition I’m able to trim very close to the template with no danger of tearout.
You can see the waste cutoff to the right of the mirror blank.
IMG_0077_Original.jpeg
I will then clean up the edge using a drum sander with a top bearing.

Just something I’ve tried to keep from scarring the **** outta myself when the bit grabs.

I loved your bandsaw box as well as your comment about being ”as artistic as a brick”. I can so relate to that description
That bandsaw guide is a great idea ! I like those mirror handles, do you insert the glass in the frame or glue it ?
Thanks for posting, sometimes when things go wrong I think it's just me who has troubles
 

welder4956

Well-known member
Joined
Apr 8, 2010
Messages
3,082
Location
Birmingham, AL USA
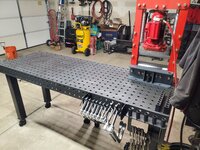
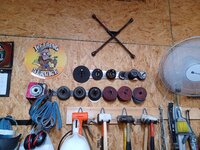
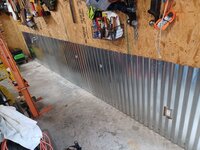
Hung a 4-way lug wrench that I've had for about 35 years on the wall with the bracket I made a couple of days ago. Then cut up three 12 ft. sheets of corrugated steel roofing and screwed them to the wall. I need to get some more sheets and figure out how to trim out the openings and edges. I'm thinking of 3/4" x 1" wood strips on the top edge.

20240928_143039.jpg

20240929_153201.jpg
 
To avoid these ads, REGISTER NOW!

Blue Chips

Well-known member
Joined
Jan 25, 2012
Messages
199
Location
Maine
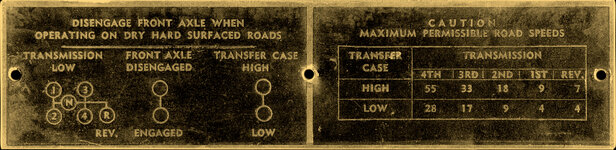
Yesterday I made another reproduction data plate for my 1954 Dodge M37. The original plate showing transmission, transfer case, and road speed information was barely readable. The original is an etched brass plate with slightly raised letters and a chemically blackened background, and I wanted to make the replacement in the same way.

Here's the old ORIGINAL plate after scanning it and making several image adjustments in Photoshop, which enhanced the detail enough to use it as a model for making a replacement.
transmission-plate.jpg

I placed the above image into Adobe InDesign and scaled it to actual size, and then re-drew the plate from scratch. I made two versions; one is a pretty accurate rendition of the original, and the other has 'improved' spacing and alignment of the contents. I did the latter just for fun. I'm actually planning to use the more accurate version on my vehicle to be more faithful to the original.

transmission-speed-plate-layout-in-indesign-smaller-image.jpg

I then printed reversed positive films of the design. They are reversed in order to place the ink side of the film directly against the photoresist film to produce sharper edges on the photoresist image.

transmission-speed-plate-positive-films-smaller-image.jpg

Then I applied photoresist film to a couple of sheets of .025" brass, exposed the photoresist through the above positive films, developed the photoresist to remove the unexposed portions, immersed the brass sheets in a special etching solution, blackened the background with Brass Black from Birchwood Casey, and removed the remaining photoresist with acetone. I also applied a thin clear satin acrylic coating, which deepened the black.

Here are both versions:

transmission-speed-plate-both-versions-smaller-image.jpg

The one shown below is the one I'll be using, which is most similar to the original.

transmission-speed-plate-reproduction-2-smaller-image.jpg

The process is a bit tedious, but kind of fun. The hardest part (for me) is applying the photoresist film to the metal without getting any bubbles in it, but after doing a few data plates I'm getting better at it.
 
Last edited:

oldman_pottering

Well-known member
Joined
Jun 3, 2024
Messages
421
Location
Tinonee, NSW Australia
Designed and 3d printed a replacement cap for a chicken waterer. My son accidentally broke one that was pretty dried out from UV exposure.

Yesterday I made another reproduction data plate for my 1954 Dodge M37. The original plate showing transmission, transfer case, and road speed information was barely readable. The original is an etched brass plate with slightly raised letters and a chemically blackened background, and I wanted to make the replacement in the same way.

Here's the old ORIGINAL plate after scanning it and making several image adjustments in Photoshop, which enhanced the detail enough to use it as a model for making a replacement.

transmission-plate.jpg

I placed the above image into Adobe InDesign and scaled it to actual size, and then re-drew the plate from scratch. I made two versions; one is a pretty accurate rendition of the original, and the other has 'improved' spacing and alignment of the contents. I did the latter just for fun. I'm actually planning to use the more accurate version on my vehicle to be more faithful to the original.

transmission-speed-plate-layout-in-indesign-smaller-image.jpg

I then printed reversed positive films of the design. They are reversed in order to place the ink side of the film directly against the photoresist film to produce sharper edges on the photoresist image.

transmission-speed-plate-positive-films-smaller-image.jpg

Then I applied photoresist film to a couple of sheets of .025" brass, exposed the photoresist through the above positive films, developed the photoresist to remove the unexposed portions, immersed the brass sheets in a special etching solution, blackened the background with Brass Black from Birchwood Casey, and removed the remaining photoresist with acetone. I also applied a thin clear satin acrylic coating, which deepened the black.

Here are both versions:

View attachment 2192610

The one shown below is the one I'll be using, which is most similar to the original.

transmission-speed-plate-reproduction-2-smaller-image.jpg

The process is a bit tedious, but kind of fun. The hardest part (for me) is applying the photoresist film to the metal without getting any bubbles in it, but after doing a few data plates I'm getting better at it.
I have admiration for those of you that can design, 3D print, photoshop etc and make items like these
 

ZRX61

Well-known member
Joined
Aug 15, 2006
Messages
28,716
Location
Solar Blight Valley, SoCal
Hung a 4-way lug wrench that I've had for about 35 years on the wall with the bracket I made a couple of days ago. Then cut up three 12 ft. sheets of corrugated steel roofing and screwed them to the wall. I need to get some more sheets and figure out how to trim out the openings and edges. I'm thinking of 3/4" x 1" wood strips on the top edge.
You screw a piece a 1x2 to the wall above the metal, then screw a piece of 1x3 to that with the top edges flush so the bottom edge of the 1x3 covers the front 1in of the metal. Then you take a piece of 1x4 & mount it flat to the top of the 1x2 & 1x3 to create a narrow shelf the length of the metal paneling.
You could also repeat the 1x2 & 1x3 at the bottom with the metal resting in the 1x2 & the 1x3 acting as a baseboard.

Kinda like this, but the shelf would be wider.

Tin1aa.PNG
 
Last edited:

DGersic

Well-known member
Joined
Mar 12, 2017
Messages
6,375
Location
DeKalb, IL
Finally finished bleeding the brakes. And cleaned up the remaining tools and stuff from the brakes. Need to pick up some Christmas trees from NAPA tomorrow to reinstall the inner fender, and a bolt for the evap canister bracket.

Made a crappy patch for the hole in the exhaust. Made some really ugly welds sticking the patch in place. Hampered by there being a crossmember and a torsion bar in the way, and working where I can’t see the weld (top of pipe) or get the MIG gun up there, it’s ugly. No pictures, I’m not showing that off.
 

LeonardY

Well-known member
Joined
Apr 16, 2011
Messages
5,096
Location
Southern California
Printed some gaskets out of TPU for the vacuum break on the sprinkler valves
1727670168404.png1727670182684.png
1727670196683.png
They work well. I'm still getting a little leaking. I may just need to tighten a few down a little more.
My brother called and asked where to get these. He said he searched Amazon but there was nothing like it.
I told him they were likely either made by my Uncle or bought at the local Farm supply.
1727670414714.png1727670432543.png
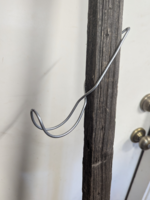
It's a branch support for fruit trees. My dad got a few from my Uncle's orchard when he sold it.
1727670520027.png
The wire is around 3/16. I have some 9 gauge galvanized wire so I thought I give that a try.
This is what I came up with.
1727671270533.png1727671287222.png
It works. I want to try to refine it.
 

Prospecter

Well-known member
Joined
May 16, 2015
Messages
2,443
Location
Maine
Took the Dingo out. Several hours later, brought it back in for an assessment. It needs an infusion of cash. Unwrapped some more stuff.
I feel your pain. Both tractors are marking their respective territories, so probably I will tackle that when cold weather arrives. What's up with the Dingo?
 

niget2002

Well-known member
Joined
Oct 2, 2012
Messages
11,237
Location
Josephine, TX
I have admiration for those of you that can design, 3D print, photoshop etc and make items like these
I went to college for engineering. CAD is taught in the engineering basics class.

You could probably find a community college course and learn that way.

Alternatively, you could create an account with onshape. That would allow you to open other people's designs and see how they did things.

3d printing itself is pretty easy. There's some trial and error in the beginning, but a lot of the newer printers and software makes it easy.
 

kaymccampbell

Well-known member
Joined
Feb 27, 2015
Messages
29,613
Location
Upstate New York
I feel your pain. Both tractors are marking their respective territories, so probably I will tackle that when cold weather arrives. What's up with the Dingo?
It's ****** dead, Jim.

First is, 20yo hydraulic line catastrophic failure. Which means it's time for a whole new set. There is no way I'm playing ****-dog-a-go-go 6 times as they each fail. Nope nope nope.

Next is a new motor. It started the death rattle as I was pulling it onto the trailer. It's not 20yo, but it is the longest living Predator motor I've ever seen do this kind of service. The poor little thing has been weakening. By the time it reached the shop and shut down, I wondered if I should have taken the time to rearrange things and position it over the lift.

Then, I'm sure the 20yo serpentine belt is due for replacement. It looks good, and I'll keep it for a spare, but...

Finally, the tracks are moving towards the frame and occasionally rubbing. So, there's another project. Not sure if it's the guides or the wheel bearings or the tensioners, or all of it.

The tracks and the belt were scheduled for October. The motor was going to be bought over the winter, and hopefully not needed til spring. And the hoses, well, I've been kinda waiting and hoping, but that didn't work out. Pity, they look like new.

And while I'm in there, I really should give the joystick a looksee.

And, all of it needs to be done before the snow flies, at the very least. Though it was scheduled in to a few fall projects, that may fall by the wayside. Which will give me the time I need to rip into the Dingo.

I gotta look at the bright side. I'll come out of it with a refreshed Dingo, and probably a few new tools. Wheee. And I won't be spending $32K.
 

Prospecter

Well-known member
Joined
May 16, 2015
Messages
2,443
Location
Maine
Yes. That sort of equipment is expensive to buy, and definitely worth nursing along. Love those Predator motors. It's so convenient to just swap the whole thing out, rather than tear into the motor. Will new tracks fix the problem, or are you looking at running gear, too.
 

kaymccampbell

Well-known member
Joined
Feb 27, 2015
Messages
29,613
Location
Upstate New York
Yes. That sort of equipment is expensive to buy, and definitely worth nursing along. Love those Predator motors. It's so convenient to just swap the whole thing out, rather than tear into the motor. Will new tracks fix the problem, or are you looking at running gear, too.
Won't know till I rip into it. It's bound to be entertaining.
 

Old Man Roger

Well-known member
Joined
Apr 6, 2017
Messages
17,818
Location
Palm Coast Florida
It's all about perception! :D

Later, I cut some pool noodles for the new truck (they go on the top of the tailgate, under the kayaks) and drug some cardboard over to peek at the U-joints...it's still vibrating at 70+, after the new tires. All of the joints look fine but the carrier bearing seems a little floppy. I think I'll give that a shot.

Unfortunately, it looks like there's several leaks going on, including the transfer case. I'll clean it up so I can monitor, then probably take it to the mechanic...no way/desire to pull an engine, trans, or x-case. It's had the rear main replaced twice but it's never stopped leaking, so I wonder if the old mechanic didn't loosen the rear main bearing while installing or what. Might end up being both mains, plus x-case input and rear output seals.
Do you feel the vibration more in your seat? Or in the steering wheel? Might give a clue to whether it's in the steering, or the drive line?


It's ****** dead, Jim.

First is, 20yo hydraulic line catastrophic failure. Which means it's time for a whole new set. There is no way I'm playing ****-dog-a-go-go 6 times as they each fail. Nope nope nope.

Next is a new motor. It started the death rattle as I was pulling it onto the trailer. It's not 20yo, but it is the longest living Predator motor I've ever seen do this kind of service. The poor little thing has been weakening. By the time it reached the shop and shut down, I wondered if I should have taken the time to rearrange things and position it over the lift.

Then, I'm sure the 20yo serpentine belt is due for replacement. It looks good, and I'll keep it for a spare, but...

Finally, the tracks are moving towards the frame and occasionally rubbing. So, there's another project. Not sure if it's the guides or the wheel bearings or the tensioners, or all of it.

The tracks and the belt were scheduled for October. The motor was going to be bought over the winter, and hopefully not needed til spring. And the hoses, well, I've been kinda waiting and hoping, but that didn't work out. Pity, they look like new.

And while I'm in there, I really should give the joystick a looksee.

And, all of it needs to be done before the snow flies, at the very least. Though it was scheduled in to a few fall projects, that may fall by the wayside. Which will give me the time I need to rip into the Dingo.

I gotta look at the bright side. I'll come out of it with a refreshed Dingo, and probably a few new tools. Wheee. And I won't be spending $32K.
''It's ****** dead, Jim.'' Star Trek reference? I love it.lol

Are you sure the death rattle wasn't because of the loss of hydraulic fluid rather than a dying engine?
 

kaymccampbell

Well-known member
Joined
Feb 27, 2015
Messages
29,613
Location
Upstate New York
Do you feel the vibration more in your seat? Or in the steering wheel? Might give a clue to whether it's in the steering, or the drive line?


''It's ****** dead, Jim.'' Star Trek reference? I love it.lol

Are you sure the death rattle wasn't because of the loss of hydraulic fluid rather than a dying engine?
Yup. And nope. Plenty of fluid and oil in it. It maybe lost a gallon out of 10.
 

Mike S.

Well-known member
Joined
Jan 16, 2022
Messages
272
Location
Charlotte, NC
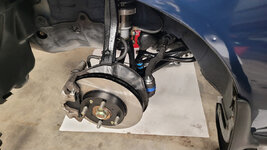
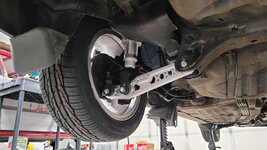
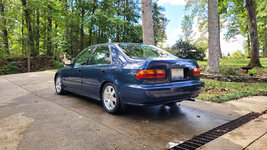
It took several nights and a couple of weekends to complete, but the suspension is back on my little '94 Civic. All new bushings for both the front and rear. The front lower control arms and strut forks were stripped, cleaned and powder coated. New front upper control arms with camber adjustment were added. New pads and rotors for the front. New coilovers installed with dampening adjustment.

frontSuspension.jpg

rearSuspension.jpg

The rusty 14" steel wheels were replaced with a 15" aluminum set from a later generation Civic.

civicRear.jpg
 

KwikFab

Well-known member
Joined
Jul 27, 2024
Messages
1,221
Location
Central Valley, CA
Got woken up and had to take the wife to work today.

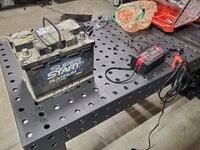
Her car wouldn't start so we just jumped in mine.

Got back and I tried starting it; crank then clicking which is the sound of a dead/dying battery.

Well 4 hours of being plugged in and it never goes above 12.5v (started at 11.1v).

20240930_131852.jpg

Funny thing is, the sticker on it says 9/21 so I just had to call and ask to confirm my purchase date. 10/8/21 so I've got some warranty left 🤣

Talk about cutting it close! Going to get it load tested after I pick her up from work today.
 
To avoid these ads, REGISTER NOW!
Top Bottom