To avoid these ads, REGISTER NOW!

What did you do "IN" your garage today?

To avoid these ads, REGISTER NOW!

Snapped-off

Well-known member
Joined
Feb 22, 2012
Messages
4,817
Location
Indiana
Rolled the toolbox out from the back corner.
1000018119.jpg

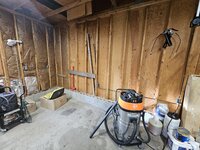
Moved approximately where it will rest on the side wall. I left it about 2 feet from the wall so I can get behind it to rewire the garage this week. It'll get pushed back once I put up the wall coverings.
1000018121.jpg

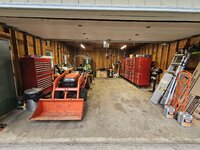
Current stage of the mess. The work bench on the left will be moved to the same wall as the big box. The small box is moving either to the front garage or the basement, I'm still unsure.

That will leave room for the tractors to move over against the wall so I can park the truck inside for the winter.
1000018122.jpg
Also one of the Kubota bucket hoses sprung a leak while I was moving some landscaping boulders, so I had to order a replacement.
 

Outlawmws

Well-known member
Joined
Aug 9, 2011
Messages
39,334
Location
The Badlands
Unloaded a lot of the camp gear, starting with the cold food and getting that put away.

Power washed the exterior of the van, rolled it onto the oil change ramps and did a lot of the underside - It's probably cleaner underneath than ever... Power washed the camp throne, both wash stations, and the cooler chest. Power washed the driveway.

Repaired and beefed up the wood bar the supports the cooler chest's top sliding basket (my own addition).

Started the process for getting the dust off things as I put them away, made a pile of laundry for the stuff being washed with "sport wash" (unscented) vs. can get regular wash.

Lots of vacuuming dust off other gear bags to go.
 

DGersic

Well-known member
Joined
Mar 12, 2017
Messages
6,386
Location
DeKalb, IL
The switch on my oldest DeWalt angle grinder has been held together with 33+ for 10 years or so.

Looks like mine is going to be rocking the electrical tape for a while. I called HF today, and they don’t have parts available. Only the motor brushes, and the top handle and its mounting screws are available.

eBay has some similar switches. I may buy one to canibalize.
 

PWC Repair

Well-known member
Joined
Dec 27, 2012
Messages
3,194
Location
Arkansas
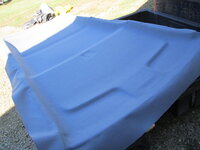
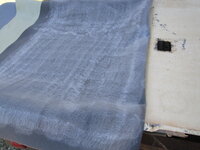
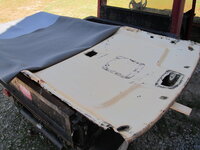
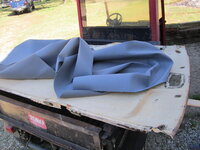
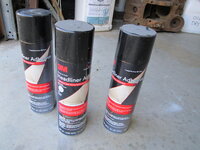
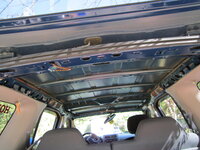
I got tired of the headliner in our tow rig resting on my head. Headliner material was in stock at Hobby Lobby for 12.99 a yard......I needed 3. BUT....today was 40% off material! I also used 2 cans of this 3M glue. Started pulling it down and found a mouse nest......WTH!!! I folded the material back and glued it down in 1/3 sections.
 

Attachments

  • IMG_3215.JPG
    IMG_3215.JPG
    623.6 KB · Views: 47
  • IMG_3214.JPG
    IMG_3214.JPG
    783.3 KB · Views: 41
  • IMG_3213.JPG
    IMG_3213.JPG
    659.1 KB · Views: 39
  • IMG_3210.JPG
    IMG_3210.JPG
    760.2 KB · Views: 41
  • IMG_3212.JPG
    IMG_3212.JPG
    749.2 KB · Views: 45
  • IMG_3211.JPG
    IMG_3211.JPG
    695 KB · Views: 47
  • IMG_3209.JPG
    IMG_3209.JPG
    548.6 KB · Views: 47

LeonardY

Well-known member
Joined
Apr 16, 2011
Messages
5,108
Location
Southern California

CoogarXR

Well-known member
Joined
Jan 11, 2016
Messages
6,873
Location
Ohio
I had just "straightened up" the new place, putting all my tools in the garage. Well, I just had to do some more wiring, and wouldn't you know, I had to drag about 80% of those tools back into the house. Jig saw, sawzall, 4 different drills, inspection camera, **** tons of blades and bits, my electrical kit, you name it. Modernizing the electrical on old houses is a ton of work.

I installed a triple-gang switch in the back entrance hallway. There was nothing at all back there. No electric, no lights, nothing. I got sick of having to use my phone flashlight to find my way out of the house at night. So the new triple switch will consist of one 3-way added to the nearest existing interior light circuit, another switch for a new overhead canless LED light in the hallway, and a 3-way for the back porch light.

Interestingly, there already is a back porch light (a big paddle-fan with a light actually), but it was never wired. It's mounted, and there is romex run to it, but I'll be damned if I can find the other end of the run. Oh well, that run is getting capped off and a new line ran to an actual switch. I have it all hooked up except the last 3-way switch by the back door. I need to go under the porch to run that (and I have to pull an ethernet and a cable for the new garage subpanel while I'm under there too). But it's like a 50ft crawl back to this location, and I was too tired. That, and there's a high probability that I may encounter a skunk or a groundhog under there, so I ain't dealing with that when I'm tired, by myself, and out in the middle of nowhere.
 

Old Man Roger

Well-known member
Joined
Apr 6, 2017
Messages
17,879
Location
Palm Coast Florida
Put all the potted flowers and plants from the yard in the garage before the storm. Moved a couple Rubbermaid out door storage containers in there too.

We aren’t supposed to get the brunt of the storm, but they’re talking 100 mph winds here, that could send a plant flying. Probably do a job on the Rubbermaids too.

With any luck, my next post here won’t involve pulling the generator out of the garage.🤞
 
To avoid these ads, REGISTER NOW!

Notgrownup

Well-known member
Joined
May 5, 2014
Messages
5,977
Location
Snow Hill NC
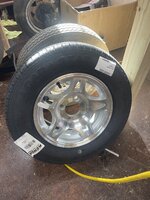
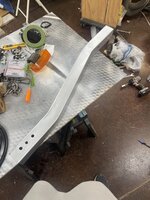
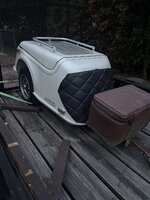
Restoring a 1993 Escapade fiberglass trailer to pull behind my Harley Trike. Stripped it down. Addressed the rust on the sub frame and tongue, painted the tongue, sanded the tub, primed the bottom and covered it with bed liner from Raptor. cutout the rear lights and filled the holes with fiberglass. Bought new wheels with radials, new Monroe shocks. Gas shock for the lid. I will keep posting progrest. I just got back from a 3000 miles trip pulling a modified Harbor Freight small trailer with a Jegs car top carrier.
 

Attachments

  • IMG_5366.jpeg
    IMG_5366.jpeg
    796.2 KB · Views: 34
  • IMG_5365.jpeg
    IMG_5365.jpeg
    670.7 KB · Views: 38
  • IMG_5368.jpeg
    IMG_5368.jpeg
    953.3 KB · Views: 34
  • IMG_5369.jpeg
    IMG_5369.jpeg
    796.5 KB · Views: 31
  • IMG_5227.jpeg
    IMG_5227.jpeg
    956.9 KB · Views: 26
  • IMG_5226.jpeg
    IMG_5226.jpeg
    710 KB · Views: 30
  • IMG_5224.jpeg
    IMG_5224.jpeg
    805.7 KB · Views: 29

rd65

Well-known member
Joined
Sep 29, 2017
Messages
2,842
Location
Granite Falls, WA

Mainiac Mat

Well-known member
Joined
Sep 2, 2020
Messages
405
Location
Maine
Sister-inlaw and neice are staying with us for a few days... man, these girls can talk... as in non-stop talk.

So what did I do in the garage? I hid! Organized, hauled summer stuff and junk up to the attic. And organized my new little U.S. General service cart. Then I cut another queen post for my timber frame screen porch build.
 

KwikFab

Well-known member
Joined
Jul 27, 2024
Messages
1,230
Location
Central Valley, CA
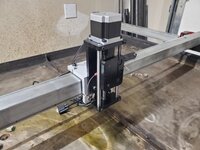
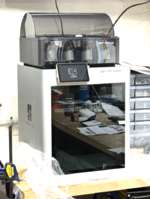
Friday I received a new Z axis assembly.

I posted how it arrived with a broken part.

Well yesterday's email response kind of surprised me (in a good way) for this reason - I was out of warranty which I mentioned in my previous post, but an assembly was still provided for warranty reasons. In my inquiry, I offered to send the "new broken" one back, and even pay for shipping. Or, that I'd be ok to cannibalize it and swap the "good" part from my old assembly onto the new assembly.

Basically attempting to be as much of a convenience as possible since their support has been amazing.

The response was to go ahead and keep the "new" broken one, attempt to fix it with my old assembly, as well as being sent yet another complete new assembly.

Really easy to disassemble but if you're not mechanically inclined, I can see it being a bit of a struggle.

The old one on the left, and the new one on the right.

20241008_103423.jpg

I never understood how people lose small parts like these springs. When I'd rebuild manual hubs, or other similar items with a detent ball and spring, I'd always chuck the parts in a sandwich bag before opening her up. This is how you catch these small parts.

20241008_104204.jpg

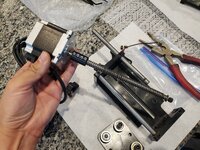
The only item that gave me any fits was the coupler on my old assembly. The socket cap screws got stripped so I had to pull the lead screw out with the motor.
20241008_110206.jpg

I'll cut the coupler off later, but I'll end up with an extra motor as well as an extra lead screw now.

After the transplant, here she is all ready to go.

20241008_110042.jpg

And installed.

20241008_111156.jpg

This is the part that broke on the new assembly. It's a sort of "L" that angles upward to catch a spring used for IHS.

20241008_112207.jpg

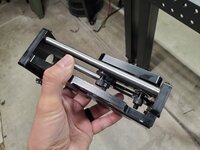
Now I also have an extra "mount" as well.
20241008_112543.jpg

Spare parts are always a win in my book.
 
To avoid these ads, REGISTER NOW!
Top Bottom