To avoid these ads, REGISTER NOW!

ZMotorsports Shop Projects 2.0

OP
Z

zmotorsports

ALLIANCE MEMBER
Joined
Oct 20, 2009
Messages
21,591
Location
Northern Utah
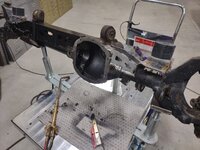
Now the last of the truss installation can take place with pieces in hand.

Test fit so the contact points could be marked on the axle housing.
gear91.jpg

Then the prep work took place on the axle truss components and everything was given a wipe down with acetone.
gear92.jpg

The differential cast housing was preheated again to approx. 350-450 degrees.
gear93.jpg

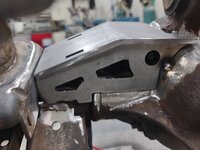
Components keyed in place and the front and rear pieces were tacked.
gear94.jpg

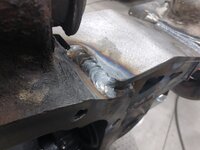
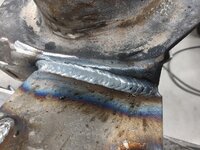
After the front and rear were fully welded, the top piece was put in place and welded. The keyed tabs were addressed first. Again, keep the wire melting at the tab, then let it puddle up and bite into the top place before moving forward. The key here is not to focus on making it look nice as much as making sure you get full penetration into the plate below.
gear95.jpg

With the cast steel differential still hot, the top piece is welded to the center section.
gear96.jpg

And then welded to the coil bucket.
gear97.jpg

Wrapped and allowed to cool for a while and then cleaned and prepped for painting.
gear98.jpg

Short side painted.
gear99.jpg

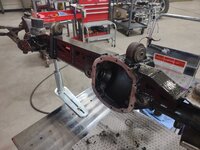
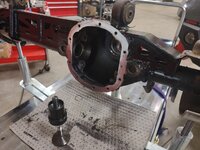
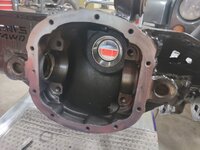
And ready to continue assembly after another thorough cleaning to ensure no debris from grinding or welding found its way into the differential housing.
gear100.jpg


Thanks for looking.
 
To avoid these ads, REGISTER NOW!

stinkity stoink

Well-known member
Joined
Apr 8, 2007
Messages
749
Location
New Jersey
As usual work Going on is top notch!
Do you have to check the axle for warping at all from all of the welding ? I’m in no way questioning what you were doing I’m just curious because I see some people say the axles warp from so much welding. I’m definitely no expert.
 
OP
Z

zmotorsports

ALLIANCE MEMBER
Joined
Oct 20, 2009
Messages
21,591
Location
Northern Utah
As usual work Going on is top notch!
Do you have to check the axle for warping at all from all of the welding ? I’m in no way questioning what you were doing I’m just curious because I see some people say the axles warp from so much welding. I’m definitely no expert.

Thank you.

Those that usually warp an axle housing generally just start welding and continue around the housing without stopping nor taking into account the forces involved when metal heats then cools. If you think through it and work from side to side and end to end, then pause and give things a chance to normalize before continuing then chances of warping are greatly diminished if not eliminated.
 
OP
Z

zmotorsports

ALLIANCE MEMBER
Joined
Oct 20, 2009
Messages
21,591
Location
Northern Utah
Made a lot of headway on the Jeep's front axle last night. Things progressed nicely.


I began by pressing the carrier side bearings onto the carrier assembly. The important thing to remember here is that you do not want to press on the outside, or cage, of the bearing. Keep in mind whichever area of the bearing that is the interference fit, that is the area that you want to press on. Here the inner race is being pressed onto the carrier so the force must be directly on the inner race. You also must use a driver that does not come into contact with the cage or you could damage the bearing before even running it. I like to spin the bearings as I'm pressing them on to ensure there is nothing obstructing the bearing from freely spinning. The first bearing is not usually the worry as the side sitting on the press doesnt' have the bearing installed yet. However, when you flip the carrier over to press the second carrier bearing on, make sure that both bearings are being properly supported on the inner races. Here the first bearing was pressed on then the carrier assembly was set onto one driver on the inner race, while I pressed the second bearing on with another driver on the inner race and I spun both bearings randomly throughout the pressing process.
gear101.jpg

Second bearing fully seated into position.
gear102.jpg

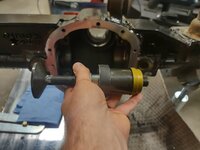
Next came time to install the inner differential seals. This tool makes installation quite easy as it pushes them from one side to the other and drives on the inside of the seal at the formed crimp where it is the strongest.
gear103.jpg

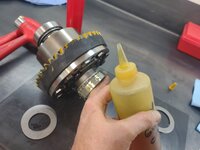
I apply a thin layer of sealant around the outside diameter of the seal before pressing into housing.
gear104.jpg

Then once the seal is fully seated, I take my finger and wipe around the circumference of the seal wiping the excess sealant away but also creating a nice uniform seal around the mating surface. This isn't 100% necessary, but on these older differentials that have been worked on before I like to add another layer of insurance against a leak as they can become gouged or scratched over the years from previous work.
gear105.jpg

Next the inner pinion race is prepped for installation. I use a little extreme pressure lube to aid in race installation. Again, cleanliness of the race's seating area is critical so I do a second and third cleaning and visual inspection before actually installing the race.
gear106.jpg

Inner race and baffle installed and fully seated. Then the same process was performed on the outer bearing race.
gear107.jpg

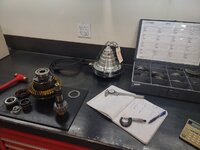
Next a starting shim pack is determined for the pinion depth and test bearings. I went with the suggested .065" starting point as per the literature that came with the gear set, although that seemed a bit thick.
gear110.jpg

Pinion installed with initial shim stack and test bearings.
gear108.jpg

Outer bearing and yoke also installed and taken down so there is no clearance in the bearings and slight drag.
gear109.jpg

Stay tuned for more....
 
OP
Z

zmotorsports

ALLIANCE MEMBER
Joined
Oct 20, 2009
Messages
21,591
Location
Northern Utah
Continuing on.

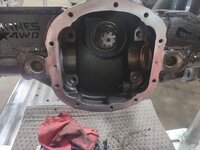
The first round was a no-go. The carrier was too tight to tighten the bearing caps as it contacted the pinion.

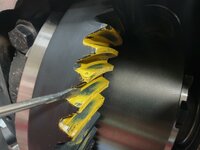
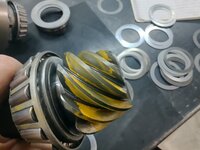
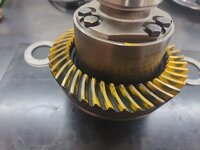
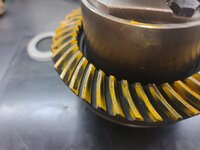
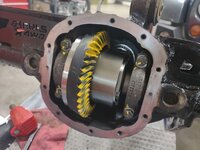
The carrier and pinion were removed and I dropped from the suggested .065" starting point down to .058" and reinstalled everything. This was better as I at least now had clearance, but only .003". My gut told me that the pinion was still too deep, but I wanted to mark up the gear and verify it was not merely ring gear position. I like this GM gear marking compound very much, hands down the best one I've found over all the years of doing rear end work. I also like to mark on the gear at 2 to 3 locations and not trust just one spot. Same with backlash readings, I like to take multiple readings approx. 120-degrees apart to make sure there are not tight spots.
gear111.jpg

This is about the third attempt and still a bit too deep with the pinion.
gear112.jpg

After another couple of iterations, I felt like it was getting closer.
gear113.jpg

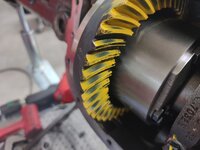
I'm really liking this setup with a .048" pinion shim stack. The pattern is centered face to root as well as heel to toe and looks even on both drive and coast sides of the ring gear teeth.
gear114.jpg

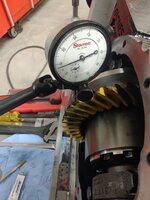
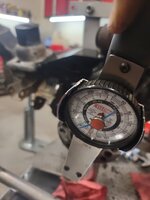
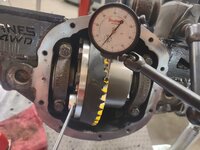
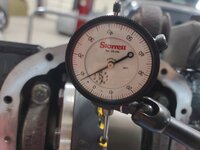
Backlash felt good but time to throw a dial indicator on it in a few spots.
gear115.jpg

Tightest spot was .007" and this spot was .0075" so perfect between the .006"-.010" recommended clearance for this gear set.
gear116.jpg

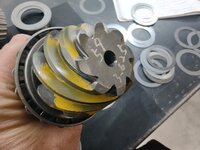
The last check will be to see how the pinion looks in relation to the ring gear and I liked what I saw.
gear117.jpg

Not running off the teeth and looks like it is getting full engagement in the middle of the pinion gear.
gear118.jpg

I like the looks of that final fitment in both pinion depth and backlash.
gear119.jpg

gear120.jpg

Now time to prep for final assembly.

Stay tuned for more...
 
Last edited:
OP
Z

zmotorsports

ALLIANCE MEMBER
Joined
Oct 20, 2009
Messages
21,591
Location
Northern Utah
Last couple of pictures.


The wife had just arrived home from work so this was a good stopping point for the evening. I removed the test bearings and measured the shim stack to ensure nothing was missing and made my final notes and then pressed the new bearing onto the pinion using the final shim stack of .048".
gear121.jpg

Shims cleaned up and set aside to avoid confusing them with the last assembly. Notes made in my records and everything ready for the final assembly. This was a good stopping point as the next step will involve heating the outer pinion bearing and then working quickly to assemble the pinion assembly, crush sleeve, slinger, seal and then lastly the yoke and nut.
gear122.jpg


Thanks for looking.
 

ntsqd

Well-known member
Joined
Jan 22, 2005
Messages
1,031
Location
Lower left coast
I've had two of the crush sleeves continue to crush or relax or whatever happened to them. One was a Toyota 8" with maybe 75k on it, only a carb'd 22R with no doubler, only 4.88's. Th other was an 8" Ford with less than 10k on it; a carb'd mild 302 street car. I am not a drag racer or a rock bouncer, so I'm a little mystified as to why they both did that. Since then I've always asked for solid spacers. It's probably over-kill in most of my uses, but.......
:)
 
OP
Z

zmotorsports

ALLIANCE MEMBER
Joined
Oct 20, 2009
Messages
21,591
Location
Northern Utah
I've had two of the crush sleeves continue to crush or relax or whatever happened to them. One was a Toyota 8" with maybe 75k on it, only a carb'd 22R with no doubler, only 4.88's. Th other was an 8" Ford with less than 10k on it; a carb'd mild 302 street car. I am not a drag racer or a rock bouncer, so I'm a little mystified as to why they both did that. Since then I've always asked for solid spacers. It's probably over-kill in most of my uses, but.......
:)

I agree, overkill in many applications. However, in any race or high horsepower application I replace the crush sleeve in favor of solid spacer/shims as well. That being said, in all of the rear ends I've built over the past 35+ years, I have never had a crush sleeve fail to provide the required preload. I have seen them get a bad name on several YouTube videos I've seen over the years, but upon watching their assembly it was obvious a couple of them over-crushed the sleeve and then backed off slightly to reduce the preload. That pretty much defeats the purpose of the crush sleeve and not the crush sleeve's fault. That was the installer's fault, but they still got trashed as inferior parts. Maybe you just got a lemon(s) or issues with them from the manufacturer.
 

ntsqd

Well-known member
Joined
Jan 22, 2005
Messages
1,031
Location
Lower left coast
The guy that set up the 8" Ford should have known what he was doing as he worked in the area's then premier drive-shafts and axles shop (now closed - owner retired), but that doesn't guarantee it. The guy who set up the Toyota is a good friend who now does all of my R&P set-ups and is sometimes asked to consult with other's who get a particularly difficult or unusual R&P set-up.

Your experience with them is much more the norm from what I see and hear. I've been thinking that my experiences were outliers, but twice bitten......
 
OP
Z

zmotorsports

ALLIANCE MEMBER
Joined
Oct 20, 2009
Messages
21,591
Location
Northern Utah
The guy that set up the 8" Ford should have known what he was doing as he worked in the area's then premier drive-shafts and axles shop (now closed - owner retired), but that doesn't guarantee it. The guy who set up the Toyota is a good friend who now does all of my R&P set-ups and is sometimes asked to consult with other's who get a particularly difficult or unusual R&P set-up.

Your experience with them is much more the norm from what I see and hear. I've been thinking that my experiences were outliers, but twice bitten......

Agreed. Your experience of being bitten twice would definitely change your perspective and bring your guard up. My experiences being the exact opposite, doesn't necessarily mean that crush sleeves are good or bad, just different outcomes from different people and builders. There are so many variables that can change but I do use crush sleeve eliminator setups (solid spacers) in any race or high horsepower applications to at least remove that variable or possibility.
 

customh

Well-known member
Joined
Feb 18, 2013
Messages
563
Location
East Bethel, MN
Gotta keep my head screwed on straight then I could be a little dialed in like you but on a smaller scale.

You sure you weren’t a MW in another entity?

Not quite sure how to take that. I don't know what an MW is? :unsure:
Guessing Millwright. Proofreading for readability would be nice.
 
OP
Z

zmotorsports

ALLIANCE MEMBER
Joined
Oct 20, 2009
Messages
21,591
Location
Northern Utah
Guessing Millwright. Proofreading for readability would be nice.

Sorry habit of the trade…..yup, Millwright, up here our education includes a lot of more precision school of thought. Also trained in the basics of machining and welding amongst other things.

Thanks for clarifying but I have another question, and excuse my ignorance. I have heard the term Millwright before, but I'm not versed in the term well enough to differentiate a Millwright from a mechanic in terminology.

Many years ago, when I started my career as an Industrial Maintenance Mechanic, I worked with an older gentleman that kept referring to himself as a Millwright and just said it was what they were called at his last job. He said it was more of a jack of all trades title, but I didn't necessarily take it as a good thing back then.

Can you help me understand what you meant please?
 

PhantomEB

Well-known member
Joined
Feb 6, 2006
Messages
6,967
Location
Medicine Hat, AB, Canuckistan
Millwright specialty is mechanic of Rotating equipment, so anything like Conveyors, Pumps, Fans, Turbines is in our ‘Jurisdiction’ of the trades. Everything from overhauls, diagnostics, layout/elevation for installation as well RnR of said examples is part of being a Millwright.

Jack of all trades, Master of none, is probably what you heard…..this is true as we are trained to dabble in a lot of other trades, like welding, machining(actually my ticket allows me to write off first year school in Machining( there’s 4/years), auto mechanics, Refridgeration as well electrical up to 480Hz is all part of our education in Canada.
 
OP
Z

zmotorsports

ALLIANCE MEMBER
Joined
Oct 20, 2009
Messages
21,591
Location
Northern Utah
Millwright specialty is mechanic of Rotating equipment, so anything like Conveyors, Pumps, Fans, Turbines is in our ‘Jurisdiction’ of the trades. Everything from overhauls, diagnostics, layout/elevation for installation as well RnR of said examples is part of being a Millwright.

Jack of all trades, Master of none, is probably what you heard…..this is true as we are trained to dabble in a lot of other trades, like welding, machining(actually my ticket allows me to write off first year school in Machining( there’s 4/years), auto mechanics, Refridgeration as well electrical up to 480Hz is all part of our education in Canada.


Thank you. The bold area above is basically everything I've been doing in my career as an Industrial Maintenance Mechanic since I hired on as an apprentice in 1988. Combined to the above is hi-rise automated storage maintenance, electric lift truck maintenance and dock doors/dock ramps/truck restraints (dock packages as we call them), etc. The fork trucks we had when I first started were LP powered but shortly after I started the company transitioned from ICE to electricl fork trucks and have been using them solely since about 1990.

It's interesting the terminology differences to describe similar industries.

Thanks for the explanation. So, when you ask if I was a Millwright in another entity, I would have to answer that I guess I still am. I just learned to tackle the automotive industry as well as that seems to be where my true passion lies.
 
To avoid these ads, REGISTER NOW!

customh

Well-known member
Joined
Feb 18, 2013
Messages
563
Location
East Bethel, MN
Thanks for clarifying but I have another question, and excuse my ignorance. I have heard the term Millwright before, but I'm not versed in the term well enough to differentiate a Millwright from a mechanic in terminology.

Many years ago, when I started my career as an Industrial Maintenance Mechanic, I worked with an older gentleman that kept referring to himself as a Millwright and just said it was what they were called at his last job. He said it was more of a jack of all trades title, but I didn't necessarily take it as a good thing back then.

Can you help me understand what you meant please?
@zmotorsports Seems to me @PhantomEB initial comment was that he's got the training to do what he sees you doing but lacks the experience and focus sometimes?

In the US it seems there is a broader definition to the title of "Millwright" than the Frozen North allows. In the US, every hick with an engine-driven arc welder and a come-along doing repairs on grain elevators call themselves millwrights whether they are trained union guys or not. I've even wondered how some of the union guys I've seen made it through school.

There are some very skilled millwrights out there working in mines, doing in-field overhauls on 500HP+ reciprocating compressors in the refineries and the oilfield and various other things. I think being a Millwright is an admirable trade, but like anything it's all about the niche you find.
 
OP
Z

zmotorsports

ALLIANCE MEMBER
Joined
Oct 20, 2009
Messages
21,591
Location
Northern Utah
@zmotorsports Seems to me @PhantomEB initial comment was that he's got the training to do what he sees you doing but lacks the experience and focus sometimes?

In the US it seems there is a broader definition to the title of "Millwright" than the Frozen North allows. In the US, every hick with an engine-driven arc welder and a come-along doing repairs on grain elevators call themselves millwrights whether they are trained union guys or not. I've even wondered how some of the union guys I've seen made it through school.

There are some very skilled millwrights out there working in mines, doing in-field overhauls on 500HP+ reciprocating compressors in the refineries and the oilfield and various other things. I think being a Millwright is an admirable trade, but like anything it's all about the niche you find.

Thanks Travis, I appreciate the comments and explanation. Not that I took offense to what @PhantomEB posted, I was asking for a bit more "color". I have a tendency to overthink things at times and even though I assumed it was meant as a compliment, I was just asking for a bit more clarity to help me understand.

With me never having any formal schooling and having had to learn everything the hard way through trial and error (lots of errors :oops:), I have a tendency to be on guard a bit when it comes to my skillset.
 

PhantomEB

Well-known member
Joined
Feb 6, 2006
Messages
6,967
Location
Medicine Hat, AB, Canuckistan
@zmotorsports Seems to me @PhantomEB initial comment was that he's got the training to do what he sees you doing but lacks the experience and focus sometimes?

In the US it seems there is a broader definition to the title of "Millwright" than the Frozen North allows. In the US, every hick with an engine-driven arc welder and a come-along doing repairs on grain elevators call themselves millwrights whether they are trained union guys or not. I've even wondered how some of the union guys I've seen made it through school.

There are some very skilled millwrights out there working in mines, doing in-field overhauls on 500HP+ reciprocating compressors in the refineries and the oilfield and various other things. I think being a Millwright is an admirable trade, but like anything it's all about the niche you find.
Theres a lot to learn in the trade, i have the focus but need to brush up on a lot of things. At my fertilizer plant, do you think they would of offered me a full time spot if they didn’t see potential?Many a buddy shows up here for a shutdown and goes holy ****, we see why you moved down here. So much more than meets the eye to learn here Than you would in the rest of the province!

There’s a lot of unskilled Millwrights up here, both union and non.

I agree that it’s all about the niche you find.
 
OP
Z

zmotorsports

ALLIANCE MEMBER
Joined
Oct 20, 2009
Messages
21,591
Location
Northern Utah
Theres a lot to learn in the trade, i have the focus but need to brush up on a lot of things. At my fertilizer plant, do you think they would of offered me a full time spot if they didn’t see potential?Many a buddy shows up here for a shutdown and goes holy ****, we see why you moved down here. So much more than meets the eye to learn here Than you would in the rest of the province!

There’s a lot of unskilled Millwrights up here, both union and non.

I agree that it’s all about the niche you find.

I think we have or had similar points of view on our field. When I was in high school all I wanted to do was work on cars, trucks and bikes. I thought the automotive industry would be my field of choice because that is all I could think about. My parents wanted me to go to school for electronics/computers but my interests did not align with that career path or field. I found out quickly that my interest did not align at all because I lacked focus on the subject and all I could think about was getting home to work on cars.

Once I graduated high school and was ready to get started on my career, I looked at the automotive industry but also saw the limitations, and really didn't want to work flat rate as I saw firsthand what that did to good mechanics. My older brother was in the Industrial Maintenance field as a mechanic and I saw how well it benefited him, not only by pay and benefits, but also the skillset he had acquired so I started to focus on those companies in our area that had an Industrial Maintenance Department. However, after multiple phone calls, handing out resumes and interviews I was finding no one wanted to hire me due to lack of experience. I tried explaining I was a hard worker and quick learner, but no one took a chance on me.

Until one did. One guy I interviewed with made the comment that he "liked hiring guys that came from a farm background because they knew how to keep **** running". Although I couldn't wait to get off the farm and really didn't look at farm life as a good thing in my eyes, I went with it because it got my foot in the door. Well, that and my girlfriend (now wife) was friends with the Maintenance Manager's niece and put in a good word for me. ;)

Lesson one on day one was that working in a professional shop was TOTALLY different than working in one's backyard in a barn on a farm. I learned everything I could from some very knowledgeable coworkers and absorbed everything I could like a sponge, as well as made my fair share of mistakes and screw-ups, but they were lessons learned. The Maintenance Manager who hired me quickly became my mentor and I aspired to be like him in many ways. After he retired, we continued to remain close friends and I think of him often as he gave me my shot if you will, at the life I now have.

I completely agree with you that "there is a lot to learn in this trade." I feel in this field of Industrial Maintenance I have far surpassed what I would have learned had I stuck solely to automotive. I have found that automotive is the passion that I feed with all of the lessons I've learned along the way as an Industrial Maintenance Mechanic, or Millwright using your terminology. :bounce:

Thank you for the comments and great conversation about our industries, although different, they seem very much the same.
 

mbryson

Well-known member
Joined
Jan 4, 2014
Messages
133
Location
Bountiful, UT
Interesting that you're an old farm kid, Mike. I grew up in Smithfield working on the neighbor's farms. You just learned to fix things good enough to get the job done. Usually you had pretty limited tools with what was in the piece of equipment you were working with. Then there was always the time factor. Is it quicker to fix in the field or run it back to the shop (where you had to sift through the insane shop with parts, tools and such scattered everywhere)?

Being a "hand", I was relegated to fixing elevators, conveyors and such. Rarely fixing/operating something cool like a tractor, combine or similar. For whatever reason, I couldn't seem to get out of the milk barn as a kid and if I did it was to throw bales in the field or dig ditches or whatever. Gave me a strong back and shoulders for sure. Sloppy tails and cows to snuggle with. Great stuff. I still love heavy equipment and farm equipment. It's fun to rent something like a mini-excavator or the like and be able to operate it decently within a few minutes due to the exposure on the farm and the understanding of hydraulic cylinders and such that gave.
 
OP
Z

zmotorsports

ALLIANCE MEMBER
Joined
Oct 20, 2009
Messages
21,591
Location
Northern Utah
I hope everyone is ok with pictures, because I have a lot of them from last night. :bounce:

At this point during an axle build the process goes quick because you have to work quick. Once the outer pinion hits the bearing heater the process goes into high speed up and you have to work quickly but methodically, or you'll be pulling things back apart if you overlook something.

Just as I arrived home, I had the plan in my head but figured before plugging in the bearing heater, I would address the differential cover bolts. I took them to the wire wheel and knocked the old RTV off the threads. I then tossed them in the basket in the media blast cabinet to prep them for paint.
gear1.jpg

They came out great and ready for paint.
gear2.jpg

Inserted them into the high-tech fastener holding apparatus. ;)
gear3.jpg

Hit the heads with a couple light coats of satin black. I have found this Seymour E-coat primer a nice coating for chassis parts as the satin black does a good job of mimicking most OEM's chassis black. I also have found that it is thin enough to apply in 2-3 light coats that it doesn't build up much mil-thickness that will get knocked off when a wrench or socket comes into contact, yet still provides good corrosion protection against the elements. Again, not sure how many shops go through this amount of detail on jobs that come through their doors.
gear4.jpg

Now the bearing heater is plugged in and turned on while I gather the necessary parts and tools all at the ready as this next part needs to be executed rather quickly.
gear5.jpg

Inner bearing pre-lubed with gear oil.
gear6.jpg

Inch/pound dial torque wrench ready with socket attached for quick access.
gear7.jpg

Temp. crayon shows that the inner race is ready @ 250*F. You want to apply enough heat to expand the inner race, yet not too much that it damages the bearing. This is where using heat indicator crayons really come in handy to sneak up on the temperature.
gear8.jpg

With the bearing's inner race showing it is ready quickly grab it and slide it onto the pinion shaft, which should already have the crush sleeve located between the bearings in the housing and awaiting the outer bearing. With the outer bearing slid into place, I apply some gear oil to the outer bearing which pre-lubes the bearing as well as cools the bearing allowing it to now contract onto the pinion shaft. I then install the outer slinger and install the oil seal. This is why thinking ahead and having all of the tools and parts sitting nearby is crucial to making this a smooth and seamless assembly. Also prior to installation and while the bearing was heating up, there was a small film of Sil-Glyde applied to the inner lip of the seal and the outer diameter of the yoke.
gear9.jpg

Here is where I use the old nut to get it close. Close meaning clearance or slop taken up in the pinion assembly and just starting to compress the crush sleeve but not near the preload stage yet. This is where the pace can slow to normal again as the bearing is in place and you will be sneaking up on the pinion preload.
gear10.jpg


Many more pictures to come.....
 
Last edited:
OP
Z

zmotorsports

ALLIANCE MEMBER
Joined
Oct 20, 2009
Messages
21,591
Location
Northern Utah
Before continuing on, I looked out the shop door and saw that the rain had turned to snow. Well, looks like winter is here, or at least knocking at the door. :(
snow.jpg

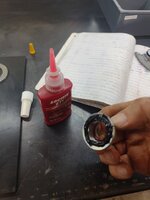
Back to the pinion setup. Once the clearance has been taken up, I remove the old nut and prep the new nut for final assembly. I apply red thread locker to the threads and some black RTV to the underside of the nut and the top of the splines. This is to keep the oil from weeping up the splines of the pinion shaft and through the bearing to escape as a nasty mess.
gear11.jpg

The nut installed and clearance taken up plus just a little force to begin crushing the crush sleeve. With the grunt tool installed it can be difficult to get a proper feel so pay attention as you don't want to go too far with the crush sleeve or you will be pulling everything apart that you just did to replace it, then heat the bearing and start all over again, as well as wasting a seal. Here on the first reading there is basically no preload but the clearances are gone.
gear12.jpg

Reinstall the grunt tool and tighten the nut a bit more. Then test and repeat as needed.
gear13.jpg

The specs. for this axle are a bit lower than most axles using new bearings so I want to be at the high side of the tolerance. Specs. show 10-15 in/lbs. of rotating force and after a couple tests, I am now right at 10 in/lbs. While this is acceptable and within tolerance, it could be left alone and considered good, but I want to be a bit higher with all bearings being new.
gear14.jpg

This is where it pays to know the "feel" of what you're doing and how far you can go without going too far. This takes experience and if you are paying attention earlier in the setup, you can gauge how far each bit on the nut affects the pinion preload and use that when creeping up on the final torque spec. I went just a bit more and landed right on 15 in/lbs. of pinion preload. Perfect.
gear15.jpg

With the pinion installation complete, it was time to move to the carrier installation. Prelubing the bearings is a must.
gear16.jpg

With the case spread the carrier is easily slid into position. Ensure all shims are fully seated into the bearing bores before installing the bearing caps, otherwise you can damage the delicate shims.
gear17.jpg

I snug up the bearing caps and then remove the case spreader for the final torquing of the bearing caps.
gear18.jpg

Once the bearing caps are torqued to spec. I paint the bolt heads to indicate they are torqued and in case I start to question myself.
gear19.jpg


Stay tuned for the last of the picture dump.
 
OP
Z

zmotorsports

ALLIANCE MEMBER
Joined
Oct 20, 2009
Messages
21,591
Location
Northern Utah
Last photos of the front axle thus far.

At this point if you have done all of the preliminary work properly there should be no surprises. We don't like surprised at all but especially not at this point because it means something changed from the initial setup. Here you want predictability. You should know exactly what the backlash should be as that is the "verify" stage that nothing has changed since the initial setup.
gear21.jpg

Bingo. Right at the same .007" from the initial setup and within spec. for this gearset which states .006"-.010" tolerance.
gear22.jpg

One more paint test to verify the verification process. ;) Pattern looks great.
gear23.jpg

Before buttoning up the cover, I dig out my electric engraver.
gear24.jpg

And mark with my signature of engraving of the specifications on the ring gear. I forgot to mention above that with the case spreader removed you should see a slight increase in preload or as I call it CPL (Combined Pre-Load) as this takes into account the carrier preload which is impossible to measure independently. If you see no noticeable increase, then chances are your carrier preload is too low which can allow the ring gear to be forced away from the pinon in high load scenarios. THIS is why I advocate so heavily that using a case spreader when setting up gears is a must. I see too many shops telling people as well as people on YouTube University say it can be done "by feel". However, I "feel" this is incorrect and substandard work as the carrier is not being properly preloaded if you can insert the shims with the case in its relaxed state. But that's just me.
gear25.jpg

Now it's time for the cover and the freshly painted bolts have had time to dry, which is why it is pays to think well enough ahead of the plan each time you walk into your shop. If I hadn't thought ahead enough I would be stopping to prep the bolts now which would delay completion and often times cost the client more money because of the mechanic's inability to prep in order. Now work continues to flow without stopping to regroup. This can also be why many shops don't go to this amount of detail. However, in all honesty, I think prepping the bolts, bead blasting them and painting them took all of about 10 minutes so it really doesn't add as much time as some people think. I feel that this small detail is what sets shops apart but again, that's just my opinion.
gear26.jpg

I use my old trust Snap-on 3/8" speeder a lot, it is especially helpful in scenarios like this where I want to "feel" the bolt going in to ensure it isn't cross threaded, yet I want to be quick about it.
gear27.jpg

Cover torqued to spec.
gear28.jpg

And that's a wrap. The front axle is completed and ready to be stabbed back under the Jeep.
gear29.jpg

gear30.jpg


Thanks for looking. I hope these pictures of doing gearwork have been helpful. I really don't "specialize" in gear setups, but it sure seems like I get a lot of them lately. :unsure:
 

customh

Well-known member
Joined
Feb 18, 2013
Messages
563
Location
East Bethel, MN
Theres a lot to learn in the trade, i have the focus but need to brush up on a lot of things. At my fertilizer plant, do you think they would of offered me a full time spot if they didn’t see potential? Many a buddy shows up here for a shutdown and goes holy ****, we see why you moved down here. So much more than meets the eye to learn here Than you would in the rest of the province!

There’s a lot of unskilled Millwrights up here, both union and non.

I agree that it’s all about the niche you find.
@PhantomEB I re-read what I said and it might sound like I was being a bit of a ***** - not the case- was just trying to translate your comment.

Hats off to you keeping a Fertilizer/Nitrogen Plant running. If you've survived and been successful any length of time in a facility like that you have a future full of options. I've worked in a few of them as well as many other petrochemical plants and I don't envy the amount of time you "get" to spend outside! Especially a few latitude lines north of here!

With me never having any formal schooling and having had to learn everything the hard way through trial and error (lots of errors :oops:), I have a tendency to be on guard a bit when it comes to my skillset.
Same here- as we've discussed before. Like you, I got the opportunity to do what I've always enjoyed (fixing broken stuff) but at that previous employer the environment wasn't.... ideal. My mentors have mostly been outside of my day-to-day employer. Dad taught me what a work ethic was and how to fix things. Grandpa also taught me about hard work on the farm. A friend who was involved in the early off-road industry of the 80s gave me access to a mill and a lathe and taught me a little about business. Wife's family friend is a designer/toolmaker and CNC machinist and made time to help me when I needed a part made/drawn or just some machine time. @4 FN 27 has also taken time to impart quite a bit of wisdom as well. I really wouldn't be where I am without GJ, that's for sure!
 

mmsheb

Well-known member
Joined
Mar 30, 2008
Messages
366
Location
Wisconsin
Mike wrote, "I took them to the wire wheel and knocked the old RTV off the threads. I then tossed them in the basket in the media blast cabinet to prep them for paint."
Basic questions, but I'm wondering what wire wheel you use for the bolts? Also, since I don't have access to a media blast cabinet to prep the bolts for paint, how would you suggest proceeding before painting?
Thanks,
Mike in WI
 
OP
Z

zmotorsports

ALLIANCE MEMBER
Joined
Oct 20, 2009
Messages
21,591
Location
Northern Utah
Interesting that you're an old farm kid, Mike. I grew up in Smithfield working on the neighbor's farms. You just learned to fix things good enough to get the job done. Usually you had pretty limited tools with what was in the piece of equipment you were working with. Then there was always the time factor. Is it quicker to fix in the field or run it back to the shop (where you had to sift through the insane shop with parts, tools and such scattered everywhere)?

Being a "hand", I was relegated to fixing elevators, conveyors and such. Rarely fixing/operating something cool like a tractor, combine or similar. For whatever reason, I couldn't seem to get out of the milk barn as a kid and if I did it was to throw bales in the field or dig ditches or whatever. Gave me a strong back and shoulders for sure. Sloppy tails and cows to snuggle with. Great stuff. I still love heavy equipment and farm equipment. It's fun to rent something like a mini-excavator or the like and be able to operate it decently within a few minutes due to the exposure on the farm and the understanding of hydraulic cylinders and such that gave.

Marc, yes, fellow farm hand here. :ROFLMAO: I was born and raised on my parent's dairy farm in West Haven, Utah, before it was actually West Haven. You are spot on with the mindset of fixing things "good enough to get the job done". My dad was a freakin' genius when it came to all things mechanical, well many other things as well, but especially mechanical things. He had one of those minds that could look at something and figure out how it worked and then actually duplicate it, although maybe not to the degree of detail but it worked. My dad simply looks at the tractors and equipment as tools to get the job done, nothing more. While my dad had a limited formal education, to me he was a genius and my hero. He was not a vocal man by any means and seldom spoke, or spoke little. However, he said more by his actions than most people who give lectures. When he needed to learn how to weld to keep equipment running on the farm, he merely took some night classes at the local college and as soon as he learned enough, he put that to work keeping the machinery working.

My dad moved to Utah when he was a young boy with his parents when they moved to Ogden from Superior, WY where my grandfather was a coal miner. My grandfather had saved up enough to relocated from the coal mining area of Wyoming, and Ogden reminded him and my grandmother of their birthplace in between Italy and Austria, called Tyrol. My dad would have been about 10 or 11 years old when his father purchased the farm in Ogden.

I came along later in my parent's life, but my dad taught me the very basics of welding and working on things, but this knowledge was merely to get the equipment back out in the field working again, nothing more as you stated. I remember as I started getting older and wanted to refine my skills a bit more, he would get so frustrated with me when I would grind out a weld to make it better, or search for a missing bolt so that it matched the others. His famous line was "we're not making pianos, that's good enough". While I understood the premise of the message he was trying to tell me, the fact is, I didn't like the actual message, so we seemed to **** heads quite a bit over this oh so common topic.

That was until I was in High School, and he saw me really start to develop my love of all things mechanical. I didn't have the "gift" that my dad had where he could easily and quickly figure out how things worked as I found myself having to scratch and claw my way through the learning process, I still do most days. :unsure: But I think he saw my passion in what I was trying to accomplish or become, so he quit pushing the issue as much as our relationship grew exponentially. In fact, I think I probably had a much better relationship with my father than any of my 6 siblings. I hear some of them talk about how mean or difficult he was and it breaks my heart to hear of them talk about him this way as that is not the dad I knew. They keep saying it was because I was the youngest, so I got to see the "nice dad", but I don't think that is it at all. I saw the same strict and demanding dad they saw growing up, but it wasn't until later that I saw the real person who just wanted so much more for his kids than he had, and even more than I think they wanted for themselves. I think once I felt like I understood him, my respect and love for him also grew. Although, I'm not gonna lie, growing up there was always a fine line between the respect and fear I had for the man. He may have had a small stature, but he carried a large presence. :oops:

My senior year of High School he helped me build a small workshop on the farm as he could see my passion really ramping up. We bought used materials and kept costs down then divided it in half so he could use part as tractor storage. The smaller 25'x25' area I used as my first workshop where I continued to fuel my passion for automotive and some racing, as I continued learning everything I could in my full-time career as an Industrial Maintenance Mechanic.

While working on the farm alongside my dad gave me the basics, I feel it did more for helping to develop a strong work ethic and having my father as an example could not have been a better childhood for my developmental years, at least I feel that way now looking back. We didn't have much in terms of monetary or financial, but my father taught me more valuable lessons by actions more so than words, that anything is possible through hard work and he was the perfect example of that.

As soon as my siblings were married or old enough to move out, they left the farm and never looked back. Me, I probably wanted off the farm more than them all combined, however, once I married and moved out, I saw that he still needed me to help on the farm as I was the youngest of 7 and last to leave home. All I wanted to do was spin wrenches and continue to learn all things mechanical, but I couldn't walk away and turn my back on the man who gave so much of himself so I could grow as a man. I continued to work the farm with my BIL for about another 5-6 years while working my full-time job as well as trying to wrench on cars on the side.

One day when I was in my mid-20's, I had to have a heart to heart with my dad and explain how I didn't want to farm any longer and just wanted to progress in my career and follow my passion of automotive and do some racing. He was so understanding and simply told me he would just lease the farm out and what turned out to be a feared conversation for several years actually turned out to be a great opportunity for both of us to grow closer. I idolized my dad in so many ways and I don't think there's a day that goes by where I don't miss him, and I owe it all to that damn farm that I grew up on yet couldn't wait to get off of.

I think back often and wonder if the mess I had to work in on the farm is what formed me into the **** person I am now or if it was something else. There is no way I could go back to working under the same conditions as I did in my early years, but I don't think I'd trade those memories for anything.
 

PhantomEB

Well-known member
Joined
Feb 6, 2006
Messages
6,967
Location
Medicine Hat, AB, Canuckistan
@PhantomEB I re-read what I said and it might sound like I was being a bit of a ***** - not the case- was just trying to translate your comment.

Hats off to you keeping a Fertilizer/Nitrogen Plant running. If you've survived and been successful any length of time in a facility like that you have a future full of options. I've worked in a few of them as well as many other petrochemical plants and I don't envy the amount of time you "get" to spend outside! Especially a few latitude lines north of here!
Thanks. Was off for 3 months for the pandemic, then saw this call pop out, said to the wife, I have always liked working there, plus 40 hrs a week is a heck of a lot more than Govt subsidy. Laid off twice while I was short term due to higher ups decisions to cut all short terms at that time or budget constraints. Left with a smile and called back a week later, never blinked at saying no problem.

fertilizer/nitrogen…..close! We are Ammonia and Urea Fertilizer with this company (farm grade) not the explosive kind that was traced from Oklahoma City to another fertilizer plant 3 hrs away.
 
OP
Z

zmotorsports

ALLIANCE MEMBER
Joined
Oct 20, 2009
Messages
21,591
Location
Northern Utah
Thankfully you realized that early in your career. It took me 10 years in a dealership before that idea got thru my thick head.

Yes, I was thankful that was an early lesson. While I was working at auto parts stores peddling parts in High School, I had two friends who worked in shops. One at an independent local shop and the other at a Chevrolet/Buick dealership. We were all on the automotive team during my Junior year and their senior years. I saw a change in them over the course of merely one year and that came from the give a **** attitude about doing things right, to cutting corners and getting it done quickly to make the book time. Now looking back I can see that they were very early on in their apprenticeships, but the lessons they were being taught by senior master mechanics was not what I wanted to deal with.

I also heard them talk about some of the working conditions and that didn't seem as pleasant as I had imagined while I daydreamed about working in a well lit and organized automotive wonderland. :bounce: Granted, I came from working in cow **** that was frozen two hour earlier to now a sloppy mess as the daytime temps approached 40 degrees, all while trying to put a chain back on a manure spreader, so my expectations of working conditions were quite low. :ROFLMAO:

Thankfully I had some conversations with others including my brother about working in the Industrial Maintenance field and my interests shifted somewhat, especially when it came to things like not only pay, but insurance and benefits. This was more important as I was engaged to be married at this time and while pay was important, that "hidden paycheck" was also very valuable in my eyes. I just didn't see the same opportunities back then in the automotive shops as existed in the non-traditional style of mechanical work. After all these years I still feel I made the right call.
 
OP
Z

zmotorsports

ALLIANCE MEMBER
Joined
Oct 20, 2009
Messages
21,591
Location
Northern Utah
Same here- as we've discussed before. Like you, I got the opportunity to do what I've always enjoyed (fixing broken stuff) but at that previous employer the environment wasn't.... ideal. My mentors have mostly been outside of my day-to-day employer. Dad taught me what a work ethic was and how to fix things. Grandpa also taught me about hard work on the farm. A friend who was involved in the early off-road industry of the 80s gave me access to a mill and a lathe and taught me a little about business. Wife's family friend is a designer/toolmaker and CNC machinist and made time to help me when I needed a part made/drawn or just some machine time. @4 FN 27 has also taken time to impart quite a bit of wisdom as well. I really wouldn't be where I am without GJ, that's for sure!


I completely agree Travis. Great mentors have a HUGE impact on us and many times they don't even realize it. I have learned so much from the people on this forum also and which is why I feel this is one of the best forums out there for the culmination of experience and knowledge.

You had mentioned your Grandpa and as I now have a grandson, it has been on my mind a lot. I have gotten to the point that more than wanting possessions as I get older, I want to have the time to create memories and experiences with my son and grandson.

I look back at what kind of legacy I will leave behind and I've had to come to grips with it really won't matter in another generation as I won't be remembered at all. I have my son to carry those memories on and hopefully my grandson, but the next generation won't know who I am, nor care. It has become so apparent to me lately that I want to have as large of impact on my son and grandson as I can rather than worrying about collecting more material possessions. Whatever material possessions I may obtain as I get older, I want them to include my son and grandson in the picture and hopefully they can look back someday and have fond memories of me and my wife.


Mike wrote, "I took them to the wire wheel and knocked the old RTV off the threads. I then tossed them in the basket in the media blast cabinet to prep them for paint."
Basic questions, but I'm wondering what wire wheel you use for the bolts? Also, since I don't have access to a media blast cabinet to prep the bolts for paint, how would you suggest proceeding before painting?
Thanks,
Mike in WI

Mike, I have a 6" wire wheel on one side of my Baldor pedestal grinder. This is what I use for pretty much all thread cleanup, and it gets used a LOT. It's nothing special, just a standard 6" x 1" wire wheel from McMaster Carr.

If you don't have a media blaster, then I guess you could continue to use a wire wheel to clean up the bolt heads, although it may be a bit longer process and not create enough "tooth" for paint to adhere to. I would also maybe suggest looking into a small benchtop tumbler setup as those can be useful for paint or coating prep. Just a thought.

Thank you for continuing to follow along and hope that was helpful.
 
Last edited:

mmsheb

Well-known member
Joined
Mar 30, 2008
Messages
366
Location
Wisconsin
I completely agree Travis. Great mentors have a HUGE impact on us and many times they don't even realize it. I have learned so much from the people on this forum also and which is why I feel this is one of the best forums out there for the culmination of experience and knowledge.

You had mentioned your Grandpa and as I now have a grandson, it has been on my mind a lot. I have gotten to the point that more than wanting possessions as I get older, I want to have the time to create memories and experiences with my son and grandson.

I look back at what kind of legacy I will leave behind and I've had to come to grips with it really won't matter in another generation as I won't be remembered at all. I have my son to carry those memories on and hopefully my grandson, but the next generation won't know who I am, nor care. It has become so apparent to me lately that I want to have as large of impact on my son and grandson as I can rather than worrying about collecting more material possessions. Whatever material possessions I may obtain as I get older, I want them to include my son and grandson in the picture and hopefully they can look back someday and have fond memories of me and my wife.


Mike, I have a 6" wire wheel on one side of my Baldor pedestal grinder. This is what I use for pretty much all thread cleanup, and it gets used a LOT. It's nothing special, just a standard 6" x 1" wire wheel from McMaster Carr.

If you don't have a media blaster, then I guess you could continue to use a wire wheel to clean up the bolt heads, although it may be a bit longer process and not create enough "tooth" for paint to adhere to. I would also maybe suggest looking into a small benchtop tumbler setup as those can be useful for paint or coating prep. Just a thought.

Thank you for continuing to follow along and hope that was helpful.
Yes, very helpful. Any suggestions for what benchtop tumbler to consider?
Thanks!
 
OP
Z

zmotorsports

ALLIANCE MEMBER
Joined
Oct 20, 2009
Messages
21,591
Location
Northern Utah
Yes, very helpful. Any suggestions for what benchtop tumbler to consider?
Thanks!

I'm sorry Mike, I actually don't have any experience with any tumblers. I've been somewhat looking at them myself, but I've found that the bead blasting cabinet does such a good all-around job I'm having a hard time justifying one at this point.

Maybe someone who has one can chime in with a recommendation.
 

ntsqd

Well-known member
Joined
Jan 22, 2005
Messages
1,031
Location
Lower left coast
I have a "Thumbler's Tumbler" used for reloading and silver-smithing. One has two bowls, one with brass cleaning/polishing media, and another with stainless steel pins and needles for the silver-smithing.
Honestly, the bowl is the hard part, best to just buy it. The vibration is simple. Put a plate on three springs to support it. Run a piece of 1/4-20 all-thread up in the middle to hold the bowl and it's lid on. Bolt a cheap electric motor to the underside of the plate with the shaft pointing down. Take a piece of 1/2" plate about an inch long and bore a shaft sized hole in it near one end. Drill in sideways for a set-screw. Clamp that onto the motor's shaft. That is how every bowl type thumbler that I've seen is made.
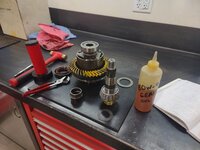
I was gifted with another tumbler and I've been looking into media for cleaning hardware and finishing small brackets with it. The tumbler is only a small part of the equation. The media used is a huge consideration, and the range of media large and wide. I've yet to find anything to give me much direction past "I've used this media and it did this for me" kinds of blogs and posts, which don't really help since they weren't doing what I want to do. Seems like there's a lot of trial and error out there, with error being common and incurring some cost.

The more industrial types of tumbling/deburring machines out there are no more complex, but they have a lot of lessons learned type nuances built into them. When I worked for the racing engines shop they had a hardware cleaning machine that I think that I've described here in the past. Two square boxes made of perforated metal with a latching lid. They were partly filled with bias cut hardened circular steel shot. The boxes had a ring of ~1/2" round bar welded to all 4 top and bottom corners. Load up a box and then turn it sideways and set it down inside the machine on two shafts. The shafts were partly submerged in solvent. A timer controlled how long the motor would spin those shafts. The whole thing was incredibly noisy, but the hardware came out clean and slightly burnished. I took to using it for the final finish on all of the small brackets that I made while working there.

Inspired by that I tried a doing the same thing with the stainless media filled bowl. It didn't work too well. Maybe bolts will work, but even small brackets are out of the question.
 
Last edited:
To avoid these ads, REGISTER NOW!
Top Bottom