More follow up from Nick on the 355 heads:
to clean off the parts, which is very typical. I’m opposed to using power tools for this type of cleanup, especially on softer metals like aluminum. Using a die grinder with a Brillo/Scotch-Brite pad, or even a nylon gasket removal wheel, is just far too aggressive. Ultimately, they remove (although a very small amount of) the parent material and leave ugly tooling marks. Because of this, all the gasket removal is done by hand with a flat razor blade, then followed up with Scotch-Brite and WD-40 by hand. It’s time-consuming, but the results are worth it—especially in these cars, where items like the valve covers are removed and worked on many times over the years. It’s gentler on the parts, helps maintain flatness, and prolongs their life.
With all the gaskets and sealant off, I was then on a mission to eradicate all the grease and grime from the parts. This is straightforward enough, with the exception of the valve covers. My OCD gets the best of me here. Typically, as these cars age, the wrinkle red powder coat on the valve covers starts to fail and flake off, and it suffers easily from staining. So, I need to get them clean without accelerating any degradation or causing the finish to start coming off. On the other hand, my OCD wants them to look brand new. It's an internal struggle every time! In the past, I’ve found that using brake cleaner works okay until the covers get hot, at which point they develop a white, milky haze. I’ve worked around this in the past by using a light coat of WD-40 after the brake clean, with good results. On your covers, I did most of the cleaning with a combination of acetone one “scrubs” hand cleaning pads, as they were gentle enough to avoid affecting the wrinkle finish. I’m hopeful that, since acetone doesn’t leave a residue like brake cleaner, the covers won’t haze. We won’t know for sure until the car is back up and running, and I get some heat in the engine. Worst case, if they do haze, I can go back to the old WD-40 trick.
Now on to the status of the heads. I spent a good deal of time on the phone with the machinist yesterday. Here is what we discussed.
Valve Guides
As you know, your car is a later production 355, so it has the “updated” sintered iron guides. Sintered iron is harder than bronze, so it tends to last longer. However, it doesn’t transfer heat as well and causes more wear to the valve stem, in addition to not having the self-lubricating properties that bronze offers.
The good news is that all of the intake guides show little wear and are acceptable for reuse. So we may be able to save on some of the overall expense by choosing to retain the intake guides. However, the exhaust guides are showing wear. The machinist believes they could have some life left, but we both agree they should be replaced while we’re here. He uses bronze manganese guides, which he has custom-made for 355 heads. This material offers the best of both worlds: heat transfer and self-lubricating properties of bronze, combined with the wear resistance of sintered iron. It also allows him to install modern Viton valve stem seals instead of the factory seals.
Valves
The stem condition and wear on both the intake and exhaust valves are within tolerance, allowing them to be reused. However, eight intake valves have margins that are too thin due to excessive pitting on the faces. This pitting required additional machining (facing), which reduced the margins to below acceptable limits.
Interestingly, the machinist’s findings align with our pre-disassembly data, matching our compression, leak-down, and emissions test results. The most problematic intake valve was found to be from cylinder #5 on Bank 2, also corresponds to the air leakage past the throttle plates in the video I shared. It’s reassuring to see all the data line up, confirming that we caught this issue early.
So you have a few options for a path forward:
• Valve guides. The machinist and I recommend that at least all exhaust guides get replaced. We do have the option of retaining the OE sintered intake guides allowing us to save you some of the expense vs replacing all of them.
• Valve replacement, for the eight worn valves. We have the option to use aftermarket valves, which I am told are physically and dimensionally identical to OEM, I think it's roughly $60ish per valve. Or we can use factory Ferrari valves at $140ish each. ~ I personally tend to prefer the OEM valves. I feel they offer a better piece of mind in terms of longevity and quality control.
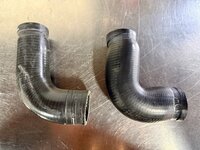
One additional note. While I was cleaning the parts, I noticed a small, but unusual indication on the upper radiator hose. It almost appears like a puncture from the outside. I cannot feel any defect or puncture on the inside o fthe hose in the same area. It also has a stain that resembles leakage. It's weird. However, when the car was still assembled, I found no leaks after fixing the two hose clamps. Also, the lower radiator hose is showing a fair amount of swelling, as you can see from the impressions where the hose clamps were. With the engine in the car, the upper hose is easy to replace. That is not the case for the lower hose. New OEM hoses are about $100 each. I didn't think to snap a picture of them, but I will run out to the shop tonight when I get home and get some for you. Maybe when you are over to clean up the suspension, we can take a look and discuss if you are comfortable with reusing them.
Feel free to comment on the direction that should be taken…
Cleaned block surface for the heads:

Cleaned up cam covers:

Happy Holidays!