To avoid these ads, REGISTER NOW!

ZMotorsports Shop Projects 2.0

OP
Z

zmotorsports

ALLIANCE MEMBER
Joined
Oct 20, 2009
Messages
21,477
Location
Northern Utah
Thanks for posting the seal puller picture.

i have the same design SnapOn tool. Instead of the welded socket mine has a threaded pin (handle)
IMG_4863.jpeg
Mine has always done the job but if I were using it now I would seriously consider welding a socket to mine like your Matco has. I don’t think I’ve used mine in the ten years since I retired.

Same here, it's not something I use very often, but it definitely serves its purpose on certain tasks. I think the Mayhew one I referenced last week has the handle much like your Snap-on one. I fabricated one similar about 35 years ago out of a piece of square stock and a small fine threaded screw at the end for engaging the seal. We had a series of gearboxes at work that it worked well on and I didn't want to buy one at the time so I fabricated one based on a coworkers purchased one.

Then about 15 or so years ago I bought my Matco version. I'll see if I can remember to grab a picture of my shop made one tonight.
 
To avoid these ads, REGISTER NOW!

Scuderia-F1

Well-known member
Joined
Feb 9, 2011
Messages
1,198
Location
Stockholm, Sweden
I hope everyone had a great weekend.

I was able to get quite a bit done on the Jeep JKU between Friday night and Saturday afternoon. The wife and I then accompanied out son, DIL and grandson to Ogden City's Christmas Village to see the light and displays. It has been quite a few years since the wife and I walked through Christmas Village during the Holiday season, probably since our son was younger, so I'll bet it's been 20~ish years or so. Our grandson has made the season enjoyable again for us rather than just something we want to get through.

I remember Ryan (@Bigblue&Goldie ) had inquired about the driver that I used to remove the outer bearing race from the axle tube so I thought I'd snap a picture of it over the weekend.

matco1.jpg

It is in fact the Match model # SP205.
matco2.jpg


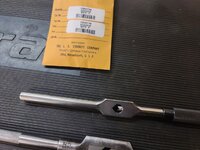
I was also tapping a couple of holes on Friday night and the first one I tapped, the damn Starrett 91B anvil broke, AGAIN. 🤬 This is really ******* me off and I do not abuse my tools. This is the first time I used the tap handle since I replaced the anvil a few weeks ago. I was nearly through the hole when I heard the faint "crack" or "ting" sound and I knew what it was. YEP, as soon as I pulled the tap handle off the tap the broken piece fell out.
starrett1.jpg

I reached for one of my old tried and true tap handles to finish the job. I have never had an issue with either the Morse or my Greenfield tap handles but this Starrett handle is trying my patience.
starrett2.jpg

After completing the job, I grabbed the package that contained the other anvil, as I purchased two when I did the last repair about a month ago. It is repaired and ready to be used again, but I have to admit, my confidence in this tap handle is not very high at this point.
starrett3.jpg

I also dug out my old homemade tap handle that I made about 30 years ago and thought that I should probably start using it more often as it has never failed me.
starrett4.jpg

Saturday morning I was leaving to meet my son for breakfast and had to snap a picture of the inversion that has settled in along the Wasatch Front this past week. So thick you could cut it with a knife.
sat1.jpg

By late morning it had cleared out and turned into a beautiful day.
sat2.jpg

Thanks for looking.
Thanks for showing that Matco tool Mike, it seems that they slightly changed the design and now calls it SP7. We don't have Matco here in Sweden, but I will consult my Snap-on rep to see what he can come up with. I can really see a benefit with a tool like that.
Excellent pics/work as always.
 
OP
Z

zmotorsports

ALLIANCE MEMBER
Joined
Oct 20, 2009
Messages
21,477
Location
Northern Utah
Thanks for showing that Matco tool Mike, it seems that they slightly changed the design and now calls it SP7. We don't have Matco here in Sweden, but I will consult my Snap-on rep to see what he can come up with. I can really see a benefit with a tool like that.
Excellent pics/work as always.

Thank you Anders. I appreciate your continued support my friend.
 
OP
Z

zmotorsports

ALLIANCE MEMBER
Joined
Oct 20, 2009
Messages
21,477
Location
Northern Utah
I was able to complete the work on the Jeep JKU last night and took it for a successful initial test drive.

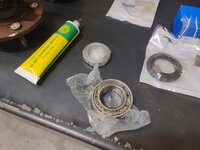
Upon arriving home from work I got everything ready to press the new bearings, seals and lock rings onto the axle shafts. Personally, the past several years I have only been using OEM axle seals on these as I had a couple of issues previously with aftermarket ones not lasting and leaking. I do use the standard BR10 bearing set from NAPA however, as they are SKF and are excellent quality, plus they come as a set and pre-greased. The OEM bearings are hella expensive and the lock rings must be purchased separately and I don't see the need to go OEM on the bearings.
gear51.jpg

Bearing is pre-greased lightly.
gear52.jpg

Retainer and seal installed. The OEM seals already have a bit of grease on the inner lip as well.
gear53.jpg

Axles prepped with press lube and components stacked and ready to go to the press.
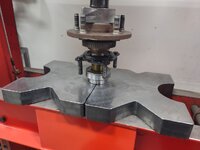
gear54.jpg

Axle shaft inverted and set into the press plates.
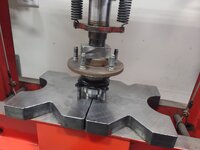
gear55.jpg

Press smoothly until full seated. Make sure the retainer stays free from binding while pressing.
gear56.jpg

One down and one to go.
gear57.jpg

Axle shafts installed and nuts started on the retainer bolts.
gear60.jpg

Housing wiped down and ready to install Lube Locker gasket and differential cover. Note the signature engravings on the ring gear.
gear58.jpg

Cover installed and bolts snugged down. Then torqued to 35 ft/lbs.
gear59.jpg


Stay tuned for more pictures.
 
OP
Z

zmotorsports

ALLIANCE MEMBER
Joined
Oct 20, 2009
Messages
21,477
Location
Northern Utah
Continuing on with the last of the work on the Jeep.

Axle retainer nuts torqued to spec.
gear61.jpg

Then the wheel spacers were installed and torqued to spec. as well as brakes assembled and torqued to spec.
gear62.jpg

Before installing rear tires/wheels, the bolts were marked with Torque Check.
gear63.jpg

Fully set down and wheels torqued to spec.
gear64.jpg

Then a couple jounces on the front end to settle everything, then the front suspension bolts can be torqued to spec. with the vehicle at ride height.
gear65.jpg

And the front suspension bolts marked with Torque Check.
gear66.jpg

Front track bar marked and upper control arm fasteners marked with Torque Check.
gear67.jpg

And back from the initial test drive.
gear68.jpg


Thanks for looking.
 

Jgaz

Well-known member
Joined
Dec 16, 2016
Messages
1,713
Location
AZ
Mike,
I’m going to continue the trend where many of us check out the background in your excellent “how to” pictures.

I noticed the multiple containers of Tub of Towels in several of your recent photos. I too am a big fan of them.
Do you have a supplier that is cheaper than Amazon? The almost $15 shown there seems to be typical.

I really like them for cleaning up glue squeeze out during glue ups in my shop. Just the right amount of moisture and a bit of tooth in the wipe material.
Also, the container is better than many others in keeping the towels from drying out during the 110* plus summer temps in my AZ garage.
 

ScepterToad

Well-known member
Joined
Nov 9, 2023
Messages
340
Really nice work Mike! Thanks for documenting all the steps in such great detail.

One question. I assume since you've done so many of these that the difference in axle in vs out of the vehicle is negligible for you. Any reason one way or the other that you'd recommend a newbie (like me) to go one way or the other? I always figured that axle out would be "easier" provided one had the necessary tools to keep the axle secure while working/torquing bolts. Thoughts?
 
OP
Z

zmotorsports

ALLIANCE MEMBER
Joined
Oct 20, 2009
Messages
21,477
Location
Northern Utah
Mike,
I’m going to continue the trend where many of us check out the background in your excellent “how to” pictures.

I noticed the multiple containers of Tub of Towels in several of your recent photos. I too am a big fan of them.
Do you have a supplier that is cheaper than Amazon? The almost $15 shown there seems to be typical.

I really like them for cleaning up glue squeeze out during glue ups in my shop. Just the right amount of moisture and a bit of tooth in the wipe material.
Also, the container is better than many others in keeping the towels from drying out during the 110* plus summer temps in my AZ garage.

Ya gotta keep me on my toes by perusing the background pics. :ROFLMAO:

Yes, I too am a fan of the Tub O' Towels. In my last shop I used ZEP hand cleaner but it was messy and seemed to drip all over the place so I didn't want to use it in the new shop. I tried a couple different brands of the moist towelette type of hand cleaners over the first couple years in the new shop and ended up liking the Tub O' Towels the best. Like you said, they seem to have a nice ratio or blend of moistness and grit to remove dirt and grease from hands. I use it once in a while to clean tools off as well but generally just my hands.

I don't really have anywhere that sells them cheaper than anywhere else, so when I get low I just run to my local Home Depot and grab another tub of them. They are just under $15 there so about the same as anywhere else and readily available. I just picked up another tub of them a week or so ago as I am nearing the end of one.
 
OP
Z

zmotorsports

ALLIANCE MEMBER
Joined
Oct 20, 2009
Messages
21,477
Location
Northern Utah
Really nice work Mike! Thanks for documenting all the steps in such great detail.

One question. I assume since you've done so many of these that the difference in axle in vs out of the vehicle is negligible for you. Any reason one way or the other that you'd recommend a newbie (like me) to go one way or the other? I always figured that axle out would be "easier" provided one had the necessary tools to keep the axle secure while working/torquing bolts. Thoughts?

Thanks Keith, glad the documentation and pictures were helpful.

I don't usually drop and axle housing from the vehicle unless I am doing more invasive work on it such as and welding, cutting or fabrication work. I know many people do sleeves and gussets with the axles in the vehicle, I've done a few as well many years ago, but was not pleased with the outcome so now I no longer do that work in the vehicle. I feel the little extra time and effort to remove the axle nets a much nicer finished product so if someone is having me do any welding or fabrication work, I really don't give them an option and they pay an extra hour or so labor to remove and prep them properly. It usually ends up being a zero sum gain in the end because I can work faster and more proficient with the axle out from under the vehicle, so the extra hour or so to remove it is usually recovered elsewhere in the work.

In this situation, had I not been welding the truss on I wouldn't have removed the axle from the Jeep. The small weld washers can be done in the vehicle as well as some minor welding/fabrication, but anything more than a weld washer or easily accessible tab or bracket, the axle will come out from under the vehicle.

At the rear, merely dropping the track bar on one end allowed me to easily get the case spreader in place and install/remove the carrier multiple times so it wasn't worth dropping the axle from the Jeep.

Great question Keith. Hope I answered it satisfactorily and it kind of explains where I draw the line on whether the axle comes out or not.
 
Last edited:

ScepterToad

Well-known member
Joined
Nov 9, 2023
Messages
340
Thanks Keith, glad the documentation and pictures were helpful.

I don't usually drop and axle housing from the vehicle unless I am doing more evasive work on it such as and welding, cutting or fabrication work. I know many people do sleeves and gussets with the axles in the vehicle, I've done a few as well many years ago, but was not pleased with the outcome so now I no longer do that work in the vehicle. I feel the little extra time and effort to remove the axle nets a much nicer finished product so if someone is having me do any welding or fabrication work, I really don't give them an option and they pay an extra hour or so labor to remove and prep them properly. It usually ends up being a zero sum gain in the end because I can work faster and more proficient with the axle out from under the vehicle, so the extra hour or so to remove it is usually recovered elsewhere in the work.

In this situation, had I not been welding the truss on I wouldn't have removed the axle from the Jeep. The small weld washers can be done in the vehicle as well as some minor welding/fabrication, but anything more than a weld washer or easily accessible tab or bracket, the axle will come out from under the vehicle.

At the rear, merely dropping the track bar on one end allowed me to easily get the case spreader in place and install/remove the carrier multiple times so it wasn't worth dropping the axle from the Jeep.

Great question Keith. Hope I answered it satisfactorily and it kind of explains where I draw the line on whether the axle comes out or not.
Thanks for the additional info Mike! Makes sense for sure.
 

Just Fishing

Well-known member
Joined
Dec 21, 2020
Messages
57
Location
Utah
Ya gotta keep me on my toes by perusing the background pics. :ROFLMAO:

Yes, I too am a fan of the Tub O' Towels. In my last shop I used ZEP hand cleaner but it was messy and seemed to drip all over the place so I didn't want to use it in the new shop. I tried a couple different brands of the moist towelette type of hand cleaners over the first couple years in the new shop and ended up liking the Tub O' Towels the best. Like you said, they seem to have a nice ratio or blend of moistness and grit to remove dirt and grease from hands. I use it once in a while to clean tools off as well but generally just my hands.

I don't really have anywhere that sells them cheaper than anywhere else, so when I get low I just run to my local Home Depot and grab another tub of them. They are just under $15 there so about the same as anywhere else and readily available. I just picked up another tub of them a week or so ago as I am nearing the end of one.

I have been using tub O' towels for years, great stuff.
Something like 6 or 8 Years ago while prepping to do some auto paint work, I had "Venom Steel workshop wipes" recommended for cleaning up tools and skin.
I never used them but put them into the bin of auto painting supplies and shelved it until I cared.

Over the summer I had a need to break out the paint gun and other masking supplies so I could do some interior boat pieces with some epoxy (shiny/tough) paint.
I found them sitting in the bin and had a moment of "oh yeah!!"

I started using them, and oh wow.
Amazing, the scrubbing texture really helps, and they cost about the same as tub O towels.

Really noticeable when cleaning semi dried epoxy paint from the tools and fingers.
1733855678227.png

Amazon link: https://www.amazon.com/gp/product/B08PW3RLK2/?tag=atomicindus08-20

A little cheaper than Tub O' Towels, but I haven't ever seen them locally.
I also like the tub O' Towels dispenser, but these do fit nicely into a drawer or glove box.
 
OP
Z

zmotorsports

ALLIANCE MEMBER
Joined
Oct 20, 2009
Messages
21,477
Location
Northern Utah
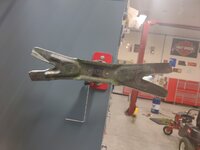
I forgot to post up a picture of my old and homemade puller that I mentioned above. It is pretty crude, so please keep in mind that I made this tool about 35 years ago shortly after beginning my career. It was used quite a bit in those early years until I purchased the Matco puller. I don't know why I kept it, other than maybe sentimental reasons. If I were to make one today I know it would look totally different, but it worked for many years as evidence by all of the strike marks.

tool1.jpg

tool2.jpg

tool3.jpg


Yeah, it's pretty primitive alright. :ROFLMAO: I'm almost embarrassed to show it.
 
OP
Z

zmotorsports

ALLIANCE MEMBER
Joined
Oct 20, 2009
Messages
21,477
Location
Northern Utah
The owner came by and picked up the Jeep last night. Hope he was pleased with all of the work that I did to it.

I was going to pull the lawn equipment into the shop and begin the winterization process, but time got away from me, so instead I gave the shop a good deep cleaning. Pulled welders away from the wall and swept between all equipment, wiped lathe and mill down as well as benches. Then while waiting for the wife to arrive home, I just sat in the shop, listened to the radio and relaxed while drinking a cold one, Root Beer that is. :bounce:

shopdec1.jpg

shopdec2.jpg
 

Boosted1

Well-known member
Joined
Nov 25, 2007
Messages
1,681
Location
Georgetown, KY
Those pics say a lot about how you setup and use you shop.
A lot of space allocated wisely to tools and equipment that is very organized and clean.
Love it.
I don't spend the time in my shop as much as I used too since I had to downsize, but taking the time to plan placement of things and clean up after every job makes the work space so much more satisfying.
 

Scuderia-F1

Well-known member
Joined
Feb 9, 2011
Messages
1,198
Location
Stockholm, Sweden
The owner came by and picked up the Jeep last night. Hope he was pleased with all of the work that I did to it.

I was going to pull the lawn equipment into the shop and begin the winterization process, but time got away from me, so instead I gave the shop a good deep cleaning. Pulled welders away from the wall and swept between all equipment, wiped lathe and mill down as well as benches. Then while waiting for the wife to arrive home, I just sat in the shop, listened to the radio and relaxed while drinking a cold one, Root Beer that is. :bounce:

shopdec1.jpg

shopdec2.jpg
A shop like that shop of yours is THE GOAL!!!!!
 

fouckhest

Well-known member
Joined
Jul 24, 2013
Messages
1,871
Location
Greer, SC
@zmotorsports Shop looks great all cleaned up, such a rewarding feeling!!

Question for you, the air line kit you used (name escapes me), but do you have any complaints, general feedback? I really need to get my shop plumbed one of these days, I know I looked at that same brand but was turned off by the color (I know dumb), but I am started to back down from that now and thinking I might bite the bullet
 

customh

Well-known member
Joined
Feb 18, 2013
Messages
562
Location
East Bethel, MN
@zmotorsports Shop looks great all cleaned up, such a rewarding feeling!!

Question for you, the air line kit you used (name escapes me), but do you have any complaints, general feedback? I really need to get my shop plumbed one of these days, I know I looked at that same brand but was turned off by the color (I know dumb), but I am started to back down from that now and thinking I might bite the bullet
He used AirCom. There are so many options for the Aluminum piping now and being in the Carolinas you're in the mecca of Industrial Compressed Air suppliers down there. You can absolutely get the piping in Grey or Black!

On one hand I love the copper system we have at the shop here. Fittings are easy to get and soldered joints don't leak. My previous employer had Transair installed when they moved buildings and when we upgraded the compressor system we used Elevation/Infinity piping in the compressor rooms.

I'd be looking at the Infinity system personally- I like the look of the aluminum fittings and they work well.
 
OP
Z

zmotorsports

ALLIANCE MEMBER
Joined
Oct 20, 2009
Messages
21,477
Location
Northern Utah
Those pics say a lot about how you setup and use you shop.
A lot of space allocated wisely to tools and equipment that is very organized and clean.
Love it.
I don't spend the time in my shop as much as I used too since I had to downsize, but taking the time to plan placement of things and clean up after every job makes the work space so much more satisfying.

Thank you very much. I can honestly say, I have had this shop designed in my head for probably ten years before we actually sold our last place and moved. I kept saying if I could build my dream shop I would do X, Y and Z, with the biggest change being square footage. Just being able to have space between each piece of equipment is a gamechanger. My last shop was only 1150 square feet and therefore equipment was almost stacked on top of each other and floor space for work was at a premium.

When designing this shop I think I did a good job not only planning out where each piece of equipment would live to promote good workflow, but I also feel I did a good job overseeing the build to ensure my vision came out in the end. I guess I could say some of the end result has to do with the amount of project development I have had to do in my full-time job. Identifying the end goal and then focusing on the details to support the end product and managing each step along the way. Now after all of the thought that went into the construction and layout, working in the shop over the past 7+ years is a joy and I look forward to hopefully decades more.

I very much appreciate the comments; it is nice when others can see the work that went into creating such a vision.


A shop like that shop of yours is THE GOAL!!!!!

Thank you very much Anders. I appreciate that. It has been my goal all along too. When I had my last shop and was adding tools and equipment and therefore running out of space to work, I had my "dream shop" in my head. However, I think maybe that I lacked the confidence to take the plunge as I continued to feel that it was something that was out of reach for the wife and I. Many days I have to pinch myself to make sure it's really mine.
 
To avoid these ads, REGISTER NOW!
OP
Z

zmotorsports

ALLIANCE MEMBER
Joined
Oct 20, 2009
Messages
21,477
Location
Northern Utah
@zmotorsports Shop looks great all cleaned up, such a rewarding feeling!!

Question for you, the air line kit you used (name escapes me), but do you have any complaints, general feedback? I really need to get my shop plumbed one of these days, I know I looked at that same brand but was turned off by the color (I know dumb), but I am started to back down from that now and thinking I might bite the bullet

Thank you for the comments, Mike, I appreciate it. Travis is correct, I used the AirCom air plumbing system. I briefly looked at the Rapidair system but wanted rigid piping vs. coiled. Yes, they offer rigid as well, but the AirCom was slightly less expensive and more importantly, my local air compressor supply store (Maddox Air) carried the AirCom system as their "house brand" and I figured even where I bought 3 full kits to plumb my shop, if I needed an individual component or two, it would be easier to come by locally without having to order or order multiples of. Turned out to be a good choice for me.

As for complaints, I have none. It has worked perfectly and as designed. Since the installation I have not had to make any repairs or changes. I like having all of the remote drops compared to my last shop so that for me was a huge improvement and not having to connect air hoses in the shop to reach certain areas.

He used AirCom. There are so many options for the Aluminum piping now and being in the Carolinas you're in the mecca of Industrial Compressed Air suppliers down there. You can absolutely get the piping in Grey or Black!

On one hand I love the copper system we have at the shop here. Fittings are easy to get and soldered joints don't leak. My previous employer had Transair installed when they moved buildings and when we upgraded the compressor system we used Elevation/Infinity piping in the compressor rooms.

I'd be looking at the Infinity system personally- I like the look of the aluminum fittings and they work well.


Thanks for answering Travis. I used copper in my last shop and contemplated in the new shop but with the price of copper being what it is now, there really wasn't much cost difference, so I went with the better looking commercially available style.
 

fouckhest

Well-known member
Joined
Jul 24, 2013
Messages
1,871
Location
Greer, SC
I'd be looking at the Infinity system personally- I like the look of the aluminum fittings and they work well.
As for complaints, I have none. It has worked perfectly and as designed. Since the installation I have not had to make any repairs or changes. I like having all of the remote drops compared to my last shop so that for me was a huge improvement and not having to connect air hoses in the shop to reach certain areas.


Thank you both for the more than detailed responses! I will take a look at both for sure, one factor that had turned me away from RapidAir was the coils and if I recall, shipping the straight tubes was ridiculous, so I stopped there.

At one point I thought about using black iron pipe, that seemed like a mess, then even thought of using black iron pipe and putting a coiled plastic system inside, but making turns seemed impossible.

Thanks for the info, now I need to go do some home work!
 
OP
Z

zmotorsports

ALLIANCE MEMBER
Joined
Oct 20, 2009
Messages
21,477
Location
Northern Utah
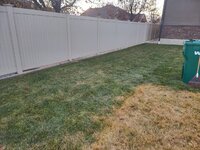
I didn't get much done in the shop last night. It was actually quite a nice day here along the Wasatch Front yesterday with temps in the low 40's and no wind so I went out to the backyard and completed round #2 on raking up the leaves from the neighbor's trees. Not sure what happened this year, but his leaves usually drop about the same time as mine and all within about a two week window. For some reason his leaves have really hung on this year and even now, they haven't all fallen so I'm certain there will be a round #3.

They're not compacted to bad yet, but I made the mistake several years ago of not raking them up soon enough and once they got packed down with snow, the lawn had a hard time recoving come spring, so now I'm paranoid of making that mistake again.
leaves1.jpg

leaves2.jpg

leaves3.jpg

leaves4.jpg

leaves5.jpg


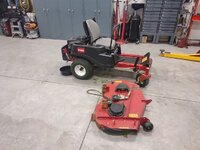
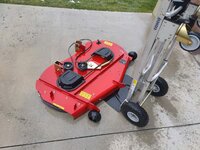
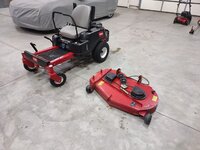
Just before starting on the leaves, I had pulled the riding mower and walk-behind mowers into the shop while I worked in the yard. I also began the oil draining before raking leaves. Once I was done working in the yard and I lost my daylight I started on the OPE winterization process. First order of business was to pull the mower deck.
ope.jpg


That's about as far as I got last night before closing up shop.

Thanks for looking.
 

WoodsTruck

Well-known member
Joined
Jan 12, 2013
Messages
1,028
Mike,
What is your plan for your sprayed out blocks in the lawn?
It appears you have some green creeping through. Good grass, or does it need treated again?
Also, do you do much fall feed on the lawn?
 
OP
Z

zmotorsports

ALLIANCE MEMBER
Joined
Oct 20, 2009
Messages
21,477
Location
Northern Utah
Mike,
What is your plan for your sprayed out blocks in the lawn?
It appears you have some green creeping through. Good grass, or does it need treated again?
Also, do you do much fall feed on the lawn?

The plan right now is to hit it again in the spring then cut out the dead and replace with new.

I did do a fall fertilizer treatment but omitted those two large areas that I killed.
 

NYBODYMAN

Well-known member
Joined
Sep 10, 2013
Messages
4,901
Location
NY
I finally finished watching your feature on Tool Box Tours. You have an amazing shop and seem to know everything about everything. I don't know how you fit all that knowledge in your head!
Also, an hour and a half didn't seem like it was long enough. We need Part 2 :). There were quite a few tool boxes left to go through ;)
 
OP
Z

zmotorsports

ALLIANCE MEMBER
Joined
Oct 20, 2009
Messages
21,477
Location
Northern Utah
I finally finished watching your feature on Tool Box Tours. You have an amazing shop and seem to know everything about everything. I don't know how you fit all that knowledge in your head!
Also, an hour and a half didn't seem like it was long enough. We need Part 2 :). There were quite a few tool boxes left to go through ;)

Thank you very much. I am flattered, but unfortunately you may be making my head swell a bit with your compliments. :bounce: I certainly don't know everything about everything, far from it, I've just been at this gig a long time and try to work on a wide variety of things vs. specializing in one particular thing. That can be good and bad. Good in the fact that I have been fortunate to have been exposed to such a vast array of vehicles and equipment so I have been able to gain wide range of knowledge, however, it can be bad because I have had to buy so many various tools in order to work on such a vast array of vehicles and equipment. :unsure: I have always tried to take work into my shop that I have been unfamiliar with rather than the same old thing all the time, and I have a VERY understanding wife who knows how passionate I am about my trade and allows me to buy the tools and equipment needed to fullfil my dream.

My good friend and mentor told me many, many years ago when I first went to work for him, not to chase the money, do the job or the work because you want to learn about it and are passionate about gaining the knowledge and experience, and the money will come. Well, that made absolutely no sense when the words left his mouth. I thought I sure as hell wouldn't be here working if I weren't getting paid, so yeah, I guess I am chasing the money. However, after a couple of years I began to understand what he meant. I then started taking in more and more work at my home shop that I was unfamiliar with solely to learn and gain knowledge. Even at work, I would take on the jobs that my coworkers would avoid, either because they were **** jobs, OR because they were scared of them. And wouldn't you know it, all these years later I have found I have acquired quite a wealth of experience to store in the old noodle for when I need it. And I still continue to learn each and every day, because I don't know everything. Far from it in fact, as the more I learn, it seems like the more questions I have about things. So in a way, it almost seems as though the more I learn the more I realize I don't know, or said another way, the more I learn the dumber I feel at times. :ROFLMAO:


I think Dustin from Tool Box Tours did a great job during his visit with me, but he only wanted to focus on the tools in the main toolbox, not so much the shop or the equipment per se. If you would like to waste another ~2hours, I have a shop tour that I posted to my YouTube channel about a year ago. Here is a link.
 
OP
Z

zmotorsports

ALLIANCE MEMBER
Joined
Oct 20, 2009
Messages
21,477
Location
Northern Utah
So, for those of you who follow my thread, you know that I'm a GM guy as well as you may also know that I like quality workmanship. The Roadster Shop has produced a couple of outstanding rides called their "Legend Series", which is a culmination of old iron melded with new powertrains for some amazing results.

Well, they hit a home run with this one. I just had to share their latest build on the Legend Series chassis.
 

Scuderia-F1

Well-known member
Joined
Feb 9, 2011
Messages
1,198
Location
Stockholm, Sweden
So, for those of you who follow my thread, you know that I'm a GM guy as well as you may also know that I like quality workmanship. The Roadster Shop has produced a couple of outstanding rides called their "Legend Series", which is a culmination of old iron melded with new powertrains for some amazing results.

Well, they hit a home run with this one. I just had to share their latest build on the Legend Series chassis.
Watched the video right when it dropped. Loved it, especially the scenes where they pulled the trailer. Excellent truck.
 

NYBODYMAN

Well-known member
Joined
Sep 10, 2013
Messages
4,901
Location
NY
Thank you very much. I am flattered, but unfortunately you may be making my head swell a bit with your compliments. :bounce: I certainly don't know everything about everything, far from it, I've just been at this gig a long time and try to work on a wide variety of things vs. specializing in one particular thing. That can be good and bad. Good in the fact that I have been fortunate to have been exposed to such a vast array of vehicles and equipment so I have been able to gain wide range of knowledge, however, it can be bad because I have had to buy so many various tools in order to work on such a vast array of vehicles and equipment. :unsure: I have always tried to take work into my shop that I have been unfamiliar with rather than the same old thing all the time, and I have a VERY understanding wife who knows how passionate I am about my trade and allows me to buy the tools and equipment needed to fullfil my dream.

My good friend and mentor told me many, many years ago when I first went to work for him, not to chase the money, do the job or the work because you want to learn about it and are passionate about gaining the knowledge and experience, and the money will come. Well, that made absolutely no sense when the words left his mouth. I thought I sure as hell wouldn't be here working if I weren't getting paid, so yeah, I guess I am chasing the money. However, after a couple of years I began to understand what he meant. I then started taking in more and more work at my home shop that I was unfamiliar with solely to learn and gain knowledge. Even at work, I would take on the jobs that my coworkers would avoid, either because they were **** jobs, OR because they were scared of them. And wouldn't you know it, all these years later I have found I have acquired quite a wealth of experience to store in the old noodle for when I need it. And I still continue to learn each and every day, because I don't know everything. Far from it in fact, as the more I learn, it seems like the more questions I have about things. So in a way, it almost seems as though the more I learn the more I realize I don't know, or said another way, the more I learn the dumber I feel at times. :ROFLMAO:


I think Dustin from Tool Box Tours did a great job during his visit with me, but he only wanted to focus on the tools in the main toolbox, not so much the shop or the equipment per se. If you would like to waste another ~2hours, I have a shop tour that I posted to my YouTube channel about a year ago. Here is a link.
Give yourself some credit. Your experience is what makes you a genius! We are definitely cut from the same cloth. I always enjoyed taking on the harder uncommon body jobs that the old grumpy guys refused or grunted about. I enjoyed working on foreign cars, and straightening metal etc. After a while though, I was turned off from the business when I was told I care too much and to hurry up. It was around the 10 year mark that I said it's time to switch careers. I do miss it dearly but I made the right choice for me and my now family.

I will definitely take a look at your channel and your 2 hr tool box tour. It won't be a waste I'm sure!
 
OP
Z

zmotorsports

ALLIANCE MEMBER
Joined
Oct 20, 2009
Messages
21,477
Location
Northern Utah
Give yourself some credit. Your experience is what makes you a genius! We are definitely cut from the same cloth. I always enjoyed taking on the harder uncommon body jobs that the old grumpy guys refused or grunted about. I enjoyed working on foreign cars, and straightening metal etc. After a while though, I was turned off from the business when I was told I care too much and to hurry up. It was around the 10 year mark that I said it's time to switch careers. I do miss it dearly but I made the right choice for me and my now family.
I will definitely take a look at your channel and your 2 hr tool box tour. It won't be a waste I'm sure!

Thank you.
 
OP
Z

zmotorsports

ALLIANCE MEMBER
Joined
Oct 20, 2009
Messages
21,477
Location
Northern Utah
I hope everyone had a great weekend. It's hard to believe that 2024 is nearing the end. Where the hell did this year go?

My wife had a party Saturday that she started when her mother was alive. My MIL's birthday is the week before Christmas and she never wanted anything for herself. Instead, she just wanted to get together with her daughters and eventually her DIL's. So my wife started doing "Christmas Tea" with her mother, sisters and SIL's about 10 years ago, where they would go to a local place that had the "English Tea" type of luncheon, with cucumber tea sandwiches and the whole 9 yards. The year my MIL was diagnosed (2019) she didn't feel like going anywhere so my wife did Christmas Tea at our home in 2019. Now it is just and expected and enjoyed tradition.

The tradition has grown over the past several years now that we have several nephews who have gotten married, my wife has extended the invitations to include all nieces as well as sisters and SIL's. This is the fifth year now and she includes a poem that her mother enjoyed as well as cookie decorating as an activity along with a nice luncheon with all the fixings.

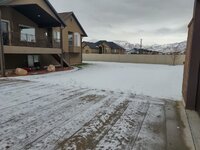
We had a bit of snow on Friday during the day, so when I arrived home Friday night from work, I cleared the front drive so it would be clear for Saturday morning.

After a few cups of coffee on Saturday morning, I headed out to clear the back yard of snow.
dec1.jpg

dec2.jpg


I was just finishing up when people started to arrive for the party. Perfect timing so they didn't have to listen to the snowblower outside. By late morning the sun came out and melted off the last of the residual from the storm and we had clear concrete again.
 
OP
Z

zmotorsports

ALLIANCE MEMBER
Joined
Oct 20, 2009
Messages
21,477
Location
Northern Utah
With the party going on inside, I stayed in the shop getting a few things done that I had put off.


It was actually quite nice to just crank up the radio and enjoy working on the OPE doing the year end service and winterization process.
ope1.jpg

Changed oil in both mowers as well as checked them over.
ope2.jpg

Then moved on to cleaning of the decks.
ope3.jpg

I checked the balance of the blade after cleaning but before sharpening. Maintained a nice balance throughout the season.
ope4.jpg

And only had a couple of very small nicks that needed attention. The blades barely needed anything more than a slight cleanup of the edges.
ope5.jpg

Then back on the balancer to double check before reinstalling.
ope6.jpg

Then the process of cleaning the ZTR deck was repeated.
ope7.jpg

And blades checked, sharpened and double checked for balance before reinstalling.
ope8.jpg

Then all of the OPE was staged inside the door so it can be pressure washed, reassembled and put in the house garage until spring.
ope9.jpg


As I was enjoying the nice warm shop and listening to Christmas music while looking around, my eyes kept getting drawn to the two large banners over my toolbox. Since I no longer own nor really even work on Harley's any longer, I feel as though I have false advertising going on with my Harley Davidson and Screamin' Eagle banners. Rather than fill the shop with the next couple of projects over the holiday, I am going to hold off until after the New Year to bring any more work into the shop, but I keep thinking I am going to use the next week to get the shop prepped for going into 2025 and ready to knock out some work. I would like to purge my chemical shelf as well as remove a couple of banners that no longer pertain to me nor the work I do in my shop, so I would like to replace them with some that I have had in storage that may be of more relevance.
 

bigdave_185

Well-known member
Joined
Feb 14, 2021
Messages
443
Location
Utah
Once again bought up on @zmotorsports page.

I sure have a bunch of definition questions about gears and alignment.
I haven’t had a chance to google or internet engineer them.

When you paint the ring gear looking for the amount of engagement you talked about toe, heal, face and flank,
Anyone help me understand those terms? I kept looking at the yellow paint marking photos and I can’t discern between the different photos.

Do you remove the paint from the gears before install? Does it wear off, wash off or would you see it in an instance where you do a full service ? Or would it still be there and see the wear pattern?

How much movement do you get from a case spreader? Are you measuring .0xyz or enough to measure .25” ? My brain says the axle housing shouldn’t give that much movement.

Thank you in advance….. and always a pleasure to follow along
 
OP
Z

zmotorsports

ALLIANCE MEMBER
Joined
Oct 20, 2009
Messages
21,477
Location
Northern Utah
Once again bought up on @zmotorsports page.

I sure have a bunch of definition questions about gears and alignment.

I haven’t had a chance to google or internet engineer them.

When you paint the ring gear looking for the amount of engagement you talked about toe, heal, face and flank,
Anyone help me understand those terms? I kept looking at the yellow paint marking photos and I can’t discern between the different photos.

Do you remove the paint from the gears before install? Does it wear off, wash off or would you see it in an instance where you do a full service ? Or would it still be there and see the wear pattern?

How much movement do you get from a case spreader? Are you measuring .0xyz or enough to measure .25” ? My brain says the axle housing shouldn’t give that much movement.

Thank you in advance….. and always a pleasure to follow along

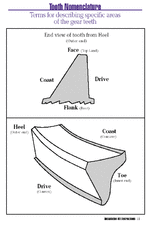
Thanks Dave, I'll try to explain the best I can. I found a small picture on the internet that may do a better job of explaining the nomenclature of the ring gear.

Here you can see the correct terms of the ring gear. Face is top of tooth, flank being the bottom or root. Toe is the tip of the gear nearest the center or axle and heel is the further point of the gear tooth away from the axle. Drive side is the convex side and Coast is the concave side. Think of the drive side trying to push the curve out of the tooth under the most tension, while driving. That is the easiest way to remember it. IT is trying to flatten the tooth while driving forces are appied.
nomenclature.gif

I don't remove the gear marking compound/paint because it is oil soluble and will dissolve within a few revolutions of the gears while submersed in gear oil. I recommend, as do most gear manufacturers, to change the oil after an initial ~500 mile break-in period. At that time the oil with dissolved gear marking compound will be removed permanently anyways and refilled with a fresh charge of gear oil. Many times I perform this initial service for the client but some choose to perform it themselves to save the cost. I'm not partial either way as long as it gets done to remove all of the debris and material from break-in before the normal service life is resumed.

When spreading the case you have to be careful, you would think the cases or housings wouldn't flex that much, but they flex enough that if you go too far you can break and destroy the case. I read in a Spicer service manual years ago max of .020" so that is what has stuck in my head all these years. I usually just throw my dial indicator on one side and put the DTI plunger against the other to measure the distance the case is spreading. Technically, you only need to open it enough to get shims in/out and nothing more. Again, the Spicer FSM that I read about 30 years ago specified a carrier preload of about .010"-.012" is all that is necessary to achieve the 3-5 in/lbs of carrier preload so it doesn't take much. However, it is more than the shims can be easily inserted and if there is clearance in the carrier then under high load, the pinion is able to force the carrier away from it and then all the time you took to set up the gear pattern and backlash have just gone out the window. So those that set up their differentials without spreading the cases may not have had failures, yet, but the pattern is changing at the worst times, when the load is the greatest. Also, this causes the contact point to be much higher up the gear tooth than it should be, which is technically at their weakest point. I would want the tooth to be fully engaged at the strongest point when the most force is being applied. :unsure:

I hope that answered your questions.

As a side note, I received a text from another gentleman yesterday. He is restoring an older Chevy K30 and needs his front Dana 60 rebuilt. He got my number from another client that I've done work for. He said I was referred to as the "gear guru". Ugh, gears again???? I wonder if people know I do things other than just gears. :headscrat
 
OP
Z

zmotorsports

ALLIANCE MEMBER
Joined
Oct 20, 2009
Messages
21,477
Location
Northern Utah
It wasn't cold enough when I arrived home last night, so I decided to freeze my *** off by getting the pressure washer out and cleaning all of the OPE. :ROFLMAO:

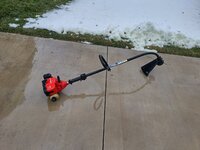
I grabbed the line trimmer off the wall in the garage and gave it a thorough cleaning.
ope1.jpg

Then repeated the process with the edger from the house garage.
ope2.jpg

Then opened the shop door to wheel the mowers out for cleaning. The underside of the deck got a good cleaning while trying not to concentrate the stream at or near the bearings in the spindles.
ope3.jpg

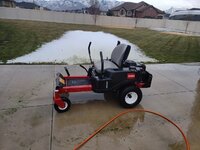
Then the ZTR was washed.
ope4.jpg

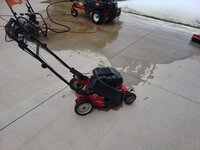
And the 33 year old Snapper 21" walk-behind mower.
ope5.jpg

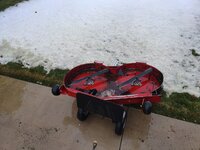
The ZTR deck was turned upright and allowed to drain off while I hit the topside.
ope6.jpg

Then the shop door was opened and everything was brought inside to dry off.
ope7.jpg

ope8.jpg

I left the deck upside down to dry for a while and once it was dried, I hit the underside of the deck with some WD-40, then turned upright so it is ready to stab back under the rider tonight.
ope9.jpg


With all of the equipment inside the shop to dry, I went back outside to pressure wash the grassy mess off my concrete.
 
OP
Z

zmotorsports

ALLIANCE MEMBER
Joined
Oct 20, 2009
Messages
21,477
Location
Northern Utah
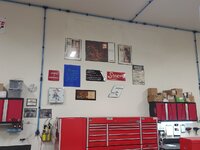
While the lawn equipment was drying off, I thought I'd tackle the banner situation in the shop. I had dug around in the boxes from the old shop and found a couple that I thought I'd hang, plus the new one I received from Banks Power for the interview I did with them a couple of years ago.

After removing the Harley Davidson banner and Screamin' Eagle banner from above the toolbox, I thought I'd move my "vintage" Snap-on promo posters that I hung up a couple of years ago over above the toolbox.
ban.jpg

Then hung my GM Performance Parts banner up where the Snap-on promo posters were. Funny, this banner seemed much larger in my last shop. :bounce:
ban1.jpg

Then hung my Warn banner up above the other workbench and above my Tom Woods Driveshaft banner.
ban2.jpg

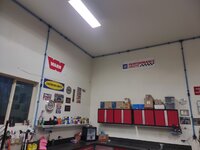
Lastly, I hung up the Banks Power banner next to the Camaro banner and hung my ARP Products banner above the clock and fabrication area.
ban3.jpg

ban4.jpg

Overall, I think that should hold me for a good long while.

Thanks for looking.
 
OP
Z

zmotorsports

ALLIANCE MEMBER
Joined
Oct 20, 2009
Messages
21,477
Location
Northern Utah
After putting the ladder away, and before the wife came home and saw that I had been on the ladder, I thought I'd tackle a small project on my walk-behind mower.

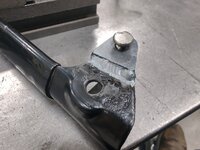
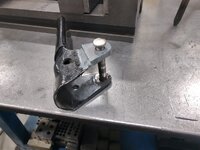
I fixed this a few years ago when the pin wore through the drive handle tab. I had welded up the hole and redrilled it, then welded up the worn groove in the pin and turned it back down on the lathe. However, while washing the mower, I noticed that there was a large amount of slop in this pivot point again so rather than wait until spring when it would surely fail, I opted to take a few minutes and fix it now so come spring it is ready to start and begin mowing.
This time I opted to cut the thin tab off the handle and fabricate a thicker tab from a drop of .187" steel. Once cut and hole reamed to .250", I cut the old tab off and welded the new tab in its place, making sure to make it flush with the underside so it would fit over the Delrin bushings without too much drag. I used the pin for aligning the tab to ensure it is located in the correct plane. Once welded I quenched it immediately to somewhat harden the tab, thinking this would prolong any more wear to the tabs hole.
ope11.jpg

Pin slides easily in and out, but as you can see the underside of the pin's head is also worn again. I grabbed a Grade 8 7/16" bolt and will machine down a .250" pin from it and case harden the pin rather than repair this pin again.
ope12.jpg

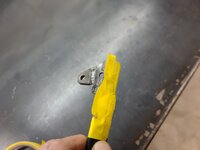
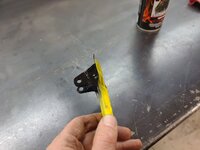
With the area prepped I back-masked the handle to touch up the paint.
ope13.jpg

ope14.jpg

Unmasked and no harsh or hard line from the paint.
ope15.jpg

Test fit onto the handle to make sure it pivots nice and smooth.
ope16.jpg

While I was spraying down the underside of the mower decks, I ran low in my spray bottle of WD-40 so as I dug the gallon out of the cupboard to refill the spray bottle, I figured I may as well top off my small bottle of Kroil at the same time. I like this small bottle with needle point as it puts the penetrant right where I want it and this is much more economical than using the spray cans of Kroil all the time when many times less is more.
ope17.jpg


This also reminded me that I would like to purge my chemical shelf sometime in the next week or so before entering into 2025. My son and I purged our chemical assortment when we closed the last shop down in 2016. However, over the past almost 8 years I've been in this shop now, I have bought so many others to try out that my shelf is overflowing, again. Most, or at least many, of the ones I've purchased over the past 7+ years I have not been overly impressed with, so I think I'll purge the shelf and more than likely end up back with most of the same ones I used in previous years. I really need to quit "trying new" stuff when what I have used for decades works perfectly well and very seldom to I find stuff I like better.
 
To avoid these ads, REGISTER NOW!
Top Bottom