To avoid these ads, REGISTER NOW!

ZMotorsports Shop Projects 2.0

To avoid these ads, REGISTER NOW!

olsenmotorsports

Well-known member
Joined
Apr 13, 2013
Messages
764
Location
Chicago, IL
I'm the oddball here lol. I look for snow in the forecast, wake up at 3am and go start raising absolute hell in it. The area where my house is has hills (chicago hills, we are talking like 30' of elevation) and some gnarly sweepers for curves (bends in the road for the rest of the world). Im out there drifting around like I'm 16 again :ROFLMAO:
 

LXCam

ALLIANCE MEMBER
Joined
Apr 23, 2013
Messages
19,214
Location
AZ
I'm the oddball here lol. I look for snow in the forecast, wake up at 3am and go start raising absolute hell in it. The area where my house is has hills (chicago hills, we are talking like 30' of elevation) and some gnarly sweepers for curves (bends in the road for the rest of the world). Im out there drifting around like I'm 16 again :ROFLMAO:
Tim, we already know you have issues.

There’s no need to brag :Freak::spit:
 
OP
Z

zmotorsports

ALLIANCE MEMBER
Joined
Oct 20, 2009
Messages
21,478
Location
Northern Utah
I'm the oddball here lol. I look for snow in the forecast, wake up at 3am and go start raising absolute hell in it. The area where my house is has hills (chicago hills, we are talking like 30' of elevation) and some gnarly sweepers for curves (bends in the road for the rest of the world). Im out there drifting around like I'm 16 again :ROFLMAO:

Up until 2009 when we sold our sleds, I too looked forward to that white stuff falling each year. I used to watch that snowline drop down the mountains and count the days until I could grab some throttle on our sleds and start climbing mountains. We snowmobiled for just over 20 years as a family but in 2009 sold them all and got completely out of sledding.

Then in 2015 my job duties changed to where I am responsible for snow removal at work and NO ONE is ever happy with the process when that white **** falls. I HATE having to deal with the snow removal for a large industrial complex.

I think once I retire and don't have to deal with all of the whining at work and only have to deal with my personal property it will become less of a headache, maybe then I can enjoy it a bit more. I also won't have to worry about the wife driving in it each day going to work.
 

olsenmotorsports

Well-known member
Joined
Apr 13, 2013
Messages
764
Location
Chicago, IL
Up until 2009 when we sold our sleds, I too looked forward to that white stuff falling each year. I used to watch that snowline drop down the mountains and count the days until I could grab some throttle on our sleds and start climbing mountains. We snowmobiled for just over 20 years as a family but in 2009 sold them all and got completely out of sledding.

Then in 2015 my job duties changed to where I am responsible for snow removal at work and NO ONE is ever happy with the process when that white **** falls. I HATE having to deal with the snow removal for a large industrial complex.

I think once I retire and don't have to deal with all of the whining at work and only have to deal with my personal property it will become less of a headache, maybe then I can enjoy it a bit more. I also won't have to worry about the wife driving in it each day going to work.
Yeah that is completely different scenario and I cannot imagine having to work with people that complain.

I am fortunate that the extent of my dealings with snow removal is just dusting off the car if i forget to bring it in the garage
 
OP
Z

zmotorsports

ALLIANCE MEMBER
Joined
Oct 20, 2009
Messages
21,478
Location
Northern Utah
Yeah that is completely different scenario and I cannot imagine having to work with people that complain.

I am fortunate that the extent of my dealings with snow removal is just dusting off the car if i forget to bring it in the garage

It definitely sours one's feelings towards winter for sure.
 

CGarage

Well-known member
Joined
Nov 23, 2018
Messages
3,063
Location
United States/Switzerland
Mike / @zmotorsports:

A question for you:

If you were to look back on both industrial and automotive service / repairs / maintenance / custom build projects you have taken on over the past decades, can you recall any jobs that were particularly difficult technically, and what you did to solve the problems or issues that came up, be it from your knowledge base or specialty tooling you have?

Thank you so much for such insight in advance.
 
OP
Z

zmotorsports

ALLIANCE MEMBER
Joined
Oct 20, 2009
Messages
21,478
Location
Northern Utah
Mike / @zmotorsports:

A question for you:

If you were to look back on both industrial and automotive service / repairs / maintenance / custom build projects you have taken on over the past decades, can you recall any jobs that were particularly difficult technically, and what you did to solve the problems or issues that came up, be it from your knowledge base or specialty tooling you have?

Thank you so much for such insight in advance.

WOW! That may be a bit of a loaded question and one I may incriminate myself on. :unsure:

Personally, I feel that there are quite a few repairs and/or jobs that I have fought with over the past nearly 4 decades now. My main reason for feeling that way is that I had no formal schooling or training to fall back on and in some cases, nowhere to really begin on some jobs that came through the door, being the shop at work or my home shop.

I would say those jobs that I fought the most with were ones that I had never done before and when my "knowledge toolbox" was more limited as I was early in my career and learning curve. Funny, as I sit here trying to think back over the course of my wrenching career of those jobs that took me the most time and that I feel like I fought the most with, I have two specific ones that popped in my head. What's even more interesting is that as I think about them, they were both hydraulic related, to some degree.


First one was around 1990 only a short couple of years of beginning to work as an Industrial Maintenance Mechanic and still very green, labeled "apprentice". Although I had learned a LOT over those first couple of years, I was also very much aware of exactly how much I did not know. We had a JLG boom lift at work that after using it to replace some pole mounted flood lights in our parking area at work, I was driving it back into the building and noted that it couldn't get up the ramp from ground level into the building. It usually drove up in low range without issue, but on that occasion it could not make it up the small incline. I had a coworker come and tow me up the ramp and then it drove under its own power back to the shop. The next day I asked my boss if he had any suggestions on where to start. We bought the lift used and had no literature available on hand for it, so after he told me to "figure it out", I called the vendor who we dealt with who carried the brand and requested a parts and service manual.

At the time my hydraulic experience had been very limited to just replacing fluids and filters on much of our equipment as a PM Mechanic as that was the level most everyone started at that time. Thinking this was my first job of being tasked to actually perform a repair and not merely pump grease, I took it and ran with it. Ran right into a wall. Wall of realizing that I was not as smart as I thought I was and that I was still very green in terms of experience and knowledge.

Keep in mind that this is all well before the internet and before manuals and troubleshooting guides were available digitally. I began reading about hydraulic systems while waiting for the parts and service manuals to arrive and felt like I had a good grasp on the basic theory. I understood the basic theory of how hydraulics worked but when the manuals arrived and I started reading how the systems all worked after being powered by a Kohler gas engine, it felt overwhelming. The little bit of reading I had done prior to the manuals arriving all of a sudden made no sense when actually trying to diagnose a specific problem.

Fortunately, my boss's boss, who became my mentor, helped me think through by giving me things to think about in a diagnosis. The most important element was to understand the system and the sequence of operation. Then and only then can a person figure out where in the process or operation that the problem is happening. This turned out to be a crucial element of any diagnostic process and one that has stuck with me to this day and more importantly, one I try to share as often as I can. A person cannot diagnose something they don't understand.

I learned the importance of taking accurate readings of various pressures when certain things were supposed to take place and I learned how to sort out the relevant information from the irrelevant based on either timing of events or operations that were not happening simultaneously. Hope that part makes sense. But by T'ing in a pressure gauge to a certain point in the system when a specific function was called for and seeing either what I was expecting to see, or more importantly, what I wasn't seeing, I was able to deduce where the problem was coming from, and I learned a TON during this week or so process.

The system had a wet brake system that had to be released instantaneously as soon as pressure was also applied to the drive motor at the two drive wheel ends. At the time I wasn't sure if this problem was electrical related or hydraulic related, but both were areas I struggled in as neither were my strong suit.

Initially, I thought electrical issue but after familiarizing myself with electrical schematics during the pressure testing phase, I quickly learned that everything was switching when it was supposed to, I turned my attention to the hydraulic schematics in the manual. I was surprised at how similar the two style of schematics were and I learned a lot about reading schematics for troubleshooting. This was probably the first job I really dove into any form of schematic in my short time in the field and the things I was learning were so new to me, but also so interesting. After a week or so of diagnosing and thinking for sure it would be a valve hanging closed restricting flow or a port being blocked and not releasing the brakes fully or something along those lines. When I found of no such issue through several nights of troubleshooting, I wondered to myself if it could simply be a worn out motor passing too much fluid past rather than turning it into useful energy.

My boss came in one morning to find me with both drive motors removed and fully disassembled comparing one to the other by measuring clearances and looking for scoring. After a short conversation to the tune of "what the hell were you thinking tearing BOTH apart?" I was able to find some suspicious scoring and had questions. On my way home from work, I stopped by a local hydraulic repair shop that we dealt with and was able to bend the ear of one of the mechanics who took the time to go over my findings with me and confirm my thinking.

After ordering a new drive motor, installing it, flushing the system and relacing filters, I was able to complete the repair and for probably the first time in my short time in the industry, found myself proud of the job I was able to accomplish. I learned more on that one job that took a week plus to complete than so many others combined. As I think about that particular job, I think that for me was a turning point to where I no longer viewed myself as merely a PM Mechanic and that I was passionate about finding answers to problems.

Several years later after opening our side business at our home shop, I had another job that tested my patience as well as my skills. This was 2006, I remember the year very well because my wife and I had the goal of paying for college for our son and he was just entering High School. I remember we didn't travel nor race much that year because I was taking on every job that I could in order to pay the home off. I was doing a lot of one-off jobs for clients who had snowmobiles and sand quads/sandrails so the work was smaller, but there was a higher volume of those jobs that were moving through the shop. I really wanted to improve my machining and my welding skills, but also my general knowledge so I was taking on everything I could get my hands on as a way to continuously improve upon my skills and I just yearned for knowledge.

Although much of my work was custom work at this time, I was also using general repairs to fill in the gaps in the custom work to keep the shop full and money coming in. I had rebuilt quite a few automatic transmissions up to this time and maybe was getting a little "cocky" as I hadn't really had any issues per se, they went relatively smooth for the most part. I had a client ask me to work on his 1996 GM truck that he hauled his toys to the dunes with as it was "acting up". Upon some diagnosing I informed him the best course of action was a full rebuild of his 700R4 transmission. He agreed and the job went relatively smooth. Transmission out, on the bench, disassembled, inspected, rebuilt, installed and tested then handed back over to the owner.

He drove it around several weeks without issue, then one day called to tell me he was sitting off the side of the road in southern Idaho with transmission fluid all over the place. He had a cooler line fail; fatigue cracked line at a connection. Unfortunately, he continued driving it longer than he should have. Once he got it back to my shop and the problem was repaired, it was obvious he had overheated the transmission, very overheated by the smell and appearance of the relatively new fluid. I thought maybe we could save it and do a couple of fluid/filter changes but the damage was more severe. Short drives it seemed fine, but anything more and it began to experience slippage.

Back apart the transmission came and burnt clutches were replaced and back together. The problem was not fixed and slippage still existed after the transmission came up to temperature and anything more than a light load applied. I must have had the transmission out of that truck 6 times if I had it out once over a week or so time span. Hell, I was about to put a zipper on the damn thing and was getting tired of pulling and reinstalling that transmission. All on my dime to boot as I still felt like it was my fault, even though others informed me that it was something unrelated to my work, even the owner was telling me this.

I learned more about those 700R4 (then 4L60E) transmissions during that week than I care to admit. Referencing back to that hydraulic drive motor issue all those years prior I began thinking the issue through and ultimately what I found was that when the transmission was overheated, there was a passage in the case that cracked between two circuits. When the transmission heated up, this crack would open just enough that it would bleed hydraulic pressure off of one circuit allowing clutch slippage.

We found a replacement case, another rebuild and that was the last time the transmission came out of the truck. I guess the common thread besides both being hydraulic related, is that those two jobs allowed me the opportunity to learn so much and really pushed me. There were times I wanted to throw my hands up on both of those jobs, but I kept my head down and continued to go through my Four C process until I triumphed.

This is why my wife continues to remind me that those jobs that I fight the most with, end up being the things I become very good at. I have had to keep reminding myself of that many, many times because of the frustration I feel when I fight a job. I wish I could say that all those hard jobs are behind me but yes, to this day I still fight various jobs as nothing goes smoothly all the time.

Not quite sure that is what you were asking, but those were the two that jumped out at me.

Great question and one that I hope I answered well.
 
OP
Z

zmotorsports

ALLIANCE MEMBER
Joined
Oct 20, 2009
Messages
21,478
Location
Northern Utah
I enjoy checking this thread daily to see what you got going on . How do you like that snap-on amp clamp ? would you buy it again or is there something else out now that you prefer ?

Thank you very much for continuing to check in on my projects.

I like the Snap-on low amp clamp. It works well and has not given me any issues. I've had mine for quite a while but I believe that Pico makes one almost identical now, at least by appearance and output voltage, but not sure if it is cheaper than the Snap-on one or not.
 

olsenmotorsports

Well-known member
Joined
Apr 13, 2013
Messages
764
Location
Chicago, IL
Thank you very much for continuing to check in on my projects.

I like the Snap-on low amp clamp. It works well and has not given me any issues. I've had mine for quite a while but I believe that Pico makes one almost identical now, at least by appearance and output voltage, but not sure if it is cheaper than the Snap-on one or not.
Sorry to hijack - just some input

I have both - the Pico one EATS batteries, 4-1 over the snappy - And the pico thumb wheel for zero is a PITA vs the snappy push button.

One thing is the pico one has a slightly smaller ID clamp which is handy for clamping wires on sensors so you do not have to remove tape etc, the snappy is a bit larger. But I am being picky.

Both perform the same
 
OP
Z

zmotorsports

ALLIANCE MEMBER
Joined
Oct 20, 2009
Messages
21,478
Location
Northern Utah
Sorry to hijack - just some input

I have both - the Pico one EATS batteries, 4-1 over the snappy - And the pico thumb wheel for zero is a PITA vs the snappy push button.

One thing is the pico one has a slightly smaller ID clamp which is handy for clamping wires on sensors so you do not have to remove tape etc, the snappy is a bit larger. But I am being picky.

Both perform the same

Not hijacking Tim, good information.

I have heard that the Pico's clamping range is on the small side but I have no personal experience, so you confirmed what I have heard.

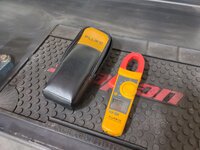
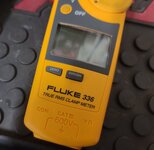
I have really not had any issues with the Snap-on one fitting over a single battery cable to do parasitic draw testing, but you have to be careful not to crank the engine as the low amp clamp is just that, low amp. I have a Fluke clamp on amp clamp that I use for testing larger loads.
 
OP
Z

zmotorsports

ALLIANCE MEMBER
Joined
Oct 20, 2009
Messages
21,478
Location
Northern Utah
thanks for the information, what model fluke are you using, they have several to choose from.

I can't remember off the top of my head. I know it's a 3-series but can't remember the exact model number, I've had it for quite a while. I will look at it when I get back to the shop and report back with a picture.
 
OP
Z

zmotorsports

ALLIANCE MEMBER
Joined
Oct 20, 2009
Messages
21,478
Location
Northern Utah
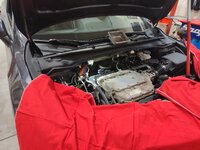
My DIL brought her 2013 RDX over last night so my son and I could replace the spark plugs that have been sitting on the bench for a couple of months as we had an open spot in the shop. My grandson was able to run around the shop and touch and play with all kinds of things and just have a blast. I gave him an air blow gun and he walked around pretending to spray stuff off. As we were changing out the spark plugs in bank 2, which is at the front of the car, my son held him up and he helped me pull on the ratchet and remove the ignition coils. He just wants to help so bad he can't stand it. I asked him if he wanted to help and he came running from the front of the shop to the front of the car saying "yes, yes". :lol:


Supplies laid out and first ignition coil removed on Bank 1, rearmost bank.
rdx1.jpg

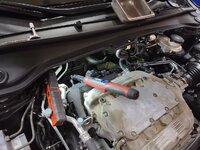
Not terrible access to be honest. Nice relatively large void between the head and the firewall in which to work. Seeing back there was the hardest part, much of it had to be done by feel.
rdx2.jpg

Torquing the plugs to spec., then reinstalling the coils and plugging everything in.
rdx3.jpg

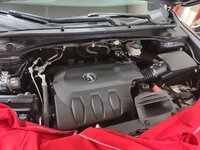
After the plugs were replaced in the front bank, Bank 2, the cover was reinstalled and that pretty much completed this quick job.
rdx4.jpg

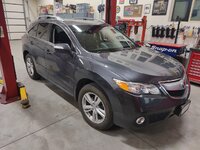
Ready to go.
rdx5.jpg


Thanks for looking.
 

fouckhest

Well-known member
Joined
Jul 24, 2013
Messages
1,871
Location
Greer, SC
I think that is the same v6 that is in my step-daughters accord, that plug on the back bank, closest to the drivers side is always fun. I think there is a combination of extensions that I have found to make it painless, but I remember cursing a bit the first time.

Also, about that engine, have you ever had an issue with it eating coil packs or fouling spark plugs? Her car had an issue bouncing back and forth between cylinders 3 & 6, but it may have been a cheap coil and or plug that got thrown in it at some point. Its been good for a while now since I replaced all 6 coils and plugs, but it was driving me crazy for about 6months a while ago
 

aka Larry

Well-known member
Joined
May 2, 2012
Messages
8,099
Location
Eastern, NC
As we were changing out the spark plugs in bank 2, which is at the front of the car, my son held him up and he helped me pull on the ratchet and remove the ignition coils. He just wants to help so bad he can't stand it.

Mike you are the master of pics on GJ, so I'm a little disappointed we don't get to see a pic of the little guy 'in action' today. ;)
 
OP
Z

zmotorsports

ALLIANCE MEMBER
Joined
Oct 20, 2009
Messages
21,478
Location
Northern Utah
I think that is the same v6 that is in my step-daughters accord, that plug on the back bank, closest to the drivers side is always fun. I think there is a combination of extensions that I have found to make it painless, but I remember cursing a bit the first time.

Also, about that engine, have you ever had an issue with it eating coil packs or fouling spark plugs? Her car had an issue bouncing back and forth between cylinders 3 & 6, but it may have been a cheap coil and or plug that got thrown in it at some point. Its been good for a while now since I replaced all 6 coils and plugs, but it was driving me crazy for about 6months a while ago

Mike, I have had to replace coil packs on my wife's Acura TL with this same engine several years ago. But for the most part it is a good solid engine. I ended up using OEM coil packs when I replaced them. I also replaced all six vs. just the two that were occasionally having issues.


Mike you are the master of pics on GJ, so I'm a little disappointed we don't get to see a pic of the little guy 'in action' today. ;)

Thanks Vincent. I was holding the ratchet and helping him, and my son was holding him above the engine, but we were laughing so hard at his grunting that I forgot to get a picture.
 

fouckhest

Well-known member
Joined
Jul 24, 2013
Messages
1,871
Location
Greer, SC
Mike, I have had to replace coil packs on my wife's Acura TL with this same engine several years ago. But for the most part it is a good solid engine. I ended up using OEM coil packs when I replaced them. I also replaced all six vs. just the two that were occasionally having issues.

Thanks, Mike. Makes me feel better that you've done coil packs as well, looks like it was Sept '23 when I did coils on here car, they were Denso, but (knocks on wood), seeing that its been a year and a half, seems reasonable to think it was a cheap component causing the issue(s).
 
To avoid these ads, REGISTER NOW!

Xti04

Well-known member
Joined
Nov 11, 2016
Messages
2,366
I think that is the same v6 that is in my step-daughters accord, that plug on the back bank, closest to the drivers side is always fun. I think there is a combination of extensions that I have found to make it painless, but I remember cursing a bit the first time.

Also, about that engine, have you ever had an issue with it eating coil packs or fouling spark plugs? Her car had an issue bouncing back and forth between cylinders 3 & 6, but it may have been a cheap coil and or plug that got thrown in it at some point. Its been good for a while now since I replaced all 6 coils and plugs, but it was driving me crazy for about 6months a while ago
Egr can cause misfire issues on the Honda v6 as well as tight exhaust valves. Have replaced some coil packs but not very many on the v6 Hondas
 
OP
Z

zmotorsports

ALLIANCE MEMBER
Joined
Oct 20, 2009
Messages
21,478
Location
Northern Utah
Hope everyone had a great weekend.

My son came over Saturday to perform some routine maintenance on his 2002 Silverado 2500HD so while he was working on his truck, I knocked out another shop accessory that I have had bouncing around in my head for a while now.

lb71.jpg

lb72.jpg


This is where my shop project came in. For the past 25+ years my zip-ties have lived in a supply drawer, along with many other supplies. At the last shop, being it was much smaller, the supply drawers were nearer to the workbenches and for the most part, where the work was being done. However, in our new larger shop, the supplies are at the furthest corner from the main work area. This usually isn't a problem as supplies are not needed on a high volume basis and I don't like them in the middle of the work area when not necessarily needed as there are more important items to keep closer to my work zone. However, zip-ties or tie-wraps, whichever you prefer to call them, are one item I seem to use a lot of in the shop.

Usually when I have been working and tying up wires or items with zip-ties, I will grab the amount that I think I'll need and of the size I think I'll use and throw them on the tool cart while working. The zip-ties end up sinking to the bottom of the tool cart mess, and I find myself digging through the tools to locate and grab a zip-tie. This is kind of a haphazard approach, and I almost always end up walking back and forth for a different size and definitely additional ones. Then when I'm cleaning up, I end up putting some back into the zip-tie drawer.

I have wanted to fabricate a tray of some sort in which I can place the zip-ties next to where I'm working but my fear has always been that I may accidentally knock them over and then have hundreds of zip-ties to pick up off the floor. Here is my zip-tie drawer at the far corner of the shop, along with my other supplies.
zip1.jpg


Stay tuned for my solution.
 
OP
Z

zmotorsports

ALLIANCE MEMBER
Joined
Oct 20, 2009
Messages
21,478
Location
Northern Utah
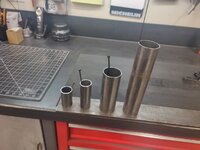
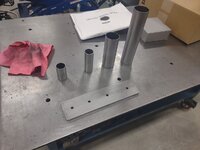
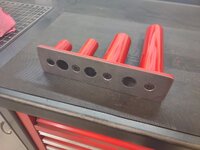
My zip-tie solution was similar to what others have done, using some tubing cut just short of each length of zip-tie, but rather than welded to a base, I wanted something a bit more elaborate, or overkill.

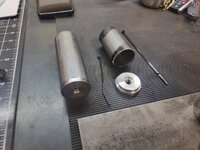
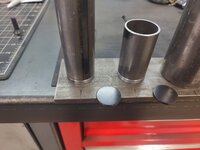
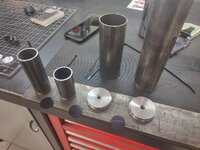
Here is what I started with. Two different diameter tubes, cut to four different lengths and a piece of 3"x .375" P&O flat bar. The base was to be heavy enough to avoid being easily knocked over.
zip2.jpg

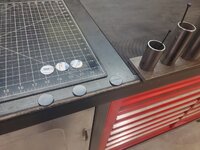
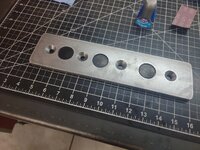
And just to make absolutely certain I don't knock the zip-ties all over the place, I located some magnets from my misc. drawer in which will be sunken into the base. Between the heavy base and the magnets, that "should" prevent them from being knocked over.
zip3.jpg

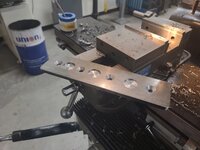
I also wanted a bit more elaborate way of mounting the tubes to the plate rather than merely welding them, like I have seen so many times. That would have been much, much faster to accomplish the end result, but I don't want to be like everyone else so I decided to machine some threaded bungs that will be welded to the end of each tube and then bolted to the base.
zip4.jpg

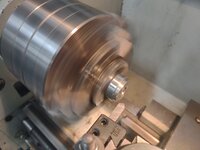
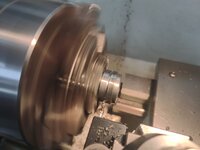
With the OD machined down as well as the step for the ID of the tubing, I parted the bung off.
zip5.jpg

Then flipped it around and faced the bottom off and chamfered the threaded bolt hole.
zip6.jpg

The two smaller bungs completed.
zip7.jpg

Tubing mocked into position to determine overall length of the base as well as magnet placement. I thought two magnets would work well, so I decided to use three. I also didn't want the tubes too close together, so I spaced them far enough apart to easily access whatever size zip-tie I needed to grab as well as making refilling easier.
zip8.jpg

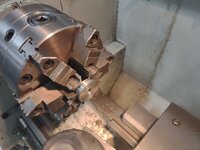
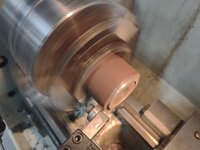
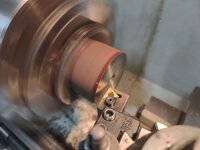
Next the attention was turned to machining the two bungs for the larger diameter tubing. I located a drop that only needed a small amount removed to match the tubing's OD. Here I am centering the short drop in the chuck using my alignment tool.
zip9.jpg

Then faced the end.
zip10.jpg

And started to work on the OD to match the tubing size.
zip11.jpg


Stay tuned for more.
 
OP
Z

zmotorsports

ALLIANCE MEMBER
Joined
Oct 20, 2009
Messages
21,478
Location
Northern Utah
Continuing on.

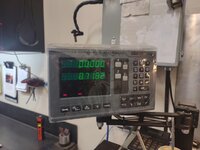
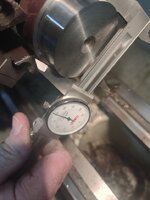
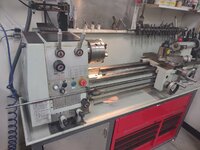
I am really getting use to and liking the DRO on the lathe. Once I make a test cut, I measure the part, determine how much material needs to be removed and then offset the DRO so that when I land on zero, the part is to size. Here I landed at zero after taking a series of roughly .030" deep cuts.
zip12.jpg

And here is what the part measured. Dead nuts on.
zip13.jpg

With all of the bungs machined, tubing cut to length, it was time to cut the base to length.
zip14.jpg

Then a wipe down with acetone and all of the parts were ready for welding.
zip15.jpg

When machining the steps in the bungs, I made them a couple thousandths larger so they were a press fit. Over to the hydraulic press to press the bungs into the tubing.
zip16.jpg

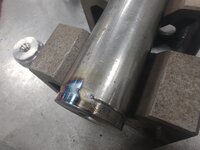
Then back to the welding table to weld the bungs to the tubing.
zip17.jpg

All four tubes completed and cooling.
zip18.jpg

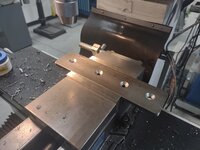
With the tubes cooling, I turned my attention to the base. After cutting to length and radiusing the corners, I drilled and tested a countersunk hole for the 3/8"-16 flathead bolts.
zip19.jpg

With the depth of the countersunk hole determined to allow the fastener to sit lower than the parent material, all four were countersunk to the same depth.
zip20.jpg

Then the magnet recesses were laid out. I didn't have the exact size end mill, so I had to sneak up on the OD and depth one by one. Starting with one that was center cutting.
zip21.jpg


Stay tuned for more pictures.
 
OP
Z

zmotorsports

ALLIANCE MEMBER
Joined
Oct 20, 2009
Messages
21,478
Location
Northern Utah
Continuing on.

With all three magnet holes recessed to allow the magnets to sit lower than flush, the base is now completed.
zip22.jpg

Next step was to prep the parts for paint. I ran a DA over all of the parts and ended with a wipe of Wax & Grease Remover.
zip23.jpg

The magnets were glued into the recesses. They ended up sitting about .020" below flush. About the same as the heads of the fasteners.
zip24.jpg

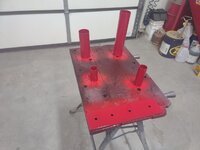
Then it was time for paint. I thought about black paint, but only for a brief moment because I figured that would blend too closely to the color of the zip-ties, so I turned to some Snap-on red, again. I'm seeing a pattern. :unsure:
zip25.jpg

Parts painted and awaiting assembly.
zip26.jpg

Tubes bolted to the base.
zip27.jpg

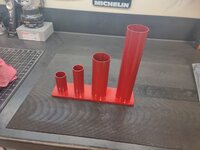
Completed.
zip28.jpg

Labeled and filled with zip-ties.
zip29.jpg

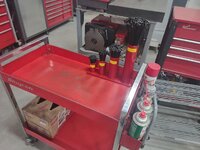
Now when working and I need an assortment of zip-ties, the holder can stand in the tool cart and with the tension of the magnets, weight of the base, I don't think they will be easily knocked over.
zip30.jpg

In fact, I may have used too high a strength magnet and maybe one too many. My fear all along on doing this was that it would get knocked over, which is probably why I delayed building it for so long. But even up on the grab bar of the tool cart it sticks with very good force from the magnets. I also made the longer tube long enough that by grasping it with one hand, rocking it back it will break the force of the magnets and make it easy to pick up and move. The 3" wide base makes it lift off the surface far enough to leverage the magnetic force just enough, yet hold it solid when sitting flat on a metal surface.
zip30a.jpg


That completes the zip-tie holder.
 
OP
Z

zmotorsports

ALLIANCE MEMBER
Joined
Oct 20, 2009
Messages
21,478
Location
Northern Utah
For the time being the zip-tie rack will sit here until I find a better location to store it when not in use.
zip31.jpg

With the work completed it was time to turn my attention to cleaning up the mess I created on the machines and floor. Lathe cleaned and wiped down.
zip32.jpg

Mill was a mess as well.
zip33.jpg

Mill cleaned and wiped down.
zip34.jpg

Floor swept and shop fully detailed.
zip35.jpg

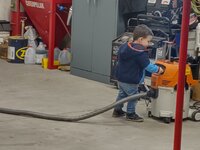
My DIL brought my grandson by to help. His favorite tool in the shop is the vacuum, so he was given the task of vacuuming the cracks in the concrete. He is such a good helper and thinks he's one of the guys working in the shop.
max2.jpg


Thanks for looking.
 

Jgaz

Well-known member
Joined
Dec 16, 2016
Messages
1,714
Location
AZ
Continuing on.

With all three magnet holes recessed to allow the magnets to sit lower than flush, the base is now completed.
zip22.jpg

Next step was to prep the parts for paint. I ran a DA over all of the parts and ended with a wipe of Wax & Grease Remover.
zip23.jpg

The magnets were glued into the recesses. They ended up sitting about .020" below flush. About the same as the heads of the fasteners.
zip24.jpg

Then it was time for paint. I thought about black paint, but only for a brief moment because I figured that would blend too closely to the color of the zip-ties, so I turned to some Snap-on red, again. I'm seeing a pattern. :unsure:
zip25.jpg

Parts painted and awaiting assembly.
zip26.jpg

Tubes bolted to the base.
zip27.jpg

Completed.
zip28.jpg

Labeled and filled with zip-ties.
zip29.jpg

Now when working and I need an assortment of zip-ties, the holder can stand in the tool cart and with the tension of the magnets, weight of the base, I don't think they will be easily knocked over.
zip30.jpg

In fact, I may have used too high a strength magnet and maybe one too many. My fear all along on doing this was that it would get knocked over, which is probably why I delayed building it for so long. But even up on the grab bar of the tool cart it sticks with very good force from the magnets. I also made the longer tube long enough that by grasping it with one hand, rocking it back it will break the force of the magnets and make it easy to pick up and move. The 3" wide base makes it lift off the surface far enough to leverage the magnetic force just enough, yet hold it solid when sitting flat on a metal surface.
zip30a.jpg


That completes the zip-tie holder.
Mike, Love the cable tie holder! Glad to see that you are holding true to your shop motto.
IMG_1157.jpeg
 
Last edited:
OP
Z

zmotorsports

ALLIANCE MEMBER
Joined
Oct 20, 2009
Messages
21,478
Location
Northern Utah
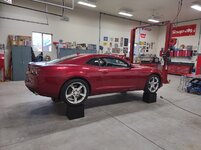
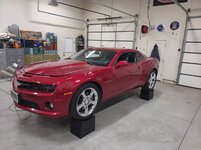
Last night I got the Camaro up on blocks at a more comfortable working height and commenced dealing with the water spots on the hood and roof.

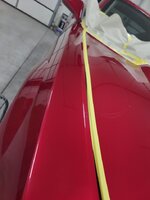
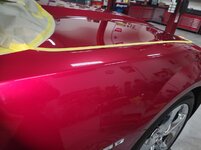
I did a full paint correction last year on our Fifth Gen Camaro, but last summer we got caught in a small rainstorm while the wife and I were away for a weekend and before I could clean it off, the water evaporated and etched the clear slightly on the horizontal surfaces. It looks like the hood got the worst of it, the roof just ahead of the sunroof and a couple small spots on the truck lid and driver's rear quarter horizontal surface. Other than that it still looks great from the paint correction, but I think when I finish addressing the water spots I am going to apply a coat of sealant to try and protect the paint a bit.

cam1.jpg

cam2.jpg

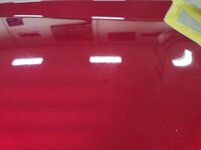
With the light, the spots are barely visible if you look at where the overhead shop light's reflection is and on the turn up at the center of the hood.
cam3.jpg

The vertical panels all look great. There are just a couple on the top of the driver's front fender as well.
cam4.jpg

Here is the worst of it on the driver's side of the hood back near the windshield.
cam5.jpg

With the evaluation complete, time to mask a couple of areas and get after it.
cam6.jpg

I did a small test area using the 2nd step polish and pad for starters. I actually think this may work and I might not have to go to the courser compound and white wool pad. The Finesse-It and yellow pad with a few passes seems like it may be working well enough to start here. If you look at the overhead light to the right of the hood's center, that has not been done yet and the one on the left I had just ran the rotary polisher over a few passes and already it looks much better.
cam7.jpg

Most of the passenger's side of the hood completed.
cam8.jpg

Stay tuned for more.
 
OP
Z

zmotorsports

ALLIANCE MEMBER
Joined
Oct 20, 2009
Messages
21,478
Location
Northern Utah
Continuing on with the work on the Camaro's paint.

I also breathed across the top of the passenger's front fender for good measure.
cam9.jpg

Using the sun light, it really pops now and shows the clarity of the paint.
cam10.jpg

Passenger's side of hood completed with the Finesse-It compound. I think that is the process. Once I do the other areas, I will come back and run over everything with the finishing glaze and a blue foam pad, which has now become my favorite combination for the final step.
cam11.jpg

Looking much better.
cam12.jpg

Passengers side front clip is now water spot free.
cam13.jpg

About the time I was ready to close up shop, my son and grandson came out to the shop and my grandson had to drive the car. When my son walked in with him he said "wow,,,,, drive it." :3gears:
cam14.jpg

Thanks for looking.
 

msharley

Well-known member
Joined
Sep 20, 2021
Messages
14,175
Location
Central Pennsylvania
I'm the oddball here lol. I look for snow in the forecast, wake up at 3am and go start raising absolute hell in it. The area where my house is has hills (chicago hills, we are talking like 30' of elevation) and some gnarly sweepers for curves (bends in the road for the rest of the world). Im out there drifting around like I'm 16 again :ROFLMAO:

Tim, we already know you have issues.

There’s no need to brag :Freak::spit:
No drift shaming here... :bounce:
 
OP
Z

zmotorsports

ALLIANCE MEMBER
Joined
Oct 20, 2009
Messages
21,478
Location
Northern Utah
Great stuff Mike !! What did you use to glue the magnets into the zip tie holder. I have had mixed results with glue and magnets.
Thanks
Dave


Thank you. Nothing special, just a little bit of 2-part epoxy. Same thing I used when I glued the magnet into my tool post height indicator on my lathe that I made about 8 years or so ago and it seems to be holding. Thought about using a dab of Super Glue, but remembered I had a small amount of the same Loctite 2-part epoxy left over.
 

customh

Well-known member
Joined
Feb 18, 2013
Messages
562
Location
East Bethel, MN
Other than that it still looks great from the paint correction, but I think when I finish addressing the water spots I am going to apply a coat of sealant to try and protect the paint a bit.
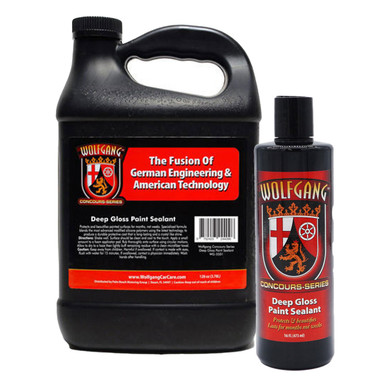
Mike: I think you should give something like this a try:
If the alliance page is accurate you'll get 20% off: http://www.garagejournal.com/forum/showthread.php?t=115880

Maybe even something like this if you want to step into that realm. https://armourdetailsupply.com/collections/protect/products/copy-of-armour-pro-quartz-coating

I've heard it said that once you see a good Ceramic product working you won't go back to the "old" ways. Especially on anything with a modern clear coat paint system.
 

customh

Well-known member
Joined
Feb 18, 2013
Messages
562
Location
East Bethel, MN
@D.F.B seems to have his **** together when it comes to detailing and he likes this stuff, maybe worth a whirl?

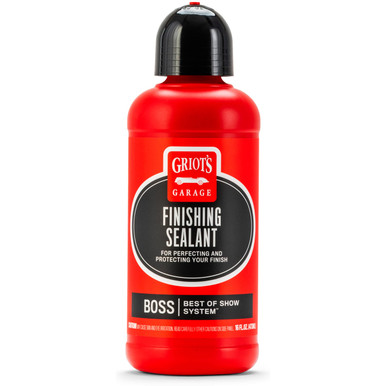
The BOSS line from Griot's also gets rave reviews:

Otherwise, what's your sealant of choice?
 
To avoid these ads, REGISTER NOW!
Top Bottom