To avoid these ads, REGISTER NOW!

ZMotorsports Shop Projects 2.0

To avoid these ads, REGISTER NOW!

bugnut

ALLIANCE MEMBER
Joined
Jul 14, 2012
Messages
4,009
Location
Central Ohio
Mike, thanks for the followup on sanding vs stoning. Your results are as I would expect. I follow a similar process as you. However as someone who occasionally dabbles in wood, I use the sander on my old C'man tablesaw and Dewalt planer and would expect to see no measurable changes to either of them.
 
OP
Z

zmotorsports

ALLIANCE MEMBER
Joined
Oct 20, 2009
Messages
21,477
Location
Northern Utah
Let me qualify that statement…when in Mike’s shop he is always right…enter the house, SWMBO is ALWAYS right.

Hell Mark, I'm not even right all the time in my shop, house never, but I appreciate the faith in me. ;) However, in reality I have learned more from my mistakes than my successes, by far. I would like to think I don't make as many mistakes these days, but it still happens I'm afraid because I am still learning and trust me, I do NOT know everything, far from it. Seems like the more I learn, the more questions I come up with that I don't have the answers to. :unsure:

I think the more important epiphany I came to after my rather quick response to @zanyad was that I needed to be certain if I was going to make such a claim. That is when I challenged myself to prove it to myself or admit I was wrong and make adjustments to my process.

I think in society these days that is something that has been left out, overlooked or in many cases flat out ignored. People tend to repeat erroneous information over and over again until they actually believe it, or worse, go on to convince others that this misinformation is actually fact. I don't want to be one of those, so I try to challenge myself when I have my doubts. @zanyad made me take a look in the mirror when he posed the question which is not a bad thing. I wish more people would look at themselves before their first reaction is the other person is wrong just because they disagreed with you or challenged you.

But that's just my opinion.....

I do appreciate the vote of confidence Mark. I'll try not to let you down. :bounce:
 
OP
Z

zmotorsports

ALLIANCE MEMBER
Joined
Oct 20, 2009
Messages
21,477
Location
Northern Utah
Mike, thanks for the followup on sanding vs stoning. Your results are as I would expect. I follow a similar process as you. However as someone who occasionally dabbles in wood, I use the sander on my old C'man tablesaw and Dewalt planer and would expect to see no measurable changes to either of them.

Thanks Joel, funny you mention about the table saw. I never really thought about it until you just mentioned it, but when I used to help my older brother in his garage as he was rebuilding wrecked cars and travel trailers, he had an old Craftsman table saw in his garage and would lay items on them for either gluing, staining or painting for the travel trailers he would rebuild and at times he would get either glue or paint on the table. He would just grab his DA sander and breath over the surface to bring it back to nice shiny metal again. Maybe that is where I picked it up. Never thought about it until you mentioned it just now. :headscrat

I appreciate the comments Joel and I think the main takeaways from my process should be not using too course grit paper, keep moving and not focus on one spot.
 

mbryson

Well-known member
Joined
Jan 4, 2014
Messages
133
Location
Bountiful, UT
Names are NOT my strong suit Marc. I just get lucky on occasion and use the correct spelling. :ROFLMAO:


For not doing well with names, you've done a masterful job of working through the 4-5 (Mark/Marc's) in this thread. Being a "Marc", I've had my name misspelled fairly frequently throughout my life. Not a big deal, I understand it's the uncommon spelling. From what I can tell, you've been able to keep people straight pretty well thus far
 
OP
Z

zmotorsports

ALLIANCE MEMBER
Joined
Oct 20, 2009
Messages
21,477
Location
Northern Utah
For not doing well with names, you've done a masterful job of working through the 4-5 (Mark/Marc's) in this thread. Being a "Marc", I've had my name misspelled fairly frequently throughout my life. Not a big deal, I understand it's the uncommon spelling. From what I can tell, you've been able to keep people straight pretty well thus far

I think your giving me too much credit Marc, so, I have a confession to make. :evil: Several months ago before I responded to one of your posts, I questioned the spelling and couldn't remember exactly. I had to go over to RME and sort through some posts to check on the spelling of your name before I actually responded to your post here.

Sorry to shatter your image of me. :bounce:
 

OutlawDrifter

Well-known member
Joined
Jan 20, 2015
Messages
3,901
Location
KS
For not doing well with names, you've done a masterful job of working through the 4-5 (Mark/Marc's) in this thread. Being a "Marc", I've had my name misspelled fairly frequently throughout my life. Not a big deal, I understand it's the uncommon spelling. From what I can tell, you've been able to keep people straight pretty well thus far

As a fellow Marc, yes, never spelled correctly in real life...and I've got a last name that no one can spell or pronounce.

I tell people my parents didn't like me much :LOL:
 
OP
Z

zmotorsports

ALLIANCE MEMBER
Joined
Oct 20, 2009
Messages
21,477
Location
Northern Utah
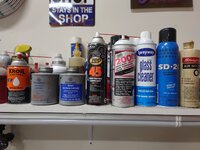
Came home from work to find my order from ZEP had arrived.


Back in the early 90's all through about 2012~ish we had a great ZEP rep ( say that 5 times quickly :ROFLMAO:). However, around 2012 or so he retired and we didn't get a replacement. I got very hooked on several ZEP products and used them both at work and my home shop. Our rep would sell products to me directly and I could purchase any amount I wanted. However, after he retired we had a harder time acquiring the products and then about 10-years ago, our corporate office, through a sourcing department, will no longer allow us to purchase these products.
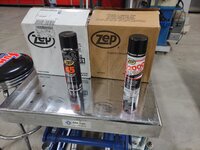
I have been able to source a few cans of my favorite products here and there as needed but to be honest when you buy them singly or in small quantities you pay an absorbent amount so I have declined buying any the last few years.

Three of my favorite products from ZEP are the Powerhouse, 45 and the 2000. I ran out of the ZEP 45 about a year ago so I substituted some Tri-Flow in it's place as it is nearly the same thing and the 2000 I have been nursing the last can for the past several months. Last year Travis, aka @customh contacted me and we split a case of Powerhouse. Last weekend working on my wife's Acura I hesitated using the 2000 because I was nearly out and I don't like not having the chemicals of my choice on hand so I went searching earlier this week.

I really didn't want to order a case of each but at case quantities it came with free freight so the price per can came in at a fairly reasonable cost. Granted a case of each will last me a very long time.

IMG_20250131_164558627.jpg

Shelf resupplied and within easy reach as needed.
IMG_20250131_164845297.jpg

The rest of the cases stored it out the way.
IMG_20250131_165024384.jpg


Thanks for following along.
 

bowtiguy

Well-known member
Joined
Jan 21, 2009
Messages
185
Location
Front Range Colorado & Northern Illinois
I got introduced to SD-20 watching the Hagerty series “ beyond the details” on YouTube. I ordered a case. Went through 1.5 cans detailing out the engine compartment of my Callaway ZR-1 corvette. That stuff is amazing w/ a little toothbrush elbow grease. Took 30 yrs of grime off like it was nothing. Citrus oils leave a nice surface sheen that doesnt collect dust/dirt like WD40 does.
 
To avoid these ads, REGISTER NOW!

bigdave_185

Well-known member
Joined
Feb 14, 2021
Messages
443
Location
Utah
Interesting about the DA on the work surfaces. My two cents no one asked for, and you hit it on the head. None of the machines your use a DA on are precision tools and most have more deflection in the material removal then you would ever cause with the DA. On the other side the flat surface of the machines is not many any means a soft material it would take a large portion of force to remove a significant amount of material from the deck of a quality drill press or band saw.
Again my 2 cents Sand only guy I have done the same thing with my table and drill press
 
OP
Z

zmotorsports

ALLIANCE MEMBER
Joined
Oct 20, 2009
Messages
21,477
Location
Northern Utah
Anyone else notice all of Mike’s spray tubes are pointing the same direction?

Keith, it's amazing the little details that some people pick up, just by looking at a picture. I have never noticed that. I'm left handed and like the labels turned facing me so I guess it's just become habit over all these years and I've never really noticed myself doing it.

Like all left handed people, he’s in his RIGHT MIND! As a fellow lefty, it is as it has to be!


^^^See, Sterling gets it. :ROFLMAO:
 
OP
Z

zmotorsports

ALLIANCE MEMBER
Joined
Oct 20, 2009
Messages
21,477
Location
Northern Utah
I got introduced to SD-20 watching the Hagerty series “ beyond the details” on YouTube. I ordered a case. Went through 1.5 cans detailing out the engine compartment of my Callaway ZR-1 corvette. That stuff is amazing w/ a little toothbrush elbow grease. Took 30 yrs of grime off like it was nothing. Citrus oils leave a nice surface sheen that doesnt collect dust/dirt like WD40 does.


I've only been using the SD-20 for a relatively short period of time but I do like it. However, if I'm being honest, I think I prefer the ZEP Powerhouse slightly more. My son and I had this discussion last summer when we were replacing the engine in his WJ. He then did a side by side comparison between the two on his 20-year old engine bay once we pulled the engine. We think the Powerhouse did a slightly better job, but it's rather subjective.
 
OP
Z

zmotorsports

ALLIANCE MEMBER
Joined
Oct 20, 2009
Messages
21,477
Location
Northern Utah
Interesting about the DA on the work surfaces. My two cents no one asked for, and you hit it on the head. None of the machines your use a DA on are precision tools and most have more deflection in the material removal then you would ever cause with the DA. On the other side the flat surface of the machines is not many any means a soft material it would take a large portion of force to remove a significant amount of material from the deck of a quality drill press or band saw.
Again my 2 cents Sand only guy I have done the same thing with my table and drill press

Thanks Dave. I would day that is an accurate statement. They are not as precision pieces of equipment as say a milking machine, but still I wanted to confirm to myself that I hadn't done damage to them over the year based on my practice.

I think I can say without a doubt now that I haven't, so I will continue doing what I've always done when it comes to these surfaces.
 

GRN96WS6

Well-known member
Joined
Dec 23, 2012
Messages
2,267
Location
SOMD
Mike, out of curiosity how long was the speech at your sons wedding.....🤣

I'm poking fun so please don't take offense, I learn a lot from reading your comments.
 
OP
Z

zmotorsports

ALLIANCE MEMBER
Joined
Oct 20, 2009
Messages
21,477
Location
Northern Utah
So with a couple of threads last week pertaining to drill presses, like the drill press vise thread and the awesome job Eric aka @NUTTSGT is doing on the drill press restoration on his thread, it got me thinking about the Jacobs chuck on my Jet drill press. Over the past several months I have noticed that the outer sleeve on my Jacobs 16N doesn't spin as freely as it once did so with only having a couple of hours to work in the shop on Saturday, I thought maybe I would tackle some drill chuck maintenance. I purchased this Jacobs 16N new when I purchased my new floor model Jet 20" drill press around 2010. I have not done anything with it other than use it for the past 15+ years but it was getting to the point where it didn't spin as easily as it once did so I assumed that the grease was either getting full of debris, or just thickening up due to age and drying out.

I thought about just throwing all of the pictures up without any documentation and let you guys sort it out so I wouldn't take up so much space typing, but I guess that just wouldn't be me as I seem to talk a lot.

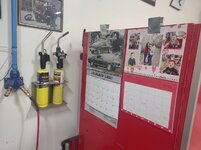
First tasks first, with the new month it was time to change the calendars.
drill1.jpg

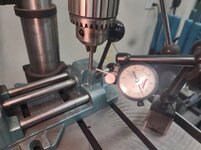
Then over to the drill press to test the drill chuck before removal. In the Jacobs literature it states to use a .250" pin and measure 1" down from the jaws at three positions, changing the pin's position in the jaws 120-degrees apart performing three tests and taking the average. Jacobs states a max. of .003" is considered acceptable. My average was right under .004" between all three positions.
drill2.jpg

Drill chuck removed for disassembly.
drill3.jpg

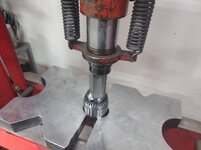
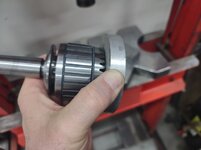
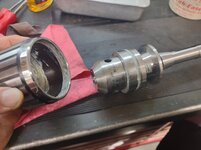
Pressing the outer sleeve off. Make sure to ONLY push on the outer sleeve so you don't damage the chuck and recess the jaws to be flush or slightly below the main body.
drill4.jpg

It should press off fairly easily.
drill5.jpg

With the sleeve removed I could see the old thick grease at the bottom of the sleeve. There was some lubricant around the body as I have applied some Tri-Flow over the past several months trying to free it up somewhat and buy me some time. It really didn't help and now that I have the sleeve off and can see the hard and thick grease, it makes sense why applying lubricant from the outside simply didn't work.
drill6.jpg

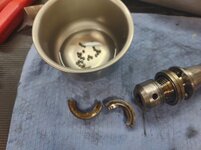
I have never had apart one of these newer Jacobs chucks. From my understanding that the newer ones, made overseas, have etched lettering rather than engraved lettering and plastic shielding holding the ball bearings in place rather than loose bearings in the older pre-60's model Jacobs ball bearing chucks. Here you can see the plastic shroud around the ball bearings.
drill7.jpg

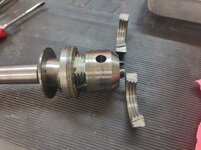
Split nut removed. Here the hard grease and some debris are evident.
drill8.jpg

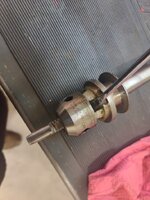
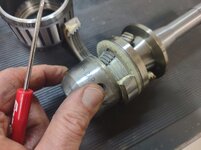
Two of the jaws slid out relatively easily, but one had to be coerced out by pushing with a screwdriver.
drill9.jpg

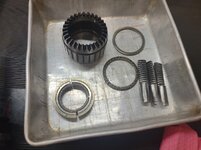
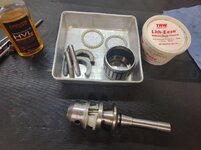
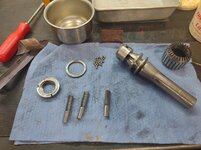
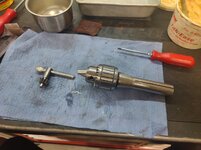
Completely disassembled and ready for cleaning.
drill10.jpg

Stay tuned for more pictures...
 
Last edited:
OP
Z

zmotorsports

ALLIANCE MEMBER
Joined
Oct 20, 2009
Messages
21,477
Location
Northern Utah
Continuing on.

At first glance the white grease appears to be still formidable, but it was hard and dried onto the body.
drill11.jpg

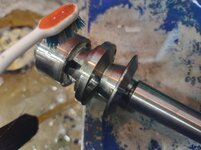
So much in fact, that the solvent brush wouldn't remove it without assistance from a coarse brush. Old toothbrushes work well to assist in the solvent tank for such operations. I would be cautious to use anything more abrasive such as a stainless steel wire brush.
drill12.jpg

The ball bearings and retainer cleaned up very well.
drill13.jpg

All components cleaned and ready to dry.
drill14.jpg

Cleaned and dried.
drill15.jpg

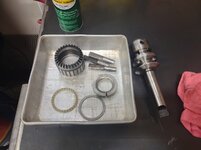
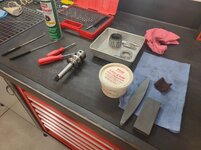
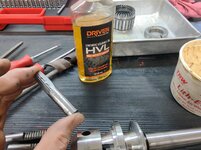
With my work area at the ready I began test fitting each component one at a time to locate where the drag was originating.
drill16.jpg

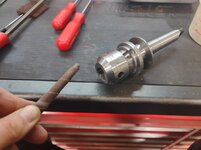
I wrapped just a little 400-grit emery paper around a round file to slightly knock off any burrs at the end of the body where the jaws slide through. I noticed one small burr which is what I think was causing one jaw to hang up slightly.
drill17.jpg

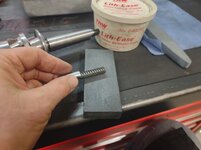
I then took each jaw and ran it lightly over the stone to make sure no burrs existed on the jaws themselves.
drill18.jpg

Test fitting each jaw one by one into the body to make sure they slide freely.
drill19.jpg

Then a shot of brake wash followed by compressed air and it was ready for reassembly.
drill20.jpg

Stay tuned for more pictures...
 
OP
Z

zmotorsports

ALLIANCE MEMBER
Joined
Oct 20, 2009
Messages
21,477
Location
Northern Utah
Continuing on.

Ready for final assembly. A little assembly lube on the jaws, followed by a small amount of white lithium grease on the threads of the jaws.
drill21.jpg

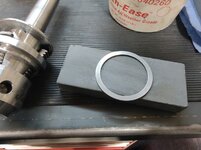
I noticed a burr on the OD of the upper thrust washer so I knocked it down with a stone and then it got the brake wash and compressed air treatment before installing.
drill22.jpg

Assembly lube applied to the ball bearings.
drill23.jpg

Ball bearings, jaws, threaded collar all assembled and white lithium grease applied to the inner sleeve.
drill24.jpg

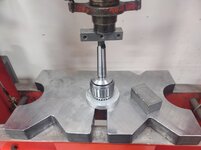
Then back to the hydraulic press to press it all together.
drill25.jpg

Pressing the sleeve onto the body and collar assembly.
drill26.jpg

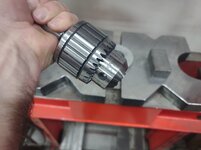
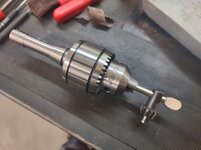
Completed.
drill27.jpg

Before installing it back into the spindle of the drill press, a thorough cleaning of the inner bore was needed.
drill28.jpg

As well as a thorough cleaning of the arbor shank.
drill29.jpg

Then install and drive the taper home with a couple smacks of the soft face deadblow.
drill30.jpg


More pictures to come..
 

LXCam

ALLIANCE MEMBER
Joined
Apr 23, 2013
Messages
19,206
Location
AZ
Thanks for chucking in this tutorial Mike. I’ve got a couple old Jacobs chucks that are in good shape but hate using them because they are sticky. I honestly hadn’t considered taking them apart and servicing them nor did I know how.

I probably would have figured it out after taking the first one apart after destroying it but you most certainly saved its life with your detailed service 😁👍
 
OP
Z

zmotorsports

ALLIANCE MEMBER
Joined
Oct 20, 2009
Messages
21,477
Location
Northern Utah
Continuing on.


With the drill chuck reinstalled in the drill press, it was time to take another test using the procedure outlined by Jacobs.
drill31.jpg

Pin marked at 1" down and inserted at three positions 120-degrees apart into the chuck and the test indicator measured at the 1" mark from the jaws.
drill32.jpg

The three positions ended up netting me just over .001" deviation. Well within spec and about .003" better than the initial test. I can live with that.
drill33.jpg

While I was at the drill press, I thought I would show this if I haven't before. I made this small pin that slides into the grooves of the table to lock the drill vise against to prevent it from spinning around if the drill bit catches.
drill34.jpg

It is quick and easy to use to prevent the vise from taking off. Although not always necessary if you pay attention and feed appropriately, I do like using it on occasion when I think the drill bit may catch.
drill35.jpg

The drill chuck is so much smoother and moves so easily now. It's hard to tell but maybe even better than new, but that could be the placebo effect as it's about a 15+ year old drill chuck.
drill36.jpg

Here is the table height after I modified my drill press column mount when I first purchased it. I fabricated a six inch riser for the base as both my son and I are over 6' and this really puts the table at a more comfortable working height for the majority of the work we use it for.
drill37.jpg

Cleaned and ready for much more use.
drill38.jpg

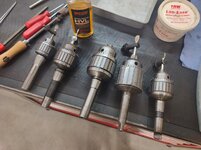
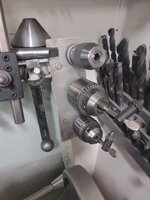
Cleaning the drill press chuck went so quickly, I figured since I had all of the supplies and tools out, I may as well so some Jacobs drill chuck maintenance. I lined up the ones from the lathe that have a MT3 and those from the mill which have an R8 arbor. The Jacobs 18N in the middle is the newest one and I purchased that when I purchased my new Precision Mathews knee mill in 2014. The others are quite a bit older. A few of them were given to me by a friend I met through RV'ing when we were conversing about the Watts link idea on our Monaco coaches. He owned a machine shop in North Carolina and we talked a lot via emails and phone calls during the design phase. Then during one of his trips to Alaska he stopped by my old shop and he brought me a box of tooling and accessories as he was closing down his machine shop after several decades of running it. I cherish these drill chucks and thought I would show them some love while I had everything out and at the ready.
drill39.jpg

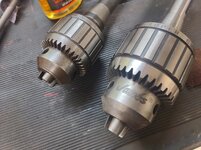
The drill chucks he brought me were all older and you can tell by the engraved lettering vs. the laser etched lettering.
drill40.jpg

Stay tuned for more pictures.
 
OP
Z

zmotorsports

ALLIANCE MEMBER
Joined
Oct 20, 2009
Messages
21,477
Location
Northern Utah
Continuing on.

These several old Jacobs chucks still don't have a home on a piece of equipment yet so they reside in a drawer until the need arises. These are all older Jacobs models, pre-60's from my best deduction.
drill41.jpg

The two chucks for the lathe were disassembled, cleaned and reassembled then back in their home on the lathe's backsplash.
drill42.jpg

I have a keyless Jacobs chuck that I purchased in 2014 when I purchased the lathe and milling machine. I ended up buying one each for the lathe and mill. GREAT chucks and hands down the two that get used the most.
drill43.jpg

Moving on to the 18N that I purchased in 2014 for the mill. Same scenario with this one. The grease looks good, but it was hard and dry and not very fluid thus hindering movement.
drill44.jpg

Disassembled and ready for the solvent tank.
drill45.jpg

Cleaned and back at the workstation.
drill46.jpg

Lubed and going back together.
drill47.jpg

Another Jacobs chuck completed.
drill48.jpg

Stay tuned for more pictures....
 
OP
Z

zmotorsports

ALLIANCE MEMBER
Joined
Oct 20, 2009
Messages
21,477
Location
Northern Utah
Last batch of pictures................I promise.


This is one of the old pre-60's Jacobs chucks with the engraved lettering that my friend from North Carolina gave me years ago. Pressing the sleeve off the body and threaded collar.
drill51.jpg

This design shows the loose fitting ball bearings without the plastic cage like the newer models.
drill52.jpg

Balls got dropped into some acetone for soaking while I cleaned the rest of the components. This was very nasty but I have not cleaned these since they were given to me about 10 or so years ago. They all very much needed a good cleaning. I had to think about how much work my friend did with these over the course of time he had his machine shop. I am honored to be able to have these and continue to use them as they hold a special place in my heart now.
drill53.jpg

Components cleaned and ready to deburr and reassemble.
drill54.jpg

I could tell a small difference in the final finish of these older parts vs. the newer ones. These seemed to need less deburring. Still, even moving the operations to overseas, Jacobs had the manufacturing facilities to a high quality for the fitment of the parts even after being made in the U.S.A.
drill55.jpg

Ready to begin assembly.
drill56.jpg

Same process with the only difference being inserting each ball bearing one by one through the notch in the split collar.
drill57.jpg

Pressing the sleever back onto the body and collar.
drill58.jpg

Another drill chuck completed.
drill59.jpg

And that was all of them for the milling machine. The keyless chucks all move freely so I didn't bother with them. That may be a job for another day.
drill60.jpg


Thanks for looking.
 

JCQuick

Well-known member
Joined
Nov 29, 2008
Messages
4,933
Location
Apopka Fla.
Mike i feel your pain on the Zep products. A good friend of mine had the same problem when his Zep rep retired they only wanted him to buy by the case. He was not happy

I have the same parts washer as you and about 6 months ago I needed to drain ,clean and refill with fresh fluid I was able to buy the zep wash fluid on Amazon of all places (Zep has a store on there ) but after it was put back in service 1 of the plastic lines that ran to the filter was leaking. it took me 2 days of phone calls and email to source the parts from zep. The guy that helped me out was a close to retiring Zep rep that worked out of his home in GA. Zep was telling me the lines were NLA and this guy told me where to tell them tto find it. it was stupid then they didn't want to sell to me as I was just a guy working in his own shop at home (aka not a business) needless to saw I bought double just to have spares. it was a real PIA
 
OP
Z

zmotorsports

ALLIANCE MEMBER
Joined
Oct 20, 2009
Messages
21,477
Location
Northern Utah
Thanks for chucking in this tutorial Mike. I’ve got a couple old Jacobs chucks that are in good shape but hate using them because they are sticky. I honestly hadn’t considered taking them apart and servicing them nor did I know how.

I probably would have figured it out after taking the first one apart after destroying it but you most certainly saved its life with your detailed service 😁👍

Glad it was useful Cam. Disassembly and reassembly is quite easy and straightforward. Don't be like me and procrastinate, clean them now and enjoy a smooth operating drill chuck.


Mike i feel your pain on the Zep products. A good friend of mine had the same problem when his Zep rep retired they only wanted him to buy by the case. He was not happy

I have the same parts washer as you and about 6 months ago I needed to drain ,clean and refill with fresh fluid I was able to buy the zep wash fluid on Amazon of all places (Zep has a store on there ) but after it was put back in service 1 of the plastic lines that ran to the filter was leaking. it took me 2 days of phone calls and email to source the parts from zep. The guy that helped me out was a close to retiring Zep rep that worked out of his home in GA. Zep was telling me the lines were NLA and this guy told me where to tell them tto find it. it was stupid then they didn't want to sell to me as I was just a guy working in his own shop at home (aka not a business) needless to saw I bought double just to have spares. it was a real PIA

I didn't realize that they discontinued their solvent tank and parts were NLA. That *****. I purchased my ZEP solvent tank nearly 30 years ago and it was not a cheap or inexpensive piece of shop equipment. I could have purchased a standard solvent tank for less money, but I wanted the best and saw the benefits of having self filtering long term.

I was spoiled when we had a rep that came by once a month, but when that benefit was lost, it became harder to buy their products, especially in smaller quantities. I was able to purchase a replacement filter bag, side filters and even the Dyna 143 solvent through Zoro about a year ago and had no issues with supply issues. I have replaced my flow through brush a couple of times now over the past several decades but have been able to purchase an aftermarket rather than have to go through ZEP.


Mike, super cool writeup on the Jacobs Chuck maintenance. Thanks! I'll add that to my list as I have a few that might be good candidates for service.

Thanks Keith. I'm embarrassed to admit that I have slacked off as I should have torn at least the one from the drill press several months ago when I noticed it being harder to turn. Once I saw how much smoother the drill press chuck operated, knocking out the other half a dozen was a no brainer. Now they all move nice and smooooooth. ;)
 

Jgaz

Well-known member
Joined
Dec 16, 2016
Messages
1,713
Location
AZ
Mike, Thanks much for the well documented drill chuck maintenance.
A few tears ago I did exactly a @LXCam said and learned first time by trial and error. Your write up should be a sticky somewhere.

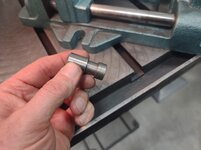
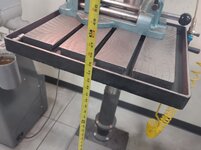
Your anti rotation pin is pretty cool.
I always just used a stud threaded into a spare tee nut. This site certainly inspires me to up my game.

Here is what I use in the tee slots on my wood working drill press table. The wood table is added on top of my metal table.
IMG_5052.jpeg
I’ve found this helpful when i don‘t always clamp down a piece of wood.
The washer can help if the piece of wood tries to climb the drill bit.
 

ntsqd

Well-known member
Joined
Jan 22, 2005
Messages
997
Location
Lower left coast
I've had a sticky Jacobs for longer than I should admit and it came from a shop that I first worked in starting about '89. It was sticky then. Like others who have posted, I've not known how to disassemble it, and it hadn't occurred to me to see if I could find out how to take it apart. Should have known that they are actually disassemble-able. Hopefully I can get to it this week.
 
To avoid these ads, REGISTER NOW!
Top Bottom