To avoid these ads, REGISTER NOW!

Between 265 & 485 SQ/FT My new garage in Wales

Workspaces sized between 265 and 485 squarefeet.
OP
Z

Zebedeewesty

Well-known member
Joined
May 31, 2013
Messages
4,153
Location
Wales, UK
Just an idea for the shed. A neighbor put 2-3 eyebolts sunk in cement and ran a wire connecting each side. One side had a turnbuckle on it to tighten it as necessary.

I’ve seen a couple of YouTube videos where people have built an interior frame to hold long tools and shelves. You might be able to secure the wood frame to the slab and points inside the shed. They used 2”x2” lumber. I don’t know what that translate to in metric measurements.

I don’t think those sheds have too much integrity if you just try to anchor the bottom.
Its got as much integrity as a wet cardboard box. Cost around $2k too. All the plastic panels just clip together and then have half a dozen 1/2" screws screwed into captive nuts moulded into the plastic. 50% of those have pulled out. Proper quality.
I think something like hurricane straps will do the job. Eyebolts in the concrete with a few ratchet straps over the roof from side to side. Brother in law suggested to him that fitting half a dozen 3" steel posts bolted to the concrete on either side to stop it moving.
2 guesses which option my FIL is thinking of doing? You're probably not gonna need the second guess to be honest as he'll always choose the option his son offers whether its stupid or not.:rolleyes:
 
To avoid these ads, REGISTER NOW!
OP
Z

Zebedeewesty

Well-known member
Joined
May 31, 2013
Messages
4,153
Location
Wales, UK
Its poured it down most of the day today, enough to fill a 10L bucket that was lying on the patio yet theres not even a drop of water inside the van. Most odd. :unsure:
I found a cab door window and windscreen external silver screen in the top cupboard and it seems in good condition still. Saves me buying one. (y)
 
OP
Z

Zebedeewesty

Well-known member
Joined
May 31, 2013
Messages
4,153
Location
Wales, UK
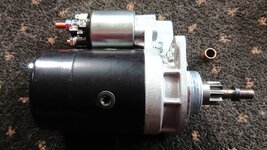
New starter and bush ready to be fitted once it's dry enough to not need scuba gear to go under the van. It came with a new oilite bush for the gearbox but it was only replaced with a new one at the end of August so not sure if i should bother replacing it again. :unsure:
2025-01-28 15.42.46.JPG
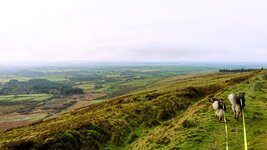
Rain stopped for a short while so i got the dogs out across the fields. Little bit of a rainbow.
2025-01-28 15.56.52.JPG
 
OP
Z

Zebedeewesty

Well-known member
Joined
May 31, 2013
Messages
4,153
Location
Wales, UK
Dry this morning down here for a change. Roads are still partially flooded so i'm going to give the caravelle a chance to drip dry before i move it to a flatter spot on the drive and venture under it to replace the starter.
It made a odd screaching noise this morning which definately points to something not being 100% with it. I'm wondering if its possibly one of the bearings inside that is fooked because it doesn't sound like its turning smoothly and gets hot as hell after just a few seconds use. :unsure:
I found my support bearing puller (a M12 bolt) so i might as well swap that out while the starter is out. I've had the new oilite bush soaking in oil overnight anyway.

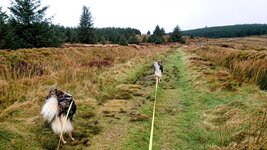
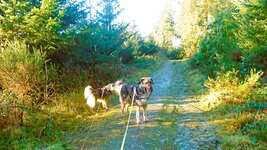
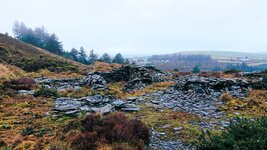
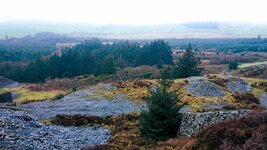
Took a walk up the hills with the dogs.
2025-01-29 09.47.03.JPG
2025-01-29 09.47.23.JPG
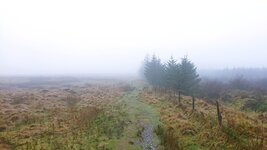
Some little pockets of mist down in the valleys.
2025-01-29 09.47.13.JPG
Mist started rolling in as we got higher.
2025-01-29 10.03.26.JPG
Turned back and it had rolled in behind us.
2025-01-29 10.12.25.JPG
Walk back down out of the mist.
2025-01-29 10.22.47.JPG
 
OP
Z

Zebedeewesty

Well-known member
Joined
May 31, 2013
Messages
4,153
Location
Wales, UK
New starter fitted and bush in the bellhousing replaced this afternoon.
Wired it up and turned the key to be greeted by a loud scraping noise when the starter engaged.
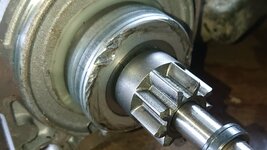
Removing it again shows the damage to the overrunning clutch where it's contacted the flywheel. Or most likely the edge of the clutch cover.
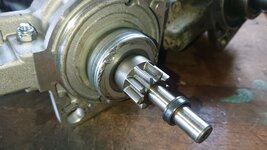
Turns out the distance between the end of the pinion and the pinion stop is 3mm longer than on the old one so it throws out slightly too far. I counted the teeth but never thought about measuring the throw out distance.
Old starter.
2025-01-29 14.39.20.JPG
New one.
2025-01-29 14.39.23.JPG
Battered overrunning clutch.
2025-01-29 14.39.23a.JPG
You can just see the edge of the clutch plate which i think is what the overrunning clutch clipped.
2025-01-29 13.41.46.JPG
 
OP
Z

Zebedeewesty

Well-known member
Joined
May 31, 2013
Messages
4,153
Location
Wales, UK
Not something you expect when you buy a part with the exact same part number to the one fitted. I've removed the cap off the end of my old one and cleaned the bearing and added some

They've just started clearing the wind blown trees in the woods from the storm at the beginning of December so theres a John Deere harvester and a forwarder in there churning up the tracks. Still haven't got up this track yet.
2025-01-30 09.39.35.JPG
2025-01-30 09.39.32.JPG
 
OP
Z

Zebedeewesty

Well-known member
Joined
May 31, 2013
Messages
4,153
Location
Wales, UK
Doesn't fit too bad for a £12 ($15) cab carpet overmat. Not going to fit the proper floormat and carpet until I can 100% guarantee the windscreen isn't leaking. Atleast I can lift this one out without needing to remove the seats and battery charger and if i trim it a little bit the shifter surround won't have to come out either.
2025-01-30 15.46.03.JPG
Had bug out for her first run since her MOT on 2nd December. She wasn't too happy at low revs on the stale E10 fuel in the tank though.
475395943_10161982810555100_364543654405363982_n.jpg
 

Prospecter

Well-known member
Joined
May 16, 2015
Messages
2,443
Location
Maine
Doesn't fit too bad for a £12 ($15) cab carpet overmat. Not going to fit the proper floormat and carpet until I can 100% guarantee the windscreen isn't leaking. Atleast I can lift this one out without needing to remove the seats and battery charger and if i trim it a little bit the shifter surround won't have to come out either.
2025-01-30 15.46.03.JPG
Had bug out for her first run since her MOT on 2nd December. She wasn't too happy at low revs on the stale E10 fuel in the tank though.
475395943_10161982810555100_364543654405363982_n.jpg
Nice work on the camper. I love that beetle!
 

Prospecter

Well-known member
Joined
May 16, 2015
Messages
2,443
Location
Maine
We've owned the caravelle 14 years now. :eek:
She's been pretty reliable so far but old father time is starting to catch up with her now. :(
2025-02-01 09.41.29.JPG2025-02-01 09.40.46.JPG2025-02-01 09.42.20.JPG2025-02-01 09.42.50.JPG2025-02-01 09.43.07.JPG
Beautiful country. I generally find our vehicles go about 14 years and 170,000 miles. Then they start needing quite a bit more work. Our current van (Dodge Grand Caravan) is 14 years and 130,000 miles. Since we don't drive as much in retirement, I did some preventive stuff last summer. We'll see how that goes. Hope that information might be of some use to you.
 
OP
Z

Zebedeewesty

Well-known member
Joined
May 31, 2013
Messages
4,153
Location
Wales, UK
Beautiful country. I generally find our vehicles go about 14 years and 170,000 miles. Then they start needing quite a bit more work. Our current van (Dodge Grand Caravan) is 14 years and 130,000 miles. Since we don't drive as much in retirement, I did some preventive stuff last summer. We'll see how that goes. Hope that information might be of some use to you.
Caravelle is now coming up to 37 years old with 211,000 on the clock. Its going to need the rear wheel bearings replaced which is a pig of a job. Drum backplates will get replaced at the same time. 46mm hub nut is done up to 375 lbft and i don't have a socket or breaker bar to do it.

Managed to get an afternoon on the van today.
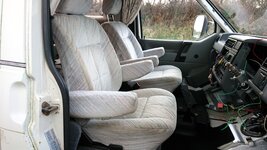
Made a start refitting the cab interior after running a couple of new wires to relocate the cigarette lighter to the side of the passengers seat so i can plug a tyre compressor in. The old location will be covered by the double DIN sony headunit.
2025-02-01 16.26.55.JPG
You can't beat the sound of a 5 cylinder petrol engine. It sounds like an Audi quattro rally car. :D
2025-02-01 16.27.17.JPG
 

Prospecter

Well-known member
Joined
May 16, 2015
Messages
2,443
Location
Maine
Whoops! Guess I've not been paying enough attention! 37 years / 211,000 miles is a great run. And more to come. . . So are you going to buy the socket and breaker bar, or just hire out the work?

I love how your camper is coming along. You've made so much progress.
 

f121

Well-known member
Joined
Dec 8, 2018
Messages
2,080
Location
UK
Shame you’re not a touch closer, would be welcome to borrow a 3/4” bar and socket.
 
OP
Z

Zebedeewesty

Well-known member
Joined
May 31, 2013
Messages
4,153
Location
Wales, UK
Whoops! Guess I've not been paying enough attention! 37 years / 211,000 miles is a great run. And more to come. . . So are you going to buy the socket and breaker bar, or just hire out the work?

I love how your camper is coming along. You've made so much progress.
I'll be doing the work myself. I suppose the cost of the breaker and socket isn't too bad. The breaker will come in useful for other stuff anyway. I had to borrow one to do the hub nuts on the bug last time. Its a 46mm nut on the caravelle and 36mm on the bug.

Shame you’re not a touch closer, would be welcome to borrow a 3/4” bar and socket.
Its not an overly expensive item to buy and handy to have in the arsenal.
 
OP
Z

Zebedeewesty

Well-known member
Joined
May 31, 2013
Messages
4,153
Location
Wales, UK
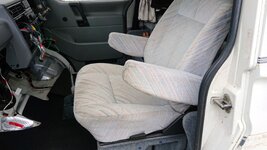
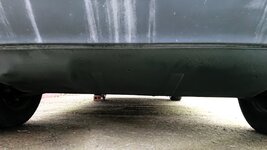
Got the drivers seat installed and refitted the sump guard after tightening up the magnets on the driveshaft for the cruise control.
2025-02-03 16.15.43.JPG
2025-02-03 16.16.01.JPG
Bumper needs another coat of linseed oil as its fading and a bit streaked.
 
To avoid these ads, REGISTER NOW!
OP
Z

Zebedeewesty

Well-known member
Joined
May 31, 2013
Messages
4,153
Location
Wales, UK
Must've put it together better'n factory! :lol_hitti
Extra weight saving. Because racecar. :ROFLMAO:
Isn’t there always extra parts left when you reassemble things?
Usually i'm pretty good at getting it all back together.
I remember someone saying they rebuilt their beetle engine and after getting fully built up and on the engine stand and before starting it they decided to clear the workbench and one of the boxes wasn't empty. It contained a new crankshaft bearing shell.:eek:

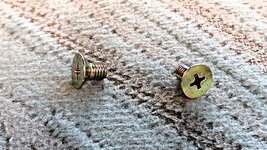
I've been through the online parts website with the exploded diagrams and still non the wiser what the screws are off.
Did a reverse picture search on google and the Brickwerks webshop says they are VW Countersunk Set Screw - T3 | T4 | LT1 | Caddy 1 / Door Pull Trim. I haven't touched the doors though.

I wonder if they were in the glovebox when i removed it and i just put them in the bag with the mounting screws. :unsure:
 
OP
Z

Zebedeewesty

Well-known member
Joined
May 31, 2013
Messages
4,153
Location
Wales, UK
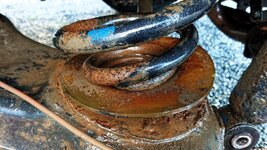
Lower spring perch repair arrived today plus a length of steel tube to remake the top bump stop mount from.
Looks like i'm going to have to sort the brakes out at the same time as the left rear brake grabbed a couple of times coming back from shopping today. The back plate is really soft so i assume the brake shoes have moved out of alignment when the brake pedal was pressed.
The rear bearings have been an advisory for a few years for a little bit of wear so i suppose as everything needs to come apart they might as well be done too. Parts and tool list (3/4" breaker bar and socket) is starting to get expensive.:rolleyes:
 
OP
Z

Zebedeewesty

Well-known member
Joined
May 31, 2013
Messages
4,153
Location
Wales, UK
Missus and i have been in town getting our eyes tested this afternoon. My normal vision is fine but i need glasses for close up. Its been 4 years since i got my last set of reading glasses but my eyesight has changed ever so slightly.

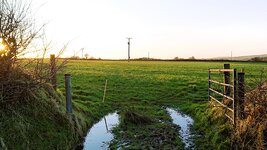
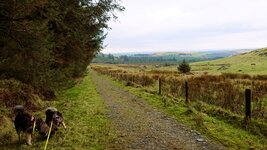
Took the dogs across the fields but theres now a double wire electric fence across the footpath. Theres hedge on top of the bank and a string of barbed wire from when they had cattle in there so i don't really see the point. The gate closes too. I assume theres going to be horses in there instead of the cows as they tend to take a bit more notice of an electric fence.
2025-02-05 16.52.51.JPG2025-02-05 16.55.06.JPG
2025-02-05 16.56.44.JPG
 
OP
Z

Zebedeewesty

Well-known member
Joined
May 31, 2013
Messages
4,153
Location
Wales, UK
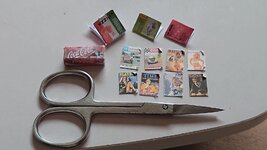
Found this picture on facebook memories of some 1:24 scale magazines and other stuff i made a while ago with a pair of nail scissors for scale. Been a while since i made a model of that scale. Prices of them have shot up over the past few years. :rolleyes:
83765995_10157522763410100_6907074686400593920_n.jpg
 
OP
Z

Zebedeewesty

Well-known member
Joined
May 31, 2013
Messages
4,153
Location
Wales, UK
Bought new brake backing plates, inner and outer wheel bearings and a few other bits and bobs needed for the rear end and the total came to just shy of £150 ($186). Hopefully its something that will last another 30+ years after its done.
Need to make the upper bump stop mount today. Atleast theres loads of pictures online showing what its supposed to look like. It was only held on with 4 small welds from the factory so its no wonder they fall off. :rolleyes:
Screenshot 2025-01-08 at 18-35-06 50063266327_64b2178a02_m.jpg (JPEG Image 240 × 231 pixels).png
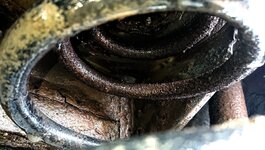
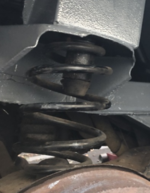
Not 100% sure of the length yet as it seems to be different depending on the year and whether its a 2wd or syncro. The drivers side is still there so i just need to figure out how to measure its length i as its inside the spring. The coils are a lot closer together with the weight of the vehicle on it.
Screenshot 2025-02-05 at 18-29-18 5cb92b5cbb4f.jpg (JPEG Image 1024 × 768 pixels).png
 
OP
Z

Zebedeewesty

Well-known member
Joined
May 31, 2013
Messages
4,153
Location
Wales, UK
Managed to get a tape measure in between the coils of the spring and took a rough measurement of the height of the bump stop mount, around 6.5cm.
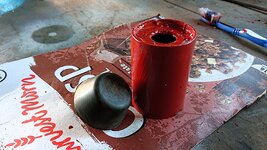
Bit of 2mm wall 45mm diameter tube cut to length (a little over size to allow for trimming down), capped it with some 2mm plate and drilled a 18mm hole in for the rubber to mount though.
2025-02-06 16.01.08.JPG
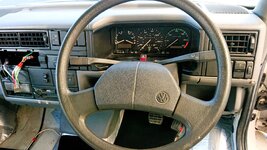
Got the cab step covers/inserts fitted, the covers for the wiper and indicator switched installed and finally got the steering wheel back in. The speedo does read only 57,574 miles, pretty low for a 30 year old van.
Not much still to do before it'll be time to get it MOT'd. Fit the radio, bolt the solar panel to the roof and run its wires to the charge controller, fit the windscreen wipers, once i find their nuts,:rolleyes: and reconnect the batteries.
2025-02-06 16.12.01.JPG
 
OP
Z

Zebedeewesty

Well-known member
Joined
May 31, 2013
Messages
4,153
Location
Wales, UK
Rear brake on the caravelle decided to lock on while driving it this morning. Got it back home again as i was only a couple of miles away and the ****** released again driving onto the drive.:rolleyes:
I suppose i should order a set of brake shoes just incase they are fooked when i remove the drums. They're only just over 3 years old which is irritating.:(
 
OP
Z

Zebedeewesty

Well-known member
Joined
May 31, 2013
Messages
4,153
Location
Wales, UK
Its felt ****** cold here today. Temperature with wind chill was zero degrees C (32f) so i decided not to spend the afternoon lying on the gravel drive under the caravelle sorting the spring mounts. Still waiting for a couple of bits to arrive by post anyway so can't crack on with the brakes either. :rolleyes:

Decided to get the solar panel out of the garage and up onto the roof as my FIL is one of those people who if something is in his way (or he thinks it is) he'll give it a kick. He's already broken one panel which he'd moved from its safe spot out of the way to one behind the door that he then slammed open on it. :rolleyes:

Theres just enough space up top for a 170w panel. It only sticks up about 1/4" above the roof bars.
2025-02-07 16.26.47.JPG
 
OP
Z

Zebedeewesty

Well-known member
Joined
May 31, 2013
Messages
4,153
Location
Wales, UK
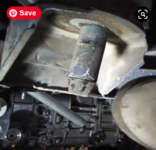
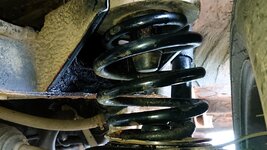
Jacked up, supported on an axle stand, wheel and shock removed and arm lowered so the spring could be removed.
2025-02-08 16.18.33.JPG Old mount chisled off and the remains ground off and repair piece aligned with the two 6mm holes in the arm.
2025-02-08 14.26.58.JPG
Jacked the rear trailing arm up so i could position the upper bump stop mount.
2025-02-08 14.45.30.JPG
Welded in and painted in red oxide primer.
2025-02-08 15.54.09.JPG
 
OP
Z

Zebedeewesty

Well-known member
Joined
May 31, 2013
Messages
4,153
Location
Wales, UK
Its been one of those days where I wish i'd just not started a job.
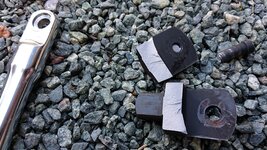
Removed the split pin and used my new breaker bar. I just lifted the bar, put some strain on it and snap, one destroyed knuckle. :rolleyes:
2025-02-10 13.20.26.JPG
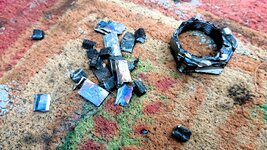
6 minutes with the angle grinder and chisel and i'm left me with a no longer nut shaped nut.
2025-02-10 16.10.15.JPG
2025-02-10 16.11.51.JPG
I attempted to remove the drum with the hub still attached but its not playing ball.
The back plate is so rotten the brake shoe retaining pins have pulled through the metal which is probably why the brake kept grabbing every so often. No idea at the moment what the break shoes are like. I suspect they'll be a bit chewed up now. They're only 3 years old too. :(
 
To avoid these ads, REGISTER NOW!
Top Bottom