To avoid these ads, REGISTER NOW!

ZMotorsports Shop Projects 2.0

OP
Z

zmotorsports

ALLIANCE MEMBER
Joined
Oct 20, 2009
Messages
21,477
Location
Northern Utah
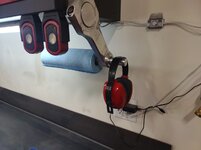
Friday night I took care of a small shop task. My earmuffs keep getting moved around from various drawers as the drawers get rearranged so I figured I would find a place outside the toolbox to hang them where they are within easy reach when needed. Figured if they are more handy to grab, I'd wear them more consistently and hopefully prolong the hearing I still have left.

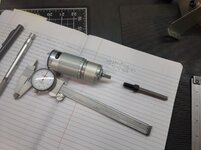
I knew just the place, but first needed to machine a small peg with a step to press into another tube. Figured a .001" interference fit would be sufficient.
hang1.jpg

Then I'd drive it into the tube of my paper towel holder.
hang2.jpg

There. That should work.
hang3.jpg


By this time the wife arrived home and I had her pull her Acura into the shop for Saturday's work.

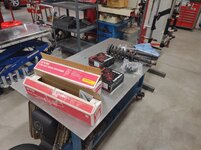
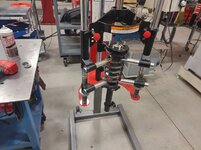
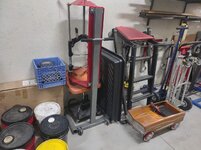
I grabbed the Branick strut compressor from the storage bay and wheeled it into the shop. Also I have the new shocks and top hats ready for installation.
hang4.jpg

hang5.jpg


That was it for Friday night as it had been a hell of a week at work and I was ready to close the books on the week.
 
To avoid these ads, REGISTER NOW!
OP
Z

zmotorsports

ALLIANCE MEMBER
Joined
Oct 20, 2009
Messages
21,477
Location
Northern Utah
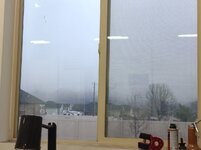
With coffee in hand on Saturday morning I headed to the shop. It was a very overcast and gloomy day along the Wasatch Front. Clouds were settled right down over the mountains where you couldn't even see them.
tl1.jpg

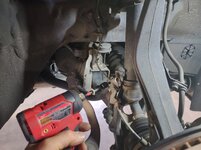
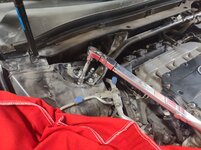
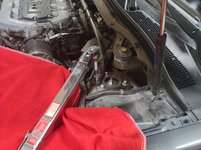
The engine covers were removed and fender covers installed. The upper shock/strut fasteners were removed with the exception of one remaining on each side, finger tight.
tl2.jpg

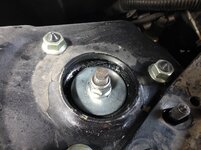
The rubber around the upper mount was deteriorating causing my creak a few weeks ago. I sprayed a bit of lubricant under them to narrow down the noise, which turned out to be this bushing. Parts arrived on Thursday so I figured I would take a couple hours on Saturday and knock this job out.
tl3.jpg

Tires/wheels removed, ABS sensor bracket removed.
tl4.jpg

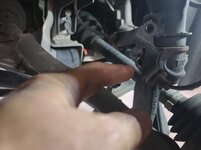
Then the shock's lower pinch bolt could be removed.
tl5.jpg

And the lower fork bolt and nut removed. Then the fork could be lowered as far as space would allow.
tl6.jpg

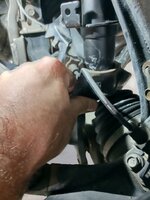
The shock comes most of the way out of the fork, just a little persuasion is needed to pry downward on the suspension to clear the fork.
tl7.jpg

Then a pole jack under the lower control arm to raise the suspension back up, which opens up the area between the inner fender and the knuckle, and the shock/spring assembly can easily be removed.
tl8.jpg

Parts laid out on the fabrication table to swap over the new shock.
tl9.jpg

Spring compressed and shock removed.
tl10.jpg


More to follow.....
 
OP
Z

zmotorsports

ALLIANCE MEMBER
Joined
Oct 20, 2009
Messages
21,477
Location
Northern Utah
Old shock removed and aligned and swapping over the bumpstop and boot.
tl11.jpg

New shock installed into the spring and top nut torqued to spec.
tl12.jpg

Passenger's side shock/spring assembly ready to reinstall.
tl13.jpg

Reverse procedure for installation. Put the lower part of the shock into the void, tilt the upper hat into the area behind the knuckle, and raise up into place and start one of the nuts by reaching over the fender.
tl14.jpg

For some reason, THIS is the part that I get the most questions on from my YouTube video that I did about 5 or so years ago when I replaced the shocks on the wife's car. People cannot figure out how to get the shock back into the fork. It isn't difficult, just have to pry slightly downward on the upper control arm, which also pushed the top hat further up into the bolt holes of the engine bay's shock towers.
tl15.jpg

This motion provides more than 3/8" of clearance between the fork and the bottom of the shock. Not quite sure why people struggle with this so much, but I get so many questions about how to get the shock back into the fork.
tl16.jpg

With the gap, just slide the fork back into position and guide the lower part of the shock into the fork. Easy peazy.
tl17.jpg

With the shock in the fork, pry the suspension downward slightly to put the bolt through the lower fork and lower control arm.
tl18.jpg

Then install the upper pinch bolt and torque everything to spec.
tl19.jpg

I prefer to torque the pinch bolt, then snug the lower fork nut and apply some upward pressure using a pole jack to center the shock in the wheelwell, simulating ride height and torque the lower fork bolt and nut to spec.
tl20.jpg


Stay tuned for more....
 
OP
Z

zmotorsports

ALLIANCE MEMBER
Joined
Oct 20, 2009
Messages
21,477
Location
Northern Utah
With everything buttoned up under the car, the tires/wheels were reinstalled and lowered back down to the ground.
tl21.jpg

The upper shock bolts and crossbar support fasteners were torqued to spec.
tl22.jpg

tl23.jpg

Then the wheels were torqued to spec. and this job was complete.
tl24.jpg

Branick strut compressor wheeled back into the storage bay and put away until it is needed again. I really like having this on wheels and not permanently mounted to the wall so I can wheel it out of the shop when not needed as it is not a piece of equipment that gets used every day, or even every week for that matter.
tl25.jpg


The car was test driven, then the shop cleaned and closed up for the day.
 
OP
Z

zmotorsports

ALLIANCE MEMBER
Joined
Oct 20, 2009
Messages
21,477
Location
Northern Utah
The wife and I then took off on a drive Saturday afternoon and found ourselves in a hell of a winter storm up near Heber City, UT, which is about 75 miles northeast of us.

The wife has meetings up there later in the week and she wanted to feel comfortable with where she was going so we did a dry run. Well, at least I thought it would be a dry run, but the weather had other plans for us.


As the snow really started coming down and the roads getting snowpacked, we decided to hop over the mountain and drop down into a little town called Kamas that we quite enjoy. Yeah, probably not the smartest call as the highway was getting pounded with snow in the mountain valley, let's go up and over the mountain. Doesn't seem to be the smartest move thinking about it now. :dunno:


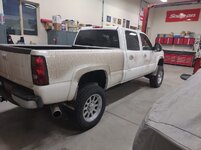
While we were sitting at a little cafe we enjoy having an early dinner the flakes outside got bigger and heavier. By the time we finished eating and hit the road to head back home the roads were very snowpacked and we didn't see a snowplow until we were almost back to the I-80 interstate. Then the plows were out and the roads were cleared. By the time we came out of Weber Canyon to our east, we drove right out of the storm and had mostly clear skies at home. We pulled into our subdivision around dusk and when I stopped to grab the mail I had to snap a couple pictures of our truck that should be white.
tl26.jpg

tl27.jpg

Not wanting to pull it into the house garage, I figured I'd pull it into the shop and let it melt off overnight.
tl28.jpg


Thanks for looking.
 
OP
Z

zmotorsports

ALLIANCE MEMBER
Joined
Oct 20, 2009
Messages
21,477
Location
Northern Utah
Yesterday was a nice and relaxing day. Went and visited the kids and our grandson for a bit. Our son is incapacitated at the moment, so we went to visit them, then just relaxed around home.

As the wife was getting ready to cook dinner last night she mentioned that the oven wasn't heating up. I found that odd because we just used it a few hours earlier.


Broil would work, so the upper burner was fine, but the lower "bake" burner was not functioning. Covers removed, then access to the burner tube so it was removed.
oven1.jpg

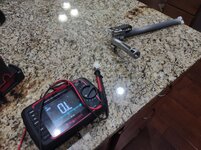
Igniter tested and sure enough, open circuit. Igniter failed. Holy ****, we just used the oven a couple hours earlier.
oven2.jpg


Well, shifted gears for dinner and an igniter ordered. Should be here later this week. If it's not one thing it's a dozen others that's for sure.
 

4 FN 27

ALLIANCE MEMBER
Joined
Oct 19, 2015
Messages
4,635
Location
Minnesnowta
We pulled into our subdivision around dusk and when I stopped to grab the mail I had to snap a couple pictures of our truck that should be white.

Bring it to MN Mike. It will be white with Salt!!!

Quick trip to Fleet Farm with a clean Truck. They laid it on thick. The salt dust is so thick you can taste it.

IMG_7121.JPG

6-7 miles round trip:

IMG_7156.JPG


I find it ironic, this falls County News Letter asked the citizens to use less salt on the sidewalks and driveways noting the harmful effects on the environment.
 

NUTTSGT

Super Moderator
Staff member
Joined
Sep 14, 2009
Messages
51,148
Location
Northern Central Ohio
Yesterday was a nice and relaxing day. Went and visited the kids and our grandson for a bit. Our son is incapacitated at the moment, so we went to visit them, then just relaxed around home.

As the wife was getting ready to cook dinner last night she mentioned that the oven wasn't heating up. I found that odd because we just used it a few hours earlier.


Broil would work, so the upper burner was fine, but the lower "bake" burner was not functioning. Covers removed, then access to the burner tube so it was removed.


Igniter tested and sure enough, open circuit. Igniter failed. Holy ****, we just used the oven a couple hours earlier.
oven2.jpg


Well, shifted gears for dinner and an igniter ordered. Should be here later this week. If it's not one thing it's a dozen others that's for sure.
. .. . ordered a pizza.
 

NUTTSGT

Super Moderator
Staff member
Joined
Sep 14, 2009
Messages
51,148
Location
Northern Central Ohio
Okay, with that out of the way, I take a small dab of dielectric grease.
coach9.jpg

And apply around the outside of the seal.
coach10.jpg


More pictures to follow.....
I'm reading this and think these are the times that the old fingers get too fat to get into places that they used to fit.

I ordered a box of these off Amazon.

1739204497948.png
 

PugetDude

ALLIANCE MEMBER
Joined
Mar 13, 2013
Messages
22,478
Location
Superstition Mountains, AZ
Yesterday was a nice and relaxing day. Went and visited the kids and our grandson for a bit. Our son is incapacitated at the moment, so we went to visit them, then just relaxed around home.

As the wife was getting ready to cook dinner last night she mentioned that the oven wasn't heating up. I found that odd because we just used it a few hours earlier.


Broil would work, so the upper burner was fine, but the lower "bake" burner was not functioning. Covers removed, then access to the burner tube so it was removed.
oven1.jpg

Igniter tested and sure enough, open circuit. Igniter failed. Holy ****, we just used the oven a couple hours earlier.
oven2.jpg


Well, shifted gears for dinner and an igniter ordered. Should be here later this week. If it's not one thing it's a dozen others that's for sure.
Hope your son is going to be OK, Mike.
 
OP
Z

zmotorsports

ALLIANCE MEMBER
Joined
Oct 20, 2009
Messages
21,477
Location
Northern Utah
Had this same conversation with my son. We purchased the oven new when we bought the house only 8-years ago. I put a new convection fan motor in it about a month or two ago and now the igniter. They definitely don't make things like they used to.

I wonder how many people would have just thrown their hands up and bought a new one without knowing where to dig in and diagnose? If I were to guess, I would say quite a few, then probably buy the new one on credit. I think most of us here would do as I did and diagnose it, buy the parts, fix it. A $25 part and move on with life.
 

ScepterToad

Well-known member
Joined
Nov 9, 2023
Messages
340
Had this same conversation with my son. We purchased the oven new when we bought the house only 8-years ago. I put a new convection fan motor in it about a month or two ago and now the igniter. They definitely don't make things like they used to.

I wonder how many people would have just thrown their hands up and bought a new one without knowing where to dig in and diagnose? If I were to guess, I would say quite a few, then probably buy the new one on credit. I think most of us here would do as I did and diagnose it, buy the parts, fix it. A $25 part and move on with life.
I think it might actually be worse than that Mike. A LOT of folks would call and appliance repair man, determine the problem which would possibly be as much or more as a new unit to fix, and then buy a new unit and have it installed by that same appliance guy. Heck, any person you hire is probably gonna charge you $100 or more just to show up at your house.

I generally get the calls from family to take a look at things. It's crazy how much money you can save just by having a little bit of knowledge on how to diagnose and fix stuff.
 

tarbellb

Well-known member
Joined
Apr 17, 2011
Messages
5,779
Location
Oregon
Had this same conversation with my son. We purchased the oven new when we bought the house only 8-years ago. I put a new convection fan motor in it about a month or two ago and now the igniter. They definitely don't make things like they used to.

I wonder how many people would have just thrown their hands up and bought a new one without knowing where to dig in and diagnose? If I were to guess, I would say quite a few, then probably buy the new one on credit. I think most of us here would do as I did and diagnose it, buy the parts, fix it. A $25 part and move on with life.

Gotta give yourself a lot of credit here, what may seem like a simple fix for you is a overwhelming task for most.

Just the thought of opening up the oven and pulling those pieces off is A) scary to most B) requires the tools C) even if they did understanding what the issue is, testing is well beyond most

I know I would be second guessing the electrical testing part of it, this helps.

It is impressive to see you tackle all things mechanical, thanks for posting in the manner you do Mike!
 

ntsqd

Well-known member
Joined
Jan 22, 2005
Messages
994
Location
Lower left coast
We do use an appliance repair firm. Father and son operation that has been in business since about when I graduated from high school. When I wasn't able to find the reason why the dish-washer was misbehaving we called them. The son came out and looked it over. His advice was to replace the machine, that his labor and the cost of the part would be ~2/3 of the cost of a new machine. Given the age of the machine the next repair was likely to cost even more. They do not sell any appliances, only repair them, so advising a new machine worked against his pocket but earned him a repeat client.
 
To avoid these ads, REGISTER NOW!
OP
Z

zmotorsports

ALLIANCE MEMBER
Joined
Oct 20, 2009
Messages
21,477
Location
Northern Utah
Oh! I bet it scored you some serious wife points too!

Not necessarily. She expects such things after all these years. It's not her fault, it's just when she informs me of a problem, she expects me to have an answer. I try to tell her I don't know everything, but she expects me to fix everything, and I hate to let her down. ;)
 

Xti04

Well-known member
Joined
Nov 11, 2016
Messages
2,363
Nice work with the Acura Mike. For years when those were all I worked on I thought that was the gold standard of suspension design. Easy to service, but I cant tell you how many folks I have seen that didnt realize the lower fork came off the strut. Watching them try to remove the whole assembly without taking out the pinch bolt and removing the fork always made me chuckle.
 

SilverJimmy

Well-known member
Joined
Apr 14, 2012
Messages
1,688
Location
Prescott/Flagstaff, AZ
A couple months after we bought our new home my wife asked me to look at the old clothes washer that came with the house. She said it didn’t seem to be getting stuff as clean as it should. After looking at it I figured out it was agitating the clothes like it should. A quick search of YouTube University and it found a simple way to diagnose and then repair the washer.
Seems it’s a common problem on these toploader washers, the auger dogs wear out. Pulled it apart, found the worn parts like the video said I would. Went online and found the replacement parts, ordered them, and Amazon had them to me in two days. Installed the parts in about 5 minutes and now the washer works like new.
Best part…. washer needs 4 dogs, Amazon has a 8 pack for $3.99! They’re just little plastic pieces that are designed to be the wear item and also a safety feature to strip if some child was to somehow end up inside the washer tub while running!
I later was talking to a guy that does appliance repair and he said most people replace their washer when those dogs wear out and the new washers rarely last more than a few years! I knew you wouldn’t fall for that trap!
 

Bob Heine

ALLIANCE MEMBER
Joined
Oct 24, 2009
Messages
10,709
Location
Boca Raton, Florida
I think it might actually be worse than that Mike. A LOT of folks would call and appliance repair man, determine the problem which would possibly be as much or more as a new unit to fix, and then buy a new unit and have it installed by that same appliance guy. Heck, any person you hire is probably gonna charge you $100 or more just to show up at your house.
@ScepterToad, I have always tried to fix rather than replace. When the Central A/C stopped working I diagnosed the problem as the fan motor on the outside condenser unit. Tried swapping the capacitor but it turns out the start capacitor is only for the compressor motor. Narrowed it down to the fan and went online to get a new one. Damn thing is over $900 and the discounted price was $750. As I was climbing the ladder to jump off the roof head first I thought I might give my 61-year old son a call. He reminded me the system was only two years old and should have a 10-year warranty.

Called the guy who installed it and he came right out. Sure enough, the fan motor was dead and it was covered 100% under the warranty. His 5-minute visit wasn't covered but I knew that ahead of time. He came back the next day and in six minutes had the new motor installed and working. Each visit was $150 so the motor replacement cost me $300. The A/C units a few decades ago had $50 fan motors in them and I replaced them myself, even when they were under warranty. When the parts are free you better be ready to bend over to acquire them. I've had a hard time sitting down for more than a few minutes at a time after that repair.
 
OP
Z

zmotorsports

ALLIANCE MEMBER
Joined
Oct 20, 2009
Messages
21,477
Location
Northern Utah
Nice work with the Acura Mike. For years when those were all I worked on I thought that was the gold standard of suspension design. Easy to service, but I cant tell you how many folks I have seen that didnt realize the lower fork came off the strut. Watching them try to remove the whole assembly without taking out the pinch bolt and removing the fork always made me chuckle.

Thanks. Yeah, I simply don't understand that. To me it's pretty obvious that the shock/spring assembly is NOT coming out of there with the fork still on and it is one bolt that separates the fork from the bottom of the shock body. :headscrat I get more questions about that on the video I did years ago, and I've answered the same question dozens of times, all people have to do is read the prior comments. What I "want" to say to them is that if you can't figure out how the fork comes off, maybe you should put the tools down. :ROFLMAO:
 

Firstram

Well-known member
Joined
May 16, 2017
Messages
1,393
What I "want" to say to them is that if you can't figure out how the fork comes off, maybe you should put the tools down. :ROFLMAO:
Similar to the people who freaked about your coach suspension servicing methods. I have only worked on one MCI bus with bags and those methods are solid and obvious. I can’t imagine not being observant enough to understand my surroundings.
 
OP
Z

zmotorsports

ALLIANCE MEMBER
Joined
Oct 20, 2009
Messages
21,477
Location
Northern Utah
Similar to the people who freaked about your coach suspension servicing methods. I have only worked on one MCI bus with bags and those methods are solid and obvious. I can’t imagine not being observant enough to understand my surroundings.

Exactly. Much of being mechanically inclined it merely observing how things fit together and interact one with another. The rest is just nuts and bolts.
 

M.Brane

ALLIANCE MEMBER
Joined
Feb 11, 2024
Messages
1,791
Location
1 hr N/W of LA LA Land
Thanks. Yeah, I simply don't understand that. To me it's pretty obvious that the shock/spring assembly is NOT coming out of there with the fork still on and it is one bolt that separates the fork from the bottom of the shock body. :headscrat I get more questions about that on the video I did years ago, and I've answered the same question dozens of times, all people have to do is read the prior comments. What I "want" to say to them is that if you can't figure out how the fork comes off, maybe you should put the tools down. :ROFLMAO:
Yup. Did all 4 struts on my girl's 07 TL in an afternoon on my buddy's lift. It was pretty simple although I did cheat, and cut notches in the rear window tray to get to the rear tops. The seat covers them no problem. No way I was removing all that plastic trim that's been baking in the SoCal sun for over a decade. That's just asking for trouble.
 
OP
Z

zmotorsports

ALLIANCE MEMBER
Joined
Oct 20, 2009
Messages
21,477
Location
Northern Utah
With the temps in the teens here along the Wasatch Front the past couple of evenings and high's barely getting up to freezing, I decided to hold off on working on the coach in the RV bay for a few more days. Instead, I grabbed the parts that I've collected for my next project off the bench and thought I'd mockup the wiring and make sure everything works like it did in my head.


The digital controller/timer was the last piece I was waiting for to arrive. I cut some short lengths of wire and connected the 12VDC power supply to the timer, then before connecting to the small 300 RPM motor, I confirmed the voltage output with a meter. With power present as it should be, I hooked up some jumpers to the motor and VOILA. Motor runs for the predetermined set time on the timer just as it should.
shaker1.jpg

Now knowing the controls work as planned, I turned my attention to my notebook to scribble out some rough plans for a couple and then a mounting bracket for the motor.
shaker2.jpg


I need a few 3mm x .5 SHCS to mount the motor so I'll have to make a stop by the local Bolt & Nut Supply on the way home.
 
OP
Z

zmotorsports

ALLIANCE MEMBER
Joined
Oct 20, 2009
Messages
21,477
Location
Northern Utah
Mike I've got one that I made with an old sawzall blade and a pair of band clamps. Works like a charm.

I've seen people use that process quite a lot Vincent. I've also seen the PVC tube connected to a drill motor, but I wanted something just a bit more elaborate that I can mount on the wall, insert a can, set a timer and walk away. Plus, it will be a cool project and something that will hopefully be remembered by my son and grandson when I'm long gone.
 

mfg0772

Well-known member
Joined
Aug 8, 2018
Messages
146
Location
Northeast CT
I've seen people use that process quite a lot Vincent. I've also seen the PVC tube connected to a drill motor, but I wanted something just a bit more elaborate that I can mount on the wall, insert a can, set a timer and walk away. Plus, it will be a cool project and something that will hopefully be remembered by my son and grandson when I'm long gone.
^This. While I am a fan of keeping it simple, you have to respect the coolness and 'because I can' factors. No doubt Mike will create a work of art with this.
 
OP
Z

zmotorsports

ALLIANCE MEMBER
Joined
Oct 20, 2009
Messages
21,477
Location
Northern Utah
^This. While I am a fan of keeping it simple, you have to respect the coolness and 'because I can' factors. No doubt Mike will create a work of art with this.

Thank you. It kind of goes back to the old saying that "if the only tool you have is a hammer, everything is a nail". With having a mill and lathe in the shop I want to come up with something just a bit nicer than "simple". While there's nothing wrong with simple, sometimes I just want more or elaborate. Plus, it is an opportunity to machine something and therefore improve upon that skillset. I always feel my machining skills need as much help as possible.
 

PugetDude

ALLIANCE MEMBER
Joined
Mar 13, 2013
Messages
22,478
Location
Superstition Mountains, AZ
Mike I've got one that I made with an old sawzall blade and a pair of band clamps. Works like a charm.
Not aerosol, but my dad used to put a gallon of paint in the trunk of his car during the week if he knew he would be painting on the weekend. He drove a lot, so the paint was always well mixed when it was time to use it.
 

PugetDude

ALLIANCE MEMBER
Joined
Mar 13, 2013
Messages
22,478
Location
Superstition Mountains, AZ
Thank you. It kind of goes back to the old saying that "if the only tool you have is a hammer, everything is a nail". With having a mill and lathe in the shop I want to come up with something just a bit nicer than "simple". While there's nothing wrong with simple, sometimes I just want more or elaborate. Plus, it is an opportunity to machine something and therefore improve upon that skillset. I always feel my machining skills need as much help as possible.
Since this is typical Mike overkill, you might as well incorporate a warmer to get the spray can to optimum temperature. Just sayin'...
 
OP
Z

zmotorsports

ALLIANCE MEMBER
Joined
Oct 20, 2009
Messages
21,477
Location
Northern Utah
Since this is typical Mike overkill, you might as well incorporate a warmer to get the spray can to optimum temperature. Just sayin'...

Lots of polished brass parts!

Now you guys are just adding work for me to add work. I want to keep this simple. It's just to shake cans and save my arms. :bounce:
 
To avoid these ads, REGISTER NOW!
Top Bottom