To avoid these ads, REGISTER NOW!

ZMotorsports Shop Projects 2.0

To avoid these ads, REGISTER NOW!

SilverJimmy

Well-known member
Joined
Apr 14, 2012
Messages
1,685
Location
Prescott/Flagstaff, AZ
I can not believe that you are going to cheat your grandson out of the wonder of discovering the magic that is hiding inside a paint can. I still remember when I finally cut a can open to see what was really rattling around in there! Besides, he’s young, in a couple years he will be able to shake all the paint cans grandpa needs shaken!
 
OP
Z

zmotorsports

ALLIANCE MEMBER
Joined
Oct 20, 2009
Messages
21,471
Location
Northern Utah
I can not believe that you are going to cheat your grandson out of the wonder of discovering the magic that is hiding inside a paint can. I still remember when I finally cut a can open to see what was really rattling around in there! Besides, he’s young, in a couple years he will be able to shake all the paint cans grandpa needs shaken!

I'm certain we'll have to "explore" the hidden rattle in the paint can at some point Sterling. But until then I can save my arm. I don't know about anyone else, but it seems like I shake the can for what feels like 2 or 3 minutes as directed on the can, but in actuality it is probably more like 15 seconds. :dunno: This way I can pre-program the timer so when I put a can in the shaker and turn it on, I can walk away and know it will shake for a few minutes when it shuts off.

I find myself using aerosol paints much more lately and to be honest, I can get pretty decent results for things like brackets, battery trays, etc. Not the same quality as a gun, but close for the intended use. Close enough for a daily driver, but I wouldn't use such measures if I were building a street rod.
 
OP
Z

zmotorsports

ALLIANCE MEMBER
Joined
Oct 20, 2009
Messages
21,471
Location
Northern Utah
Made a little progress on the aerosol can shaker last night.

I dug through my aluminum plate and found one the width I needed. It had a few holes drilled and tapped down one side, so I determined where the opposing threaded hole needed to be, drilled and tapped it, then cleaned up the edge with an end mill. I'll leave it lengthwise until I determine the exact length I need to cut the base plate.
shaker3.jpg

Shaker assembly fastened to the base plate. Now I can measure the height to the center of the pivot point to determine height of the motor off the base.
shaker4.jpg

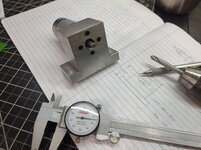
After some measuring, I prepared to bore a mounting block for the motor.
shaker5.jpg

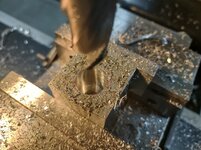
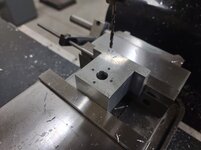
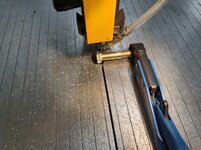
Started by drilling through the block for the output shaft of the motor, then I figured I would practice my boring techniques as I haven't bored to a specific diameter bore and depth in a while and need the practice. After drilling the through-hole, I used a 1" end mill to remove much of the material and get within a few thousands of the flat bottom spec.
shaker6.jpg

Good starting point for the boring bar.
shaker7.jpg

Boring bar mounted in my small Criterion boring head and ready to commence taking the bore to size and depth.
shaker8.jpg

I was shooting for a clearance of .001" over the motor diameter.
shaker9.jpg

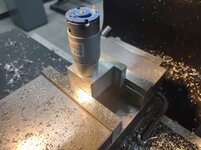
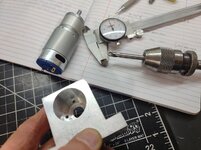
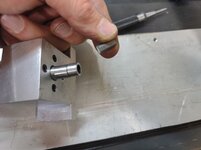
Nailed it. The motor won't quite go into the bore without some coaxing. Here it's just sitting on the bore.
shaker10.jpg

With a little finesse, it slid right into the bore to the correct depth.
shaker11.jpg


Next will be to drill the bolt hole pattern in the mounting block to match the motor and then it can be secured in place and the coupler length can be determined.

Thanks for looking.
 

RickP

Well-known member
Joined
Jan 15, 2013
Messages
1,557
Location
Annapolis, MD
Great idea for a can shaker, and that bore in the base for the motor looks perfect.

Any way you can add some steampunk elements to your design? Definitely for style, but also make them functional -- your grandson will love it! 😉
 
OP
Z

zmotorsports

ALLIANCE MEMBER
Joined
Oct 20, 2009
Messages
21,471
Location
Northern Utah
Great idea for a can shaker, and that bore in the base for the motor looks perfect.

Any way you can add some steampunk elements to your design? Definitely for style, but also make them functional -- your grandson will love it! 😉

Thanks Rick. I was quite pleased with the finish of the bore and how flat the bottom came out. In the past I have struggled getting good surface finish and the flat bottoms I seem to get chatter. This time I snuck up very slowly on the bottom and took a bit more aggressive cut for the last pass in the bore. Carbide inserts like to eat and I think by taking lighter cuts it affects pressure at the cutter's tip therefore affecting overall surface finish. I took several heavy cuts earlier on in the bore to confirm the boring bar's setting to what was actually being removed and on the last cut I simply dialed it in and tried to have confidence in myself that the final dimension would be exactly what I was shooting for. I think sometimes I start second guessing myself and that's why I take a light cut at the end, but then it bites me in the *** on finish.

Hope all that makes sense.
 

fouckhest

Well-known member
Joined
Jul 24, 2013
Messages
1,871
Location
Greer, SC
Great project, Mike!

I am with you on the program and walk away, I also find my self using rattle cans a lot these days, the quality is really quite good with the right prep, temperature and technique. Plus, when I need to "shake" myself, I find myself wondering around trying to find a way to be productive during this seemingly, "non-value-add" time of the project/process.
 
OP
Z

zmotorsports

ALLIANCE MEMBER
Joined
Oct 20, 2009
Messages
21,471
Location
Northern Utah
Great project, Mike!

I am with you on the program and walk away, I also find my self using rattle cans a lot these days, the quality is really quite good with the right prep, temperature and technique. Plus, when I need to "shake" myself, I find myself wondering around trying to find a way to be productive during this seemingly, "non-value-add" time of the project/process.

Funny you mentioned looking for other things to do while shaking cans of paint Mike, I do the same thing, wandering around looking for something that needs to be put away or moved to another location. Anything but waste time doing NVA work.

I also agree with the quality of many of these products as of late. I have been quite impressed with the results over the past few years and find myself beadblasting and painting parts more so than in the past, even on side work or daily drivers. I did a test last summer when working on my son's WJ of a longer more thorough shake of the paint can vs. the shorter version I was "actually" achieving, and the finish did vary depending on the time spend shaking so there is something to be said about more thoroughly mixing of the solids into the carrier of a longer shake interval. Even though I "thought" I was shaking the cans enough, I obviously was not.

I've had the idea of some form of aerosol paint can shaker kicking around in my head ever since, just couldn't make up my mind on which direction I wanted to go. First thought was quick and simple, either the sawzall method or PVC tube method. But then I saw one on social media and was intrigued by the design so I started doing some research and purchased a few components to build a little nicer one that will hopefully outlive me.

I just hope it works and doesn't turn out to be a waste of time and money.
 

ntsqd

Well-known member
Joined
Jan 22, 2005
Messages
993
Location
Lower left coast
I don't see shaking the cans as NVA because that shaking affects the quality of the finish. Seems to be a direct relationship there, poorly shaken = poor finish. Although I do see it as time that I'd rather be doing something else......

This begs the question though, what aerosol paint are people using? I used to use Krylon, have literally shot cases of it, but in the last couple of years I've been disappointed with it. Tried "Steel-It", not impressed as it didn't hold up for very long. Rustoleum seems to be hit and miss. Maybe I'm doing it wrong, but their nozzles plug up badly even when 'cleared' upside down after every use. Recently I got a can of Eastwood's "Chassis Black." Still testing it.
 

fouckhest

Well-known member
Joined
Jul 24, 2013
Messages
1,871
Location
Greer, SC
Funny you mentioned looking for other things to do while shaking cans of paint Mike, I do the same thing, wandering around looking for something that needs to be put away or moved to another location. Anything but waste time doing NVA work.

This doesn't surprise me at all! :)

I did a test last summer when working on my son's WJ of a longer more thorough shake of the paint can vs. the shorter version I was "actually" achieving, and the finish did vary depending on the time spend shaking so there is something to be said about more thoroughly mixing of the solids into the carrier of a longer shake interval. Even though I "thought" I was shaking the cans enough, I obviously was not.

I have a buddy that is basically a life long body guy, has owned shops on/off and now close to retirement works at a dealer....but, for years he has been amassing his "retirement fund" in the form of a old Honda motorcycles, and as he was restoring one years ago and I saw him painting the frame with VHT Chassis and Rollbar paint, I gave him some $hit, to which I was quickly schooled on how good that paint is due to having a built-in self etch primer and then proceeded to tell me about how long to shake, etc., That said, it is very curious how good of results you can get when the conditions and recipe are correct.

I am highly confident it will exceed expectations and I am looking forward to seeing how it turns out...you may even inspire me! I am actually typing and thinking about how I could build a stand for a sawzall, mount it under my shed roof so I can shake and walk away.....🤔
 
OP
Z

zmotorsports

ALLIANCE MEMBER
Joined
Oct 20, 2009
Messages
21,471
Location
Northern Utah
I don't see shaking the cans as NVA because that shaking affects the quality of the finish. Seems to be a direct relationship there, poorly shaken = poor finish. Although I do see it as time that I'd rather be doing something else......

This begs the question though, what aerosol paint are people using? I used to use Krylon, have literally shot cases of it, but in the last couple of years I've been disappointed with it. Tried "Steel-It", not impressed as it didn't hold up for very long. Rustoleum seems to be hit and miss. Maybe I'm doing it wrong, but their nozzles plug up badly even when 'cleared' upside down after every use. Recently I got a can of Eastwood's "Chassis Black." Still testing it.

Thom, I haven't used Steel-It yet. I received a sample can several months ago but haven't found anything worth while to test it on yet.

As for my go-to's I have been using Eastwoods Extreme Chassis paints for about 10 years now with excellent results. I still use them but I have also added a few more to my arsenal of products. I like the Seymour line very much. Been using their E-Coat for corrosion protection on fasteners and small things. For nice coverage on larger areas, I have been using the Seymour Fleet line which is a very nice high solids paint that holds up well and covers very nicely. I have also had very good results with VHT line of chassis/rollbar paint, it holds up very well.

The Rustoleum products I have used have held up well, but I think the Seymour is slightly better. I have no complaints about the Rustoleum red I've been using on tools and my lawnmower, it has taken some abuse and held up well.
 
OP
Z

zmotorsports

ALLIANCE MEMBER
Joined
Oct 20, 2009
Messages
21,471
Location
Northern Utah
This doesn't surprise me at all! :)


I have a buddy that is basically a life long body guy, has owned shops on/off and now close to retirement works at a dealer....but, for years he has been amassing his "retirement fund" in the form of a old Honda motorcycles, and as he was restoring one years ago and I saw him painting the frame with VHT Chassis and Rollbar paint, I gave him some $hit, to which I was quickly schooled on how good that paint is due to having a built-in self etch primer and then proceeded to tell me about how long to shake, etc., That said, it is very curious how good of results you can get when the conditions and recipe are correct.

I am highly confident it will exceed expectations and I am looking forward to seeing how it turns out...you may even inspire me! I am actually typing and thinking about how I could build a stand for a sawzall, mount it under my shed roof so I can shake and walk away.....🤔

Mike, you were ahead of me mentioning the VHT Chassis and Rollbar paint. I have been using that for a few years now and works great for chassis or underhood touch-up jobs. Holds up well.
 
OP
Z

zmotorsports

ALLIANCE MEMBER
Joined
Oct 20, 2009
Messages
21,471
Location
Northern Utah
Mike,
are you building a version of Robert Cowan's Paint can shaker?

Jason

I'm not sure who that is. Maybe, it was just one I saw a few months back online somewhere. The one I saw was a benchmounted style and I want to make something to hang on the wall and be fully covered, so it will differ from what I saw online.
 

OutlawDrifter

Well-known member
Joined
Jan 20, 2015
Messages
3,898
Location
KS
For those of you wanting a satin/matte black, look no further than John Deere Blitz Black. It's still my go to for anything less than a gloss finish when it comes to black. I keep a quart to spray out of the gun and always have a couple of aerosol cans handy.

The entire engine bay of my Z28 was sprayed with it when I did the LS swap, that was 2011'ish...when sprayed off or wiped down, it still looks as good as the day I sprayed it. The engine side of the firewall in the '49 GMC was also sprayed in BB...fantastic stuff, very durable and WILL NOT chalk.

For all other colors, depends on its intended purpose...but for general use, Rustoleum 2x has been a good performer for me.
 
OP
Z

zmotorsports

ALLIANCE MEMBER
Joined
Oct 20, 2009
Messages
21,471
Location
Northern Utah
For those of you wanting a satin/matte black, look no further than John Deere Blitz Black. It's still my go to for anything less than a gloss finish when it comes to black. I keep a quart to spray out of the gun and always have a couple of aerosol cans handy.

The entire engine bay of my Z28 was sprayed with it when I did the LS swap, that was 2011'ish...when sprayed off or wiped down, it still looks as good as the day I sprayed it. The engine side of the firewall in the '49 GMC was also sprayed in BB...fantastic stuff, very durable and WILL NOT chalk.

For all other colors, depends on its intended purpose...but for general use, Rustoleum 2x has been a good performer for me.

I have not tried that Marc. I may have to give it a shot. ;)
 
To avoid these ads, REGISTER NOW!

Bob Heine

ALLIANCE MEMBER
Joined
Oct 24, 2009
Messages
10,709
Location
Boca Raton, Florida
when I need to "shake" myself, I find myself wondering around trying to find a way to be productive during this seemingly, "non-value-add" time of the project/process.
For me it isn't so much trying to be productive as it is to do an effective job of shaking the aerosol can. I actually bought the reciprocating saw shaker for three reasons:
  1. The measurement accuracy of the home-made one I would produce would result in an Aerosol Gun that shoots cans across my garage.
  2. Fighting with hose clamps would waste even more time and cause me to go back to my 37-second wrist twisting.
  3. I liked the idea of the adapter to shake smaller bottles of paint, polishes and anything else that recommends "Shake Well" in its first instruction step.
I bought this MixKwik package. It has a tool-less quick-release strap that works perfectly for me. I have a 12v Porter Cable reciprocating saw attached because that tool line got absorbed. I still have a charger and low amp-hour batteries for the P-C tools but red 12- and 18-volt ones are my go-to.
Paint Shaker 800.jpg
I can wander around looking for things to do while carrying the shaker and the variable speed means I can shake the can really fast, convincing myself that 37 seconds is enough time. Actually, I shoot for a couple of minutes. I bought my shaker direct from MixKwik
in 2021 but it appears they are sold out and the ones from Amazon don't offer the small bottle adapter. They do show a jar of peanut butter being shaken so it's good for more than just paint.
 

WoodsTruck

Well-known member
Joined
Jan 12, 2013
Messages
1,027
I have a 90+ year old neighbor that swears by heating up his can of paint before applying. He says he uses a bucket of hot water to soak the paint can in for 10-15 minutes. Anyone else pre-heat the paint besides the hypersonic shaking of the mixing ball?
 

ntsqd

Well-known member
Joined
Jan 22, 2005
Messages
993
Location
Lower left coast
I have to wonder if putting an aerosol can in my ultrasonic cleaner might both warm it and shake it?
:cool:

I have warmed aerosol cans of paint on cold days in the past, but usually just by leaving them in the sun.
 

Bodj Built

Well-known member
Joined
Feb 3, 2016
Messages
1,167
Location
Moorpark, CA
I have a 90+ year old neighbor that swears by heating up his can of paint before applying. He says he uses a bucket of hot water to soak the paint can in for 10-15 minutes. Anyone else pre-heat the paint besides the hypersonic shaking of the mixing ball?

It makes a huge difference, especially on colder days. Almost completely eliminates any buildup on the nozzle
 

rharman

Well-known member
Joined
Apr 22, 2012
Messages
8,911
Location
SoCal
I have a 90+ year old neighbor that swears by heating up his can of paint before applying. He says he uses a bucket of hot water to soak the paint can in for 10-15 minutes. Anyone else pre-heat the paint besides the hypersonic shaking of the mixing ball?
I try and put them out in the sun for 15 minutes or so. I try to rotate the can halfway through.
 
OP
Z

zmotorsports

ALLIANCE MEMBER
Joined
Oct 20, 2009
Messages
21,471
Location
Northern Utah
Hope everyone had a nice Valentine's Day/President's Day weekend.

I spent a good portion of it clearing snow from several intervals of snow over the weekend so I didn't get a hole hell of a lot of time in the shop.

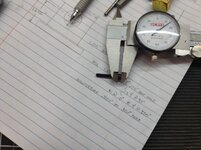
After clearing the snow on Saturday, I was able to spend a couple hours in the shop working on the paint shaker project. I started by machining the small step into the mounting block to compensate for the step on the motor where the output shaft bearing is located. I needed to machine a .125" deep step .0780" in diameter so the motor would fully seat into the block.
shaker12.jpg

Bingo. That should work.
shaker13.jpg

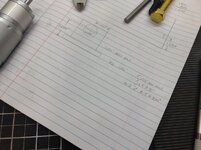
Next was to program into the DRO the PCD (Pitch Circle Diameter) of the bolt pattern for mounting the small motor. I measured the outside of the bolt holes.
shaker15.jpg

Then subtracted one bolt diameter to get the bolt pattern centerline.
shaker16.jpg

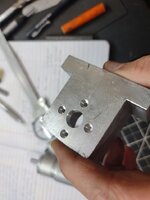
I will drill them 90-degrees apart.
shaker17.jpg

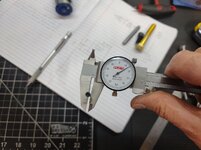
This wasn't necessary, but I also wanted to recess the SHCS into the block so I measured the head's diameter and thickness for the bolt head's countersink hole depth.
shaker18.jpg

Working my way around the bolt pattern.
shaker19.jpg

With the bolt pattern drilled, it was time to swap out the drill bit for an end mill and make the counterbore.
shaker20.jpg

The correct depth and diameter for the fasteners. Three more to go.
shaker21.jpg

All four counterbore's machined.
shaker22.jpg


Stay tuned for more pictures....
 
OP
Z

zmotorsports

ALLIANCE MEMBER
Joined
Oct 20, 2009
Messages
21,471
Location
Northern Utah
Continuing on.

My deburring tool wouldn't fit down inside the bore, so I used a spotfacing drill bit in a small drill chuck to debur the inside of the bolt holes.
shaker23.jpg

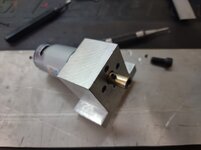
Motor mounted in the block. Everything aligned perfectly.
shaker24.jpg

Next I wanted to ensure my height was spot on so I mocked it up into position. It aligns with the crank bolt perfectly.
shaker25.jpg

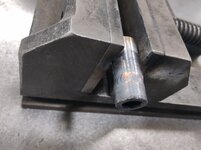
Next task was to machine the coupler for the motor to crank bolt. Rather than starting from scratch, I just used a cut down 7/16" diameter bolt as I just needed about 3/4" of the shoulder.
shaker26.jpg

Drilled and reamed the motor shaft side.
shaker27.jpg

Then tapped for a 8-32 set screw.
shaker28.jpg

Test fit on the motor shaft. Next was to drill and tap the other side to accept a 5/16"-24 SHCS.
shaker29.jpg

With the opposing end drilled and tapped, SHCS threaded in, it was time to weld the SHCS into the coupler. The cut down allen wrench will serve as the coupler.
shaker30.jpg

The coupler welded.
shaker31.jpg

And test fit. Perfect alignment with the crank bolt.
shaker32.jpg


That was all I was able to complete on Saturday. Next up will be to mount the motor block, then begin work on an enclosure.


Thanks for looking.
 

rharman

Well-known member
Joined
Apr 22, 2012
Messages
8,911
Location
SoCal
< snip >

This wasn't necessary, but I also wanted to recess the SHCS into the block so I measured the head's diameter and thickness for the bolt head's countersink hole depth.
shaker18.jpg

< /snip >

< snip >

All four counterbore's machined.
shaker22.jpg

< /snip >

Uh.... I think a survey would show that all of us agree that was a necessary step. 👍
 
OP
Z

zmotorsports

ALLIANCE MEMBER
Joined
Oct 20, 2009
Messages
21,471
Location
Northern Utah
Didn't get any shop time last night, but the part for our oven finally arrived so I wrapped that up at least.

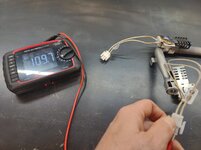
Looks like the original, other than one additional mounting tab.
oven1.jpg

Tests good. It's not open, which is a good sign. ;)
oven2.jpg

Replaced on the burner tube, plus I blew a little compressed air through the tube to ensure all of the ports were clear. Not necessary, but I figured since I was right there and had the air available.
oven3.jpg

Replaced, covers reinstalled and racks back in place.
oven4.jpg


The wife was so happy to have her oven back she threw a few cookies in it to test it out. I can attest the over is working. They were delicious. 😋 🍪
 

NUTTSGT

Super Moderator
Staff member
Joined
Sep 14, 2009
Messages
51,144
Location
Northern Central Ohio
Didn't get any shop time last night, but the part for our oven finally arrived so I wrapped that up at least.


oven4.jpg


The wife was so happy to have her oven back she threw a few cookies in it to test it out. I can attest the over is working. They were delicious. 😋 🍪
I believe we need some "samples" as proof. . . Snickerdoodles or Molasses.
 
OP
Z

zmotorsports

ALLIANCE MEMBER
Joined
Oct 20, 2009
Messages
21,471
Location
Northern Utah
I was able to make a little more progress on the paint can shaker and give it a test run last night.

Started by drilling and counterboring the mounting holes for the motor block.
shaker41.jpg

SHCS's recessed properly into the motor mounting block.
shaker42.jpg

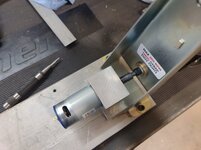
Then I determined the overall depth of the base, cut to length, milled the ends smooth and drilled & tapped the motor block mounting holes. Mocked up for final fitment check.
shaker43.jpg

Then I had to take it for a test drive......
shaker44.jpg

I determined a mounting location on the wall, then drilled and countersunk holes for the flathead grabber screws.
shaker45.jpg

Metal prepped, wiped down and setup for tacking.
shaker46.jpg

Final welds.
shaker47.jpg

Messy work area.
shaker48.jpg

Mocked up and then test fitted to the wall. I think the location will work well between my man door and the east overhead shop door. The man door when fully open will almost contact it, which it is seldom ever opened to the extreme, but that can be easily corrected with a door stop.
shaker49.jpg


Next step will be to fabricate a sheet metal cover, then add a small gusset to the wall mounting bracket which will also serve as a mounting point for the cover. A cover probably isn't necessary, but it will conceal the wiring plus I want to finish it off nice as well as provide a flat surface on the face of the enclosure in which to mount the timer/controller.

Thanks for looking.
 
To avoid these ads, REGISTER NOW!
Top Bottom