To avoid these ads, REGISTER NOW!

What did you do "IN" your garage today?

Outlawmws

Well-known member
Joined
Aug 9, 2011
Messages
39,331
Location
The Badlands
Congrats.
My buddy's dad told him to get a hobby so he wouldn't get bored. My buddy said, "You have severely underestimated my ability to lay on the couch and do nothing."

Picked up this quote and forgot to respond:

Thanks, and:

Your buddy is a prime candidate to become a statistic, -As Kay said IIR "landing in a shoe box"
 
To avoid these ads, REGISTER NOW!

driftpin

Well-known member
Joined
Dec 22, 2016
Messages
11,313
Location
Miami-Dade/Broward Co. Florida
We got a Golden Retriever puppy almost a year ago, from a local breeder. She is a tough to control little gal, 60 lbs now and another month to 1 year. We take her to obedience training, and she's making progress. She is very devoted to us and she likes people. A surprise is her bark, which is more like a 75 lb male Doberman in the volume and tone (I had one of those for 15 wonderful years).

She is still in the "if I find something to knaw on, I'm gonna do it!" stage. Not chewing her way through the plaster walls of the house, or destroying the sofa or the beds, but she likes my boat deck shoes, our sneakers, and unfortunately, prescription glasses. Now we place our glasses into the nightstand before going to bed.

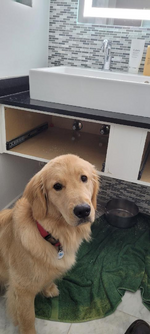
Another issue we had, was under an en-suite bathroom counter and double sink, she would go under the sink, which is open from side to side. The problem is, when she did that, she would hit the P-trap, and then it would start to leak, necessitating a session of setting the connectors tight, and mopping-up water which had leaked, revealing the loose P-trap.

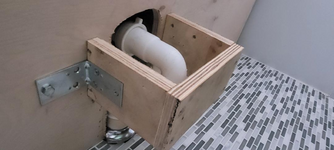
She did it again today, so I decided to make a block to her knocking-loose the P-trap. Here it is.

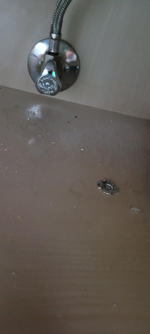
I used some wood from a HFT furniture dolly I'd replaced with 2 x 4" & 2 x 6" PT lumber, and had saved the 8-ply 3/4" X 3" wood frame. I made a simple 'U' shape to cover the downward protrusion of the P-trap, and I fastened it in place with some stamped steel L-brackets from Ace hardware. I used some 1/4" x 20 tpi x 5/8" T-nuts to hold the wood U-bracket to the underside of the 'floating' bathroom vanity which is fastened to the side walls of the bathroom. Now there is a stout reinforcement shielding the P-trap from the dog's search for a comfortable resting place under the double sink/vanity. The T-nuts allow easy < 1 minute unscrewing of the wood U-bracket from the underside of the vanity, providing easy access to the P-trap.

The dog and the vanity, drawers removed.
1740944813267.png

The U-bracket.

1740944886081.png

The T-nut and a shut-off.

1740944962482.png

With drawers removed, the P-trap guard, fending-off our puppy.
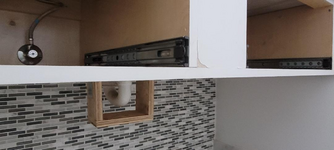
1740945040302.png

She can still maneuver around the wood U-bracket/P-trap, if she wants to get beneath the sink. The P-trap is well-defended, now.

During the work, the puppy came into the bathroom to check on progress, and she found a nylon beveled pipe gasket, for one of the connections, and without me noticing it, she snuck it away, and chewed it into trash. My wife caught her happily munching-away, in an adjoining room, and she brought it to me, "I hope you don't need this!" Well, yes I do. Fortunately, I had another in my chest of plumbing parts, so I was able to fix things without another trip to the hardware store. Puppy: 1, Daddy: 1.
 
Last edited:

M.Brane

ALLIANCE MEMBER
Joined
Feb 11, 2024
Messages
1,791
Location
1 hr N/W of LA LA Land
Today? Nothing.

Yesterday finished transferring all the fasteners from the bolt bins to the card file cabinet. My belts for the '38 Craftsman drill press finally showed up after being sent from So Cal to WA, and back (WTF Fedex?) Got 'em installed, and drilled a test hole at 200 RPM with a 3/8 bit into 3/16 steel. Like buttah! Nice spirals of metal coming off. I like it.

Put the bolt bins on the curb, and posted on CL for free. They were gone in a few hours. Payin' it forward.
 

JEFFREYWisconsin

Well-known member
Joined
Oct 9, 2021
Messages
380
on my way out to the shop, I found one of my trip springs in my grass... sure enough looks like I broke a bolt and lost the right side spring on the Polaris plow last storm... add an eyebolt to my list, thankful I found it before mowing season, that could make a bad day for the mower!
 

Attachments

  • IMG_0983.jpeg
    IMG_0983.jpeg
    862.2 KB · Views: 57

rcktpwrd

Well-known member
Joined
Mar 5, 2008
Messages
1,104
Location
Raleigh, NC
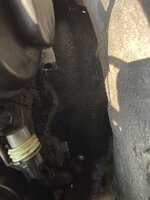
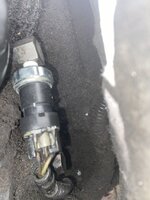
Replaced a leaking oil pressure sender on the wife's wagon. Lots of oil/dirt still to clean off the back of the engine/top of transmission.

sender located back here:
IMG_9974.jpg
IMG_9955.jpg

sender removed:
IMG_9960.jpg
New senser installed, unfortunately the clip broke off when I was putting the wires on:
IMG_9965.jpg

I also swapped out the alternator:
IMG_9968.jpg
 

JEFFREYWisconsin

Well-known member
Joined
Oct 9, 2021
Messages
380
Replaced a leaking oil pressure sender on the wife's wagon. Lots of oil/dirt still to clean off the back of the engine/top of transmission.

sender located back here:
IMG_9974.jpg
IMG_9955.jpg

sender removed:
IMG_9960.jpg
New senser installed, unfortunately the clip broke off when I was putting the wires on:
IMG_9965.jpg

I also swapped out the alternator:
IMG_9968.jpg
some of those clips are such BS
 

SMOKEYBEAR

Well-known member
Joined
Jan 3, 2016
Messages
466
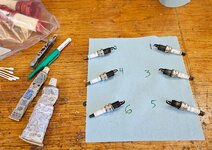
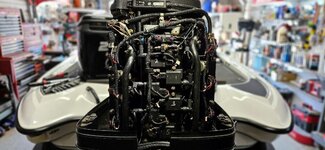
Boat maintenance Easy Jobs. - Fuel filter and spark plugs. Well 5 of the 6 plugs got changed. 1 of the new ones had an imperfection in the tip, so I passed on using it. Another one will be here tomorrow. The 2 stroke has proven finicky (understatement) when it comes to spark plugs, brand and gap. I've learned a bunch watching other people make mistakes. It was relieving to see the consistency in the ones I took out. I'm not quite ready for a repower, but I won't put much more money in the 2 stroke. It hit me for a solid chunk a year ago with some fuel rails and air/ fuel injectors. Not much to really see, but pictures make it better.

Auto bilge switch is next, but I'm not starting that this late on a Sunday.
 

Attachments

  • XS1.jpg
    XS1.jpg
    164.7 KB · Views: 33
  • XS2.jpg
    XS2.jpg
    96 KB · Views: 34

BreeStephany

ALLIANCE MEMBER
Joined
May 19, 2012
Messages
854
Location
Oregon
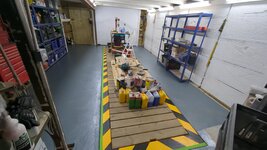
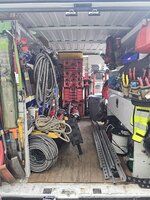
Spent the afternoon yesterday emptying out my service van and attempting to make some sense of organization after 6 months of working out of it without really spending any real time to get it properly set up...

The ultimate conclusion is the van is desperate need of some packout shelves to get my packouts off the floor, a few more packouts for the smaller fittings and devices and I need to get permanent spots for tooling, as well as rethink what all I need for tooling.

Keeping ALL the tools, diagnostic tools, materials and backup materials for daily main service upgrades, main panel upgrades, battery installs, inverter installs and service work / troubleshooting is indeed a challenge in a ProMaster 2500 🤣

It's sad that this is the result of a few hours of 'organization' but I think makes it clear why I need to get my garage cleaned up and actually setup for working on projects out of.

20250301_153331.jpg
 

cody1325

Well-known member
Joined
Apr 17, 2024
Messages
1,116
Location
Southwest Virginia
Basement shop, not garage.

I'm on my third day of dunking a bunch of seriously rusty stuff in Evaporust--most of it '20s and '30s wrenches. The only "modern" tool was a rusty Craftsman Professional (that spent 20+ years under the toolbox on a floor prone to water intrusion) PH0 to join my PH1. They're slowly gaining on me, but people are nuts to pay eBay prices. I have exactly one dollar in my set--and while I'd like to eventually have a set, it looks like whatever I find at flea markets will be the way the collection grows. Heck, the PH1 came from the flea market this spring.
 

welder4956

Well-known member
Joined
Apr 8, 2010
Messages
3,084
Location
Birmingham, AL USA
Replaced the chain on the Dewalt pole trimmer, then sorted metric vs. SAE hex wrenches that were piled in my small tool drawer and put them in separate pouches. After that I replaced the dead battery in my Asus laptop and promptly broke the ribbon cable connector to the motherboard. So I removed the solid state drive and ordered a SATA to USB adapter so I can transfer my old files to a new laptop.
 

rd65

Well-known member
Joined
Sep 29, 2017
Messages
2,841
Location
Granite Falls, WA
Went to move the Miata, dead battery. Hooked up the charger for a few minutes, started car, when removing negative charger lead I found that the negative was loose on the post. Band type clamp, bolt is bottomed out. Loosed up clamp and slid it the last little bit down on the post and tightened it up. Will have to look into new clamp for this thing. Sharpened chain saw after touching some gravel and possibly an awning post while cleaning up fallen tree mess.
 
To avoid these ads, REGISTER NOW!

PowerWagonBuilder

Well-known member
Joined
Jan 21, 2025
Messages
82
Location
NW of Richmond, Va
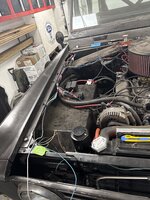
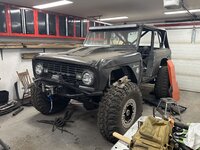
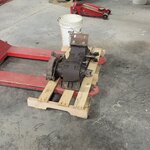
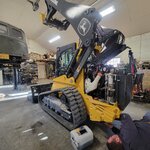
A friend hung out and helped me pull the transfer case out of my Carryall and then we did the 50 hour break in service on the new Skid Steer. Had it since October and only put 50 hours on it and it already had 12 on it when I picked it up but looking forward to getting to put it to work on some property maintenance this spring.

20250302_185000.jpg

20250302_160410.jpg
 

cannuck

Well-known member
Joined
Nov 30, 2021
Messages
4,661
Location
Rural SK
Found a few hours to finish up first stage of RPC (rotary phase converter). Still no where near balanced voltages (2 legs good, 3rd 20V too high). Will have lunch with my EE buddy tomorrow to have him calculate best capacitance to correct differential. I used on 2 pole relay to pull in main 240 single phase, a second to dump motor start capacitor current into generated leg - these started by parallel contacts on a modular momentary NO / NC push button. Used pilot lights to indicate successful voltage on wild leg then another momentary NO to engage 3ph out through fuse block. Both in and out are held after momentary power by hold in circuits - so a power failure of any kind isolates both current in and out. Stop is another momentary NO/NC using the NC side to interrupt mains hold in circuit.

Sorry for the detailed explanation - but the secondary purpose of this project was to get me thinking in AC design/build mode - as I have enjoyed free ride on EE and CEET resource for last few decades. ALMOST got through the whole thing without any smoke leaking out, but then found out the hard way there was a very illogically placed (hidden) wire terminal in the 3ph out contactor. Won't power up the mill until I read enough of the miserable manuals online to make sure I am not going to crash anything when I engage the quill, downfeed, electric VSD feed, coolant, etc.
 
Last edited:

GreenIron

Well-known member
Joined
Sep 26, 2021
Messages
2,092
Location
A bit north of the GOA
You're going to cut grass today ?! It was -27f here this morning. I actually found myself wishing for some grass to cut today until I realized I must have been outside too long and gotten a frozen brain.
Yes. I did that day. I also mowed yesterday. It was 71°. (y)
-------

In the shop yesterday, I fabricated legs and upper mounting brackets for a false-wall next to the welding table.
There is no way to utilize the wall space behind the sliding door, so I built a false-wall to hang fabrication/welding related item onto. The sliding door will then be similar to a pocket-door. Once I have the mounting pretty much done, it will be removed to add additional legs and a final painting before mounting.
IMG_0889.jpg
 

JEFFREYWisconsin

Well-known member
Joined
Oct 9, 2021
Messages
380
Yes. I did that day. I also mowed yesterday. It was 71°. (y)
-------

In the shop yesterday, I fabricated legs and upper mounting brackets for a false-wall next to the welding table.
There is no way to utilize the wall space behind the sliding door, so I built a false-wall to hang fabrication/welding related item onto. The sliding door will then be similar to a pocket-door. Once I have the mounting pretty much done, it will be removed to add additional legs and a final painting before mounting.
IMG_0889.jpg
Great idea and that should work perfectly.
 

cliffcharb

Well-known member
Joined
Nov 7, 2021
Messages
238
Location
North Port, Fl
No photos, but spent about two hours changing the transmission fluid and filter on my 2020 GMC Sierra HD, “Allison” trans.
Neighbors probably eyeing me sideways as I was brake torquing for a good 10 minutes getting the fluid hot enough to verify level.
No dipstick, just a plug in the pan with a standpipe. Level at temp is when fluid only drips out of the pipe, but doesn’t flow.
Dealer wanted over $900 for that service.
 

Jay__Dub

Well-known member
Joined
Nov 19, 2024
Messages
1,256
Location
Cold Country, Canada
No dipstick, just a plug in the pan with a standpipe. Level at temp is when fluid only drips out of the pipe, but doesn’t flow.
Dealer wanted over $900 for that service.
I often wonder how much they saved by eliminating the dipstick for ****** fluid. It is outrageous. I read the manual for checking it on my Wife's car, couldn't believe it, but it be so.
 

Hooked

Well-known member
Joined
Sep 24, 2010
Messages
445
Location
League City, Texas
Spent most of Friday replacing the valve cover gaskets on my wife's Sequoia. Cleaned them up in the process so at least something is looks clean under the hood now. Then Saturday as I was cleaning up the tools I noticed I had left off the insulater cover on the PCV valve so spent a few minutes fixing that. Big mistake. LOL
Of course, since I ONLY did that one little thing with the PVC valve hose there was no need to test run the engine again. After breakfast Sunday morning (my wife is so nice to wait) she tells me about her early morning drive to Mass and back. Uh-oh.
What discovered today was I had somehow managed to disconnect the electrical connector from one of the injectors. No wonder it barely limped along.
Also discovered the hose from the PCV valve must have cracked when I put it back on so there's a new one on there now.
 

nadogail

Well-known member
Joined
Jan 23, 2009
Messages
32,049
Location
Coronado, CA
Slept in late, made my own breakfast and read the whole newspaper.
My personal garage door opener broke on Saturday and I called a one man, one truck Garage Door Service company who had been dispatched to repair a faulty opener. I figured if he is good enough to do factory service work for Genie he’s good enough for me.
He replaced the broken trolley and checked and lubricated every thing and left a bill for only $120. I will definitely call him again for my next problem.

A-OK Garage Door in San Diego.
 

Wrench97

Well-known member
Joined
Jun 23, 2018
Messages
12,163
Location
Southeastern Pa
Spent most of Friday replacing the valve cover gaskets on my wife's Sequoia. Cleaned them up in the process so at least something is looks clean under the hood now. Then Saturday as I was cleaning up the tools I noticed I had left off the insulater cover on the PCV valve so spent a few minutes fixing that. Big mistake. LOL
Of course, since I ONLY did that one little thing with the PVC valve hose there was no need to test run the engine again. After breakfast Sunday morning (my wife is so nice to wait) she tells me about her early morning drive to Mass and back. Uh-oh.
What discovered today was I had somehow managed to disconnect the electrical connector from one of the injectors. No wonder it barely limped along.
Also discovered the hose from the PCV valve must have cracked when I put it back on so there's a new one on there now.
Too many luber goobers adding the wrong fluid/overfilling and burning out transmissions early, no dipstick eliminated the problem.
 

rzims

Well-known member
Joined
Oct 25, 2006
Messages
461
Location
Grass Valley, CA
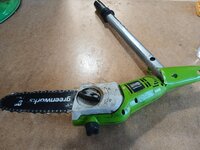
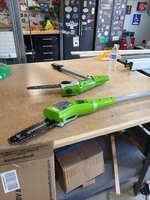
Well, last week I ran over the polesaw with the tractor.... so had to order a new head. 🤬
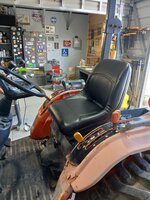
The seat on the tractor also ripped at some point over the winter which provides me with a soaking wet a$$ every time I sit down. So I ordered a new seat and got that installed today....interestingly, I never even realized the seat was adjustable. When I took the old one off, I saw the slide mechanism was so rusted and gunked up. i spent some time with PB Blaster, a wire brush and then some grease and now it slides forward and back :)

old seat.jpgnew seat.jpgpole saw.jpgpolesaw new head.jpg
 

cody1325

Well-known member
Joined
Apr 17, 2024
Messages
1,116
Location
Southwest Virginia
Swearing, lots and lots of swearing. And also finding out cheaping out just don't cut it when putting a winch on a 20 year old Kubota RTV 900 that at various times, has had the plans of a winch being added since the day it was delivered new.

Got the 2500 lb. Badlands winch from Harbor Freight, as I didn't need to pull the whole weight of the UTV--just to move and pull things like tree limbs off of fences--it was half the cost of the 5000 lb. UTV model.

However, it wouldn't fit on Kubota's stock mounting plate inside the winch cubby--even with the additional ATV mounting plate. There are mounts you can buy from a few places online that will fit more than the pre-drilled holes on the stock mounting plate--but apparently, the 2500 lb. model has a non-standard fairlead, which means that has to be bought as well. That's like $15 more than the difference of returning this one and paying for the correct stuff.

Instead of spending more money on ordering a Kubota-specific winch mounting plate (which also means more work--the stock Kubota plate has to go) and additional fairlead mount, I'm going to take the 2500 lb. winch and that POS plate back to HFT and spend the extra money on the 5000 lb. model and the matching fairlead mount. That is ONCE I measure the mount. Supposedly, most 4-hole mounts are standard. That'll also give me time for a buddy of mine to come on the weekend and help me get it on.
 

Outlawmws

Well-known member
Joined
Aug 9, 2011
Messages
39,331
Location
The Badlands
Turns out I'm still a boogery welder, just a boogery welder with a shiny new multi process welding machine.

Welding requires practice, but it also takes some consideration for being able to wield the fire with steady hand. Gas, arc, MIG, TIG, A steady hand and motion control is crucial

One tip I was given a long time ago, and works particularly well for gas and arc - take a wrap around your arm with the cables/hoses. this makes it so you hand is not being jerked around. -same principal for MIG/TIG - make sure you are not fighting those cables.
 
To avoid these ads, REGISTER NOW!
Top Bottom