To avoid these ads, REGISTER NOW!

Between 705 & 1200 SQ/FT My Wyoming Dream Garage and Shop

Workspaces between 705 and 1200 squarefeet.

R_C

Well-known member
Joined
Mar 6, 2018
Messages
150
Location
Wyoming
I built my dream garage and shop a few years ago and I have been meaning to document the build so that others can learn from my mistakes and maybe a few things I got right.

Long story short, 30 years ago, my wife and I bought a couple of acres when we were newlyweds and poor. Bankers wouldn’t lend for the conservative starter home we wanted to build because they said we were “under-developing the land” and we would have “excess land value” and they weren’t in the “business of land speculation.” Stymied by the banks, I spent a winter reading up at the library then we built a small log cabin ourselves and moved in. Three years later, while my wife was designing the “real house”, I built a small addition that would connect the cabin to the future house. A few years later, we hoped to have someone build the real house but we got burned by a couple of unscrupulous contractors and had to fire them with only a foundation and subfloor in place. We found someone to stack the logs and put a roof on then we took over. It took two years of weekends and nights to complete the house.

After all of that, any plans for a garage were pushed far into the future. I got by maintaining vehicles and tractors in a pole barn I built, which isn’t much fun with 5-month winters in big snow country.

Approaching retirement, I got serious about adding a garage and shop to our property and began designing my dream garage. I’ll document that build in this thread.
 
Last edited:
To avoid these ads, REGISTER NOW!
OP
R

R_C

Well-known member
Joined
Mar 6, 2018
Messages
150
Location
Wyoming
Intending that someone would build the complete garage, I began designing what I wanted. I am a software guy, so I learned SketchUp (free at the time) to 3D model the garage. I started with the footprint by putting our vehicles and popup camper in the model with enough room for a decent shop. I came up with 32 ft. deep by 34 ft. wide. Here’s my footprint model.
SketchUp1.jpg

Next, I added clerestory windows for more light, and a covered porch for messy outdoor work. Below are images showing what I came up with. Sketchup allows you to put things on layers so you can turn them on and off. Turning the roof layer off gives a nice look inside.
SketchUp2.jpg
SketchUp3.jpg

A neighbor built his shop with structural insulated panels (SIPs). The more we talked and I researched, the more I liked the SIP concept, including the fast construction and energy-efficiency which is nice in our climate. I called two SIP manufacturers. The one my neighbor used was willing to do the engineering for our snow load and they could create their construction drawings from my dimensionally-accurate SketchUp drawing. And they recommended a contractor who did most of their projects in my region. I initiated all of this in December/January hoping that was enough lead time for July/August construction. I was wrong.

The contractor thought my project would work perfectly with his schedule since his current job in the region would be wrapping up by June. After speaking with him, he said he would stop by. He didn’t. After calling again, he said he would stop by. Again, no show. I called, left messages, and sent emails. Nothing. By now it was March. I began calling every contractor I could find, every contractor my wife knew, and every contractor referral we could get. No one was available or interested.

We live in the most rural county in the state. But we border the most affluent county in the country (that’s right country). So, most contractors in the region are busy building McMansions and have no interest in small projects like my garage. So, just like the house I had to build myself 25 years ago, I had no choice but to build again myself. Ugh!
 
Last edited:
OP
R

R_C

Well-known member
Joined
Mar 6, 2018
Messages
150
Location
Wyoming
I really wanted someone to do the whole project. Since that was not going to happen this year, I resolved to do it myself. I needed someone to do the concrete work and someone to assemble the SIPs. I could take over from there.

I left voice messages with three concrete contractors in the region. No response from any of them. I persisted and finally got one to answer their phone. Their response was “Oh. We don’t do work in your county.”

One of the few general contractors who actually returned my call said he was booked for two years. I asked him who did his concrete work and he gave me two names. I left voice messages with both and one returned my call. He came to my house, looked at the site and the plans, and gave me a quote in a couple of days. This was late March and he agreed to start in late May or early June after the ground dried out from the snow melt. Looks like I will be under way.
 

GlennSullivan

Well-known member
Joined
Mar 15, 2006
Messages
345
Location
Yorktown, NY
That construction is very interesting. I do have questions about it

I'm assuming the panels are shipped in a modular fashion and since they come complete with inner and outer walls and insulation, how are the mechanical components installed? This would include but not limited to:
Electrical wiring, including boxes for switches outlets and lighting
Low voltage wiring
Plumbing
HVAC Ducting
 
OP
R

R_C

Well-known member
Joined
Mar 6, 2018
Messages
150
Location
Wyoming
That construction is very interesting. I do have questions about it

I'm assuming the panels are shipped in a modular fashion and since they come complete with inner and outer walls and insulation, how are the mechanical components installed? This would include but not limited to:
Electrical wiring, including boxes for switches outlets and lighting
Low voltage wiring
Plumbing
HVAC Ducting
The SIPs I used are just two sheets of 7/16" OSB bonded to the closed cell EPS foam core. In my case, the only thing pre-installed in any panels, was the Romex in a couple of the roof panels for lights and garage door openers. All wall panels have vertical and horizontal chases to pull your own electrical. If you follow this thread, you will see that the electrical was a real pain. In SIP home construction, there are attics and basements/crawl spaces to help with the mechanicals. My garage has a slab floor and no attic since the SIP panels are the roof. I used hydronic heating in the slab and I have no plumbing so electrical was my only challenge.
 
Last edited:
OP
R

R_C

Well-known member
Joined
Mar 6, 2018
Messages
150
Location
Wyoming
I still had lots of details to work out with the SIP manufacturer including snow load. Our county has no building inspectors so you can’t call a building department and ask for snow load figures. When I built our cabin, I just winged it. I used a 12/12 pitch metal roof with 2x8 rafters, expecting the snow to slide off the roof. It does, and that roof has never had any problems. We did have some engineering on the real house. Again, we used a 12/12 pitch metal roof, 2x12 rafters, and a couple of 6x30 glue lam beams supporting the rafters. The snow also slides off that roof.

The garage would have a 3.5/12 pitch metal roof similar to my pole barn. The snow doesn’t slide off the pole barn so I wanted to make sure the garage could handle the load. My wife used to work for an engineering firm so she dug around and came up with a web page at the Univ. of Wyoming that showed how to translate snow water equivalent (SWE) into roof snow load.

Here goes. SWE in inches times 5.2 equals ground snow load in lbs/ft2. Ground snow load times 0.7 equals roof snow load, which implies some of the snow is going to melt or blow off the roof. Got it. But where do I find SWE for my location?

The USDA’s National Water and Climate Center maintains a network of automated Snow Telemetry (SNOTEL) sites in remote, high-elevation watersheds in the western US to monitor snowpack, precipitation, temperature, and other climate data. One of these SNOTEL sites is about 8 miles from my house at about the same altitude. I grabbed the historical data from that site shown below and sent it to the SIP manufacturer’s engineer.

Snotel SWE.png

The engineer used the highest SWE of 27.9” in the data for 145 lbs/ft2 ground snow load, which he rounded up to 105 lbs/ft2 roof snow load. That’s the snow load my garage is designed to hold.
 
OP
R

R_C

Well-known member
Joined
Mar 6, 2018
Messages
150
Location
Wyoming
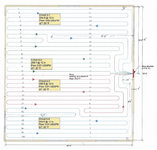
My neighbor used hydronic radiant heating in his shop floor. And he convinced me to do the same. It’s efficient and you can use any energy source to heat the glycol. I planned to use propane. I found a company in Idaho that did the calculations and provided the output of their CAD software showing the total heating load, tube layout for the slab, and recommended propane boiler for the load. We talked about using different zones for the garage and shop areas but I decided that was unnecessary. We used a single zone with four circuits. Here’s the tube layout.

PEX tub layout.png

I found an Idaho source for the under-slab insulation panels that accept the PEX tubing. The total number of panels needed would not fit in a pickup bed so on the way to the manufacturer I stopped and bought a 14 foot utility trailer that I would need for this project anyway. I picked up the insulation panels and PEX tubing and stored them in the pole barn. I was now ready for concrete. Here are the panels I used.

EZ Floor.png
 
OP
R

R_C

Well-known member
Joined
Mar 6, 2018
Messages
150
Location
Wyoming
A month before he began the concrete work, I asked the contractor if he knew anyone who could help me put up the SIPs. He said they occasionally did framing work and once did a SIP project so he gave me an hourly rate for him and his crew of two and his boom truck. He also had equipment to unload the SIPs and steel when the shipment arrived. I was now ready for construction.

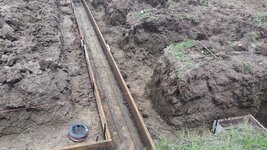
When I built my cabin and house I drew up my own electrical plans after lots of reading of the NEC and other library sources. Since they were supplying all the hardware, the electrical supply company reviewed my plans and made suggestions. Not anymore. Either lawyers or insurance now prevent them from providing that service. So I had another neighbor who is a licensed electrician review my garage electrical plan. Just like I did for the cabin and house, I paid for a permit and electrical inspection from our state’s electrical inspector. If you are doing your own electrical, a passed final inspection certificate is good to have for insurance. The state electrical inspector who covers my county was awesome. She welcomed any questions I had and recommended a ufer ground for the garage and came out to inspect before the pour. Here’s what she saw and approved.

Ufer ground.jpg

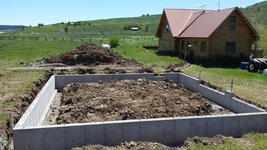
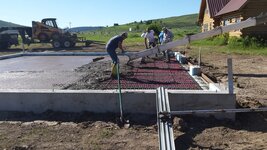
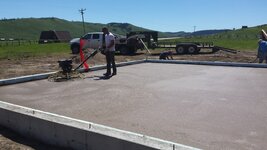
And here are pictures of the footer, sono tubes, and foundation wall pours.

Footer1.jpg
Foundation walls.jpg
Foundation.jpg

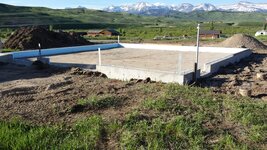
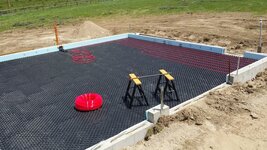
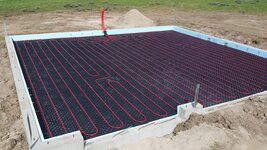
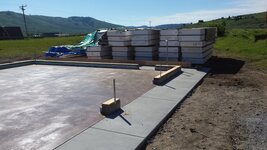
In the picture above, you can see the electrical trench I dug by hand. Next, the contractor prepped for the slab then I laid the insulation panels and ran the PEX tubing.

Foundation2.jpg
EZfloor1.jpg
EZfloor2.jpg
EZfloor3.jpg
 

Firebrick43

Well-known member
Joined
May 12, 2015
Messages
14,399
Location
West central Indiana
what a stunning backdrop!

Quick question - why no external insulation around the footers? I thought that helped with frost heaving and heat loss from the hydro floor?
You can put it on the inside like he did without issue on the side walls. No requirement with traditional footers for the outside of the wall to be insulated., as the footer is below the frost line.

Your thinking a shallow frost protected foundation which this is not.
 
OP
R

R_C

Well-known member
Joined
Mar 6, 2018
Messages
150
Location
Wyoming
what a stunning backdrop!

Quick question - why no external insulation around the footers? I thought that helped with frost heaving and heat loss from the hydro floor?
Yes, our view is stunning, and we never take it for granted.

As Firebrick43 pointed out, the footer is below the frost line. The 2" insulation on the inside of the stem walls and the insulation panels under the slab are there to insulate the slab. Realistically, we really don't have any frost because the depth of our snowpack is a great insulator. There may be some frost in the early fall. But we have snow on the ground around Halloween and it is here until late April or early May. Right now, we have about 4 feet of undisturbed snow on the ground. I am skiing over buckrail fences that are chest high.
 
OP
R

R_C

Well-known member
Joined
Mar 6, 2018
Messages
150
Location
Wyoming
The SIP shipment arrived about a week after the concrete work was completed. The concrete contractor arrived with equipment to unload the flatbed semi trailer. The forklift just barely managed to unload the two steel I-beams the engineer added at my request to eliminate any interior columns. The load included all the lumber, fasteners, sealant and other supplies required to assemble. When the contractor and I agreed to start assembling the SIPs the following week, I handed him the manufacturer’s instruction manual. He chuckled and said that was my job.

The SIPs are not loaded on the trailer in any logical order and wall and roof panels were mixed within stacks. Every panel is numbered to identify its assembly order. So that I wasn’t paying the crew to sort through stacks of panels, I spent a day or two, sliding panels off one stack then up to another to get them in assembly order. It was a big puzzle and a lot of work solo, but it saved time during assembly. Here are some of the stacks of panels after delivery.

SIPs delivered.jpg

So that I was prepared when the crew arrived on Monday morning, my wife and I assembled the first wall over the weekend. The wall panels are bulky but not that heavy. I used a dolly to roll them across the slab. The foundation prep is simple. First rip the treated sill plate to the full width of the wall panel and secure to the foundation. Next, rip the 2x top plate to the width of the panel’s inner foam (panel width minus thickness of the two OSB sheets). Center and secure the top plate to the sill plate. When the panels are placed over the top plate, the OSB slides down and rests on the sill plate. The panels can then be slid horizontally to lock into the adjacent panel. Special sealant is applied between panels and the panels are secured with nails every 6”. Here are images of the first wall going up. Note the three horizontal chases for electrical in the foam in the picture below.

First wall1.jpg
First wall2.jpg
 
OP
R

R_C

Well-known member
Joined
Mar 6, 2018
Messages
150
Location
Wyoming
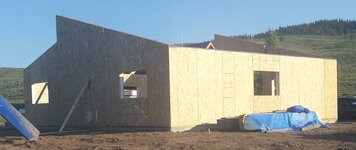
When the crew arrived the following week, I was ready. Since I was working with them, I didn’t have much time for pictures. We finished assembling the entire structure in three days. Here are a few pictures showing the completed walls at the end of day one.

Walls1.jpg
Walls2.jpg

The two 32 foot i-beams arrived without fastening holes. I had to drill four ½” holes in each end for a total of 16 holes. Here is the installation of the first i-beam. The wall panels containing the support columns for the beams were very heavy requiring the boom truck for installation.

Beam.jpg

I had to cut and assemble a 36-foot 3-ply beam from 2x10s that spans the five 6x6 porch posts that you see here supporting the porch side roof panels.

Lower roof1.jpg
Lower roof2.jpg

At the manufacturer’s recommendation, I cut a hole in a 6” diameter ¼” steel plate and welded a ¾” hex nut to the plate. We used that plate and an 18”x3/4” eye-bolt to install each roof panel by drilling a hole through the center of the panel, inserting the eye-bolt and securing the plate. Each roof panel was easily lowered into place with the boom truck. Later, I filled the panel holes with the expanding foam supplied. Here are pictures showing the second i-beam supporting the lower roof panels and the clerestory wall.

Clerestory wall1.jpg
Clerestory wall2.jpg

In the picture above you can see the Romex for lights and door openers attached to four of the upper roof panels yet to be installed. The previous picture with the two i-beams, shows one of the issues that I did not catch in the drawings. The i-beam on the left that supports the upper roof panels, is 6 inches higher than the i-beam on the right. Additional blocking above the beam could have put both i-beams at the same height. Although I haven’t done it, I may add storage between the two i-beams and it would have been much easier and cleaner if they were at the same height. Had I been more alert, I should have caught the problem in the wall roof section drawing below.

Wall roof section.png
 
OP
R

R_C

Well-known member
Joined
Mar 6, 2018
Messages
150
Location
Wyoming
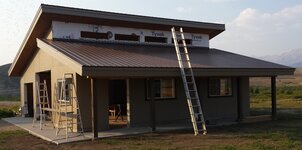
It took me and the 3 to 4 man crew only three days to assemble the structure. Now it was all mine to finish. Here’s what it looked like as I got started with the fascia.

Exterior1.jpg

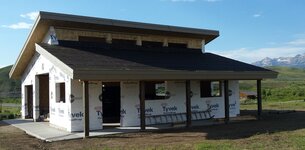
I have been maintaining a log home for over 30 years. I didn’t want to add garage exterior maintenance to the list so I opted for pre-finished LP SmartSide panels and trim with cedar texture. They are not cheap but this is my dream garage! I ordered the metal roofing from my lumber yard using the same color and manufacturer I used on our log cabin and home. Just as I did on our house, I used 30# felt under the metal. I’ve since learned there are newer alternatives but I’ve never had any problems

Exterior2.jpg

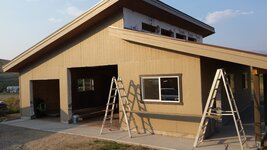
The LP SmartSide panels are 4’x9’, which worked out nicely for my 8.5’ walls. They also have lap joints on the vertical edge but I didn’t want to see those joints and I wanted to mimic the board and batten look on our pole barn so I used their 1x2 trim for the battens. I also used their trim for the windows and doors.

Exterior3.jpg
Exterior4.jpg
Exterior5.jpg

I am pleased with the results. Here, I only have the man door and garage doors to install to be weather tight.

Exterior6.jpg
 
OP
R

R_C

Well-known member
Joined
Mar 6, 2018
Messages
150
Location
Wyoming
Here is the almost complete exterior. I just need to install the lights and cover the beam on top of the porch posts with cedar.

Exterior7.jpg

Now on to the interior and my biggest complaint with building with SIPs: electrical. I think electricians must hate working on SIP jobs. My neighbor, who convinced me of the wonders of SIPs (from the same manufacturer), just surface mounted Romex on the interior OSB walls of his shop. I doubt that would pass inspection and didn’t want that look in my garage.

As I mentioned earlier, in SIP home construction there are attics, basements, crawl spaces, and interior walls to help run the electrical. I don’t have any of those in my garage, so pulling wires was a challenge and the SIP manufacturer made it more difficult. First, the wall panels have three horizontal chases shown in the panel drawing below.

Wall panel dimensions.png

I assume these chase heights would be for normal wall outlets, countertop outlets, and wall lights or smoke detectors. The manufacturer had all of my doors and windows in their construction drawings as well as the six inch foundation curb above the slab. I put all of the many wall outlets at countertop height, so I would be relying on the center chase. I think they just forgot the six inch curb. So instead of the chase being below the window openings, here’s where it is and my workaround. I had sheet metal U-channel fabricated for the window sills so I don’t put a nail or screw through the wire.

Electrical1.jpg

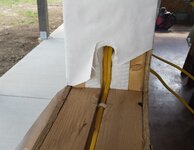
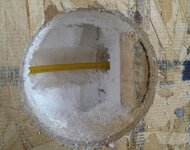
Often it was impossible to push or pull Romex through multiple panels. Stumped, I got out the hole saw to investigate the problem and here’s what I found in the foam at a panel junction. Both panels are sitting firmly on the sill plate. It may be difficult to see in the picture but the 1 ¼” chases are offset by ¾”. I ended up using the hole saw many times.

Electrical2.jpg

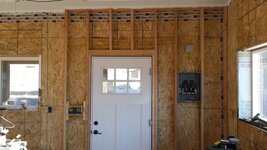
The location of my subpanel was on my electrical plan the manufacturer used. I don’t know how the existing chases would accommodate the wires from the panel. Most of the circuits had to be run by crossing the man door. There was only one chase above the garage doors and that one was a real challenge pulling wire for the outside lights. So I built a 2x4 wall to distribute the wires.

Electrical3.jpg

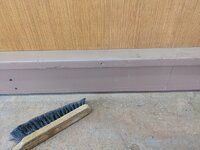
The subpanel is on the south wall and I had to pull wires to all four walls. Pulling wires through corners is particularly challenging. Getting to the north wall meant pulling through two corners. After too many chase miss-alignment issues at panel junctions, I made my own chase in the exposed blue board against the curb. I used that chase for some of the longer wire runs. The early sketch below shows how I covered the blue board and the picture shows the final result. The 1x trim is screwed to the curb and I kept it off the slab so it is unaffected when I hose the floor. The 2x cap is screwed to the sill plate so I didn't need the aluminum angle sketched.

Blue board sketch.png
Blue board finish.jpg

I did all the electrical in our cabin and home and, unlike plumbing, I enjoy the work. The electrical work for this project was challenging and slow.
 
To avoid these ads, REGISTER NOW!

RyanE

Well-known member
Joined
Feb 4, 2013
Messages
201
Location
Golden, BC
Great build!

I really like the SIP concept. With a 6 person crew, it looks like you could go from foundation/slab stage to lockup in a week or less. Amazing.

I will be following.
 
OP
R

R_C

Well-known member
Joined
Mar 6, 2018
Messages
150
Location
Wyoming
Great build!

I really like the SIP concept. With a 6 person crew, it looks like you could go from foundation/slab stage to lockup in a week or less. Amazing.

I will be following.
Thanks. I like how efficient they are and how quick to build. The materials are probably more expensive than conventional framing. But quick construction may offset the cost.
 
Last edited:
OP
R

R_C

Well-known member
Joined
Mar 6, 2018
Messages
150
Location
Wyoming
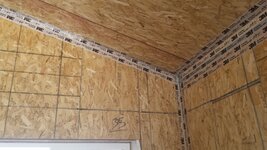
On to the interior finish. According to the manufacturer, all interior panel seams must be taped with one of the tapes provided (4”, 6”, and 12”). My understanding is that SIP failure is most often caused by moisture infiltration, which the tape prevents. The picture below shows me just getting started.

Seam tape.jpg

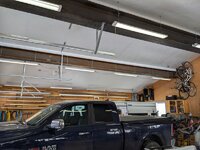
I read lots of posts on GJ about finishing OSB. I decided to paint the ceiling and cover the walls. As others warned, it took many coats to get an acceptable look. The paint did a pretty good job covering the seam tape. I rented a lift to paint and install the lights. I should also do something to the steel.

Ceiling.jpg

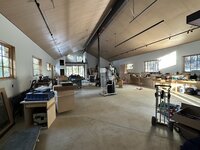
For the walls, I used 4’x8’ sheets of 5mm RevolutionPly from Lowes. I stained the sheets then glued and stapled to the OSB. I still have the clerestory wall to finish.

Interior1.jpg
Interior2.jpg

I have put the excess LP SmartSide trim to good use. Here you can see how I’ve used it to trim benches and shelves and used it for drawer fronts.

Interior3.jpg
 
OP
R

R_C

Well-known member
Joined
Mar 6, 2018
Messages
150
Location
Wyoming
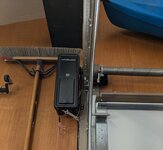
I have never owned let alone installed a garage door and opener. During my inadequate planning I read up on door openers and included ceiling outlets in the proper location for the two openers. Only after the structure was up did I realize how unsightly all that bracketing would be to hang the openers and they would be in the way when the doors are closed. Then I learned about wall-mount openers, which is what I used. I still put the opener-activated lights on the ceiling but that means the 20A circuit I installed just for the openers is now only used by two lights. Maybe I should put a couple of retractable drop lights in those ceiling outlets to feel better.

Opener.jpg
 
OP
R

R_C

Well-known member
Joined
Mar 6, 2018
Messages
150
Location
Wyoming
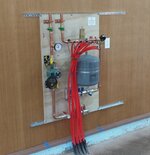
The Idaho company that did the tube layout for the radiant floor also offered to build a hydronic panel. I took them up on the offer thinking I only needed to buy and install the boiler they recommended.

Hydronic panel.jpg

Have I already mentioned I don’t like plumbing? I’ve done a lot, I’m slow, don’t enjoy the work, and really did not want to do propane plumbing. I was saved when I downloaded the installation instructions for the boiler, an expensive item, and learned that the warranty is void if not installed by a licensed tech. Enough said. I called a plumbing contractor, they came out, looked at the panel and heat load calculations, and said while they would have done the panel differently they could make it work. They’d get back to me with a proposal. Never heard from them again. I left multiple voice messages and emails with no luck. Huh?

I called three more HVAC/plumbing shops and left voice messages. One returned my call, said they could do the job so I emailed a picture of the tubes before the slab pour and the two-page CAD output with heat load and tube layout. Never heard from them again. Huh?

Meanwhile, I had my propane supplier deliver a new tank and I hand dug the 15 foot trench from tank to garage. All I needed was a boiler and someone to install. No luck. It was now December with plenty of snow on the ground so I gave up. I covered the trench with plywood. My dream garage would have no heat for the first winter. At least our vehicles were out of the weather.

The following spring, while waiting for recall work on my truck, I biked around an industrial park I had never explored. When I noticed an unfamiliar to me plumbing contractor, I popped in and asked if they could install a propane boiler in my garage. They said they could, I emailed the same info I sent all the others, and they actually called back with a quote and scheduled a summer installation. Woo hoo!

Installation day arrives. Installer: “Where’s your condensate drain?”. Me: “What’s condensate and why do I need to drain it?”

In all the reading, researching, ordering, and preparing for this project, I knew nothing about condensing boilers. GJ helped me out a lot, but sometimes you have to know where to look and what questions to ask. My bad!

Me: “Can’t I run the condensate into a five gallon bucket?” Installer: “Mid-winter, that will fill in a few days!”

Got it. There was no way I was going to drill through the slab. We talked about running a drain through the wall, but that would require heat tape or some way to prevent freezing. You can see my solution below. I added the condensate acid neutralizer and run the condensate into a 30 gal. drum. About once a month, I stick a hose out the window and turn on a pump that empties the drum. The task is my penance for the blunder.

Boiler.jpg
 
OP
R

R_C

Well-known member
Joined
Mar 6, 2018
Messages
150
Location
Wyoming
You have a very nice looking shop, I like the roof line you chose. I hope you enjoy it!
Thanks. I wanted a covered outdoor work space. When I showed my wife my initial sketch with a porch that just wasn't working out, she jumped in and added the clerestory. So, she gets the credit for the final roof line.
 
OP
R

R_C

Well-known member
Joined
Mar 6, 2018
Messages
150
Location
Wyoming
IMG_2550.jpeg
I’m a big fan of the RevoPly. What did you use for a finish? I did a spray poly and I’m not in love with the results. Your’s has a great tone to it.
Nice shop!

I used Messmer's U.V. Plus stain, either their Natural or Natural Cedar color. I didn't like the pink tones in the unfinished RevolutionPly. With just one coat, the Messmer's stain produced a nice result.
 
Last edited:
OP
R

R_C

Well-known member
Joined
Mar 6, 2018
Messages
150
Location
Wyoming
Garage lights.jpg

For over 25 years, my wife parked her car in the pole barn. She left for work in a cold car. When it was below zero (-20F to -40F is common in winter), I would plug in the block heater so the car would start and she’d get heat a little more quickly. My vehicles were in the weather, requiring lots of snow removal. And any woodworking or wrenching on vehicles or tractors was done in the weather or in the pole barn.

But now we are civilized. Coming up the drive and pushing a button in the vehicle to open the garage door and turn a light on is just luxury! HomeLink? Who knew?

Sometimes I regret not building sooner. But building earlier in our careers and finances would have resulted in a lesser garage and likely without a dedicated shop space. This garage and shop was worth the wait.

I hope my experience helps someone with their build. Thanks for following along!

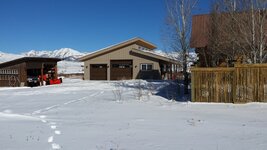
House garage barn.jpg
 

thammel

Well-known member
Joined
Oct 3, 2005
Messages
2,259
Location
Maryland
Great post! I'm with you on wishing we could have done these things earlier.....finances are a reality for most of us!
 

paulsomlo

Well-known member
Joined
Jul 16, 2013
Messages
3,949
Location
Northern Colorado
Very nice job, @R_C - the one thing I would have done differently, would have been to run emt and surface mount all the electrical, for accessibility and expansion.
 
OP
R

R_C

Well-known member
Joined
Mar 6, 2018
Messages
150
Location
Wyoming
Thanks everybody for the comments. I will post if I make any improvements. Not sure if this counts as an improvement, but I’ve agreed to build my wife a 160 sq.ft. standalone garden shed/studio this summer to reclaim the 9 sq.ft. of shop currently occupied by her gardening bench. I mean, really. A guy needs his shop space!
 
To avoid these ads, REGISTER NOW!
Top Bottom