To avoid these ads, REGISTER NOW!

What did you do "IN" your garage today?

To avoid these ads, REGISTER NOW!

rd65

Well-known member
Joined
Sep 29, 2017
Messages
2,841
Location
Granite Falls, WA
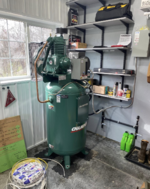
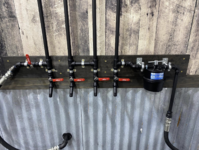
Thanks to a friends help with the wiring and plumbing the Transair lines, I finally have compressed air.

The compressor was delivered about two months ago, but due to a multitude of reason, we just got it wired and hooked up this evening.

Makes 24cfm @ 175psi. Fills the 80 gallon tank from empty to 170psi in about 4 minutes.

No leaks in my redneck cooler/water separator, the Transair plumbing or the three regulator/filters at each drop.

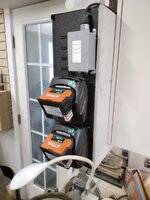
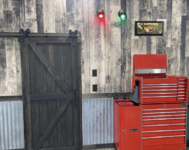
The green light on the exterior of the tool room tells you the compressor is energized, the red one tells you the Milwaukee and Dewalt chargers are energized so I don’t forget to turn them off at the end of the night.
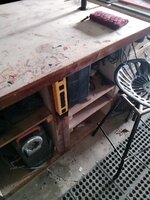
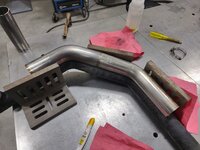
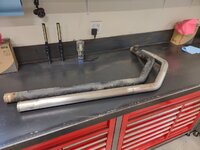
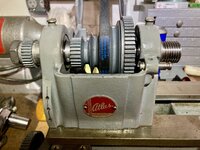
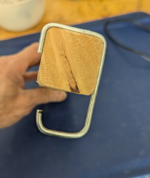
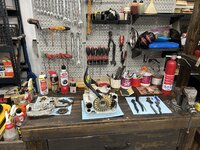
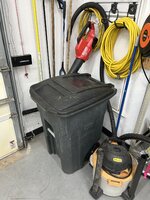
Screenshot 2025-04-01 at 6.21.40 PM.pngScreenshot 2025-04-01 at 6.21.51 PM.pngScreenshot 2025-04-01 at 6.22.02 PM.pngScreenshot 2025-04-01 at 6.22.13 PM.png
Thought I recognized that sidebox.
 

Attachments

  • Screenshot 2025-04-01 201338.png
    Screenshot 2025-04-01 201338.png
    2.9 MB · Views: 38

cannuck

Well-known member
Joined
Nov 30, 2021
Messages
4,662
Location
Rural SK
I have had a diamond face tool finishing grinder sitting on workbench between lathes for decades. Many years ago, it tripped a breaker - but I had been switching to insert tooling wherever possible so just let it sit. Needed to grind a bunch of brazed insert boring bars (for indexing head) and sure with I had the finishing tool working, so took it apart yesterday. It was a shop made box using 1/4" aluminum plates with countersunk 1/4 UNC socket head screws that were a bear to get apart with tiny hex keys (had to heat!!). I assumed they were threaded into the aluminum angle frame beneath, but they had nuts, hex one side and 90 degrees apart squares since the builder didn't think about them colliding inside - where they were nearly inaccessible. Must have been an apprentice project, as full of fiddly details. Originally a V belt drive with tensioning system but at some point made into timing belt with locked centers. I found the problem was within the original power cord the insulation on individual wires had totally decayed and allowed short to ground (it actually HAD a ground circuit - surprising for the time). Tapped the frame holes to 5/16 UNC as access to replace nuts was...well...NUTS! Extremely satisfied to return a very old but very good tool (adjustable angle table with feed groove) to useful service.
 

Copymutt

Well-known member
Joined
Sep 3, 2016
Messages
3,408
Location
Colorado
Gravity *****
Yes, it takes a systemized approach to avoid “Garbage”.
I do collect and cash in aluminum cans & have done so for decades, occasionally smelting them down for casting. As for the odiferous kitchen waste, the neighbors chickens devour all of that w/ relish. So no organics go into the compactor. If it weren't for the chickens I would build a small compost pile.
 

LeeG

Well-known member
Joined
Nov 29, 2012
Messages
1,532
Location
Phoenix, AZ
My neighbor came over while I was puttering around in my garage and asked if I'd check his hot water heater. Disconnected power and removed the leads, and the lower element had a dead short. Drained the tank, replaced the elements, and back up and going in less than an hour.
 

Brent T

Well-known member
Joined
Sep 29, 2018
Messages
459
Location
Arizona, USA
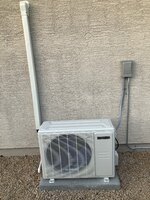
Over the last couple weeks I (with skilled help) installed a mini split in my garage.
IMG_5284.jpeg
IMG_5285.jpeg

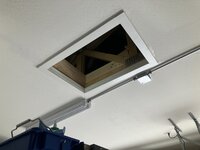
Today I finished the access hatch into the garage attic.
IMG_5290.jpeg

Insulation still needed in the attic.
Looks great! I insulated my garage and installed the mini-split here in Phoenix a few years back and it was a game changer. Only issue I've had is the plastic line cover on the outside of the garage melted in the extreme heat and doesn't look so great now. Still haven't decided what to do about that.
 

Jgaz

Well-known member
Joined
Dec 16, 2016
Messages
1,712
Location
AZ
Looks great! I insulated my garage and installed the mini-split here in Phoenix a few years back and it was a game changer. Only issue I've had is the plastic line cover on the outside of the garage melted in the extreme heat and doesn't look so great now. Still haven't decided what to do about that.
Thanks. Time will tell on the line cover. It’s sure going to get a test as it gets the full blast, west, summer sun. I don’t know what kind of plastic it is but I always paint any plastic out here and it seems to help especially when the material is PVC
 

bulletpruf

Well-known member
Joined
Nov 28, 2013
Messages
11,137
Location
San Antonio
Spread out a bunch of receipts from my Alfa GTV build on the garage floor to take pics for the Bring a Trailer Auction.

Did some minor cleaning on Stihl MS660 bits; still waiting for parts to arrive so I can reassemble.

Cleaned and categorized nuts, bolts, etc., from a coffee can that's been waiting to be categorized for a decade or two.

Busted out the Work Sharp Ken Onion II and sharpened two Fiskars axes, a Fiskars maul, a machete, and a hatchet. Took about 15 minutes total.
 

kaymccampbell

Well-known member
Joined
Feb 27, 2015
Messages
29,626
Location
Upstate New York
what kind did you get?
Like most of my small yardwork machines, Stihl. I chose the MSA-70, as it uses the same battery lineup as the Kombi unit I purchased a couple years ago. It's about as quick as my MS-170, with none of the noise, vibration, or stink. We'll see how it does over the long term.
 
To avoid these ads, REGISTER NOW!

Snip's

Well-known member
Joined
Apr 29, 2017
Messages
1,867
Location
Ohio
Today I put in 2 new Timken bearings 4 new bearing dust covers, a new spindle in the headstock and a new Goodyear belt...
There was evidence Bubba Jr. went at the spindle with a file where the bearings sit...
Probably an attempt by the PO to reduce the shaft so the bearings would slip on without using a press for the install...
There was also hammer marks on the spindle, which is a no-no...
All the Zamak gears spent some relaxing time in the ultrasonic tank with a bit of HF degreaser...
Timken bearings have been well lubricated now with SAE 20 ND oil...
I have a length of 1/4" diameter felt rod that will be cut to 1/4" pieces and inserted into the two Gits to filter the lube...
The world is all better now...
IMG_4736 2.jpg
 

cody1325

Well-known member
Joined
Apr 17, 2024
Messages
1,117
Location
Southwest Virginia
Organization--big time.

Various jobs here and there resulted in my maybe 10 lb. hand box ballooning to 30 pounds worth of "better grab the steel Craftsman" it was supposed to replace. I had actually overloaded the little Old Pal cantilever tackle box that's my hand box for most chores, to the point that it was starting to stress the spill-proof latch rivets.,

Thus, it got pared down to just the basics and the stuff divvied up between the three chests in the basement, garage, and farm shop. Stupid to have such a heavy box when I have three 20-inch Craftsman top and bottom chests (one pair each in the garage, shop, and basement), a ton of old cabinets in the basement workshop, plus a fair bit of pegboard space.

Built a toolbox for the UTV using a spare Plano Sportsman's trunk. Put my PPE in there (hard hat, saw chaps, safety glasses, some cheap work gloves, couple pairs of ear plugs), and used a plastic Stack-On toolbox to hold the tools. Put my fencing tools, chainsaw stuff, a handful of zip ties, and a basic assortment of "oh ****" stuff for jobs away from the house in it. The trunk is decently waterproof and should keep water out. Definitely better than blowing a hundred bucks on a Montezuma. I also added a tarpaulin (ventilation curtain material) toolbag Granddad used in the mines to hold stuff like T-post clips, brace wire, and rebar tie wire. '

Put the new Tekton Torx set in the basement. Going to soon be joined with the Phillips/slotted set. The Mac drivers went in the basement as well, with the mixed breed of leftovers (save for one Williams screw-starter PH2 that I'm always using since magnets drop screws) going in the garage and/or shop. The household box now only has a Megapro.

Finally got my SAE wrenches in the garage organized. Ended up with enough extras to have a good start on sets for the farm shop and basement. I mostly stuck with SK, Craftsman, and Blackhawk, with Action/Thorsen going in the basement. Need to pick up a 1 1/8 SK or Proto from the mine supply for hitch balls.


Down to just the basics now for the "upstairs" box, and I'll get the Trusco "Mountain" box for them, as I really don't like fussing with tool rolls, and I really am not the biggest fan of plastic toolboxes.
 
Last edited:

ssjones

Well-known member
Joined
Mar 19, 2007
Messages
213
Location
Covington, Louisiana
My daughter brought her 2017 VW Jetta over last night, her brake light was on. 61K on the car. I told her to pick up some front pads and brake fluid. Pulled the front wheel, those brakes were fine. Pulled the rear wheels, yep, those pads very thin. I hadn't worked on a VW since 1984 (Golf Diesel). I sent her for those pads, while I pulled the caliper. As soon as I had the caliper off, I knew a tool was needed. I called her to grab a brake caliper repair set loaner, but she'd already left the store. I put the wheels back on to finish the job today while she was working.
Today I used the tool to wind in the piston, but it was difficult to get it turning. I hit it with more brake cleaner, came back and it screwed in easily, installed new pads and put the wheel back on. On the drivers side, not so lucky. The piston wouldn't budge, even after cleaning. I kept trying to screw it in, but only managed to slightly bend the support plate on the tool. Now, the tool was wedged in place. I opened the bleeder valve, but that didn't help. The reverse position from the other side made it impossible to get leverage with a wrench to unscrew it. I considered cutting the tool,but she would have lost $70 on the loaner set. I googled the problem and the VX Vortex showed a lot of similar issues. One guy pulled the caliper, so I did the same, mounted it in my vise and then removed the tool. The piston then easily screwed in by hand. Put it all back together and drove it back to her house. Yikes, wasn't expecting to spend three hours on rear brakes!
 

Prospecter

Well-known member
Joined
May 16, 2015
Messages
2,446
Location
Maine
My daughter brought her 2017 VW Jetta over last night, her brake light was on. 61K on the car. I told her to pick up some front pads and brake fluid. Pulled the front wheel, those brakes were fine. Pulled the rear wheels, yep, those pads very thin. I hadn't worked on a VW since 1984 (Golf Diesel). I sent her for those pads, while I pulled the caliper. As soon as I had the caliper off, I knew a tool was needed. I called her to grab a brake caliper repair set loaner, but she'd already left the store. I put the wheels back on to finish the job today while she was working.
Today I used the tool to wind in the piston, but it was difficult to get it turning. I hit it with more brake cleaner, came back and it screwed in easily, installed new pads and put the wheel back on. On the drivers side, not so lucky. The piston wouldn't budge, even after cleaning. I kept trying to screw it in, but only managed to slightly bend the support plate on the tool. Now, the tool was wedged in place. I opened the bleeder valve, but that didn't help. The reverse position from the other side made it impossible to get leverage with a wrench to unscrew it. I considered cutting the tool,but she would have lost $70 on the loaner set. I googled the problem and the VX Vortex showed a lot of similar issues. One guy pulled the caliper, so I did the same, mounted it in my vise and then removed the tool. The piston then easily screwed in by hand. Put it all back together and drove it back to her house. Yikes, wasn't expecting to spend three hours on rear brakes!

You're a good Dad.
 

Snip's

Well-known member
Joined
Apr 29, 2017
Messages
1,867
Location
Ohio
Welp...Today I wrestled the Tanker desktop from the garage (where I disassembled the desk) up the narrow stairwell to my "new to me" office... I got two of these Tanker desks from a business that was closing and if I could get them gone they were mine... even got the keys...
IMG_4739.jpg

Spent the better part of the day bolting the top down, deep cleaned the desk with Pine Sol and lubed all the drawer rollers...
Found my old fluorescent desk lamp that fortunately still works...
The desk top is some kind of rubber, kind of mildly soft, maybe a early vinyl (not linoleum)...
Love the SS corner protection detail...
IMG_4738.jpg

Finished... For now... Next week I'll start on the second Tanker Desk... Rinse and repeat...
IMG_4737.jpg
These things are really built well... If you ever get the opportunity of snagging one, grab it...
I can't find any date of manufacture, but I'm guessing mid century modern 50's-60's maybe...
I think they were the de rigueur secretary desk for the office work force... I think the military used a bunch of these...
 

ararat

Well-known member
Joined
Dec 27, 2018
Messages
601
Location
Ararat NC
Welp...Today I wrestled the Tanker desktop from the garage (where I disassembled the desk) up the narrow stairwell to my "new to me" office... I got two of these Tanker desks from a business that was closing and if I could get them gone they were mine... even got the keys...
IMG_4739.jpg

Spent the better part of the day bolting the top down, deep cleaned the desk with Pine Sol and lubed all the drawer rollers...
Found my old fluorescent desk lamp that fortunately still works...
The desk top is some kind of rubber, kind of mildly soft, maybe a early vinyl (not linoleum)...
Love the SS corner protection detail...
IMG_4738.jpg

Finished... For now... Next week I'll start on the second Tanker Desk... Rinse and repeat...
IMG_4737.jpg
These things are really built well... If you ever get the opportunity of snagging one, grab it...
I can't find any date of manufacture, but I'm guessing mid century modern 50's-60's maybe...
I think they were the de rigueur secretary desk for the office work force... I think the military used a bunch of these...
I had one as my desk once upon a time. I really liked it. Definitely lives up to the "tank" name.
 

Wiz02

Well-known member
Joined
Jul 13, 2007
Messages
2,399
Location
Southeastern PA
Welp...Today I wrestled the Tanker desktop from the garage (where I disassembled the desk) up the narrow stairwell to my "new to me" office... I got two of these Tanker desks from a business that was closing and if I could get them gone they were mine... even got the keys...
IMG_4739.jpg

Spent the better part of the day bolting the top down, deep cleaned the desk with Pine Sol and lubed all the drawer rollers...
Found my old fluorescent desk lamp that fortunately still works...
The desk top is some kind of rubber, kind of mildly soft, maybe a early vinyl (not linoleum)...
Love the SS corner protection detail...
IMG_4738.jpg

Finished... For now... Next week I'll start on the second Tanker Desk... Rinse and repeat...
IMG_4737.jpg
These things are really built well... If you ever get the opportunity of snagging one, grab it...
I can't find any date of manufacture, but I'm guessing mid century modern 50's-60's maybe...
I think they were the de rigueur secretary desk for the office work force... I think the military used a bunch of these...
Sat behind one of those at more than one job as electrical engineer.
 

Outlawmws

Well-known member
Joined
Aug 9, 2011
Messages
39,334
Location
The Badlands
Next week I'll start on the second Tanker Desk... Rinse and repeat...
Including taking it upstairs? :oops:


Sat behind one of those at more than one job

Me too. both as a desk and as a reference table behind me at my drafting table. Worked at an old school space co. that started in the late 40's.
 

Snip's

Well-known member
Joined
Apr 29, 2017
Messages
1,867
Location
Ohio
I was able to get a matching Shaw Walker side table at the same time...
It was quite a bit easier with only needing to remove the four legs...
The top was still pretty heavy for me to wrangle it upstairs by myself...
Got it cleaned up, reassembled and set up to be used as a sewing table for my wife...
The room smells Pine Sol-y now... Reminds me of the HS gym locker room....:oops:
IMG_4742.jpg
Check out the detail on the feet... Kind of Art Deco (got them sitting on furniture coasters so they don't gouge the wood)...
IMG_4743.jpg
 

CoogarXR

Well-known member
Joined
Jan 11, 2016
Messages
6,872
Location
Ohio
Decided to re-use the original kitchen cabinets at the new place (for now). The sink base cabinet was badly damaged from a water leak. The cabinet face was in good shape, but there was literally no other good usable wood. So I rebuilt the entire cabinet from scratch using wood scraps I had on hand, lol. Nobody will see all my mismatched wood, plus it will be way stronger than the original. I mean, the original cabinet was framed with 1x3's and 3/8" particle board panels, I used 1x10's and 1/2" OSB. Hey, it's what I had laying around. Got that built, all that is left is to reattach the old face to the new cabinet.
 
To avoid these ads, REGISTER NOW!
Top Bottom