To avoid these ads, REGISTER NOW!

Between 265 & 485 SQ/FT The Time Machine: Rebuilding a PNW 1.5 car garage from 1946

Workspaces sized between 265 and 485 squarefeet.
To avoid these ads, REGISTER NOW!
OP
T

Tim_with_a_T

Well-known member
Joined
Dec 30, 2013
Messages
231
Location
Vancouver, WA
The next project for the garage is to install the remaining two windows. I mentioned that in making the window frames, I had trouble ripping them in my table saw, and the previous windows I ripped down in my dad’s saw, so that’s the issue I’m against. Because I have quite a few woodworking projects in my future, especially for the house, I’ve started looking for some old machinery to help me get to where I need to go.

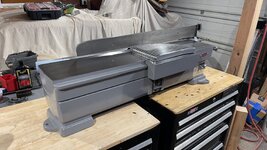
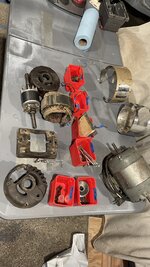
The first piece I found is a Craftsman 103.20660 6” jointer, and I spent the last week pulling it apart, cleaning, and rebuilding it. I now need to rebuild the motor and build a stand for it, but then it’s ready to go! I figure I can thin down the window frames on this. I’m missing the correct handle for the protractor fence, so I found a temporary 4” jointer handle off eBay to get me by till I find the right one (at which point I’ll polish it). Anyway, pictures:


IMG_1874.jpegIMG_1875.jpegIMG_1876.jpegIMG_1877.jpeg
 

drivesitfar

Well-known member
Joined
Oct 23, 2013
Messages
36,217
Location
Pacific Northwest
Tim: if you have a Restoration thread please let me (us) know what that is with a link or please try and take and let us know how you make that old metal shine cause you did a great job on that little planer. I had one of those years ago that works ok for a small job, but I found a bit bigger 6 inch Jet planer that could use a restoration, but it still works ok. for bigger lumber I bought a Dewalt DW735 (I think that is the number) that planes up to 12 inches wide and 6 inches thick that works great if you are doing a fence or maybe a woodworking project.

keep up the great work and I do love what you did in your attic and i'm certain your garage will be even better. have you moved anything fairly heavy up on your hoist yet?
 
OP
T

Tim_with_a_T

Well-known member
Joined
Dec 30, 2013
Messages
231
Location
Vancouver, WA
Tim: if you have a Restoration thread please let me (us) know what that is with a link or please try and take and let us know how you make that old metal shine cause you did a great job on that little planer. I had one of those years ago that works ok for a small job, but I found a bit bigger 6 inch Jet planer that could use a restoration, but it still works ok. for bigger lumber I bought a Dewalt DW735 (I think that is the number) that planes up to 12 inches wide and 6 inches thick that works great if you are doing a fence or maybe a woodworking project.

keep up the great work and I do love what you did in your attic and i'm certain your garage will be even better. have you moved anything fairly heavy up on your hoist yet?

For the hoist, the heaviest thing I've lifted is probably 60lbs or so - not nearly what it's rated/capable of. Most of what I needed to put up there is 20lbs or less, just awkward to carry up a ladder. The hoist makes it a much safer operation. I've really enjoyed the attic and hoist - been using both frequently. I should have done this a long time ago.

I didn't take the time to document what I did on the jointer - IMO it would be hard to outdo what @11b30b4 has done with his YouTube series:
https://www.youtube.com/watch?v=mj_ymIQf2zI&list=PLfmzf8SKnxXmiKE1LiKglXL31W1BTxyrB
I more or less followed what he did exactly, cutting a few corners, but adding my own flare as well.
 

drivesitfar

Well-known member
Joined
Oct 23, 2013
Messages
36,217
Location
Pacific Northwest
Again WELL DONE and keep up the great work. take as many pics as you can and post them as you have time to later cause not only will you help others but you might find guys willing to help you when you're scratching your head and youtube and google can't solve your issue.

looks like mid 60's coming next week so we get to toss the sweatshirts and warm clothes and rain gear for a few days!!
 
OP
T

Tim_with_a_T

Well-known member
Joined
Dec 30, 2013
Messages
231
Location
Vancouver, WA
Thanks guys! This helps keep me motivated! I spent the day with friends, but this evening I spent some time staring at the next project- the jointer stand. Initially I thought I’d build some sort of roll around deal, but like most other things in the shop, I’m learning it’s much better to do a built-in. My thoughts for tools in this small space was initially to have everything on wheels, but my own personal experience with this has been more of an annoyance than a convenience. Moving forward, I plan to have a quadrant of the garage as conversion space for woodworking, with some of the heavier tools (i.e. jointer) built into the walls. BTW - jointer weighs 130lbs and motor 28lbs, so not a lightweight combo!

I currently do not have access to an easy to use 3d modeling program, so I’m exiled to isometric paper once again, which is fine, but drawing any design elements outside 90* corners becomes a little murky. Anyway, no photos of this progress- just know that I’m gonna wing it and see how it goes.
 

drivesitfar

Well-known member
Joined
Oct 23, 2013
Messages
36,217
Location
Pacific Northwest
Tim: great restoration of the joiner!! While stuff is fresh on your mind most of us document the process and what we’d do different next time in our own threads so we can look them up later if needed. AND it usually helps out a few members in the meantime. Care to share the good and bad of 50 year old motors restoring please do.

I’ve seen many rolling workbenches that have built in table and miter saws so why not a jointer too if they is in the cards. The original stands are cool but take up way too much room in small garage.

Keep up the good work!!
 
OP
T

Tim_with_a_T

Well-known member
Joined
Dec 30, 2013
Messages
231
Location
Vancouver, WA
Tim: great restoration of the joiner!! While stuff is fresh on your mind most of us document the process and what we’d do different next time in our own threads so we can look them up later if needed. AND it usually helps out a few members in the meantime. Care to share the good and bad of 50 year old motors restoring please do.

I’ve seen many rolling workbenches that have built in table and miter saws so why not a jointer too if they is in the cards. The original stands are cool but take up way too much room in small garage.

Keep up the good work!!

As mentioned previously, I followed @11b30b4 's YouTube series closely and don't feel like I have much to add. Seriously, he's done an amazing job documenting all of this, including the jointer owner's manual, which has an assembly diagram and parts list, as well as motor owner's manual, also with motor assembly diagram and parts list. I also followed his series for the drill press, as well as the 3-wheeled bandsaw. I highly recommend checking his channel out. You will not regret it.

A couple things I did differently:

I didn't soak everything in Simple Green for 24hrs - I sprayed everything down with either Simple Green or Brake Cleaner, scuffed with ScotchBrite, then dried and painted. So I cut a corner there, but I feel I achieved the same level of cleanliness, outside of some residual paint.

For all the cast iron table surfaces, I painted on a rust remover jelly. As long as that stuff stays in gel form, it will basically wash off with water and a brass wire brush and/or ScotchBrite. If it dries, you'll have to scrape harder and you'll have some ghost brush strokes in the metal from applying the jelly. I block sanded the tables with 1000 grit to get an even-ish finish. Better than what crusty finish they had anyway.

For the aluminum bits, I sanded with 400, 800, 1000, 1500, 2000, 2500 then polished with a couple buffing wheels in my 8in bench grinder. First wheel is a firmer wheel, with a coarser grit rouge, last wheel is a softer wheel with finer rouge. I also polished the shafts - the ones I remembered to polish anyway.

That's all the deviating I did on the tool restorations.

For the motor, he polishes the stator band, then has a grid of 1/8" vinyl tape spaced every 1/8" to create an alternating pattern. He applies the grid of tape to the stator band, scuffs w/ ScotchBrite, then removes the tape, revealing a polished/scuffed/polished/scuffed etc pattern. I didn't have an alternating grid of 1/8" vinyl tape, and Amazon had the closest delivery date of sometime this week for 1/8" pinstripe tape. I mentally committed to have the motor done this past weekend, so I had to improvise. I spent significant time polishing the stator band, then manually marking 1/8" graduations across the band, then manually alternating tape lines to scuff individual 1/8" sections. It took significant time and is not evenly spaced. I know for next time what I'll try differently. I'm not going to document that until I can verify it works.

Last motor deviation was: the bearings mine had, and some of the assembly, were different than what he showed. My bearings were a 6202 dual rubber seal. 97% of the search results were 15mm ID, but one or two outliers were 16mm ID. They were off brand Chinese bearings, so I wasn't interested in using them. I measured my bearings and the 16mm ID is more accurate to what was needed, but I rolled the dice and ordered some Timkens spec'd out at 15mm, hoping there was some sort of rounding error converting from inch to metric or some such thing. Nope. They were 15mm. Remember I said I mentally committed to finish the motor this past weekend? I got the bearings Saturday around noon. Armed with a heavy metal playlist and a Dremel tool, I spent the next 3hrs carefully boring the ID 0.039" (1mm) over to fit the 16mm shaft. I was worried I may have a concentricity issue but like I said - committed to finish, and willing to roll the dice.

The hardware for my particular motor was not in good condition, but readily available 8-32 and 10-32 stainless steel offerings were available from my favorite hardware store, Parkrose Hardware. I polished each one and gave them a coat of anti-seize, then used them for re-assembly. I replaced the switch on my motor, solely because it will match the switches I used on the drill press and bandsaw, and it allowed me to use ring terminals instead of soldered connections.

The initial power up of the motor was a little nerve racking - but that thing is smooth, vibration free, and quiet. I'd call it an overall success. Next time I'll be better prepared with bearing info when ordering, revised plan for stator band pattern, and that's about it.

I have eleventy-billion projects going on at all times in various stages of completion. I get it that ppl generally like to share the gritty details of their projects, with tips and tricks along the way. I do not have time to document in that way. I work full time, and every lunch break, after work until 10 pm, and every weekend my girlfriend hasn't planned something for us to do - I am working on stuff. I am a perfectionist to a fault, and I know that. Years ago, I implemented a 90% rule on myself. Make it 90% good then move on. If that extra 10% bothers me years later, I can come back to it. So far, I've not had time to come back to any of it.

I have a goal to have the garage finished by end of summer. That is a massive ask, but I have to try. If I manage to pull that off, I have a goal of finishing the T bucket by my 40th birthday (next year). I started building that car in 2011, and life keeps getting in the way. I'm tired of having this thing hanging over my head. I've set a hundred deadlines for that car and missed every one of them, but I will finish it. After the T is done, I've promised my girlfriend I'll be working on the house. The kitchen cabinets are completely torn apart with plywood tops, there's a mini fridge as the primary fridge, there's bare stud walls with very little insulation in several rooms, bare sub floor in many of the rooms, electrical and plumbing nightmares, and an absolute mountain of work to do to restore the home and make some changes. I fund these projects out of pocket, with myself as labor. All this to say, I cannot always take the time to document every detail of an equipment restoration. There's a lot of that content already out there, with those guys doing a fantastic job of documenting it. I don't need to add to it. I am a busy beaver, with a forest of old growth timber to chew through, armed with a dull set of teeth. I do the best I can with what I've been given, but it's far from ideal. This thread is mainly to motivate myself to get this done, and I feel as though I am contributing something of value to the board by posting my progress - I just do not have the time to document things step by step.
 

drivesitfar

Well-known member
Joined
Oct 23, 2013
Messages
36,217
Location
Pacific Northwest
I didn’t mean to imply you’re retired or not a busy guy so totally understand and trying to throw out some friendly advice.

Post as you wish and have time and I’m sure more members and onlookers will appreciate whatever you can.

Again nice job on the old jointer. These kind of posts remind me that I need to start spiffing up or at least cleaning up my quality tools too.
 
OP
T

Tim_with_a_T

Well-known member
Joined
Dec 30, 2013
Messages
231
Location
Vancouver, WA
Love the cross ram manifold.

Thank you. I've looked for one for years - could never afford it when one would come up for sale. On top of that, Hot Rod Magazine did a multi-carb shootout article in January 2002 where the cross ram did NOT perform well. I sorta gave up on the dream and decided to go for the tri power look on the T, because I've rebuilt a few of them over the years and felt the tunnel ram is played out (even though the tri power wasn't that great in the HRM article, either - I have some ideas to try and improve that).

Fast forward a bunch of time and Engine Masters tested the Edelbrock STR10 cross ram, pitting it against the Weiand tunnel ram P/N 1984 (I think... don't quote me) and I think an Edelbrock TM1 (the infamous single plane "Tarantula" manifold), although it may have been Vic Jr intake - I don't remember. Anyway, the cross ram accidently was totally awesome. At the end of the episode they speculated the 1" tapered combo carburetor spacers helped the fuel mixture considerably, which was the main difference from the test done in 2002. David Freiburger and Steve Brule were part of both tests, which was an interesting full circle type of deal. So plug that info into Tim's brain, then show Tim's brain this picture of **** Knudson's bucket built in Eugene, OR back in the 1960s - I was on the hunt for a cross ram once again. I paid a small fortune to get the tri power intake on the T polished, and figured I wanted the cross ram polished as well, so this time I waited for the right thing to come along. One day on an ebay death scroll I found it - polished, in great shape, and sorta at the going rate for pricing. I decided to pull the trigger. The plan is to use the engine seen in the T on page one for the 32, then put the cross ram on a different engine for the T, effectively killing two birds with one stone and several fistfuls of cash.


fb_img_1707582923041-jpg.5968053
 
OP
T

Tim_with_a_T

Well-known member
Joined
Dec 30, 2013
Messages
231
Location
Vancouver, WA
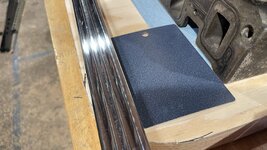
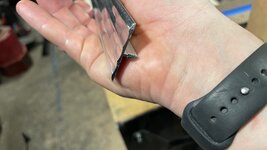
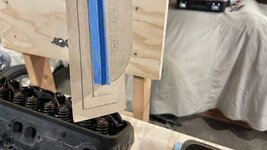
Tonight after we realized the predicted golf ball sized hail was a no show, I got out to the garage and started working on the jointer table, which will mount to the West wall of the garage. I cut 2 3/4” plywood sheets as close as I could to the same size, then used a combo of a belt sander and DeWalt handheld planer to true them up. When you don’t have deep enough clamps, a pair of Vortec heads will do just fine!

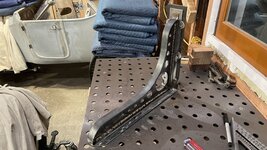
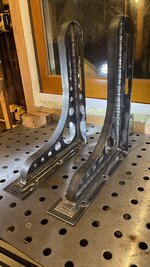
The next bits will be difficult for me to pull off, but I’m gonna give ‘er all I got trying. The plan is to make some steel shelf brackets that will bolt to the wall, welded in such a way they look like an industrial forging. The pattern does not show all the detail I’m hoping to achieve, just a rough concept for scale. For all worktop surfaces, I plan to use a Formica wrapped in polished fluted aluminum. There’s quite a bit to pull off in this project, but this will pave the way for what’s to come.

Pictures:
 
To avoid these ads, REGISTER NOW!

SRU1436

ALLIANCE MEMBER
Joined
Apr 1, 2017
Messages
597
Location
Bay Area, CA
Thank you. I've looked for one for years - could never afford it when one would come up for sale. On top of that, Hot Rod Magazine did a multi-carb shootout article in January 2002 where the cross ram did NOT perform well. I sorta gave up on the dream and decided to go for the tri power look on the T, because I've rebuilt a few of them over the years and felt the tunnel ram is played out (even though the tri power wasn't that great in the HRM article, either - I have some ideas to try and improve that).

Fast forward a bunch of time and Engine Masters tested the Edelbrock STR10 cross ram, pitting it against the Weiand tunnel ram P/N 1984 (I think... don't quote me) and I think an Edelbrock TM1 (the infamous single plane "Tarantula" manifold), although it may have been Vic Jr intake - I don't remember. Anyway, the cross ram accidently was totally awesome. At the end of the episode they speculated the 1" tapered combo carburetor spacers helped the fuel mixture considerably, which was the main difference from the test done in 2002. David Freiburger and Steve Brule were part of both tests, which was an interesting full circle type of deal. So plug that info into Tim's brain, then show Tim's brain this picture of **** Knudson's bucket built in Eugene, OR back in the 1960s - I was on the hunt for a cross ram once again. I paid a small fortune to get the tri power intake on the T polished, and figured I wanted the cross ram polished as well, so this time I waited for the right thing to come along. One day on an ebay death scroll I found it - polished, in great shape, and sorta at the going rate for pricing. I decided to pull the trigger. The plan is to use the engine seen in the T on page one for the 32, then put the cross ram on a different engine for the T, effectively killing two birds with one stone and several fistfuls of cash.


fb_img_1707582923041-jpg.5968053
Tri-power set ups are cool too, as well as tunnel rams. I don’t own any of them. I wasn’t aware the tarantula intakes existed, but now it makes more sense. When I was a kid my dad had a v drive boat with a corvette 327 and a scorpion intake. I still have a few edelbrock scorpion stickers in a garage from way back. sorry not tying to detract from your thread. I’m really digging what you did with the garage so far.
 
OP
T

Tim_with_a_T

Well-known member
Joined
Dec 30, 2013
Messages
231
Location
Vancouver, WA
Tri-power set ups are cool too, as well as tunnel rams. I don’t own any of them. I wasn’t aware the tarantula intakes existed, but now it makes more sense. When I was a kid my dad had a v drive boat with a corvette 327 and a scorpion intake. I still have a few edelbrock scorpion stickers in a garage from way back. sorry not tying to detract from your thread. I’m really digging what you did with the garage so far.

Very cool! From my understanding, I believe the tarantula manifold evolved into the scorpion manifold, which evolved into the Vic Jr.

For their time(s), they were great single plane intakes. I bet that boat ran out pretty good! Thank you for sharing- I love hearing about stuff like that. Being a couple miles up the road from the Columbia River and several lakes nearby, I’d love to have some sort of v drive or sbc/bbc day cruiser…. But for now I gotta focus on the projects I’ve already started lol.
 
OP
T

Tim_with_a_T

Well-known member
Joined
Dec 30, 2013
Messages
231
Location
Vancouver, WA
Today’s progress - not as far as I wanted to get but it’s turning out good. I spent quite a bit of time making my own washers with a hole saw, plus there was some misc. stuff to do around the yard etc. Hopefully tomorrow I can get them at least tack welded together, although there is still some machine work to sort out.

IMG_1945.jpeg
 
OP
T

Tim_with_a_T

Well-known member
Joined
Dec 30, 2013
Messages
231
Location
Vancouver, WA
Another massive struggle today, but turning the corner. I ran out of time to make noise, ran out of welding gas, and ran out of energy lol. I managed to finish machining/welding one bracket, and 95% done machining the other bracket, but still need to weld it all together. I’ve been trying to figure out shortcuts along the way, and short of sending off a file to sendcutsend or something, there are no shortcuts lol. Hopefully this week I can wrap this project up.

IMG_1947.jpegIMG_1948.jpegIMG_1949.jpegIMG_1950.jpegIMG_1951.jpegIMG_1953.jpeg
 
OP
T

Tim_with_a_T

Well-known member
Joined
Dec 30, 2013
Messages
231
Location
Vancouver, WA
Ok update time. Small update, but trying to motivate myself, so here we are. Last week, I marked an hung the brackets to the wall in front of the West window. I wanted to be sure the table the brackets will mount to the wall has clearance for the tires of the 32. Well, I wasn’t thinking about the height of the brackets themselves, so I’m a tiny bit short (like 1/4”)… so my plan is to scoot them up a couple inches to make sure I’ve got room.

Thursday night last week, my buddy Jeremy and I went to a metal show (In Flames and Unearth). Fuel for my soul.

Friday early morning, I was up and at the Portland Swap Meet with my buddy Corey. We walked both the Racetrack and the Expo - 12+ miles that day. My brother, Andy, joined for a couple hours to look at the junk. It was a great time... I spent like $100 on parking, admission, food and beverage... and $1 on a somewhat rare Stewart Warner Twin Blue Oil Pressure gauge.

Saturday, I had enough time to sleep on a couple things I wanted to make an offer on at the swap meet, so back I went. This time, I only had to walk about 4 miles, but about 1.5 miles of that I carried a pair of Trick Flow aluminum Camel Hump cylinder heads back to the truck. My arms were sore for like 3 days after that. I also picked up a couple Holley 4bbl carburetors to have for cores to rebuild and a neat Art Deco under-dash heater for the '32. All in all a great swap meet!

Sunday, I flew home to Boise to surprise my mom for her birthday. I stayed overnight, taking Monday off work. While there, my dad and mom wanted to show me a new sporting goods store, Scheels (East Coast chain like Cabela's). When there, I stumbled across a Leupold spotting scope on clearance, which was awful tempting. My girlfriend and I have been making regular outings to nearby wetlands to check out some birds and other wildlife, and having one pair of binoculars gets old. I've also wanted to do some moon gazing and such, so anyway, I slept on that decision and decided to walk to the store and pick it up Monday morning. Welp, I was NOT anticipating the size of the box LOL. That was a comedy of errors carrying that 2.5 miles back to my parents' house but let me tell you, WORTH IT! Today after work, gf and I are gonna go check out our usual spots to see what we can find.

Anyway, back to the brackets. Before moving them up, I figured I’d try one out to ensure they will be up to the task. So, today on lunch break, I made some plywood spacers to simulate wall thickness, then mounted the bracket and gave it all 220lbs of me on the very edge. Rock solid. Makes me happy. So, I’ll get some wooden dowels made to fill the whoopsies, move them up a couple inches, and move onto the next step.

IMG_2002.jpeg
 
Last edited:
OP
T

Tim_with_a_T

Well-known member
Joined
Dec 30, 2013
Messages
231
Location
Vancouver, WA
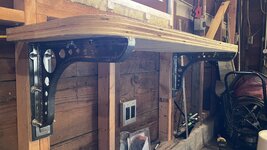
Finally got brave and drilled the mounting holes for the table, with the help of my girlfriend. Once everything is all said and done, I’ll trim the extra stud length. I will need to finesse the slots so the table slides easily off the wall. Right now it’s a little janky. I might not have explained that part, but I slotted the mounting holes so I can gain ~ 4" by having the table stored butted up to the wall. When I need to use the jointer, I'll slide the table out, which gives room for the jointer fence slotted adjuster to be fully out of the way of the cutting blades.

IMG_2072.jpeg

IMG_2073.jpeg
 
Last edited:

SRU1436

ALLIANCE MEMBER
Joined
Apr 1, 2017
Messages
597
Location
Bay Area, CA
Ok update time. Small update, but trying to motivate myself, so here we are. Last week, I marked an hung the brackets to the wall in front of the West window. I wanted to be sure the table the brackets will mount to the wall has clearance for the tires of the 32. Well, I wasn’t thinking about the height of the brackets themselves, so I’m a tiny bit short (like 1/4”)… so my plan is to scoot them up a couple inches to make sure I’ve got room.

Thursday night last week, my buddy Jeremy and I went to a metal show (In Flames and Unearth). Fuel for my soul.

Friday early morning, I was up and at the Portland Swap Meet with my buddy Corey. We walked both the Racetrack and the Expo - 12+ miles that day. My brother, Andy, joined for a couple hours to look at the junk. It was a great time... I spent like $100 on parking, admission, food and beverage... and $1 on a somewhat rare Stewart Warner Twin Blue Oil Pressure gauge.

Saturday, I had enough time to sleep on a couple things I wanted to make an offer on at the swap meet, so back I went. This time, I only had to walk about 4 miles, but about 1.5 miles of that I carried a pair of Trick Flow aluminum Camel Hump cylinder heads back to the truck. My arms were sore for like 3 days after that. I also picked up a couple Holley 4bbl carburetors to have for cores to rebuild and a neat Art Deco under-dash heater for the '32. All in all a great swap meet!

Sunday, I flew home to Boise to surprise my mom for her birthday. I stayed overnight, taking Monday off work. While there, my dad and mom wanted to show me a new sporting goods store, Scheels (East Coast chain like Cabela's). When there, I stumbled across a Leupold spotting scope on clearance, which was awful tempting. My girlfriend and I have been making regular outings to nearby wetlands to check out some birds and other wildlife, and having one pair of binoculars gets old. I've also wanted to do some moon gazing and such, so anyway, I slept on that decision and decided to walk to the store and pick it up Monday morning. Welp, I was NOT anticipating the size of the box LOL. That was a comedy of errors carrying that 2.5 miles back to my parents' house but let me tell you, WORTH IT! Today after work, gf and I are gonna go check out our usual spots to see what we can find.

Anyway, back to the brackets. Before moving them up, I figured I’d try one out to ensure they will be up to the task. So, today on lunch break, I made some plywood spacers to simulate wall thickness, then mounted the bracket and gave it all 220lbs of me on the very edge. Rock solid. Makes me happy. So, I’ll get some wooden dowels made to fill the whoopsies, move them up a couple inches, and move onto the next step.

IMG_2002.jpeg
Sounds like a good haul. I’d like to see the Stewart Warner gauge, and under dash heater, if you care to share. Cool pics with the spotting scope.
 
OP
T

Tim_with_a_T

Well-known member
Joined
Dec 30, 2013
Messages
231
Location
Vancouver, WA
Sounds like a good haul. I’d like to see the Stewart Warner gauge, and under dash heater, if you care to share. Cool pics with the spotting scope.

Best pic I got is of the whole lot:
IMG_2003.jpeg

The heater and the Oil Pressure gauge will be for the ‘32. I’ve slowly been collecting a set of Twin Blues, trading out for better ones as they come along. I’ve gotten reasonably good at amateur restoration on them - this picture was before I pulled them apart.

IMG_2086.png

Tonight’s sighting - I missed a group of 5 juvenile bald eagles hanging out in a tree together, and an older vs younger fight in the air… I’m gonna have to get quicker on the draw setting up the scope, tripod, and camera. This shot is from about 300yds out. I love this scope! Gonna try again early tomorrow morning.
IMG_2081.jpeg
 
To avoid these ads, REGISTER NOW!
Top Bottom