To avoid these ads, REGISTER NOW!

ZMotorsports Shop Projects 2.0

madison069

Well-known member
Joined
Nov 5, 2010
Messages
4,252
Location
Monroeville, PA
Your order of hose clamps makes me want to get my collection of hose clamps organized and determine if they are junk or not. I know they are from the oil field days and estate sale shopping so I’m sure it’s a mixture. But I’m happy to say the majority of my hose clamps are in one spot atleast! 🤣😂🤣
 
To avoid these ads, REGISTER NOW!
OP
Z

zmotorsports

ALLIANCE MEMBER
Joined
Oct 20, 2009
Messages
21,484
Location
Northern Utah
When I was starting people out in TIG welding (not sure that I'm qualified to call it 'teaching') I recommended the same thing. I also suggested that they first get the feel for running a bead without filler metal, and with the machine set so that they could run with the pedal floored. Carbon steel is really easy to boil with a TIG, I tried to get some scrap stainless for their first couple of pieces to weld on. That was before we knew much about hexavalent chromium.

I do the same thing Thom. I think once someone gets proficient at gas welding, the TIG process comes much quicker and easier. Even then, I have found torch angle to be a big issue, so I have them run autogenous welds as well and just focus on puddle control, travel speed and torch angle before introducing filler into the mix.

Your order of hose clamps makes me want to get my collection of hose clamps organized and determine if they are junk or not. I know they are from the oil field days and estate sale shopping so I’m sure it’s a mixture. But I’m happy to say the majority of my hose clamps are in one spot atleast! 🤣😂🤣

I have one of those wire racks from an auto parts store on my wall that organizes all of my hose clamps and has worked well for many years. That is until I went down the recent rabbit hole. Now I need to start replacing them with better quality ones and sorting them out.
 
OP
Z

zmotorsports

ALLIANCE MEMBER
Joined
Oct 20, 2009
Messages
21,484
Location
Northern Utah
It was either ABA or Norma who used to sell a flexible shank nut driver and claimed that if you used it that you could not over-torque one of their hose clamps. We used one exclusively on the Lola T-8990 because the Boss said so.

To be honest, it wasn't until recently that I discovered most hose clamps actually have a torque specification. I'm embarrassed to say as long as I've been wrenching and to the level I hold myself that I didn't go down this rabbit hole sooner. It wasn't until I started doing more research for constant torque hose clamps for my coach's cooling system that I started doing even more research about standard hose clamps and was somewhat dumbfounded by the varying levels of quality. I've never really had that big of issues with hose clamps, probably because I don't crank down on them to the point some do, but I recently learned there is quite a difference. I went down a similar rabbit hole with zip ties a few years ago. These rabbit holes get expensive quick. :rolleyes:
 

plain2car

Well-known member
Joined
Nov 27, 2008
Messages
514
Location
Gilbert, Arizona
Mike, nice right up on the maint. projects. I guess I missed it, or didn't read close enough, but I just realized the Jeep is a LS conversion? the engine cover is the same on my LS converted '86 C10 2wd SWB! it is a '13 DOD (delete) model. I am not surprised thinking about it now....as doing that would be minimal effort project for your talents!! ;) :p very clean & factory looking install!!
 

Xti04

Well-known member
Joined
Nov 11, 2016
Messages
2,366
I find that as we age we up our game just a little bit and it slowly adds up to a much more reasonable cost than we might think. I look at zip ties and think " oh just any old tie will work" and buy some cheap ones. Next thing you know they dont hold for **** and a wiring harness gets eaten. Or a clamp lets go and you blow off a radiator hose. Those little things seem insignificant but they add up. It can be a pay now or pay later for sure! Considering both of these have happened to me at various points in my career, I like to spend just a bit more and get something that prevents me doing the job twice. Now I have to go look at these clamps ........ dammit Mike!
 
OP
Z

zmotorsports

ALLIANCE MEMBER
Joined
Oct 20, 2009
Messages
21,484
Location
Northern Utah
Mike, nice right up on the maint. projects. I guess I missed it, or didn't read close enough, but I just realized the Jeep is a LS conversion? the engine cover is the same on my LS converted '86 C10 2wd SWB! it is a '13 DOD (delete) model. I am not surprised thinking about it now....as doing that would be minimal effort project for your talents!! ;) :p very clean & factory looking install!!

Thank you. Yes, I dropped a 6.2 liter LS (L94) into my Jeep back in late 2018/early 2019, just over 70k miles ago. I show the full build process here in this thread, back somewhere around page 50 is where it starts.
 
OP
Z

zmotorsports

ALLIANCE MEMBER
Joined
Oct 20, 2009
Messages
21,484
Location
Northern Utah
I find that as we age we up our game just a little bit and it slowly adds up to a much more reasonable cost than we might think. I look at zip ties and think " oh just any old tie will work" and buy some cheap ones. Next thing you know they dont hold for **** and a wiring harness gets eaten. Or a clamp lets go and you blow off a radiator hose. Those little things seem insignificant but they add up. It can be a pay now or pay later for sure! Considering both of these have happened to me at various points in my career, I like to spend just a bit more and get something that prevents me doing the job twice. Now I have to go look at these clamps ........ dammit Mike!

You bring up a valid point, maybe that's what it is, we up our game as we age. I have considered myself to be relatively thorough throughout my career and I've tried to learn as much as I can as I come across various aspects of the trade, however, maybe things like zip ties and hose clamps have seemed "too simple" to give much additional thought to in the past. That is up until recently, when I began taking a deeper look at these items and it hit me that there has to be better available, only to find these are very deep rabbit holes in which a person can go down.

While I don't mind paying a bit more for higher quality of most all things, I also feel there is a point of diminishing returns on most items as well. Things like zip ties and hose clamps are a perfect example. While there are some that are absolute junk and then there is the top tier, there is also a lot in between those extremes that can be explored. In many cases there is a huge price jump from say the top of the mid-tier to the top tier yet there is negligible gain in quality. Then other items have a huge jump in quality for a smaller cost increment. These areas are where I try to explore and try to keep both budget as well as quality factored in.

Some items only the best will do, and the cost be damned, other items maybe the best quality for the cost will do. :unsure: These are decisions I am sure most all of us are faced with to keep our budgets (and sanity) in check. ;)
 

gorilla

Well-known member
Joined
Dec 13, 2007
Messages
1,657
My first exposure to zip ties was in the industrial world, we called them ti-raps because that was the name that Thomas and Betts called them. We also used crimp fittings from Thomas and Betts. The junk sold in hardware and auto parts is an example of what happens when good stuff is cheeped to sell in the consumer market.
 

ntsqd

Well-known member
Joined
Jan 22, 2005
Messages
997
Location
Lower left coast
I buy both inexpensive and T&B zip-ties. I build using the T&B's and I keep a bundle of the inexpensive ties in most vehicles for easy trail fixes. Out in Nowhere, NV (near the Flying M for those who know of it) last week I noticed one of the guys' vehicle's trailer light wiring was hanging down where it was going to get pulled on by a sage brush or something. Handed him the zip-tie bundle and quickly he had the wire bundle pulled up out of the way.
 

Boosted1

Well-known member
Joined
Nov 25, 2007
Messages
1,681
Location
Georgetown, KY
Didn’t you just recently have the coolant pipes off the coach?
Is there a reason you are draining coolant so soon after that job (which was really nice work)?
 
OP
Z

zmotorsports

ALLIANCE MEMBER
Joined
Oct 20, 2009
Messages
21,484
Location
Northern Utah
My first exposure to zip ties was in the industrial world, we called them ti-raps because that was the name that Thomas and Betts called them. We also used crimp fittings from Thomas and Betts. The junk sold in hardware and auto parts is an example of what happens when good stuff is cheeped to sell in the consumer market.

Same here, as an Industrial Maintenance Mechanic I was introduced to the high quality ones from the beginning. Depending on the vendor, they've been called zip ties, cable ties or ty-raps but they're all the same thing in the end. The Thomas & Betts Ty-Rap has been our go to for years, but we've also used some others that have been very good. I remember the house brand from Lawson being quite good, but we haven't dealt with Lawson for a long time. The ones I used to buy from NAPA were actually pretty good, however, the last 8+ years or so they've been garbage so I quit buying them. Since then I've been using some from McMaster Carr which have been excellent quality, but the price has been a bit higher than I like so I've just been doing some research for some that are a bit more cost effective as I use a lot of zip ties in my shop.


I buy both inexpensive and T&B zip-ties. I build using the T&B's and I keep a bundle of the inexpensive ties in most vehicles for easy trail fixes. Out in Nowhere, NV (near the Flying M for those who know of it) last week I noticed one of the guys' vehicle's trailer light wiring was hanging down where it was going to get pulled on by a sage brush or something. Handed him the zip-tie bundle and quickly he had the wire bundle pulled up out of the way.

This has been my process for many years. Cheaper/lesser quality ones for non-critical tasks and the T&B Ty-Raps for critical tasks. However, recently I have been searching for something more conducive to both methodologies, so I don't have to stock such a variety. Good quality yet cost effective is what I've been searching for.
 
OP
Z

zmotorsports

ALLIANCE MEMBER
Joined
Oct 20, 2009
Messages
21,484
Location
Northern Utah
Didn’t you just recently have the coolant pipes off the coach?
Is there a reason you are draining coolant so soon after that job (which was really nice work)?

Yes, the Cummins ISL engine has all fresh coolant when I rebuilt the coolant pipes and replaced the thermostat and the water pump. The engine is at the rear of our coach. The coolant I am draining now while awaiting parts is for our Onan 10kw generator which is what is located at the front of the coach. I try to keep the coolant at roughly the same age to keep things straight in my records so the generator is getting the cooling system serviced now.

Thanks for the comments and for following along. Maybe I should have explained in more detail what I was doing.
 

PugetDude

ALLIANCE MEMBER
Joined
Mar 13, 2013
Messages
22,488
Location
Superstition Mountains, AZ
Same here, as an Industrial Maintenance Mechanic I was introduced to the high quality ones from the beginning. Depending on the vendor, they've been called zip ties, cable ties or ty-raps but they're all the same thing in the end. The Thomas & Betts Ty-Rap has been our go to for years, but we've also used some others that have been very good. I remember the house brand from Lawson being quite good, but we haven't dealt with Lawson for a long time. The ones I used to buy from NAPA were actually pretty good, however, the last 8+ years or so they've been garbage so I quit buying them. Since then I've been using some from McMaster Carr which have been excellent quality, but the price has been a bit higher than I like so I've just been doing some research for some that are a bit more cost effective as I use a lot of zip ties in my shop.


This has been my process for many years. Cheaper/lesser quality ones for non-critical tasks and the T&B Ty-Raps for critical tasks. However, recently I have been searching for something more conducive to both methodologies, so I don't have to stock such a variety. Good quality yet cost effective is what I've been searching for.
Let us know where you land on the price/performance matrix.
 
OP
Z

zmotorsports

ALLIANCE MEMBER
Joined
Oct 20, 2009
Messages
21,484
Location
Northern Utah
Let us know where you land on the price/performance matrix.

Will do Scott. I've been collecting some samples for a comparison so I will report back on my findings.

For shits and grins, Project Farm did a great review of a variety of brands so I'm not wasting a lot of time. Just a couple that I have used and a couple I have not for quick comparisons.
 
OP
Z

zmotorsports

ALLIANCE MEMBER
Joined
Oct 20, 2009
Messages
21,484
Location
Northern Utah
Last night after arriving home I had a couple of boxes waiting for me.

First was my order of Swepco 715 power steering fluid that I ordered over the weekend.
IMG_20250423_160123097.jpg


Next is in response to Scott, aka @PugetDude who asked about zip ties, or ty-raps or cable ties, whatever you wish to call them. I had done a little bit of sampling over the past couple of weeks. Nothing crazy, just took some I had on hand and have been using over the years, plus a couple vendors that I reached out to for samples and after some very crude and not so scientific assessments, I settled on a vendor whom checked the two boxes I was most focuses on, quality and price.
zipties1.jpg

Customer service and speed of which they shipped was a pleasant and unexpected bonus. I just ordered these on Monday after speaking with them last week and they already arrived yesterday. I ordered these from ziptie.com and so far, am quite impressed and pleased the little bit I've used them thus far, between the samples and last night's work. The actual order arrived quickly and it matched the samples perfectly, so they didn't to the rope a dope on me :D , you know, the whole send high quality samples and then lesser quality normal supply once the order is placed. I'm not suggesting there are companies that do that, but I've been burned before on rare occasions. :unsure: These particular zip ties meet the UL94 V2 rating for automotive work in particular which constitutes being oil and grease tolerable, good UV protection and a wide working temperature range.
zipties2.jpg

My "go-to" sizes are 4", 6", 8" and 14" with the 6" and 8" being hands down the most heavily used in my inventory.
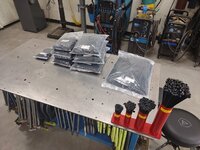
zipties3.jpg


I know most already have their favorites and if they're working for you then great. I was using a mix over the years with the Thomas & Betts being my go-to's when I really needed it and they've not failed me. Some of the "cheaper" quality ones would break during the actual installation process and not even make it to supporting any weight. I purchased quite a few from NAPA over the past 15+ years and they were actually quite good, until a few years ago where I don't know who's making them and labeling them under NAPA, but the quality fell off the cliff so I haven't purchased any from NAPA for a couple of years now. I've purchased some from Sherco where I buy some electrical supplies and they've been decent, but the cost is quite a bit higher. The ones I've gotten from McMaster Carr have also been of high quality, however, over the past couple of years their prices have crept upward on more than one occasion so I have just been looking for something that maybe checks both boxes, quality AND price, which would allow me to not have to be faced with the decision of which category this particular job is worthy of each time I need a zip tie.

They had great price breaks at 1k quantities, so I think I'm set for a while now, even after my son taking quite a few last night during his visit, which I think he's pretty well setup for a while as well.
 

PugetDude

ALLIANCE MEMBER
Joined
Mar 13, 2013
Messages
22,488
Location
Superstition Mountains, AZ
Last night after arriving home I had a couple of boxes waiting for me.

First was my order of Swepco 715 power steering fluid that I ordered over the weekend.
IMG_20250423_160123097.jpg


Next is in response to Scott, aka @PugetDude who asked about zip ties, or ty-raps or cable ties, whatever you wish to call them. I had done a little bit of sampling over the past couple of weeks. Nothing crazy, just took some I had on hand and have been using over the years, plus a couple vendors that I reached out to for samples and after some very crude and not so scientific assessments, I settled on a vendor whom checked the two boxes I was most focuses on, quality and price.
zipties1.jpg

Customer service and speed of which they shipped was a pleasant and unexpected bonus. I just ordered these on Monday after speaking with them last week and they already arrived yesterday. I ordered these from ziptie.com and so far, am quite impressed and pleased the little bit I've used them thus far, between the samples and last night's work. The actual order arrived quickly and it matched the samples perfectly, so they didn't to the rope a dope on me :D , you know, the whole send high quality samples and then lesser quality normal supply once the order is placed. I'm not suggesting there are companies that do that, but I've been burned before on rare occasions. :unsure: These particular zip ties meet the UL94 V2 rating for automotive work in particular which constitutes being oil and grease tolerable, good UV protection and a wide working temperature range.
zipties2.jpg

My "go-to" sizes are 4", 6", 8" and 14" with the 6" and 8" being hands down the most heavily used in my inventory.
zipties3.jpg


I know most already have their favorites and if they're working for you then great. I was using a mix over the years with the Thomas & Betts being my go-to's when I really needed it and they've not failed me. Some of the "cheaper" quality ones would break during the actual installation process and not even make it to supporting any weight. I purchased quite a few from NAPA over the past 15+ years and they were actually quite good, until a few years ago where I don't know who's making them and labeling them under NAPA, but the quality fell off the cliff so I haven't purchased any from NAPA for a couple of years now. I've purchased some from Sherco where I buy some electrical supplies and they've been decent, but the cost is quite a bit higher. The ones I've gotten from McMaster Carr have also been of high quality, however, over the past couple of years their prices have crept upward on more than one occasion so I have just been looking for something that maybe checks both boxes, quality AND price, which would allow me to not have to be faced with the decision of which category this particular job is worthy of each time I need a zip tie.

They had great price breaks at 1k quantities, so I think I'm set for a while now, even after my son taking quite a few last night during his visit, which I think he's pretty well setup for a while as well.
Thanks, Mike!
Link to the winning zip ties?😉
 
Last edited:
To avoid these ads, REGISTER NOW!

plain2car

Well-known member
Joined
Nov 27, 2008
Messages
514
Location
Gilbert, Arizona
Mike, THANK YOU!! for the endless time you have given us & continue to give us on all the things you do! I took the time to read through the LS swap & it is VERY IMPRESSIVE! I was striving for a similar objective on my build, but I do not have near the talent or tools to pull it off as well as you have. I have a question and a suggestion ;) :p. I was wondering with the engine being a new pkg. from GM how does the warr. play in relation to the engine not being in a GM vehicle? although I know you have nothing to worry about as you can fix anything! just curiosity. Also related to the Emissions cert. have you had any "issues" (inspection) with it now that time has gone by? finally a suggestion: maybe "dress" up the engine cover a bit? a link to something I did for mine.. since the covers are the same... link ...just don't laugh too hard at the quality of the build so far!! :ROFLMAO: Don't feel like you have to read thru it all, just skip to the bottom of the link page. :p
 
OP
Z

zmotorsports

ALLIANCE MEMBER
Joined
Oct 20, 2009
Messages
21,484
Location
Northern Utah
Mike, THANK YOU!! for the endless time you have given us & continue to give us on all the things you do! I took the time to read through the LS swap & it is VERY IMPRESSIVE! I was striving for a similar objective on my build, but I do not have near the talent or tools to pull it off as well as you have. I have a question and a suggestion ;) :p. I was wondering with the engine being a new pkg. from GM how does the warr. play in relation to the engine not being in a GM vehicle? although I know you have nothing to worry about as you can fix anything! just curiosity. Also related to the Emissions cert. have you had any "issues" (inspection) with it now that time has gone by? finally a suggestion: maybe "dress" up the engine cover a bit? a link to something I did for mine.. since the covers are the same... link ...just don't laugh too hard at the quality of the build so far!! :ROFLMAO: Don't feel like you have to read thru it all, just skip to the bottom of the link page. :p

Thank you very much for the comments.

I discussed the warranty on the "production" engine when I purchased it and was told they would warranty that there were no defects or issues being a new engine. I purchased this from a GM dealership who had purchased a few dozen of the L94 production engines when GM made the switch to the LT design on the production line. This was not a "crate" engine and was an actual "production" engine, so I was less concerned on whether it would run correctly or not. I waffled on doing the AFM delete before dropping the engine into the Jeep but only decided not to at that time to make sure everything was going to run properly, and I'd perform the AFM delete at a later date, although I did tune out the AFM function at the time of installation. I will be doing an AFM delete at some point, same with my Fifth Gen Camaro.

The engine didn't come with an engine cover, but pretty much everything else, including the mounting ears and contact points and I thought about fabricating a sheet metal one at the time but decided I wanted this to look as close to 100% OEM as possible which is why the engine cover is left unmolested. I purchased a new engine cover and I only had to trim the sides slightly and machine down the mounting points to get the cover sitting about .750" lower to clear my hood, which really wasn't too big of a job. Nearly every LS swap into a Jeep I had seen up until this point did not run an engine cover on the truck/SUV engine, but some did on the LS3 due to the lower intake manifold design. Again, I wanted this to be as close to what it would have looked like had it rolled off the assembly line so nothing fancy in the engine bay. I really don't even like the open air filter element if I'm being honest as I much prefer OEM airboxes as a general rule.

I appreciate the comments and thank you for checking out my build and my thread.
 

plain2car

Well-known member
Joined
Nov 27, 2008
Messages
514
Location
Gilbert, Arizona
thanks for the reply, yea.. I learned the hard way about AFM & DOD. I am now well versed in the do's & dont's of the Gen IV! :sneaky: the engine cover comment was in jest... i think that the cover is fine & completely understand your reason(s). I too agree that the fact that it is able to be utilized is in itself a "custom" touch. Again you did a fantastic job & i think it should be shared on a few different forums! i know you mentioned that you are a GM guy at heart, so if not aware you should visit the 67-72 chevytruck forum! there are alot of builds on there that you would find very interesting... just in case you needed some reading material in your "down time".... :ROFLMAO:
 
OP
Z

zmotorsports

ALLIANCE MEMBER
Joined
Oct 20, 2009
Messages
21,484
Location
Northern Utah
thanks for the reply, yea.. I learned the hard way about AFM & DOD. I am now well versed in the do's & dont's of the Gen IV! :sneaky: the engine cover comment was in jest... i think that the cover is fine & completely understand your reason(s). I too agree that the fact that it is able to be utilized is in itself a "custom" touch. Again you did a fantastic job & i think it should be shared on a few different forums! i know you mentioned that you are a GM guy at heart, so if not aware you should visit the 67-72 chevytruck forum! there are alot of builds on there that you would find very interesting... just in case you needed some reading material in your "down time".... :ROFLMAO:

Thank you. Actually, I'm afraid to go on any 67-72 GM site as those were some of my favorite years. I had a 1967 Chev truck at one time but sold it to buy the wife's engagement/wedding ring. I would love to build another at some point. Unfortunately, there are other vehicles I would like to build at some point and going to a 67-72 GM site would just make me want one worse and I'm not ready for another full build for a while. At least not until I get the mortgage paid off and retire. :unsure:
 

plain2car

Well-known member
Joined
Nov 27, 2008
Messages
514
Location
Gilbert, Arizona
yea... as Justin knows the classic chevy trucks can't be beat! ... errrrr ..wait.... what... :ROFLMAO: :rocker: I do agree that it can't hurt to just "window shop" and store one up... ;) you letting loose on a '68 would be AWSOME!! (y)
 

ntsqd

Well-known member
Joined
Jan 22, 2005
Messages
997
Location
Lower left coast
I'm guessing that you don't have a lot of room for anything air filter-wise, but have you looked at the Express van air filter assemblies? They're very "Donaldson"-like in how they're shaped. I am intending to use one, if at all possible, on the Wagon's LM7 transplant.
 
OP
Z

zmotorsports

ALLIANCE MEMBER
Joined
Oct 20, 2009
Messages
21,484
Location
Northern Utah
I can imagine how clean, classy and bad *** you would build one of those trucks. So stay away from that site, but can't hurt to shop for a project vehicle to tuck away until you have time. prices aren't going to go down.

yea... as Justin knows the classic chevy trucks can't be beat! ... errrrr ..wait.... what... :ROFLMAO: :rocker: I do agree that it can't hurt to just "window shop" and store one up... ;) you letting loose on a '68 would be AWSOME!! (y)

Thanks guys. I've always loved those 67-72 GM trucks, especially when I was in High School and a friend's uncle (Fred) had a 1972 shortbed Chevy with factory A/C. It was all black with the chrome trim/grille package, had 4" lift and 33" tires and 350/350 engine/trans. powertrain. I admired that truck and considered it a rolling work of art and I loved seeing it nearly every day driving past the dealership where he worked as the service manager. It was ALWAYS spotless, I don't think I ever saw it dirty. Even after a morning drive in a hellacious snowstorm, he'd get to work early, give it a bath and would have it parked out front in his parking spot all nice and clean. I would just drool over that truck.

Funny, looking back with me driving a rebuilt 1979 GMC Jimmy in 1984 at the time when I got my driver's license and then shortly afterwards a 1984 Chevy shortbed in 1987 (senior year of High School) almost identical in trim, lift and tires/wheels but I always liked that "old Chevy shortbed" Fred owned since new. However, in about 1987 when I built my 1984 shortbed from a wrecked pile of scrap and swapped in a 400 cid smallblock with TH400 trans. and then shortly afterwards a 396 bored to 402 cid big block with built TH400, his truck was only 12 years older than my "relatively" new truck and I still drooled over that 1972 thinking how I hoped I would be able to keep an old truck like that looking nice and clean as long as possible. Now I drive a 19-year-old truck that is in about as good of condition as Fred's old 1972 was back then. Funny how things come full circle sometimes. :unsure:

When I ran across the chance to grab a 1967 Chevy 1/2 ton longbed shortly after high school in very, very poor condition I snatched it up, actually traded a riding lawnmower for it. :bounce: After about a year of bringing it back while dating my girlfriend (now wife), I sold it to purchase a wedding/engagement ring. Best decision of my life, but I would like to build another 67-72 GM truck someday. I'm especially fond of the '67 with the more sloped leading edge of the hood and where it tucked in behind the grille.

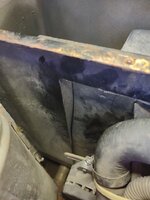
I'm afraid to start looking at this time because I don't have the time, nor funds, to build one the way I want and I don't necessarily want one sitting around the yard until I get the opportunity to build it. I'll have to postpone looking until I get to a point where I have the resources (time and money) to commence a build.
 
OP
Z

zmotorsports

ALLIANCE MEMBER
Joined
Oct 20, 2009
Messages
21,484
Location
Northern Utah
I'm guessing that you don't have a lot of room for anything air filter-wise, but have you looked at the Express van air filter assemblies? They're very "Donaldson"-like in how they're shaped. I am intending to use one, if at all possible, on the Wagon's LM7 transplant.

Yeah, I looked at those canister style GM boxes from the vans, but just no room in the Jeep's small engine bay. Hell, I barely have enough room for an open air filter element and keep looking at how to construct a custom box but I end up not dedicating any time to go any further. The open air filter works for now although I do install a sock over it when off-roading in extremely dirty/dusty situations. I really wanted to use something from an OEM to keep with my theme, but I think ultimately I'll have to custom build something when I get around to it, just don't know when that will be.
 
OP
Z

zmotorsports

ALLIANCE MEMBER
Joined
Oct 20, 2009
Messages
21,484
Location
Northern Utah
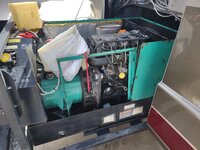
Made some headway on the Onan 10kw generator in the coach last night. Only had to crawl under and out about 20 times. :ROFLMAO:


When I removed the covers the other night, I noted that a good bit of foam between the blower area and the engine enclosure was missing. These Onan Quiet Diesel generators rely on a sealed "box" sometimes referred to as a "hushbox" to not only keep them quiet, but also to ensure the airflow is properly routed. This particular generator is similar to the 12.5kw whereas the radiator is mounted under the engine horizontally and the blower assembly is attached to the crankshaft. Air is pulled across the radiator from the bottom, up through the engine/generator box assembly and finally to the blower assembly where it is then pushed out the back of the enclosure well behind where the intake for the air is located. Hope that all makes sense.... It requires a tightly sealed box in order to properly flow air throughout the designed path and if anything obstructs or disrupts this airflow it will shut down. These cannot even be run with the covers off for more than a few minutes before they shutdown on an overtemp error. So when I noticed some foam missing and/or deteriorated to the point it could begin causing issues, I took some measurements to obtain some for replacement.

I got a call from my local Grainger yesterday letting me know the Trim-Lok EPDM weatherstripping had arrived so I grabbed it on the way home.
gen1.jpg

This is the same manufacturer we've had such good luck with at work on our generator enclosures and other industrial enclosures around our site so I figured I'd use it for my personal generator as well. Onan wanted ridiculous money for replacement foam for these Quiet Diesel (QD series) generators and this EPDM weatherstripping from Trim-Lok works excellent against the environment and heat.
gen2.jpg

Here you can see the section of OEM foam that is barely remaining between the blower housing area and the engine/generator area.
gen3.jpg

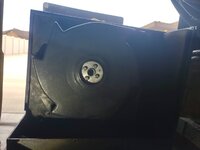
Here you can see what I saw when I removed the covers, the side piece as well as the top piece of insulating weatherstripping are missing. This could potentially create the hot air to recirculate between the two areas and not fully pull the air through the designed flow path.
gen4.jpg

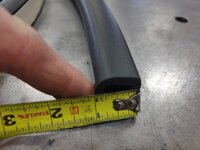
It measures about 3/4" thick.
gen5.jpg

So I purchased the Trim-Lok EPDM material that was 1" by 1" to allow for some compression and sealing to take place.
gen6.jpg

gen7.jpg

Before crawling under the coach to get to the blower housing area and knowing I would be creating some dust from removing the old foam, I figured I would close up the cooling system with the parts that just arrived from my local Cummins/Onan dealer. Prepped the thermostat opening by thoroughly cleaning the mounting surface and groove.
gen8.jpg

Installed the new OEM thermostat.
gen9.jpg

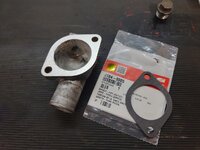
Prepped the thermostat housing and used a new OEM gasket.
gen10.jpg


Stay tuned for more.
 

OutlawDrifter

Well-known member
Joined
Jan 20, 2015
Messages
3,903
Location
KS
Mike, growing up my grandpa had a 1967 C10 shortbed with the big back window. Pretty basic pickup, vinyl seat/floor, heater, no power steering(grandpa always said, the more power you put to it, the better it steers :LOL:), AM radio, white grill and headlight buckets, but it did have the basic chrome on the side. Chrome reverse wheels w/baby moons, 283/powerglide. We put the 350hp L79 camshaft in the 283 and left the 2GC in place...it always sounded great with the dual exhaust and glasspacks. Chevy Red with a white top. I'll see if I can dig up a picture.
 
OP
Z

zmotorsports

ALLIANCE MEMBER
Joined
Oct 20, 2009
Messages
21,484
Location
Northern Utah
Continuing on with the Onan generator work.

Thermostat housing installed as well as the hose connection and new OEM sending unit installed.
gen11.jpg

Upper radiator hose installed and wiring laid back out where it goes.
gen12.jpg

With the cooling system closed up, I crawled underneath the coach to remove the blower housing, the blower and the shield separating the two areas, thus exposing the deteriorated foam on the sides and top. The bottom pieces surprisingly still looked good so I left it intact.
gen13.jpg

With the foam removed, I grabbed a die grinder with a Roloc style strip disc and removed all of the foam and adhesive remnants from the surround. Unfortunately, this took some of the area down to bare steel so it needed to be prepped and painted.
gen14.jpg

After wiping the area down with acetone to prep the surface, I applied a few light coats of Seymour Big Rig semi-gloss black paint.
gen15.jpg

When the paint dried, I cut to size the new EPDM weatherstripping and applied it to the specific areas.
gen16.jpg


About that time the wife arrived home from work so it was a good place to stop for the night. Next will be to install the steel divider back into place and then the blower assembly and blower housing before buttoning up the work underneath.

Thanks for looking.
 
OP
Z

zmotorsports

ALLIANCE MEMBER
Joined
Oct 20, 2009
Messages
21,484
Location
Northern Utah
Mike, growing up my grandpa had a 1967 C10 shortbed with the big back window. Pretty basic pickup, vinyl seat/floor, heater, no power steering(grandpa always said, the more power you put to it, the better it steers :LOL:), AM radio, white grill and headlight buckets, but it did have the basic chrome on the side. Chrome reverse wheels w/baby moons, 283/powerglide. We put the 350hp L79 camshaft in the 283 and left the 2GC in place...it always sounded great with the dual exhaust and glasspacks. Chevy Red with a white top. I'll see if I can dig up a picture.

Sounds like a cool truck Marc.

The one I traded for and built was a very, very understated build. It was a C10 but with the longbed (8') and therefore not the most sought after design. If I knew then what I know now, I would have cut the bed down and turned it into a shortbed.

It too had the white grille, vinyl seat (badly torn) and 283 cid with TH350 trans. I put a used muffler on it, bought used white spoke wheels and used tires so they all matched (not two matching tires when I obtained it) and even used some mixmatched paint (blue enamel) that I was able to get all with small outlay of cash at the time. I took this on trade knowing it would be flipped, even before "flipping" was a thing. :bounce: I just knew I needed the money because I had a plan in place with the sweetheart I was dating and I needed money to make that happen. Figured I could get more money for the truck once completed than the $300 I was asking for the mower I had just rebuilt. Although if I charged a dollar an hour for my labor at the time I probably lost money. :ROFLMAO:

Truck turned out decent enough and netted me enough to take a trip with the girlfriend to the jewelry store to go shopping. ;) And the rest as they say, is history.
 

WoodsTruck

Well-known member
Joined
Jan 12, 2013
Messages
1,028
Mike,
With all the discussions on wiring and the apparent general dislike for plastic split loom, have you ever encountered wire insulation abrasion where the wire leaves the split loom?
My father in law had a '68 Chevy that he ordered new when he worked at the local dealer. CST with the factory 396. Nice enough truck but he had a habit of over-camming every engine he had so it would barely get out of its own way. I'm pretty sure my 302 powered Bronco is quicker.
 
OP
Z

zmotorsports

ALLIANCE MEMBER
Joined
Oct 20, 2009
Messages
21,484
Location
Northern Utah
Mike,
With all the discussions on wiring and the apparent general dislike for plastic split loom, have you ever encountered wire insulation abrasion where the wire leaves the split loom?
My father in law had a '68 Chevy that he ordered new when he worked at the local dealer. CST with the factory 396. Nice enough truck but he had a habit of over-camming every engine he had so it would barely get out of its own way. I'm pretty sure my 302 powered Bronco is quicker.

I have not personally ever seen any insulation abrasion at the point where the wires exit the split loom. When I install the new nylon spiral style of wrap, I do find myself cutting a slit or window in the wrap where the wires exit, but this is more to allow the wire to exit without holding the spiral wrap open and look like garbage, so it's more for aesthetics.
 

M.Brane

ALLIANCE MEMBER
Joined
Feb 11, 2024
Messages
1,797
Location
1 hr N/W of LA LA Land
Eric, I have a new Miller 180 Diversion TIG that humbles and embarrasses me every time I try to use it. 🙁
Learning TIG was one of my retirement goals, but it has eluded me so far.
You too eh? I can do steel or aluminum passable, but SS kicks my ***. Can't seem to find that nice spot between too hot, and not hot enough.
 

ntsqd

Well-known member
Joined
Jan 22, 2005
Messages
997
Location
Lower left coast
I don't understand that, I used to start the people that I got started TIG welding on SS because it is more tolerant of too much heat than is carbon steel. Have you tried using your carbon steel setting for the same thickness SS? That should be pretty close.
 
OP
Z

zmotorsports

ALLIANCE MEMBER
Joined
Oct 20, 2009
Messages
21,484
Location
Northern Utah
Hope everyone had a great weekend.

Friday I arrived home to find the remainder of my order of Norma hose clamps from Belmetric sitting on the doorstep, so I took some time to organize them into a supply drawer. I was planning on doing yardwork but it was threatening rain and I figured the sure fire way to ensure it would rain would be to fire up the mower. :ROFLMAO:
norma1.jpg

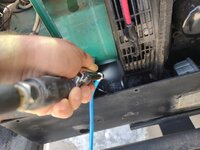
I then proceeded to pull a vacuum on the cooling system of the Onan generator with the Air Lift vacuum system.
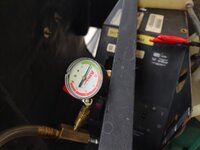
gen21.jpg

Nice tight system according to the gauge, but I like to let them sit under vacuum for at least 20-minutes or so.
gen22.jpg

Pulled the hoses flat.
gen23.jpg

While the cooling system was holding a vacuum, I went into the shop to clean the blower housing. Cleaned up the housing with some Meguiar's All Purpose Cleaner and then applied some weatherstripping to the backside.
gen24.jpg

Blower housing installed on the back of the generator and ready to install the rear cover.
gen25.jpg

I also had a gallon of degreaser arrive, so I mixed some up in preparation for Saturday's work.
gen26.jpg

The Milton air blower/siphon tool at the ready as well.
gen27.jpg


That was it for Friday night as it was time to close up the shop and relax with the wife.
 
OP
Z

zmotorsports

ALLIANCE MEMBER
Joined
Oct 20, 2009
Messages
21,484
Location
Northern Utah
Friday night my son text me to see if I wanted to go to breakfast with he and my grandson? Well hell yeah I do.

We had a great breakfast with three generations breaking bread and enjoying our morning.

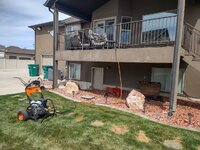
After arriving home, I pulled the coach outside and began to prep the area to pressure wash the generator as well as the deck on the house while the pressure washer was out.

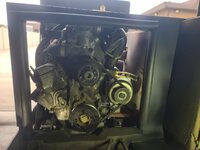
Pressure washer ready, degreaser ready and air blowers ready.
gen28.jpg

I sprayed some solution through the radiator fins using the Milton siphon blow gun. I generally give the generator radiator a thorough cleaning such as this about every other year, but with the ability to now park the coach inside the garage, I don't find the need to clean it as often and only hit it every several years. It wasn't too awfully bad but I was still able to get some dirt and debris out of it.
gen29.jpg

Making sure to get as much surface area of the radiator as possible. It's a bit tight and compact inside of the enclosure so it's difficult to get a straight shot on all of the surface area and care must be taken to not damage any of the radiator fins.
gen30.jpg

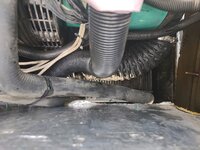
I then put the larger nozzle on the pressure washer to reduce pressure and widen the fan to avoid damage and to not force water into connections where it doesn't belong. It sure came out nice and clean though, even the hoses and ductwork.
gen31.jpg

gen32.jpg

I used compressed air to blow dry the generator before removing the plastic bags covering sensitive electrical components.
gen33.jpg

The radiator fins look great. Nice and clean, although they weren't terribly dirty to begin with.
gen34.jpg

gen35.jpg

A bit of dirt and debris was washed out of the unit.
gen36.jpg

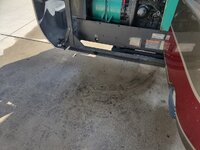
But not terrible seeing as how it's been over 4 years since I gave it this deep of a cleaning.
gen37.jpg


Thanks for looking.
 
To avoid these ads, REGISTER NOW!
Top Bottom