To avoid these ads, REGISTER NOW!

ZMotorsports Shop Projects 2.0

OP
Z

zmotorsports

ALLIANCE MEMBER
Joined
Oct 20, 2009
Messages
21,477
Location
Northern Utah
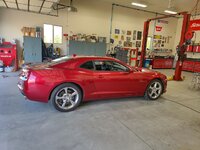
While the deck and the coach's generator were still drying, I pulled the cover from the Camaro and checked fluids and tire pressures as the wife and I wanted to go for a drive Saturday afternoon.

camaro1.jpg

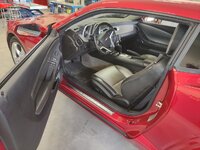
Gave the interior a good wipe down as well as it's been under cover all winter.
camaro2.jpg

Ready to go.
camaro3.jpg

By mid-afternoon, I backed the coach into the shop and we hopped in the car and went for a drive as it was a beautiful Saturday afternoon.
camaro4.jpg

camaro5.jpg

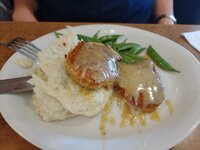
Not knowing exactly where we were going other than to put some miles on the car, we ended up at one of our favorite little diners in a very small town about 70-miles from home. They start serving dinner @ 5pm and we were just a bit early so we sat and enjoyed our conversation while we waited for the clock to strike 5pm so we could order. It was worth the wait as usual. The wife ordered mustard crusted chicken with sugar snap peas and garlic mashed potatoes and I had their small prime rib, with sugar snap peas and augratin potatoes. Freakin' delicious and worth the drive and wait.
camaro6.jpg

camaro7.jpg

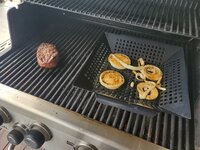
Yesterday we hung out with our son, DIL and grandson for a bit later in the morning and then just enjoyed being home all afternoon. Last night threw some meatage and onions on the grill for dinner to wrap up the weekend.
camaro8.jpg


Thanks for looking.
 
To avoid these ads, REGISTER NOW!
OP
Z

zmotorsports

ALLIANCE MEMBER
Joined
Oct 20, 2009
Messages
21,477
Location
Northern Utah
Looks like a great weekend, even better when a nice cruise gets thrown in the mix!

Thanks Mike, yeah it was nice to be behind the wheel of the car again, just enjoying a nice relaxing drive. Although it's now covered in bugs and needs a thorough cleaning. Wouldn't have to wash it if I would have left it in the shop under the cover. :unsure:
 
OP
Z

zmotorsports

ALLIANCE MEMBER
Joined
Oct 20, 2009
Messages
21,477
Location
Northern Utah
Bugs stuck on it are sign that it's being enjoyed instead of merely looked at.

That's what the wife said. She was concerned when I did the paint correction that it would be a garage queen like our street rod was and we wouldn't drive it and enjoy it. I need to make it a point to get it out more often and enjoy it though. I also need to slow down on the side jobs so I don't stress so much about making the time to actually wash it.
 

Xti04

Well-known member
Joined
Nov 11, 2016
Messages
2,366
That's what the wife said. She was concerned when I did the paint correction that it would be a garage queen like our street rod was and we wouldn't drive it and enjoy it. I need to make it a point to get it out more often and enjoy it though. I also need to slow down on the side jobs so I don't stress so much about making the time to actually wash it.
Amen to slowin down! Im so covered up I dont have time to clean my boat and its 80 degrees here. My priorities are screwed up!
 

bigdave_185

Well-known member
Joined
Feb 14, 2021
Messages
443
Location
Utah
@zmotorsports
General question, my onion gen on my toy hauler doesn’t have an awesome pull out tray like yours and is very closed off. I didn’t see a coolant overflow or anything. Is there a chance it’s air cooled? Of course I don’t have an owners manual being 20 yrs old
 
OP
Z

zmotorsports

ALLIANCE MEMBER
Joined
Oct 20, 2009
Messages
21,477
Location
Northern Utah
@zmotorsports
General question, my onion gen on my toy hauler doesn’t have an awesome pull out tray like yours and is very closed off. I didn’t see a coolant overflow or anything. Is there a chance it’s air cooled? Of course I don’t have an owners manual being 20 yrs old

Dave, yes, more than likely it is an air-cooled model. It is probably either a Marquis or Emerald model and both are air cooled, some are even LP and not gasoline, depends on the setup the RV manufacturer chose.
 
OP
Z

zmotorsports

ALLIANCE MEMBER
Joined
Oct 20, 2009
Messages
21,477
Location
Northern Utah
I finished up the Onan QD service last night and got it all put back together and ran it with the A/C's going for about an hour while I cleaned up and put tools away.

Front and side cover installed. The ECM/computer put back in place and all the intake duct work connected and positioned along with the air filter and ready for the top to be installed.
gen41.jpg

Completely assembled, coolant surge tank filled, all covers buttoned up and running.
gen42.jpg

Creating a nice draw of air through the radiator and is expelling a strong air stream out the back of the enclosure.
gen43.jpg


That pretty much concludes the generator cooling system service on our coach's power system and ready for a warm summer of traveling.

Thanks for looking.
 

rabakoe

Well-known member
Joined
Dec 28, 2011
Messages
64
Location
America's Dairyland
It wasn't until I started doing more research for constant torque hose clamps for my coach's cooling system that I started doing even more research about standard hose clamps and was somewhat dumbfounded by the varying levels of quality.

What do you like for constant torque clamps? Do you prefer the belleville spring style (e.g. Norma Breeze)? Or the spring band type used by many OEMs?

IMG_1831.jpeg

I’ve been needing to replace a few temporary clamps on radiator coolant hoses that are… uhhh… at risk of becoming permanent fixes if I don’t act on it soon. I had been leaning towards the Breeze clamps but then was stuck on their light duty vs heavy duty line. Thoughts?

Only on Garage Journal do I start overthinking hose clamps…
 

bugnut

ALLIANCE MEMBER
Joined
Jul 14, 2012
Messages
4,010
Location
Central Ohio
Mike, looks like I'm going to be getting a new motor for the vw baja. Probably more torque and greater than 2000cc. I have been looking at the kits, and I am leery as I know when you buy a package it is not always as it seems. I plan on doing mostly road driving, about 80% of the time and less than 2000 total miles a year. I'm leaning toward a local builder, but would appreciate any insight or input. Needless to say this is probably in the realm of ~8000 bucks, which I don't spend lightly. Thanks in advance.
 
OP
Z

zmotorsports

ALLIANCE MEMBER
Joined
Oct 20, 2009
Messages
21,477
Location
Northern Utah
Jesus - Im always amazed at this thread. Im over here trying to figure out how to put gas in my own car and you are over here working on coaches, grass, mowers, like everything!

I should have stayed in school.

Thanks Tim, I appreciate the comments. FYI, not college taught here, hell I barely made it through high school. Learned the hard way as I wasn't cut out to sit in a classroom. Most everything I've learned has just been digging in and making my fair share of mistakes along the way.
 
OP
Z

zmotorsports

ALLIANCE MEMBER
Joined
Oct 20, 2009
Messages
21,477
Location
Northern Utah
What do you like for constant torque clamps? Do you prefer the belleville spring style (e.g. Norma Breeze)? Or the spring band type used by many OEMs?

IMG_1831.jpeg

I’ve been needing to replace a few temporary clamps on radiator coolant hoses that are… uhhh… at risk of becoming permanent fixes if I don’t act on it soon. I had been leaning towards the Breeze clamps but then was stuck on their light duty vs heavy duty line. Thoughts?

Only on Garage Journal do I start overthinking hose clamps…

I use both style of constant tension clamps, but I really like the bellville style used on the Breeze HD clamps. As for light duty, I went down the rabbit hole and ordered a lot of the Norma Torro style, but I also use the Breeze light duty. As a side note, the Breeze light duty was what was used on my Onan 10kw generator in our coach and Onan isn't known for going cheap on anything, so I was pleased to see what they used.

I'm with you about overthinking hose clamps. I definitely went down the rabbit hole over the past couple of months and prior, I never gave hose clamps much thought. Same with zip ties. :ROFLMAO:
 
OP
Z

zmotorsports

ALLIANCE MEMBER
Joined
Oct 20, 2009
Messages
21,477
Location
Northern Utah
Mike, looks like I'm going to be getting a new motor for the vw baja. Probably more torque and greater than 2000cc. I have been looking at the kits, and I am leery as I know when you buy a package it is not always as it seems. I plan on doing mostly road driving, about 80% of the time and less than 2000 total miles a year. I'm leaning toward a local builder, but would appreciate any insight or input. Needless to say this is probably in the realm of ~8000 bucks, which I don't spend lightly. Thanks in advance.

Joel, I did a few 1776 and 1835 cc engines, but the owners were somewhat disappointed in the power output after spending a good chunk of money. They were reliable and ran well, but I steered people away from them due to the poor feedback from a performance aspect.

I mainly did 1915, 2276 and a few 2332 cc engines for sandrails. The 2332's were a real hot rod, especially when equipped with a T3/T4 turbo. The only downside to them was in a sandcar after a couple of hard pulls up the dunes, they really needed to be allowed to cool down so I really only recommended these for those clients who realized they were building a real hot rod and not a mild-mannered drive it and park it style of car.

In my opinion, the 2276cc was a good all-around engine and seemed to have good power output and was pretty reliable as long as it wasn't flogged on too bad. I also did a couple of 2276's for street cars and ran 44IDF's on them. Many people kept telling me that the 44IDF's were too small for a 2276, but on a street car that doesn't see WOT as much as a sandcar, they worked great and were very streetable for a nice smooth and reliable driver. I waffled years ago when my son was younger about building a street VW driver and I was planning on using the above combination, 2276cc with 44IDF carbs.
 
Last edited:
OP
Z

zmotorsports

ALLIANCE MEMBER
Joined
Oct 20, 2009
Messages
21,477
Location
Northern Utah
The sun was shining yesterday so after arriving home from work I pulled the Camaro out and gave her a good cleaning.

I washed the front end in the shade, then turned the car around and washed the rear end to avoid having water spots from drying too quickly in the sun. Had I waited a couple more hours I would have had the whole car in the shade but I wanted to get it done as soon as I got home.
wash1.jpg

wash2.jpg

Then pulled the car back into the shop and worked on a few other things.
wash4.jpg

Before closing up the shop for the night I threw the cover on it as we're supposed to have some wet weather for the next few days and I don't see us driving it this weekend.
wash5.jpg


On a side note, my new drill bits arrived on Friday afternoon so I gave them a try last night. We started using these at work and have had great success on our rack leg kits. We were going through multiple drill bits per leg kit and although these are expensive, we opted to give them a try for our rack techs and they love them. They told me that they can now get multiple leg kits completed on the same drill bit.

I gave the Norseman Vortex drill bits a try at my home shop last night and they didn't disappoint.
drill1.jpg

drill2.jpg

Thanks for looking.
 

ntsqd

Well-known member
Joined
Jan 22, 2005
Messages
997
Location
Lower left coast
My second generation ACVW engine builder told me that given my use (beating the avatar against the desert rocks to see what broke) to stick to the 90.5mm P&B's as they have the thickest cylinder walls of any of the oversize P&B's. That does limit the max displacement to less by a considerable amount than what is possible. My mildly stroked 1955cc is not a street car engine, but it could be closer to one with a lighter than stock flywheel and a lighter crank pulley. I wanted as much flywheel inertia as I could get, so stock weight flywheel and a cast iron crank pulley (with a second belt groove for A/C). Static CR is set at 8:1, a Howard's H-1 cam, some CB 1.25 rockers, an OEM Toyota electronic ignition reluctor & pick-up coil fitted into a Bosch 010 distributor run by the Toyota module hidden inside an old Delta Mark Ten B electronic ignition conversion housing, and a single DGV is the rest of the engine's set-up. Can post a few pics if there's interest.
 
To avoid these ads, REGISTER NOW!

signcrafter

Well-known member
Joined
May 9, 2012
Messages
12,531
Thanks Tim, I appreciate the comments. FYI, not college taught here, hell I barely made it through high school. Learned the hard way as I wasn't cut out to sit in a classroom. Most everything I've learned has just been digging in and making my fair share of mistakes along the way.
I know exactly what you mean Mike. People always ask if I went to school for construction or auto repair and my response is always I don't have a degree but I've spent a lot of time in "college" and still go every day. Countless hours learning from books or now internet and by learning as I go and learning from mistakes, some of them costly. Two stories I tell a lot and have probably already shared with you are my first brake job and my first small engine rebuild. I didn't have anyone to teach me or ask questions when I was growing up. My first car needed brakes and I was poor. I got the caliper off and got my rotors turned and went to put together. Put new pads in the caliper and it wouldn't fit over the new rotor. Must have gotten the wrong parts? Didn't even have a clue you had to push the piston back in. That's when I started researching everything and learning as much as I could and recognized the importance of things like repair manuals and now service info online. Have come a long way since then but still look back at those days and what a learning experience it's been. Doing injector seals on a 6.0 diesel and a cam and rockers in a 5.3 this week.

Second story is I bought a jet ski when I was 16, spent 5 times what my car at the time cost me on it. The first winter I took the "tear the motor apart for fun" college coarse but my professor(myself) wasn't very knowledgeable. He forgot to tell me that when you tear a motor all the way down you can't reuse piston pin circlips. It ran fine the first time out for about an hour and then the noises started. Tore it back down and found the clip had come out and made it's way into the combustion chamber and put a neat design on the piston and head. Ordered new parts and took the jug in to get bored out and they found it was cracked. Found a used jug and got it back together and running again. That was an expensive college coarse and I saved the old head as my "degree". A lot of people would lock those bad experiences away but in a way I'm proud of them because it's part of the experience and I learned a lot along the way and it's good to look back and see how far I've come. I tell these stories to younger people when they ask how I learned or if I went to school to try and encourage them.
 
OP
Z

zmotorsports

ALLIANCE MEMBER
Joined
Oct 20, 2009
Messages
21,477
Location
Northern Utah
I know exactly what you mean Mike. People always ask if I went to school for construction or auto repair and my response is always I don't have a degree but I've spent a lot of time in "college" and still go every day. Countless hours learning from books or now internet and by learning as I go and learning from mistakes, some of them costly. Two stories I tell a lot and have probably already shared with you are my first brake job and my first small engine rebuild. I didn't have anyone to teach me or ask questions when I was growing up. My first car needed brakes and I was poor. I got the caliper off and got my rotors turned and went to put together. Put new pads in the caliper and it wouldn't fit over the new rotor. Must have gotten the wrong parts? Didn't even have a clue you had to push the piston back in. That's when I started researching everything and learning as much as I could and recognized the importance of things like repair manuals and now service info online. Have come a long way since then but still look back at those days and what a learning experience it's been. Doing injector seals on a 6.0 diesel and a cam and rockers in a 5.3 this week.

Second story is I bought a jet ski when I was 16, spent 5 times what my car at the time cost me on it. The first winter I took the "tear the motor apart for fun" college coarse but my professor(myself) wasn't very knowledgeable. He forgot to tell me that when you tear a motor all the way down you can't reuse piston pin circlips. It ran fine the first time out for about an hour and then the noises started. Tore it back down and found the clip had come out and made it's way into the combustion chamber and put a neat design on the piston and head. Ordered new parts and took the jug in to get bored out and they found it was cracked. Found a used jug and got it back together and running again. That was an expensive college coarse and I saved the old head as my "degree". A lot of people would lock those bad experiences away but in a way I'm proud of them because it's part of the experience and I learned a lot along the way and it's good to look back and see how far I've come. I tell these stories to younger people when they ask how I learned or if I went to school to try and encourage them.


Thanks for sharing Scott. In my last shop I rebuilt/built a lot of powersports engines for dirt bikes, snowmobiles and sand drag ATV's as well as quite a few sandcars and drag cars and I had a box of used pistons. A couple were from my own failures, but most were from client's engines that I kept after disassembling and studying. I would tell people they were my training materials. :bounce:
 

4 FN 27

ALLIANCE MEMBER
Joined
Oct 19, 2015
Messages
4,635
Location
Minnesnowta
On a side note, my new drill bits arrived on Friday afternoon so I gave them a try last night. We started using these at work and have had great success on our rack leg kits. We were going through multiple drill bits per leg kit and although these are expensive, we opted to give them a try for our rack techs and they love them. They told me that they can now get multiple leg kits completed on the same drill bit.

I gave the Norseman Vortex drill bits a try at my home shop last night and they didn't disappoint.
drill1.jpg

Mike I hope you don't mind, I passed your comments on to the President of Viking -Norseman.

IMG_7388.PNG
 

larry4406

Well-known member
Joined
Jan 27, 2006
Messages
19,638
Location
Northern Virginia
The sun was shining yesterday so after arriving home from work I pulled the Camaro out and gave her a good cleaning.

I washed the front end in the shade, then turned the car around and washed the rear end to avoid having water spots from drying too quickly in the sun. Had I waited a couple more hours I would have had the whole car in the shade but I wanted to get it done as soon as I got home.
wash1.jpg

wash2.jpg

Then pulled the car back into the shop and worked on a few other things.
wash4.jpg

Before closing up the shop for the night I threw the cover on it as we're supposed to have some wet weather for the next few days and I don't see us driving it this weekend.
wash5.jpg


On a side note, my new drill bits arrived on Friday afternoon so I gave them a try last night. We started using these at work and have had great success on our rack leg kits. We were going through multiple drill bits per leg kit and although these are expensive, we opted to give them a try for our rack techs and they love them. They told me that they can now get multiple leg kits completed on the same drill bit.

I gave the Norseman Vortex drill bits a try at my home shop last night and they didn't disappoint.
drill1.jpg

drill2.jpg

Thanks for looking.
Those Norseman Vortex drill bits look very interesting. I will have to look into them.
 

Jgaz

Well-known member
Joined
Dec 16, 2016
Messages
1,713
Location
AZ
Thanks for sharing Scott. In my last shop I rebuilt/built a lot of powersports engines for dirt bikes, snowmobiles and sand drag ATV's as well as quite a few sandcars and drag cars and I had a box of used pistons. A couple were from my own failures, but most were from client's engines that I kept after disassembling and studying. I would tell people they were my training materials. :bounce:
The good builders stand head and shoulders above the completion partly because of the broken parts they‘re standing on.
 

GRN96WS6

Well-known member
Joined
Dec 23, 2012
Messages
2,269
Location
SOMD
As meticulous as you are I'm shocked you use a cover on the Camaro, I feel no matter how "soft" they are they still scratch the paint. Other than it being a giant PITA, any reason you don't do the same to the Truck and Coach when not using them?
 
OP
Z

zmotorsports

ALLIANCE MEMBER
Joined
Oct 20, 2009
Messages
21,477
Location
Northern Utah
As meticulous as you are I'm shocked you use a cover on the Camaro, I feel no matter how "soft" they are they still scratch the paint. Other than it being a giant PITA, any reason you don't do the same to the Truck and Coach when not using them?

I on the other hand have had excellent results using the California Car Covers on several my cars. Had one on my Chevelle as well as my 1940 Chev coupe street rod/race car and never had any adverse effects from the cover. No microscratches or anything. The main reason I use/used a car cover is because they were/are kept inside the shop where work is being done. I don't want any dust from machining, grinding or just general work to settle on the car's finish. The truck, Jeep and wife's car all reside in the house's attached garage and therefore not around any work being done.

When I built my detached shop and added the wall between the RV bay and the shop, the whole point of segregating them was for this very reason, to keep dirt and debris off of the coach when parked inside the building. The added benefit was that I gained another 100' of wall space in which to place equipment, 50' on the shop side and 50' on the RV/storage bay side. My contractor tried talking me out of the dividing wall and keeping all 3k square feet open, but I knew with all of the work I would be doing that it would eventually make me anxious about anything getting on the coach.
 

GRN96WS6

Well-known member
Joined
Dec 23, 2012
Messages
2,269
Location
SOMD
I on the other hand have had excellent results using the California Car Covers on several my cars. Had one on my Chevelle as well as my 1940 Chev coupe street rod/race car and never had any adverse effects from the cover. No microscratches or anything. The main reason I use/used a car cover is because they were/are kept inside the shop where work is being done. I don't want any dust from machining, grinding or just general work to settle on the car's finish. The truck, Jeep and wife's car all reside in the house's attached garage and therefore not around any work being done.

When I built my detached shop and added the wall between the RV bay and the shop, the whole point of segregating them was for this very reason, to keep dirt and debris off of the coach when parked inside the building. The added benefit was that I gained another 100' of wall space in which to place equipment, 50' on the shop side and 50' on the RV/storage bay side. My contractor tried talking me out of the dividing wall and keeping all 3k square feet open, but I knew with all of the work I would be doing that it would eventually make me anxious about anything getting on the coach.
I used a CCC on my WS6 I had but it was outside, wind does a number no matter how soft, if it's inside always likely a non issue.

Thanks for the reply, hope I didn't come across as judgemental as it was not my intent.
 
OP
Z

zmotorsports

ALLIANCE MEMBER
Joined
Oct 20, 2009
Messages
21,477
Location
Northern Utah
I used a CCC on my WS6 I had but it was outside, wind does a number no matter how soft, if it's inside always likely a non issue.

Thanks for the reply, hope I didn't come across as judgemental as it was not my intent.

No, not judgemental at all.

As for being outside, I would 100% agree. I routinely advise against using RV covers on those being stored outside for the same reason, the wind causes them to flap and they wear the paint at contact points. Funny, I used to get criticized by neighbors and friends because I didn't cover our coaches at our last home that were parked outside. :bounce:
 

Bigblue&Goldie

Well-known member
Joined
Mar 12, 2009
Messages
10,734
Location
AZ
Joel, I did a few 1776 and 1835 cc engines, but the owners were somewhat disappointed in the power output after spending a good chunk of money. They were reliable and ran well, but I steered people away from them due to the poor feedback from a performance aspect.

I mainly did 1915, 2276 and a few 2032 cc engines for sandrails. The 2032's were a real hot rod, especially when equipped with a T3/T4 turbo. The only downside to them was in a sandcar after a couple of hard pulls up the dunes, they really needed to be allowed to cool down so I really only recommended these for those clients who realized they were building a real hot rod and not a mild-mannered drive it and park it style of car.

In my opinion, the 2276cc was a good all-around engine and seemed to have good power output and was pretty reliable as long as it wasn't flogged on too bad. I also did a couple of 2276's for street cars and ran 44IDF's on them. Many people kept telling me that the 44IDF's were too small for a 2276, but on a street car that doesn't see WOT as much as a sandcar, they worked great and were very streetable for a nice smooth and reliable driver. I waffled years ago when my son was younger about building a street VW driver and I was planning on using the above combination, 2276cc with 44IDF carbs.

I agree, I have a 1776 in a Chenowth 4lwd and it runs good, but definitely suffers on the top end. When it comes to VW's I feel like your really need to go with bigger CC's to get the torque out of them. Granted, growing up I had a neighbor with a single overhead carb (I think it was a 44) 1600 that would pop the front end off the ground! The key to any VW is cooling the oil. Big, low compression VW's will run a long time with good oiling.

At the end of the day, I'd probably do an EcoTec transplant for $6k. My buddy did it to his buggy after finding out how much a VW cost to build. I even offered him a full race motor for less money. I love VW's, which is the only reason I never made the change. The EcoTec's just flat run. It takes a hell of a VW motor to beat a stock EcoTec. When my team first started racing 5 Unlimted, we won the points championship with a bone stock junkyard EcoTec. In many years of racing, I can only think of 2 that we blew up. One was just the other day (still waiting to hear why); one was due to a failed intake sucking in silt.
 

bugnut

ALLIANCE MEMBER
Joined
Jul 14, 2012
Messages
4,010
Location
Central Ohio
Gents, thanks for the replies and experiences. I too have acquaintances with 1776s and they are displeased with the bang for their buck, don't get much improvement out of the money spent.

I'll be chewing on this for a couple more days then fumble around with some half-assed decision. As for an EcoTec transplant, highly unlikely at this time.

Joel, I did a few 1776 and 1835 cc engines, but the owners were somewhat disappointed in the power output after spending a good chunk of money. They were reliable and ran well, but I steered people away from them due to the poor feedback from a performance aspect.

I mainly did 1915, 2276 and a few 2032 cc engines for sandrails. The 2032's were a real hot rod, especially when equipped with a T3/T4 turbo. The only downside to them was in a sandcar after a couple of hard pulls up the dunes, they really needed to be allowed to cool down so I really only recommended these for those clients who realized they were building a real hot rod and not a mild-mannered drive it and park it style of car.

In my opinion, the 2276cc was a good all-around engine and seemed to have good power output and was pretty reliable as long as it wasn't flogged on too bad. I also did a couple of 2276's for street cars and ran 44IDF's on them. Many people kept telling me that the 44IDF's were too small for a 2276, but on a street car that doesn't see WOT as much as a sandcar, they worked great and were very streetable for a nice smooth and reliable driver. I waffled years ago when my son was younger about building a street VW driver and I was planning on using the above combination, 2276cc with 44IDF carbs.

My second generation ACVW engine builder told me that given my use (beating the avatar against the desert rocks to see what broke) to stick to the 90.5mm P&B's as they have the thickest cylinder walls of any of the oversize P&B's. That does limit the max displacement to less by a considerable amount than what is possible. My mildly stroked 1955cc is not a street car engine, but it could be closer to one with a lighter than stock flywheel and a lighter crank pulley. I wanted as much flywheel inertia as I could get, so stock weight flywheel and a cast iron crank pulley (with a second belt groove for A/C). Static CR is set at 8:1, a Howard's H-1 cam, some CB 1.25 rockers, an OEM Toyota electronic ignition reluctor & pick-up coil fitted into a Bosch 010 distributor run by the Toyota module hidden inside an old Delta Mark Ten B electronic ignition conversion housing, and a single DGV is the rest of the engine's set-up. Can post a few pics if there's interest.

I agree, I have a 1776 in a Chenowth 4lwd and it runs good, but definitely suffers on the top end. When it comes to VW's I feel like your really need to go with bigger CC's to get the torque out of them. Granted, growing up I had a neighbor with a single overhead carb (I think it was a 44) 1600 that would pop the front end off the ground! The key to any VW is cooling the oil. Big, low compression VW's will run a long time with good oiling.

At the end of the day, I'd probably do an EcoTec transplant for $6k. My buddy did it to his buggy after finding out how much a VW cost to build. I even offered him a full race motor for less money. I love VW's, which is the only reason I never made the change. The EcoTec's just flat run. It takes a hell of a VW motor to beat a stock EcoTec. When my team first started racing 5 Unlimted, we won the points championship with a bone stock junkyard EcoTec. In many years of racing, I can only think of 2 that we blew up. One was just the other day (still waiting to hear why); one was due to a failed intake sucking in silt.
 
OP
Z

zmotorsports

ALLIANCE MEMBER
Joined
Oct 20, 2009
Messages
21,477
Location
Northern Utah
I agree, I have a 1776 in a Chenowth 4lwd and it runs good, but definitely suffers on the top end. When it comes to VW's I feel like your really need to go with bigger CC's to get the torque out of them. Granted, growing up I had a neighbor with a single overhead carb (I think it was a 44) 1600 that would pop the front end off the ground! The key to any VW is cooling the oil. Big, low compression VW's will run a long time with good oiling.

At the end of the day, I'd probably do an EcoTec transplant for $6k. My buddy did it to his buggy after finding out how much a VW cost to build. I even offered him a full race motor for less money. I love VW's, which is the only reason I never made the change. The EcoTec's just flat run. It takes a hell of a VW motor to beat a stock EcoTec. When my team first started racing 5 Unlimted, we won the points championship with a bone stock junkyard EcoTec. In many years of racing, I can only think of 2 that we blew up. One was just the other day (still waiting to hear why); one was due to a failed intake sucking in silt.

Ryan, thank you for confirming what my clients had told me. It makes me feel better about steering people from them all these years. Some thought it was just to drum up more money on the builds but I tried explaining that I didn't want to see them spend several thousand dollars only to be disappointed. My theory was that they should save up and put that towards an engine that they would be more pleased with. Unfortunately, some chose to still go with the lesser cc engine because they wanted it now and didn't have the funds for a larger engine. Those were after I had the initial feedback from trusted clients so I sent them elsewhere because I didn't want to do those builds and then have people disappointed in an engine I built. I could have taken their money but I know how people are and they'd badmouth the builder rather than tell people they didn't want to take the builder's advice. In the off-road/sand duning world bragging rights were king so if they got beat up the hill, they surely wouldn't reveal the full story, they'd blame the builder. I didn't need that kind of reputation, so I chose to not build them any longer.

When one of my engines ripped up Sand Mountain in a mid-engine car with the front end hanging in the air, that was bragging rights. :bounce: I loved it when rear-engine drivers would brag about the front end lifting, but shut right down when a mid-engine car passed them with tires in the air. That's when they realized it wasn't all that impressive for a rear engine car. :ROFLMAO:


Gents, thanks for the replies and experiences. I too have acquaintances with 1776s and they are displeased with the bang for their buck, don't get much improvement out of the money spent.

I'll be chewing on this for a couple more days then fumble around with some half-assed decision. As for an EcoTec transplant, highly unlikely at this time.

Keep us posted on what you decide Joel. I think you'd be pleased with a 2276 on 44IDF's for the street and have nice power. In sand cars I ran the 48's because they were usually run WOT blasting the dunes, but on the street the 44's gave good throttle response and still pulled strong.

As for other components, I generally ran **** cranks and rods, sometimes Pauter rods on the higher end builds, then Mahle jugs and pistons, sometimes Wiseco pistons and I liked the Engle cams quite well, but there are lesser expensive components that are pretty good. Those are the ones I had repeatable success with over the years.
 
OP
Z

zmotorsports

ALLIANCE MEMBER
Joined
Oct 20, 2009
Messages
21,477
Location
Northern Utah
So another "odd" project in the shop last night.

Here's a little backstory:

My wife's grandmother had been sliding downhill lately, mentally as well as physically, after they put her in a care center a couple of months ago. Her kids (my wife's aunts/uncles) have been going through her home and getting it ready to sell. It's been hard for my wife to see this process take place and has sparked many, many conversations lately between the two of us about a couple's life together, what they collect over a lifetime, memories they share and things that were important to them and more importantly, what happens to the "stuff" when they are no longer with us. Our feelings are a bit more on the sentimental side as we are under a very similar mindset that whatever is in their home was important to them at one time and therefore should demand at least some consideration rather than saying everything needs to go the dump.

They did a lot of traveling, even when they had a young family and money was scarce, but they did it as a family and traveled via car then truck and camper. They took a LOT of pictures of their travels over their 75+ years of marriage and you can really get a sense of their love and devotion to one another. Unfortunately, no one wanted the photo albums so my wife took it upon herself as a grandchild to take the photo albums home, sort through them and divide them up to the corresponding children and their families. Let me say there were NUMEROUS photo albums all completely full. I mean boxes of them that were stashed in closets, under beds and cupboards that we hauled to our home. She sits down a little each night as time allows and over the weekends to sort through them and then has been working to get them in the hands of a member of each sub-family to do with them what they want. I have struggled to understand this because there seemed to be so much love in that family but yet now at the end, there is such a disconnect and almost resentment to some extent that some don't want the pictures and are almost cross with my wife for going through this process. :headscrat I hate seeing my wife in such mental anguish with little to no support and struggle through this on her own, so all I can do is be supportive as possible and continue talking about the good times she had with her grandparents and let her know that they really did have a big impact on me as well. Their love and caring for one another was a great example from the first time I met them just before we were married almost 36 years ago now. It has been good for me to look through the pictures as well and I've realized how many people I know from the pictures that her siblings don't, I kind of enjoyed these reunions, even when I was a much younger man. The stories we'd hear and the people we met were from a different era and one to really be admired and respected. They all had a big impact on my wife and I as we often joke that we were born a few decades too late. My wife says "we're old souls" and I want to think she means that in a positive way. :bounce:

My wife and I feel we have the memories and we were there for them in life and it is not necessary to jump in at this point, so we've stood back and been observers for the past while. My wife did ask if we could drive over and walk through their home last weekend along with our son and his family just to have one last look. It was awesome to hear my son tell his wife stories about the smells he remembered and the food all laid out around various holidays and special occasions. My son wanted to walk out back and look at the yard as he remembers his great-grandfather grilling during 4th of July bar-b-ques and birthday parties and how proud he was of his yard and garden. He remembered where he parked his truck and camper alongside the house and how pristine he kept it, he remembered the patio table next to the grill, all of which are gone now. He would roll over in his grave if he saw what has become of his home and yard now. ☹️ I remember driving down their street and all the homes were well cared for and they had some great neighbors that really took pride in their properties. These were long time neighbors who all moved to the area around early to mid-50's and raised their families together. In my wife's grandfather's yard there was never a blade of grass out of place, every inch of the sidewalk and patio were perfectly trimmed and edged and there wasn't a single weed in the garden. His car was parked in the one car garage which was also well organized and clean and his truck, camper and small fishing boat parked outside along the house were always clean and had coverings on all windows and tires. It was evident he really took care of what he had, even though it was older.

My wife spotted her grandmother's ironing board leaning against the wall and shared a memory of how often she saw her grandmother standing at that ironing board ironing clothes. She then said it was in much better condition than our ironing board and she asked if we could take it home and use it. I noticed that it seemed to be quite old, but still in excellent condition so we took it home so I could check it out. Upon first inspection I noticed it would not stay at the proper height and knowing absolutely nothing about ironing boards turned to Google to see if I could figure out how it worked. I found similar ones online being sold as "vintage" but nothing really showing the adjustment or latching mechanism. I finally found an old document that showed a primitive drawing which revealed to me that there must be a couple of parts missing.

My wife was saddened when she came home from work the other night and I informed her that I thought some parts were missing but I may have a plan after coming up empty handed during some searching. :unsure: Last night I dove in and fabricated the parts and was able to revive the ironing board and give it a chance at a second life. My wife and I both have a special place in our hearts for older, well-made things and I was happy to have been able to save this piece from her grandparent's home and my wife's childhood memory which will hopefully provide her with some joy while using it.

Sorry for the long introduction, but now the repair. Keep in mind I am all new to ironing board repair. :ROFLMAO: My wife said she would be fine if I just made it work at a "fixed" height, but I really wanted to make it adjustable like it was originally.

This truly does have some classic styling though with the swooping curved and chrome legs.
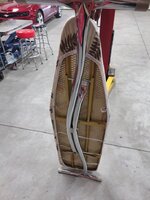
iron1.jpg

iron2.jpg

Upon closer inspection I could not piece together how it was supposed to work but I felt there were some parts missing. The release handle is present but it wasn't contacting anything.
iron3.jpg

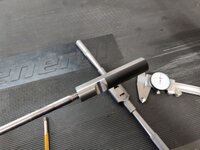
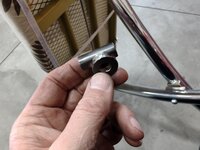
I thought about some form of ratcheting mechanism with a saw cut detent, then thought about a sliding rod and a waffle plate to capture the rod. I actually think this is exactly how it was supposed to function after finding a rather crude drawing online. I began by cutting a small 1" x .750" x .125" plate that would fit into the small slit in the framework. I would drill a slightly oversized hole in the plate that with the help of a compression spring would provide the "bite" on the .250" rod.
iron4.jpg

A .250" rod slid through the holes. Now to figure out how to make them work together.
iron5.jpg

My first thought was to spot weld the washers onto the rod which would hold all of the components together and allow for adjustment.
iron6.jpg

But I then was hit with the thought of how I would fish the rod through the holes properly if everything was one piece. Next thought was to make the rod a separate component that would thread onto the other. For this I put the rod in the lathe and threaded about an inch of one end. During a mock up run, I noted that the waffle plate really didn't "bite" into the rod enough to hold it tightly, so while it was in the lathe I spun it slowly and ran a file down the length to add a small "groove" or spiral depression in the rod in which the plate could fixate on and hold it firmly at any height. Turns out this works perfectly.
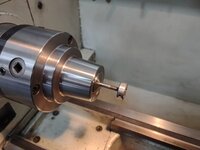
iron7.jpg

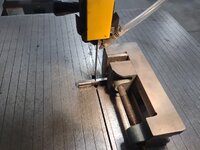
Next was to machine a threaded end in which to thread the rod into.
iron8.jpg

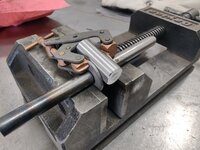
To keep the alignment as close as possible to the crossbar, I clamped it in the mill vise and machined a radius in it that would allow the rod end to sit tightly down on the crossbar.
iron9.jpg

Coming along.
iron10.jpg


Stay tuned for last of the repair.
 
Last edited:
OP
Z

zmotorsports

ALLIANCE MEMBER
Joined
Oct 20, 2009
Messages
21,477
Location
Northern Utah
Continuing on.

Cutting the rod end to length.
iron11.jpg

Prepping for welding and making one last measurement.
iron12.jpg

Threaded rod in place as well as the compression spring wound into position. The spring was a ******, but I won, and it holds the rod very firmly now, especially after adding a spiral groove to the rod.
iron13.jpg

Now to mock up a crossbar and weld the washers to the rod end. The washers were stripped of their zinc coating by letting them sit in vinegar overnight. A trick I learned from another GJ member as it is less toxic than the muriatic acid that I generally use, just takes longer. Overnight seemed to work well.
iron14.jpg

Both washers welded to the rod end and allowed to cool.
iron15.jpg

A quick trip to the wire wheel and it's ready for final assembly with crossed fingers.
iron16.jpg

Rod threaded into the rod end and tested out. The grooved rod holds and the release lever just needed a small tweak to allow enough movement to straighten the waffle plate and allow the rod to easily slide through.
iron17.jpg

At full height. Even with downward pressure on the surface, it holds true.
iron18.jpg

A slight squeeze on the release lever and you can position it to any height.
iron19.jpg

Last up was to give the chrome legs a going over with some 0000 steel wool and a coat of chrome polish.
iron20.jpg


And that concludes the ironing board refurbish.

I guess I can now add ironing board repair to my repertoire of services I can provide. ;)

I hope this brings my wife comfort and to some extent, maybe even some joy each time she uses it. I love seeing that woman smile and hate seeing her in emotional turmoil.


Thanks for looking.
 
OP
Z

zmotorsports

ALLIANCE MEMBER
Joined
Oct 20, 2009
Messages
21,477
Location
Northern Utah
That's a great story Mike. Good of you and I'm sure that scored some brownie points with the wife.

Thanks Scott. I didn't know what I was getting myself into, but I thought "it's an ironing board, how hard can it be?" :unsure: Little did I know that it nearly kicked my *** just trying to figure out what was actually missing in the mechanism. 😳
 

Wiz02

Well-known member
Joined
Jul 13, 2007
Messages
2,399
Location
Southeastern PA
Thanks Scott. I didn't know what I was getting myself into, but I thought "it's an ironing board, how hard can it be?" :unsure: Little did I know that it nearly kicked my *** just trying to figure out what was actually missing in the mechanism. 😳
Mike, you could have asked some of the GJ members that have a few miles on their odometer for a pic of their ironing boards. I think that my wife’s ironing board is similarly constructed to the one that you rescued. Just no cool chrome legs.

But then again, where's the fun in that? Re-engineering the height adjust / latching mechanism from scratch as you did is much more satisfying.
 
To avoid these ads, REGISTER NOW!
Top Bottom