To avoid these ads, REGISTER NOW!

VISE REPAIR 101 all vise repairs, lubricants, sources for parts and the tricks to fix

Fretters

Well-known member
Joined
Jan 25, 2014
Messages
4,217
Location
South Yorkshire, England
Fret! Long time no see man! Hove have you been?

I'm keeping fine. I'm same as ever. :) I'll let you decide whether that's good or bad. :D How's things keeping with you all?

I've been erratic in my appearances on here simply because there's always so much to do. Life has a bad habit of interfering with tinkering time.
 
To avoid these ads, REGISTER NOW!

Outlawmws

Well-known member
Joined
Aug 9, 2011
Messages
39,326
Location
The Badlands
I retired about 7 weeks back, I'm still "acclimating" - I'm almost done with all the "finish this paperwork before XYZ" stuff, including my income taxes...

Discussing a 4 day camping trip with some buddies soon.
 

Shiftless

Well-known member
Joined
Mar 9, 2014
Messages
14,591
Location
East Bay SFO
When you say “swivel base center pin” I assume you are talking about the shoulder bolt that is in the middle of the swivel base there at the bottom.

I use a drag link socket on the tough ones. You’ll need a BIG one.

I have heard some guys have success with a piece of steel plate that just fits the slot and then turn that with a big crescent wrench.

1093086F-D16F-4E89-865A-9577A34FCC8D.jpeg
 
Last edited:

RTM

Well-known member
Joined
May 13, 2019
Messages
13,253
Location
SF Bay Area
Hey all, i'm looking for a little help here. I've got a Reed 405 with a swivel base center pin that is stuck. I've tried hitting it with Kroil, i've soaked it in evaporust, i've soaked it in PB blaster, all to no avail. Anyone have a suggestion?
I used a whack it with a hammer impact wrench, with a drag link on the bottom to fill the slot, on my 203 1/2. Once it moved a fraction of a revolution, I went to a big breaker bar.

On another project, I used the heat and wax method seen here somewhere. Heat it up with a propane torch, rub paraffin around it so it can run in (tilt as needed). Let cool, repeat. When I finally got it apart, there was wax down in the grooves of the bolt. My skeptical nature subsided there.


Be patient, it's only original once. If you **** up the bolt, you have the tools to make a replacement. Many of us don't, so we need to be more cautious.
 

Midwest Shop Supply

Well-known member
Joined
Jan 22, 2025
Messages
74
Location
Northern Illinois
When you say “swivel base center pin” I assume you are talking about the shoulder bolt that is in the middle of the swivel base there at the bottom.

I use a drag link socket on the tough ones. You’ll need a BIG one.

I have heard some guys have success with a piece of steel plate that just fits the slot and then turn that with a big crescent wrench.

1093086F-D16F-4E89-865A-9577A34FCC8D.jpeg
Yes exactly, I just picked one of these up. I have let it sit in vinegar overnight, and I will try this out with an air wrench.
 

Outlawmws

Well-known member
Joined
Aug 9, 2011
Messages
39,326
Location
The Badlands
it worked!

Specifically what worked? Rattle gun? Hammer impact? Big breaker bar?

I suspect rattle gun, I doubt a hammer impact would have broken the drag link socket getting it out.

I'm not a fan of the rattle gun for this application. the hammer impact shocks the fastener in two directions. Its all I will use on the big #3 PH hinge screws on Samurai doors. A rattle gun either strips the cross in the screw, or ruins the #3 PH bit.
 
To avoid these ads, REGISTER NOW!

Midwest Shop Supply

Well-known member
Joined
Jan 22, 2025
Messages
74
Location
Northern Illinois
Specifically what worked? Rattle gun? Hammer impact? Big breaker bar?

I suspect rattle gun, I doubt a hammer impact would have broken the drag link socket getting it out.

I'm not a fan of the rattle gun for this application. the hammer impact shocks the fastener in two directions. Its all I will use on the big #3 PH hinge screws on Samurai doors. A rattle gun either strips the cross in the screw, or ruins the #3 PH bit.
First I soaked it overnight in vinegar, then I hammered on it with a pair of hand vise grips and a 4 pound hammer, then I tool that drag link socket and used a 1/2" air wrench. That is what snapped it, but luckly it loosened it up enough that I was able to move it and gently tap it out with a hammer after that.
 

Outlawmws

Well-known member
Joined
Aug 9, 2011
Messages
39,326
Location
The Badlands
This is what RTM and I are talking about when we say "hammer impact".

Its a cam driven tool - can be used right or left thread loosening, (or tightening if you don't care about torque specs...) and when you"set" it you are twisting it in the direction you want it to go. Smack it hard. For bit fasteners its not going to cam out of the cross or slot, it shocks the thread loose, driving it onto the hole and the cam turns the fastener. - it will work when all other methods fail in my experience, so long as the part is able to sustain the pounding.

1745422401597.png
 

Outlawmws

Well-known member
Joined
Aug 9, 2011
Messages
39,326
Location
The Badlands
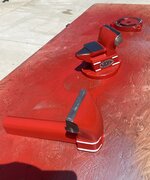
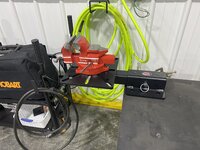
Couldn’t sleep so I finished up Grandad’s / Dad’s 60+ year old vise. As soon as I get some wire and shielding gas, I can zap down the base for its new home. Before & after.

IMG_7313.jpeg

Came out nice!

Don't forget to have the Static jaw just past the edge of the plate, so long materials can drop past the plate vertically.
 

SouthernIllinois

Well-known member
Joined
Jan 14, 2024
Messages
1,691
Beautiful job! What did you use for the filler? Weld? If so, did you preheat it?
Thank you!

I didn't have to fill anything.

Basically all I did was:

1. Soaked it in Corrosion-X and PB Blaster to break the frozen parts free.
2. Disassembled it.
3. Sandblasted the vise body.
4. Chased the threads with a tap.
5. Used a die grinder to remove rust from the handles and polishing rouge to shine them up.
6. Used an angle sander with 80 & 120 grit to shine up the areas of the vise body I wanted in bare metal.
7. Masked off the parts I wanted left bare metal.
8. Primed it with 2K primer and painted it with implement enamel (Ford Red).
9. Used Testors enamel model paint for the white stripes and lettering.
10. Clear coated the entire vise body.
11. Reassembled it.

The vise belonged to my Grandfather who gave it to my Dad who used it until his death last year. It's more of a sentimental thing than anything. Although I will use it some just because they did, I will probably end up buying a used, big vise for daily use.
 

Shiftless

Well-known member
Joined
Mar 9, 2014
Messages
14,591
Location
East Bay SFO

SouthernIllinois

Well-known member
Joined
Jan 14, 2024
Messages
1,691
What a transformation! Great work!

Really? No filler? That primer must be quite good at hiding all the dings.

IMG_1647.jpegIMG_1647.jpeg
Thanks.

A lot of what looks like dings along the top was in some sort of thick, ancient putty or caulk that was smeared all over the top of the jaws. It took awhile with a razor scraper to get that off - sandblaster wouldn't touch it.

I did use an angle grinder to clean it up though. Went from 36 grit to 80 grit to 120 grit to get some of them out. The top edge of the jaws still have some significant "scarring".
 

fishwatcher

Well-known member
Joined
Jan 26, 2023
Messages
759
Thank you!

I didn't have to fill anything.

Basically all I did was:

1. Soaked it in Corrosion-X and PB Blaster to break the frozen parts free.
2. Disassembled it.
3. Sandblasted the vise body.
4. Chased the threads with a tap.
5. Used a die grinder to remove rust from the handles and polishing rouge to shine them up.
6. Used an angle sander with 80 & 120 grit to shine up the areas of the vise body I wanted in bare metal.
7. Masked off the parts I wanted left bare metal.
8. Primed it with 2K primer and painted it with implement enamel (Ford Red).
9. Used Testors enamel model paint for the white stripes and lettering.
10. Clear coated the entire vise body.
11. Reassembled it.

The vise belonged to my Grandfather who gave it to my Dad who used it until his death last year. It's more of a sentimental thing than anything. Although I will use it some just because they did, I will probably end up buying a used, big vise for daily use.
Fantastic job!!
 

Shiftless

Well-known member
Joined
Mar 9, 2014
Messages
14,591
Location
East Bay SFO
Thank you.

I had almost forgotten how much I enjoy doing this sort of thing.
I am really enjoying now having the time, space and tools to get back into it.
Livin’ the good life… fixin’ old vises and
hanging out on Garage Journal with the gang of virtual friends. 😎

Beer ( if your doctor approves ) adds to the enjoyment of surfing GJ.
Here is the one I just finished.
 

Attachments

  • IMG_1649.jpeg
    IMG_1649.jpeg
    374.9 KB · Views: 13
Last edited:
To avoid these ads, REGISTER NOW!
Top Bottom