To avoid these ads, REGISTER NOW!

Between 705 & 1200 SQ/FT New 28' X 38' Garage Build in Portland

Workspaces between 705 and 1200 squarefeet.

cccoltsicehockey

Well-known member
Joined
Apr 3, 2014
Messages
1,524
Location
Charlotte, NC
The garage is taking shape nicely. They definitely went above and beyond on the siding work. I know they didn't do all that end prep on mine.

According to the schedule, they will pour the slab next week. I plan to seal the concrete with Ghost Shield once it cures adequately. Do I need to ask for any specific surface finish in prep for the Ghost Shield (e.g. power vs hand trowel, etc)?
Mine was power trowled and the Ghost Shield went on great. The one nice thing about your drywall and primer being done before the concrete is you will hopefully have less concrete cleaning to do before you can seal it. The amount of Ghost Shield you need is less with power trowled as well.
 
To avoid these ads, REGISTER NOW!
OP
L

lyonkster

Well-known member
Joined
Nov 18, 2009
Messages
433
Location
Portland, OR
The garage is taking shape nicely. They definitely went above and beyond on the siding work. I know they didn't do all that end prep on mine.
Thanks, and I agree! I'm pretty picky, and I really haven't had anything significant to complain about (other than minor things that I fixed myself).
Mine was power trowled and the Ghost Shield went on great. The one nice thing about your drywall and primer being done before the concrete is you will hopefully have less concrete cleaning to do before you can seal it. The amount of Ghost Shield you need is less with power trowled as well.
I'm starting to lean towards a coating (maybe polyurea) rather than a penetrating sealer like Ghost Shield. I understand that they all have pros and cons, but I think that worrying about staining from fluids will drive me crazy. From my reading, a coating is better from that standpoint than a sealer. But that should not affect the concrete pour tomorrow, which is my nearterm focus.

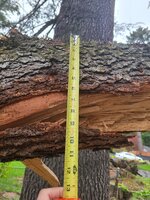
In other news, we had a few huge branches fall from an old cedar tree. We heard the noise last night, but didn't see what happened till this morning. Looks like a large branch high up broke off, and took out several branches along the way. Fortunately this was not one of the trees near the garage, and I don't see any damage (other than to the tree itself). But I'll have to have a closer look at the branches of the trees near the garage - some of them are as big as the ones that broke off.

1744064119751.jpeg
 

cccoltsicehockey

Well-known member
Joined
Apr 3, 2014
Messages
1,524
Location
Charlotte, NC
There are definitely pros and cons to both options and for now at least no one has designed a one size fits all solution. If staining is your number one priority and you don't plan on welding then I think the polyurea is likely a great solution for you.
 

madison069

Well-known member
Joined
Nov 5, 2010
Messages
4,485
Location
Monroeville, PA
Got lucky with the tree it sounds like! would **** to get this far and then the tree damages the garage. That reminds me that I need to get a tree company out to the house to have them trim the trees up on the property.
 
OP
L

lyonkster

Well-known member
Joined
Nov 18, 2009
Messages
433
Location
Portland, OR
Got lucky with the tree it sounds like! would **** to get this far and then the tree damages the garage. That reminds me that I need to get a tree company out to the house to have them trim the trees up on the property.
Yeah, that was a close call, the broken limbs were about a foot in diameter, certainly not something you'd want to be under when they came crashing down. Also saw some nasty dagger-like remnants that would have gone through a person like butter:

1744140496209.jpeg
1744140506482.jpeg

The good news is that the tree crew came out this morning and took care of it all. As luck would have it, they showed up at the same time as the concrete pumper and the concrete truck, so it was a bit of a battle for driveway access, but it all worked out:

1744140597272.jpeg

That 90' spider lift is one amazing machine:

1744140689475.jpeg
1744140673188.jpeg
 
Last edited:
OP
L

lyonkster

Well-known member
Joined
Nov 18, 2009
Messages
433
Location
Portland, OR
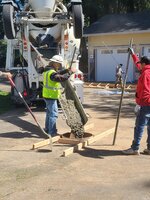
Here are some photos from the slab pour:
1744230803770.jpeg
1744230786620.jpeg
1744230822372.jpeg

About 4 hours after the pour, they power troweled it:
1744230859068.jpeg

Then a few more hours went by before final hand troweling:
1744230884152.jpeg

This morning the saw cut team came by. Since "the team" was just one guy, I gave him a hand snapping chalk lines for the cuts, which was great because I was very particular about where I wanted the cuts to be. He was on board with making the cuts line up with the "posts" between the three doors, so we were on the same page. I was quite impressed with the saw he used for the cuts - quick, precise, and no dust!
1744231226089.jpeg
1744231245880.jpeg
1744231258744.jpeg
1744231274995.jpeg

Now I have 28 days to ponder what coating to choose; I'm pretty set on a polyurea, just need to decide which one.
 

cccoltsicehockey

Well-known member
Joined
Apr 3, 2014
Messages
1,524
Location
Charlotte, NC
Looks good. Crazy size of those branches.

They went to the edge of the foundation with your slab. My builder put the foam expansion joint material along the wall on my build which I thought was interesting but he said it was standard procedure. I think I would have preferred it done like yours.
 
OP
L

lyonkster

Well-known member
Joined
Nov 18, 2009
Messages
433
Location
Portland, OR
Looks good. Crazy size of those branches.

They went to the edge of the foundation with your slab. My builder put the foam expansion joint material along the wall on my build which I thought was interesting but he said it was standard procedure. I think I would have preferred it done like yours.

Yeah, I thought about the many options for this connection - pour slab all the way to the stem wall, or leave an expansion gap, etc. In the end we settled on the hybrid approach - use 3" foam between the slab and the stem wall for insulation/expansion, but taper the upper portion of the foam so that the slab contacts the stem wall at the top (photo below). I know that some folks say that the thin wedge of the slab in that area may crack, I guess I'll deal with that if/when that happens!

1744910115303.jpeg
 
OP
L

lyonkster

Well-known member
Joined
Nov 18, 2009
Messages
433
Location
Portland, OR
Lots of progress in the last week or so. The garage doors started going in, until I realized that they were using standard tracks, which were about 2 feet below the ceiling:

1745447089345.jpeg
That would defeat the whole point of having a high ceiling so that I could have a car on the lift and open the garage door without hitting the car, so all came to a screeching halt while we wait for "high lift tracks". Hopefully those will be here in a week or two. Until then we have doors installed (mostly), but they cannot be operated:

1745447174836.jpeg

So we used the downtime to put on some paint samples (see above), and decided that SW Iron Ore (left) had a bit too much blue, so we settled on Greenblack (second from left).

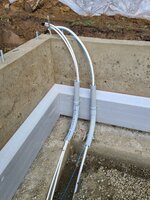
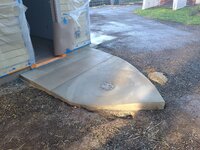
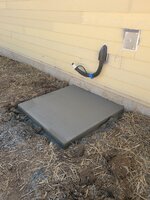
The guys also poured caissons for a carport that we want close to the house, for those heavy rain days when we don't want to schlep all the way from the garage to the house:

1745447360064.jpeg
1745447377306.jpeg
1745447437693.jpeg
1745447411512.jpeg
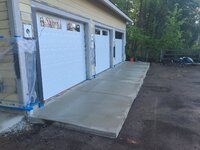
The concrete contractor prepared the apron in front of the garage:
1745447478896.jpeg
Then it was time for the pour:

1745447543353.jpeg
1745447584643.jpeg
 
OP
L

lyonkster

Well-known member
Joined
Nov 18, 2009
Messages
433
Location
Portland, OR
More pics of the finished concrete (hopefully the last for this project):

1745447801487.jpeg
1745447816646.jpeg
1745447829926.jpeg

1745447842294.jpeg


From there, the pace really picked up. The painters showed up the next day:
1745447880416.jpeg
1745447893174.jpeg
Then the HVAC crew showed up the following day:
1745447934111.jpeg
1745447967246.jpeg
I was hoping to get the last of the R410 units, but unfortunately they were all out locally, so we ended up with R454B:
1745448015333.jpeg
1745448033692.jpeg
 

madison069

Well-known member
Joined
Nov 5, 2010
Messages
4,485
Location
Monroeville, PA
They were booging! The color looks good too!

***** about the wrong track being installed.

Did the painter paint the missing garage panels on the right?
 
Last edited:

AC-WC

Well-known member
Joined
Jan 22, 2023
Messages
794
Location
NE, Indiana
Lucky you were able to be onsite to catch the door tracks!
I'm so far behind on refrigerant numbers. When did they start R454B?
 

cccoltsicehockey

Well-known member
Joined
Apr 3, 2014
Messages
1,524
Location
Charlotte, NC
The garage is coming along well. Was the high lift a screw up on the order by the manufacturer or miss communication that you were just expecting and the contractor didn't realize?

Lucky you were able to be onsite to catch the door tracks!
I'm so far behind on refrigerant numbers. When did they start R454B?
R454B is brand new for 2025. R410a equipment is no longer allowed to be manufactured but there is still some equipment stock lingering around. I just had two systems installed and actually have one of each.
 
OP
L

lyonkster

Well-known member
Joined
Nov 18, 2009
Messages
433
Location
Portland, OR
Did the painter paint the missing garage panels on the right?
Yes, they painted the last panel separately.

I'm so far behind on refrigerant numbers. When did they start R454B?
New for 2025. We were told the contractor had some R410 units still on hand, which we said we'd like to get. But apparently those units were all gone by the time they came here. Oh well, not much I can do about it now, hopefully this R454B stuff won't turn out to be a dud.

The garage is coming along well. Was the high lift a screw up on the order by the manufacturer or miss communication that you were just expecting and the contractor didn't realize?
Probably a bit of each. I know that during the design process I mentioned my desire for high ceiling clearance (hence the odd shape of the roof/ceiling), with the tracks closely hugging the ceiling. But apparently that did not trickle down to the builder side, or to the sub. The type of track was not mentioned in the bid, so I "assumed" that it would be what I wanted, but we know how those assumptions work out :). Similar to what happened with the siding (I wanted smooth, we got textured).

That's the one thing that I find somewhat frustrating about the GC process. While my GC is great, he is both a facilitator but also a middle man between me and the subs, so the risk of miscommunication increases. Oh well, so far I've been very happy with everything, and all surprises (like the siding or the door tracks) have been handled well by the GC.
 
OP
L

lyonkster

Well-known member
Joined
Nov 18, 2009
Messages
433
Location
Portland, OR
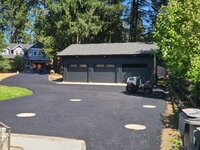
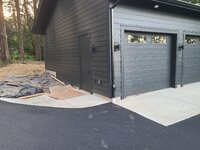
A few more photos. Here is the front apron - note the difference in elevation from left to right - it goes from about 3" above existing asphalt on the left to about 10" above it on the right. We're having the driveway repaved this week, so the asphalt will be the same height as the concrete, and won't look as silly:

1745792419814.jpeg
1745792441805.jpeg
Here's the interior with all the ceiling lights on. I have three "sets" of lights - two come on with a motion detector as soon as someone enters the garage; another eight are controlled by a switch, and the last ten are controlled by a second switch. It's pretty bright inside, but not too bright, I'm glad I didn't skimp on the lights:

1745792561512.jpeg

I looked at the builder's schedule in Buildertrend, and saw that he shows everything finishing up this week, with only punch list items remaining after that. I was surprised at first, then it hit me that indeed, everything is basically done other than the paving (this week), the landscape/rain garden (TBD, but unrelated to the garage, only needed to get the permit signed off), finishing the garage doors (new tracks are due the week of 5/5), and then the punch list items. So I think the build will be done in a couple of weeks!

Last week I ordered Armorpoxy's SPGX polyurea, which I plan to apply to the concrete floor as soon as the concrete is cured. Of course none of this can come too soon - I've been holding off on doing brakes on our daily driver until the garage was ready, despite them giving me clear indications that they were due. But alas, some things can't wait, so I had a "car day" today on the driveway, with the beautiful garage right in background, ironically unusable:

1745792933145.jpeg1745792949462.jpeg
This is what I get for trying to ignore the noises:
1745793063813.jpeg
Oh well, let's hope that this was the last of my driveway projects!
 
Last edited:

thammel

Well-known member
Joined
Oct 3, 2005
Messages
2,268
Location
Maryland
LOL, you really needed to do the brakes!!! I have the same catch bottles.....but why did you bleed to change rotors and pads?
 
OP
L

lyonkster

Well-known member
Joined
Nov 18, 2009
Messages
433
Location
Portland, OR
LOL, you really needed to do the brakes!!! I have the same catch bottles.....but why did you bleed to change rotors and pads?
Yup, I couldn't stretch it out any longer, even though I wanted to - even as it is, the rotors were gouged, but they had 100K miles on them so I wasn't too sad about replacing them.

And oh, I didn't bleed the brakes, that can wait until the garage is done. I merely used the catch bottle for the fluid - I like to crack the bleeder screw while pushing back the caliper's pistons, that way the fluid goes out to the catch bottle instead of back into the master cylinder.
 
Last edited:

cccoltsicehockey

Well-known member
Joined
Apr 3, 2014
Messages
1,524
Location
Charlotte, NC
You definitely needed to do the brakes. I am in a similar situation and have been holding off on some brakes on the truck and I know it needs them for the same reason. I likely need to pull a wheel and be sure I am still good after seeing those.

So nice to see your CG was smart and covered the concrete before doing work inside. Lots of saved aggregation for everyone involved by taking the time do do that.
 
OP
L

lyonkster

Well-known member
Joined
Nov 18, 2009
Messages
433
Location
Portland, OR
You definitely needed to do the brakes. I am in a similar situation and have been holding off on some brakes on the truck and I know it needs them for the same reason. I likely need to pull a wheel and be sure I am still good after seeing those.

So nice to see your CG was smart and covered the concrete before doing work inside. Lots of saved aggregation for everyone involved by taking the time do do that.

I see from your posts that you're in a similar place - the garage is basically finished, but you still can't use it for car work, so frustrating! I hope your driveway issue gets resolved soon, but don't wait on those brakes too long, unless you're willing/ready to do the rotors at the same time (I was perfectly happy to go that route).

And yes, the builder said that they always cover concrete slabs to protect them from other trades, so I hope/assume that the slab won't need any special prep prior to my coating it (other than the mild etch that they recommend for polyurea).
 
To avoid these ads, REGISTER NOW!
OP
L

lyonkster

Well-known member
Joined
Nov 18, 2009
Messages
433
Location
Portland, OR
While I'm waiting for the driveway paving and garage doors to be finished, I figured I might as well get internet to the garage, and set up wifi. I plan to run fiber between the buildings, connecting the house's main Structured Media Enclosure (SME) in the basement to the new SME in in the garage. I know we discussed the approach earlier, but now I'm ready to settle on the actual details and wanted to get some feedback on the plan.

Starting with the garage, I plan to initially use my Deco unit as an AP wifi source, mounted high on the ceiling. There's a CAT6 cable routed to that location from the garage SME, and an AC outlet right nearby, so the Deco will plug right into it.

Then in the garage SME, I'm thinking of installing a POE switch with a fiber port, thus avoiding having to get a converter from fiber to CAT6 - something like this. The cost seems comparable to a regular POE switch and a converter. I thought the POE switch would be a wise upgrade for future POE components in the garage (e.g. cameras).

Then I'd run multimode OM3 fiber through the low voltage conduit that connects the garage SME to the crawlspace. I don't know much about fiber, but does this or this look reasonable?

Once in the crawlspace, I have a choice. I can continue running fiber through the crawlspace (about 40 feet) all the way to the SME in the mechanical room that's at the end of the crawlspace. Then I'd install a switch with a fiber port (like the one in the garage) in the mech room SME, and connect the fiber to the switch.

But I read that fiber can be delicate, and I'm a bit concerned about routing it from the crawlspace to the mech room SME and possibly getting it damaged by future handling. So the other option is to switch from fiber to CAT6 in the crawlspace, right where the fiber exits the conduit. Then run a CAT6 cable from there to the SME. If I did that, I'd need to add an AC outlet in the crawlspace so that the converter can be plugged in. I don't particularly relish adding an outlet to the crawlspace, I hate crawling in there even though it's much nicer now that I added a bunch of lights, as well as nice floor plastic:

1745960941653.jpeg

Still, crawling there is not my idea of a good time. Honestly, I think I'd prefer to avoid adding the outlet and switching from fiber to CAT6 in the crawlspace, and would rather just run fiber all the way to the SME.

I know all of this is a bit confusing, so here's a schematic of the plan - all-fiber on top, fiber-to-CAT6 converter in crawlspace on the bottom:

1745962516207.png

Thoughts/suggestions? Feel free to tell me I have it all wrong, I don't pride myself on my electronics knowldege :).
 

kj_mustang

Well-known member
Joined
Feb 9, 2011
Messages
1,221
Location
Harrisonburg, VA
I bought and used the same fiber patch cable in your link about 6 months ago. Works fine and is good quality. I had an unused 1.5 conduit with pull string and only a couple turns so I got away with not using the model with the pulling eye. I ran conduit for the fiber all the way to below the ceiling of my mechanical room in my house basement and then plastic flex conduit down the wall to the switch. Make sure the poe switch you buy has LC connectors for the interface.
 
OP
L

lyonkster

Well-known member
Joined
Nov 18, 2009
Messages
433
Location
Portland, OR
I bought and used the same fiber patch cable in your link about 6 months ago. Works fine and is good quality. I had an unused 1.5 conduit with pull string and only a couple turns so I got away with not using the model with the pulling eye. I ran conduit for the fiber all the way to below the ceiling of my mechanical room in my house basement and then plastic flex conduit down the wall to the switch. Make sure the poe switch you buy has LC connectors for the interface.
Thanks for the feedback. You reminded me that in my shopping list above, I neglected to include transceivers to go between the fiber and the SFP ports in the switch, which are already included with media converters like this. So I think the higher cost of the SFP port switches (compared to all-ethernet switches) combined with the transceivers will be slightly higher than all-ethernet switches and media converters. Although there would be fewer "hardware" components and AC adapters if used the SFP port switches.
 

cccoltsicehockey

Well-known member
Joined
Apr 3, 2014
Messages
1,524
Location
Charlotte, NC
The fiber in your link will be fine, but you also don't need outdoor rated fiber since it will be in conduit. I would not put the switch or a fiber to copper converter in the crawl space. I would run the fiber to the media location in the house. If there is no conduit in the crawlspace itself then I would install a small junction box on the crawl space. They make 6x6x4in ones that would be perfect for this. Then I would run smurf tube/low voltage flexible conduit in the crawl space to where it goes up the wall to protect the fiber. You could also get an LC to LC coupler and change to a different piece of fiber in that junction box so that if something did get snagged in the crawl space you wouldn't have to repull the entire piece of fiber.
 
OP
L

lyonkster

Well-known member
Joined
Nov 18, 2009
Messages
433
Location
Portland, OR
The fiber in your link will be fine, but you also don't need outdoor rated fiber since it will be in conduit. I would not put the switch or a fiber to copper converter in the crawl space. I would run the fiber to the media location in the house. If there is no conduit in the crawlspace itself then I would install a small junction box on the crawl space. They make 6x6x4in ones that would be perfect for this. Then I would run smurf tube/low voltage flexible conduit in the crawl space to where it goes up the wall to protect the fiber. You could also get an LC to LC coupler and change to a different piece of fiber in that junction box so that if something did get snagged in the crawl space you wouldn't have to repull the entire piece of fiber.
Thanks for the great suggestions as always! I ordered two sections of Monoprice fiber from Amazon, and will connect them with an LC to LC coupler in a junction box in the crawlspace. In the meantime, I used my air compressor to "blow" a pull string through the conduit from the garage SME to the crawlspace. So once I receive the fiber, I'll just pull it through with the pull string. Easy peasy (hopefully).
 
OP
L

lyonkster

Well-known member
Joined
Nov 18, 2009
Messages
433
Location
Portland, OR
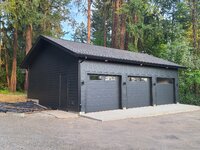
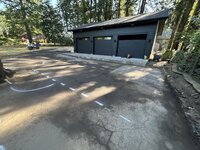
The driveway was paved last week, so now the apron is at the same level as the asphalt, no more having to deal with the 9" step. I can almost picture myself driving into the garage, although the replacement door tracks will not arrive till Friday, so I'm trying to be patient.

Before:

1746499524457.jpeg
1746499539647.jpeg
1746499562344.jpeg
1746499610765.jpeg

During:

1746499632021.jpeg
1746499642131.jpeg
1746499656583.jpeg

After:

1746499744408-jpeg.2326551
 

Attachments

  • 1746499716994.jpeg
    1746499716994.jpeg
    1.3 MB · Views: 9
  • 1746499744408.jpeg
    1746499744408.jpeg
    1.7 MB · Views: 312

cccoltsicehockey

Well-known member
Joined
Apr 3, 2014
Messages
1,524
Location
Charlotte, NC
Thanks for the great suggestions as always! I ordered two sections of Monoprice fiber from Amazon, and will connect them with an LC to LC coupler in a junction box in the crawlspace. In the meantime, I used my air compressor to "blow" a pull string through the conduit from the garage SME to the crawlspace. So once I receive the fiber, I'll just pull it through with the pull string. Easy peasy (hopefully).
Maybe you already know but pull another string through alone with the fiber incase you ever need to add something to the conduit.

Driveway looks great. Has to be a great feeling to be so close to getting cars in there. Parking in there by the weekend.
 
OP
L

lyonkster

Well-known member
Joined
Nov 18, 2009
Messages
433
Location
Portland, OR
Maybe you already know but pull another string through alone with the fiber incase you ever need to add something to the conduit.
Yes, thanks for the reminder, I saw that tip a while back and was planning on doing that.
Driveway looks great. Has to be a great feeling to be so close to getting cars in there. Parking in there by the weekend.
Indeed! Although the garage will not be ready for regular use until I get the floor sealed later this month or in June.
 
OP
L

lyonkster

Well-known member
Joined
Nov 18, 2009
Messages
433
Location
Portland, OR
We're having a bit of an issue with the HVAC system. As I think I mentioned earlier, the HVAC bid was for the Mitsubishi MUZ/MSZ-GS18NA system, which is R410. But the installers ended up installing an R454 system - when I asked them why they switched, they said that the R410 systems were not readily available.

I decided to let it go, but then last week the county inspector came by and failed the final electrical inspection. Turns out that the 14 AWG wires from the panel to the outdoor unit were OK for the 15A circuit of the specified MUZ-GS system, but the installed R454 outdoor unit needed a 20A circuit, i.e. 12 AWG wires. Nice to see that the inspector caught this.

Since the drywall is already up and finished, there is no practical way to get 12 AWG romex to the outdoor unit (I did not want to have an outdoor conduit installed around a brand new garage). So the builder got a hold of the HVAC contractor and they agreed to put in the R410 system instead.

Fast forward to yesterday, they came by and put in the R410 system. However, when I looked at the plate to check the ampacity, I noted that the system that they put in was MUZ/MSZ-HM18NA, instead of MUZ/MSZ-GS18NA. After checking the submittals for both, it appears that the HM is less efficient than GS (18 SEER2 vs 21.5 SEER2). Also the HM system is not Energy Star certified, whereas the GS system is. And finally the HM system is probably ~$1000 lower in cost than the GS system.

I pinged the builder about this, and he's checking with the HVAC sub. We'll see what transpires with this. It was interesting how much bigger the R454 outdoor unit was than the R410 unit.

R454:

1746548039311.jpeg

R410:

1746548062981.jpeg
 
Last edited:

madison069

Well-known member
Joined
Nov 5, 2010
Messages
4,485
Location
Monroeville, PA
The 454 coils are generally 20% bigger for the same capacity of a 410, it needs that surface area to properly transfer heat at the same capacity.
 

cccoltsicehockey

Well-known member
Joined
Apr 3, 2014
Messages
1,524
Location
Charlotte, NC
Are you pictures backwards since the 454 unit appears larger? I have the 410a GS18NA and my outdoor unit is the size of the larger one. My 9k units for my loft and wood shop are the size of the smaller one.
 
OP
L

lyonkster

Well-known member
Joined
Nov 18, 2009
Messages
433
Location
Portland, OR
Are you pictures backwards since the 454 unit appears larger? I have the 410a GS18NA and my outdoor unit is the size of the larger one. My 9k units for my loft and wood shop are the size of the smaller one.
The pictures were right but I had the "bigger" and "smaller" backwards, corrected now :).

Also interesting is that within the 18K R410 family, the MUZ-GS18 that we wanted is significantly larger than the MUZ-HM18 that we got. Not sure why that is, and if "bigger is better"? Regardless, I'm not happy about giving up the 3 SEER units.

HM18 outdoor unit:

1746556962035.jpeg

GS18 outdoor unit:

1746556947410.jpeg
 

cccoltsicehockey

Well-known member
Joined
Apr 3, 2014
Messages
1,524
Location
Charlotte, NC
The pictures were right but I had the "bigger" and "smaller" backwards, corrected now :).

Also interesting is that within the 18K R410 family, the MUZ-GS18 that we wanted is significantly larger than the MUZ-HM18 that we got. Not sure why that is, and if "bigger is better"? Regardless, I'm not happy about giving up the 3 SEER units.

HM18 outdoor unit:

1746556962035.jpeg

GS18 outdoor unit:

1746556947410.jpeg
Bigger is better, I believe, cause there is more coil space for heat transfer to happen faster. I won't claim to be an expert on it but I also upgraded to the GS units for the garage so that I had the higher efficiency for rapid cooling once pulling a hot car into the garage. I would not be happy about losing the efficiency either. I can tell you right now I have added very little power consumption to use two 21.5 seer and two, I believe, 31 seer units in my building. I would definitely want what you were supposed to have. The other question is do you have the lower end head inside then I would imagine because that means that you might have less options for control on the remote itself.
 
OP
L

lyonkster

Well-known member
Joined
Nov 18, 2009
Messages
433
Location
Portland, OR
Bigger is better, I believe, cause there is more coil space for heat transfer to happen faster. I won't claim to be an expert on it but I also upgraded to the GS units for the garage so that I had the higher efficiency for rapid cooling once pulling a hot car into the garage. I would not be happy about losing the efficiency either. I can tell you right now I have added very little power consumption to use two 21.5 seer and two, I believe, 31 seer units in my building. I would definitely want what you were supposed to have. The other question is do you have the lower end head inside then I would imagine because that means that you might have less options for control on the remote itself.

Thanks, that's what I'm thinking as well. I'll see what the builder comes back with after talking to the HVAC sub. I wouldn't be surprised if they say that the GS18NA components are not available, but we'll cross that bridge when we get to it.
 

cccoltsicehockey

Well-known member
Joined
Apr 3, 2014
Messages
1,524
Location
Charlotte, NC
Thanks, that's what I'm thinking as well. I'll see what the builder comes back with after talking to the HVAC sub. I wouldn't be surprised if they say that the GS18NA components are not available, but we'll cross that bridge when we get to it.
I feel like that would not be your problem though. They should have known about this change and that they either needed to buy things ahead of time to insure stock or know there is a chance they need to supply the GS18NA equal that runs on 454B.

Last year we had ordered mine a good 3 months before we installed them because we were worried about losing the ability to get them even last year possibly.

Hopefully they make it right for you without much hassle beyond what it has already been.
 

madison069

Well-known member
Joined
Nov 5, 2010
Messages
4,485
Location
Monroeville, PA
I'd stay firm for a little bit and see if they budge, but with the mindset that there might be a supply issue going on.

Maybe call a few HVAC supply house to see if they have that particular model in stock and if the contractor says it's a supply issue, give them the supply house information and tell them this supply house has one in stock. Kind of an ace in your sleeve deal.
 
To avoid these ads, REGISTER NOW!
Top Bottom