To avoid these ads, REGISTER NOW!

ZMotorsports Shop Projects 2.0

To avoid these ads, REGISTER NOW!

ntsqd

Well-known member
Joined
Jan 22, 2005
Messages
993
Location
Lower left coast
We had a Pep Boys, became Adavanced, then it shut down. Our third NAPA try recently shut down. In town we're left with Autozone and OReillys. One of the sister NAPAs to the last attempt is going strong in the town where I work, ~14 miles away. I visit them on my lunch breaks. Local Autozone seems to have upped their game, but the OReillys is still the better bet even though it's 2.5X miles further away.
 

Xti04

Well-known member
Joined
Nov 11, 2016
Messages
2,359
Asvance shut down a ton of west coast stores, they also sold Worldpac due to loss of profits from those stores. Worldpac is amazing for getting high quality OEM parts and even sometimes branded parts. They still order from them but the deals were better when they still owned them. When we got a Worldpac warehouse in town a few years ago it was the next street over from my old shop. I could will call if we were in between deliveries and go grab whatever I needed on a test drive. Loved how easy it was to get parts in a pinch.
 

madison069

Well-known member
Joined
Nov 5, 2010
Messages
4,230
Location
Monroeville, PA
I tend to order online, but when I need it locally I go to advance. Napa is hit and miss here. Autozone here is a warehouse hub so they tend to stock more parts. But good luck finding someone who can help you on none specific car parts. Getting parts on swapped projects is a nightmare there.
 

ntsqd

Well-known member
Joined
Jan 22, 2005
Messages
993
Location
Lower left coast
I learned long ago to tell the big box parts counter people that I needed the part for whatever it's donor is rather than what I'm putting it on. No better way to get them crossed-up and sideways than telling them something like I needed an EFI fuel pressure regulator for a '26 Model T.

And once they're in that rut you almost can't get them out of it. Usually easier to go to a different store or come back another day.

Tell them you need it for a '95 Mustang 5.0 and they go get the part. When buying parts for a bunch of different donors at one time and they start to look at you oddly mutter "Too dang many cars that need work....." It will save you some time. :)

The guys at the now closed NAPA had *just* gotten used to me when they closed. :(

FWIW I've started logging all these different donors in an Excel spreadsheet, makes it very easy to keep track of everything. I break the file down by each system having it's own tab, i.e. 'Fuel Supply', Engine Management', 'Brakes', etc.
 
Last edited:

rharman

Well-known member
Joined
Apr 22, 2012
Messages
8,905
Location
SoCal
OP
Z

zmotorsports

ALLIANCE MEMBER
Joined
Oct 20, 2009
Messages
21,469
Location
Northern Utah
Got a call from my hydraulic shop just before heading home yesterday so I swung by and picked up the seals that I had ordered the day before. $30 for five full sets. Much better than the $700/cylinder that HWH wants for their rebuilds that I see people buying and installing. That can add up quick with multiple slideouts.

hyd23.jpg
 
OP
Z

zmotorsports

ALLIANCE MEMBER
Joined
Oct 20, 2009
Messages
21,469
Location
Northern Utah
After arriving home I started on the Jeep JKU that's in the shop.

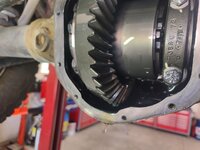
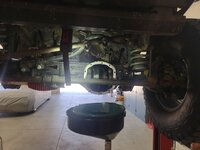
Pulled the rear diff. cover and while not necessary for a pinion seal replacement, I wanted to check the gearset as well as drain and refill the fluid and not have it spill out the pinion once the seal is removed.
jp1.jpg

For just over 4k miles the oil still looks new.
jp2.jpg

Nothing odd in the gearset. All looks great and turns smoothly.
jp3.jpg

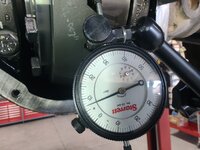
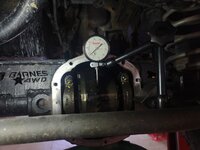
I thought I'd throw a dial indicator on and just make sure nothing has moved. I doubted it with only 4k miles, but it's easy to check with the cover off, so why not?

Zero'd the dial indicator.
jp4.jpg

Rocked the ring gear and it is still at .007". Spot on where it was set up.
jp5.jpg

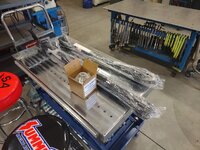
Just as I was about to move to the front I received a phone call from Tom Woods Driveshafts letting me know the driveshafts were completed and ready to be picked up. It was nearly their closing time, but they're only 15-minutes from me so I hurried and hauled *** to their shop and caught them just as they were locking up for the night. I was shocked by the call, when I ordered them I was told more than likely it would be Friday before they were ready.

New driveshafts and yokes at the ready.
jp6.jpg

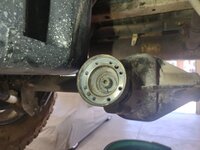
Now time to remove the old driveshaft and yoke.
jp7.jpg

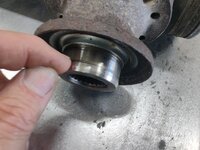
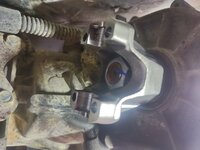
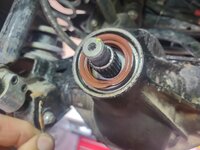
I really don't see anything wrong with the pinion seal. No tears or nicks in the seal itself. There was a lot of dirt and debris under the yoke so that could have been part of it, but still has me baffled.
jp8.jpg

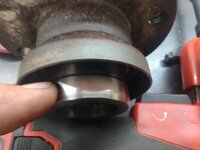
The yoke doesn't look terrible. The groove looks worse than it is actually. I noted in my notes during the gear replacement that their was slight wear on the pinion yoke, but my nail doesn't catch on it. Maybe I should have recommended a Speedi-sleeve to the owner at the time. This really comes down to a juggling act lately as I have always prided myself on trying to save my clients money and not have them spend more than necessary by just throwing all new parts at things yet still trying to provide a higher level of workmanship than any other shop around. Maybe I need to just start following suit like other shops and just insist throwing all new parts at things whether they need it or not. :unsure: I just don't know that I can bring myself to do that or not. Doesn't quite seem honest and then I'd just be another one of those damn parts swappers I despise so much.
jp9.jpg

Pinion seal once folded in on itself a little can then easily be grabbed by a pair of vise grips and pulled out with a slide hammer with a couple smacks.
jp10.jpg


Stay tuned for more.
 
OP
Z

zmotorsports

ALLIANCE MEMBER
Joined
Oct 20, 2009
Messages
21,469
Location
Northern Utah
Continuing on.

With the seal removed, I cleaned the seal bore and inspected for nicks or dings. None noted.
jp11.jpg

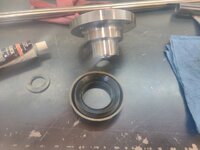
Prepped the new seal by applying a bit of grease to the spring on the backside and then some Sil-Glyde to the sealing surface as well as wiped and prepped the new yoke for installation. When installing a yoke, I apply a bit of sealant (RTV) to the top 1/2" or so of the splines so as the yoke is installed it seals the splines from fluid creep. Then the little bit that it pushes upwards creates a nice tight seal when the washer goes on.
jp12.jpg

Seal installed.
jp13.jpg

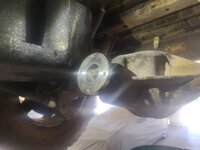
Yoke installed.
jp14.jpg

Washer and nut installed, washer sealed off the splines and a bit of Loctite 271 applied to the nut. Grunt tool locked against the frame so I could sneak up on the rotating torque setting. I forgot to mention, before disassembling anything I took a measurement of the rotating torque so I could put it back to where it was plus another couple inch/pounds.
jp15.jpg

With the nut tightened to the proper rotating torque it was torque sealed.
jp16.jpg

Then the cover was cleaned, reinstalled and torqued to 35 ft/lbs.
jp17.jpg

Moving forward, the transfer case yoke was removed and replaced with the new yoke. Splines were cleaned and some sealant applied to the last bit of the splines, similar to the rear diff.
jp18.jpg

Once the yoke was installed I noticed that although there are deeper splines on the TC output shaft, they didn't come out quite as far as on the pinion shaft. So just to be sure I added a small amount of RTV to the underside of the nut as well as some Loctite 271 before installing and torquing in place.
jp19.jpg

Once the nut was torqued to spec. I torque sealed it as well.
jp20.jpg


That's about where I left off last night.

Thanks for looking.
 

ScepterToad

Well-known member
Joined
Nov 9, 2023
Messages
340
Interesting that you didn't find much in the way of an obvious reason. I have to ask, what do you think about the dirt? You always make sure everything is super clean, and at only 4,ooo miles, it seems liker there shouldn't be much (if any) in there.
 
OP
Z

zmotorsports

ALLIANCE MEMBER
Joined
Oct 20, 2009
Messages
21,469
Location
Northern Utah
Interesting that you didn't find much in the way of an obvious reason. I have to ask, what do you think about the dirt? You always make sure everything is super clean, and at only 4,ooo miles, it seems liker there shouldn't be much (if any) in there.

Unsure if the dirt caused the leak or not Keith. I know with 110% certainty it was clean when I rebuilt it back in late November, but the owner has admitted to using his Jeep as a "tractor" on his property. By seeing how much dirt and debris is on my shop floor from when I dropped the skidplate last night, I would have to concur. :eyecrazy: That being said though, Jeeps aren't necessarily known for operating solely on nice clean highways. :bounce:
 

WoodsTruck

Well-known member
Joined
Jan 12, 2013
Messages
1,026
Mike,
Two questions:
1. Have you had good luck with LubeLocker axle cover seals? I bought one for the 9" in my Bronco instead of the paper gasket and RTV that I had typically used.
2. Is there enough compression on a new seal that a slightly scuffed yoke could be cleaned up in the lathe and reused in a pinch, or would it just not create enough squeeze pressure around the yoke to seal well?
 
OP
Z

zmotorsports

ALLIANCE MEMBER
Joined
Oct 20, 2009
Messages
21,469
Location
Northern Utah
Mike,
Two questions:
1. Have you had good luck with LubeLocker axle cover seals? I bought one for the 9" in my Bronco instead of the paper gasket and RTV that I had typically used.
2. Is there enough compression on a new seal that a slightly scuffed yoke could be cleaned up in the lathe and reused in a pinch, or would it just not create enough squeeze pressure around the yoke to seal well?

Yes, I have had excellent results with the Lube Locker gaskets and highly recommend them to my clients when doing gears. I first started using them in 2011 when I did the regear on my personal Jeep JKUR and have been using them ever since on many other vehicles. I have found that they can be reused multiple times and they still seal up fantastic. Hope I didn't jinx myself. :unsure:

I have not tried removing any material from the yoke. My thinking is that if the area where the seal is riding is questionable as far as the groove not allowing enough sealing pressure, then removing material will only have the opposite effect. Instead, when I run across a seal groove I prefer to use a Speedi-Sleeve. I have had excellent results with them over the past nearly 4 decades now of using them. They are easy to use and relatively inexpensive compared to either a new yoke or a shaft (depending on component).

The sealing areas are usually so small that they are hard to accurately measure so my experience has been if you can feel the groove and catch it with a finger nail, it should be corrected, by either a replacement part OR a Speedi-Sleeve. This one was probably borderline but in my mind I didn't feel it was bad enough to replace and was trying to save the client some money. Looking back, that may not have been the best call. :headscrat
 
OP
Z

zmotorsports

ALLIANCE MEMBER
Joined
Oct 20, 2009
Messages
21,469
Location
Northern Utah
Last night I tackled the front axle under the Jeep JKU.

Removed the front diff. cover to replace fluid and give an overall inspection. Everything looks great, fluid still looked new.
jp21.jpg

Backlash was still spot on @ .007".
jp22.jpg

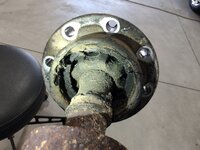
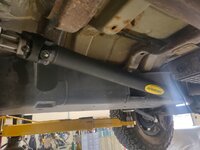
Moving around to remove the front driveshaft I found something worse than expected. When the owner dropped the Jeep off, we racked it and gave it a once over and I questioned the front boot on the Rzeppa joint as it was hard to see, but once I dropped the driveshaft out it was evident that the boot as well as all of the grease inside have checked out. So little grease and so much dirt in such a short time.
jp23.jpg

I removed and replaced the yoke at the TC and torque sealed it the nut.
jp24.jpg

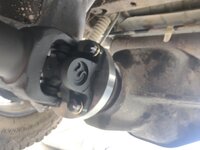
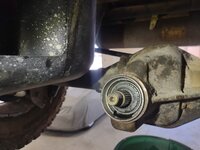
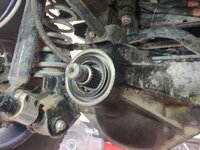
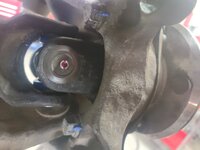
Next I moved to the pinion yoke and once I removed it a couple small twigs fell out. Well, one fell out and one stayed somewhat lodged up against the seal. Looks like it was putting some pressure on the seal in fact.
jp25.jpg

After cleaning the debris away I could see that the seal was permanently deformed, so I'm guessing the debris had been there for a few miles. The way the yoke has a small shield over the seal I would think that whatever gets in there is going to stay for a while is can't easily be seen nor fall away through normal use. Those shields on yokes are a double edge sword, they are designed to be there to protect the seal, but then once debris gets under them, they pretty much trap it there unseen.
jp26.jpg

Upon close inspection of the yoke this groove I can now catch my fingernail on and therefore I won't reuse it. Once this was discovered I jumped on the phone trying to locate either a Speedi-Sleeve or a new yoke. Even called a few friends whom I have replaced these for to see if anyone had a good used one kicking around. No luck on a good/used one, but I think I found a new one that I'll grab after work so I can hopefully wrap this job up.
jp27.jpg

Once I discovered one, I went back to work on the Jeep before the wife arrived home from work. I removed, cleaned the bore and replaced the pinion seal so once I have the yoke in hand I can put everything in the front back together. I also reinstalled the front diff. cover and torqued to spec. so it is ready to accept fluid after yoke installation.
jp28.jpg

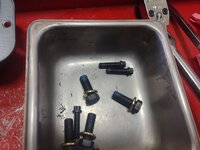
I filled the rear differential with fresh fluid and decided to install the rear driveshaft. A little Loctite 242 on the fasteners.
jp29.jpg

Then installed the rear driveshaft torquing the front yoke bolts to 20 ft/lbs. and the rear yoke fasteners to 50 ft/lbs.
jp30.jpg


That is where I ended the night and locked up the shop.

Thanks for looking.
 

WoodsTruck

Well-known member
Joined
Jan 12, 2013
Messages
1,026
Is that Rzeppa joint held on the drive shaft with a snap ring?
Looks familiar to the CV joints my old VW's had.
 
OP
Z

zmotorsports

ALLIANCE MEMBER
Joined
Oct 20, 2009
Messages
21,469
Location
Northern Utah
Is that Rzeppa joint held on the drive shaft with a snap ring?
Looks familiar to the CV joints my old VW's had.

I believe so. The round base fits into the recessed yoke and sandwiched with the 8 fasteners. Once removed the base can be disassembled in "layers" and I believe there is a snap ring that is accessible on the backside once the end cap is removed. I say "I believe" because I have only pulled one apart about 12 or so years ago trying to help a client get a few more miles out of one and I remember there being some type of retaining ring that had to be removed.

I don't really dissect these OEM Rzeppa style of driveshafts these days as they are somewhat problematic on lifted Jeeps. More than a few inches of lift on these Jeeps causes the angles to be such that the boot tears and that's the beginning of the end for these, plus due to the large tube OD, with only a few inches of lift, the front shaft comes in contact with either the exhaust on 2012-2017 models or the crossmember on 2007-2011 models so when I get one in the shop I generally recommend a driveshaft replacement at the same time as other work.

In this instance, I was trying to help the owner save a few bucks as I was already doing a lot of expensive work for him and his driveshafts were actually in fair condition at the time of the axle builds. My recommendation was to run them until they let him know they were no longer happy and then we could install new driveshafts as that would have added another ~$1200 to the build at that time. I know what it's like for clients to be budget conscious, so I try to accommodate, but sometimes it comes back to bite me in terms of rework. Nature of the game I guess. :unsure:
 

ntsqd

Well-known member
Joined
Jan 22, 2005
Messages
993
Location
Lower left coast
Interesting that Jeep so compromised the CVJ design that badly. Normally they will operate, and live, at a far higher angle than a Cardan Joint design. I know of one IFS rock-crawler from the late 90's that used the 934 type CVJ's for it's front drive-shaft. The owner put a 9" on center in the front and that had the front drive-shaft angles too steep for a Cardan joint design to live very long. He also had a clearance problem with the NV4500. Front drive-shaft was a shaft made by SAW and not a tube. It barely cleared the NV's case.

BTW, I would call those a Birfield type rather than a Rzeppa type CVJ. Birfield's have the ball grooves in the races parallel to the splined bore. Rzeppa's have the grooves at opposing angles, and the balls are placed in oppositely angled pairs of grooves.
 
Last edited:
To avoid these ads, REGISTER NOW!

Grant Gunderson

Well-known member
Joined
May 17, 2013
Messages
2,331
Location
Bellingham, WA
Got a call from my hydraulic shop just before heading home yesterday so I swung by and picked up the seals that I had ordered the day before. $30 for five full sets. Much better than the $700/cylinder that HWH wants for their rebuilds that I see people buying and installing. That can add up quick with multiple slideouts.

hyd23.jpg
I’ve found that backup rings seldom need to be replaced. Occasionally they get damaged, but usually you can just clean them and reuse as the O-ring is the wear part. If the backup rings are reasonably priced I just replace them, but I’ve found many times they are stupid expensive
 
OP
Z

zmotorsports

ALLIANCE MEMBER
Joined
Oct 20, 2009
Messages
21,469
Location
Northern Utah
I’ve found that backup rings seldom need to be replaced. Occasionally they get damaged, but usually you can just clean them and reuse as the O-ring is the wear part. If the backup rings are reasonably priced I just replace them, but I’ve found many times they are stupid expensive

While I agree they seldom go bad unless something catastrophic occurred, as cheap as they are I generally replace them anytime I rebuild a cylinder. There have only been a few times I haven't replaced them as sometimes if they don't come in a repair "kit". The solid nylon ones are a bit more problematic to replace because they have to be stretched over the piston, which is why the split ones are so common. However, lately I have been using the urethane backing rings and they seem to rebound better and don't form a memory from being stretched. The nylon ones sometimes require clamping and letting sit overnight to resize after stretching over the piston which can effect downtime on a production environment.
 

Just Fishing

Well-known member
Joined
Dec 21, 2020
Messages
57
Location
Utah
The sand at my property get's everywhere! :ROFLMAO:
Seeing that front driveshaft, I'm surprised it isn't worse looking.
That sand is so fine it amazes me every time.

I usually leave that place taking on a nice layer that makes me feel very tan until I take a shower. 😆


Mostly I blame this guy that I named the googly eyed monster!
1750465775073.png
 

Xti04

Well-known member
Joined
Nov 11, 2016
Messages
2,359
While I agree they seldom go bad unless something catastrophic occurred, as cheap as they are I generally replace them anytime I rebuild a cylinder. There have only been a few times I haven't replaced them as sometimes if they don't come in a repair "kit". The solid nylon ones are a bit more problematic to replace because they have to be stretched over the piston, which is why the split ones are so common. However, lately I have been using the urethane backing rings and they seem to rebound better and don't form a memory from being stretched. The nylon ones sometimes require clamping and letting sit overnight to resize after stretching over the piston which can effect downtime on a production environment.
While I havent rebuilt a hydraulic cylinder, when Audi went to direct injection in 2006 we had a special kit for the injectors which included a tapered installer to get the special nylon seals over the injector tip and then 2 sizing sleeves which compressed the nylon back down to the correct diameter. In my head I am imagining the nylon backer seals you are talking about being similar to those seals we used.
 
OP
Z

zmotorsports

ALLIANCE MEMBER
Joined
Oct 20, 2009
Messages
21,469
Location
Northern Utah
While I havent rebuilt a hydraulic cylinder, when Audi went to direct injection in 2006 we had a special kit for the injectors which included a tapered installer to get the special nylon seals over the injector tip and then 2 sizing sleeves which compressed the nylon back down to the correct diameter. In my head I am imagining the nylon backer seals you are talking about being similar to those seals we used.

Sounds very similar. Many automatic transmissions utilize a similar style of seal and require resizing sleeves to bring them back to size after stretching over the drum shafts. It's not an uncommon practice in a wide range of components.

Although, in hydraulic cylinders, we started using the urethane backing rings to alleviate this process and the fact that they are a bit more "user friendly" for our mechanics and they have been working out well for the past several years with no downside to assembly nor longevity that I've seen. Even the hydraulic shop I bought them from said they use them when available for the size. That being said, our maintenance department at work doesn't rebuild nearly as many hydraulic cylinders as we used to when I was wrenching daily. Seems like I was doing 4-6 a month myself at work back in the late 80's through around 2015 timeframe.
 
OP
Z

zmotorsports

ALLIANCE MEMBER
Joined
Oct 20, 2009
Messages
21,469
Location
Northern Utah
Hope everyone had a nice weekend. Mine was busy as hell and a couple things did not seem to go as planned. Don't you hate it when that happens? :mad:


Friday night I trimmed, edged and mowed lawns but it took me what seemed like forever to get home due to multiple accidents on the freeway and the secondary streets were also overwhelmed. After work I had to run about 8 miles north past our home to grab a yoke for the Jeep in the shop and by the time I finally made it home I was fuming after dealing with traffic and idiots for an hour and a half. Fortunately, once I got mowing my lawn my mood mellowed and I was able to relax.

I had been exchanging texts with a guy that was recommended to replace the dead sod in my back yard and he was finally able to stop by later Friday evening so I was in no hurry to get the lawn done. Just relaxed and enjoyed the mow. :bounce: He finally stopped by around 7:30 Friday night to give me a quote on cutting out, over-excavating the couple areas and bringing in some good topsoil and finally replacing with good quality sod. While I was at it, I had him give me an optional quote on a small section at the bottom of my stairs coming down from the deck. I had replaced the sod in this area about 4 years ago and the sod that I purchased locally was absolute garbage and I have had to look at it ever since. The quote seemed reasonable based on the amount of work he was going to do and I liked the detail he informed me he would go through so now just need to see when he can get me scheduled in.

Saturday morning after enjoying a few cups of coffee on the deck with the wife, I headed out to the shop to complete the Jeep JKU now that I had a new front yoke to complete the job. All that was remaining was to install the yoke, the front driveshaft and factory skid plate then a test drive and this job was done. Well, I thought it was anyways. :unsure:

Front yoke installed, torqued to spec. enough to net me a couple inch/pounds more rotating torque on the pinion then the front driveshaft was installed and all bolts torqued to spec.
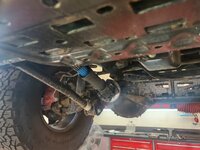
jp31.jpg

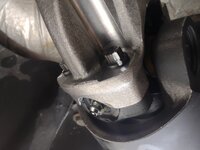
After torquing the fasteners to specification, I paint marked each fasteners on both front and rear driveshafts.
jp32.jpg

jp33.jpg

jp34.jpg

Lastly, the factory skid plate could be installed with a little anti-seize on the threads.
jp35.jpg

This job is done, so I thought.
jp36.jpg

My wife and DIL were going to a baby shower so rather than take the test drive I cleaned and put tools away because I wanted to see my DIL and my grandson when they came to pick up my wife. My grandson was able to help me clean and put tools away for a couple of minutes before leaving. That little stink remembers that you have to slide the drawer locks to the side before pulling the drawers open. I think my son and DIL are going to be in trouble, that little guy only has to be shown something once and he remembers.
jp37.jpg

The test drive did not go as planned. To bring you up to speed, when the owner dropped the Jeep off last week, he asked me to address the rear pinion seal leak, but he also mentioned a clunking or clicking noise that he thought was coming from the rear end. Now while this concerned me because I had rebuilt both front and rear axles only 4k miles ago, I could not remember any part of either axle that stuck out to me as being questionable nor anything I should have been concerned about. I read back through my notes multiple times trying to jar my memory if anything seemed out of the norm while performing the work.

Now while I hate comeback work, I have also learned that no one, and I mean no one, is the exception to having work come back at some point. As **** as I am about doing things properly, I am human and I don't want to be one of "those" mechanics who point the finger everywhere but at himself when a client comes back and says something isn't right. I am one of the first to start looking where the last work was performed when a vehicle comes into my shop.

That being said, I saw absolutely NOTHING wrong in either front or rear end when I pulled the diff. covers (this was the reason I pulled both covers and did a thorough inspection). The owner also could not duplicate the noise when I went for a test drive with him upon dropping the Jeep off, so I had nothing to go off of. I even commented about how deathly quiet and smooth the Jeep was during our test drive. With the doors and top off I was very impressed with the sounds I was not hearing, no rattles, squeaks or noises at all.

Well, upon completing the Jeep late Saturday morning and taking it for a test drive after the wife, DIL and grandson left the shop, I didn't even make it out of the neighborhood when I heard the noise or at least what I suspected was the noise the owner was talking about. Sounded like it was right under my feet, but I know how noises travel throughout powertrains. It definitely sounded exterior though, meaning not inside a differential or gearbox, too tinny or tingy sounding, much like maybe a U-joint. :unsure:

I racked it a few inches off the ground and run the powertrain in gear at idle. Nothing at all with just the rear end being driven. As soon as I stopped it and engaged the front axle the noise was evident. I took a couple recordings and sent them to the owner asking if this was something he wanted me to repair or if he would like to address it as it was a pretty simple job of replacing the passenger side axle shaft U-joint. He asked me to replace both sides so I ran and grabbed the parts from my local NAPA and began tearing into the front axle.

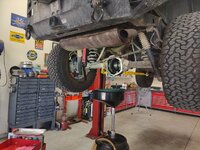
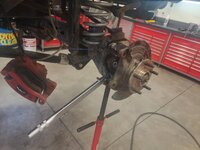
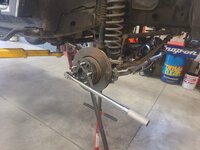
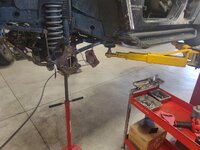
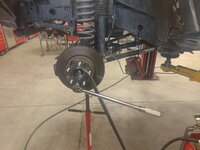
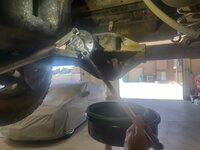
I cut these pole jacks down a few years ago for jobs just like this as they work perfectly for doing suspension or axle work when the vehicle is at mid-rise on the lift. I can tilt the axle up on the side I am working on to keep fluid from leaking out past the inner axle seals.
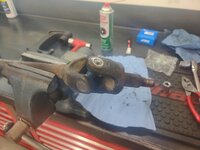
jp38.jpg

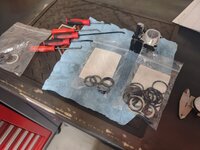
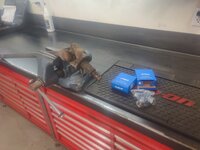
With the axle shaft out and on the bench, new U-joints at the ready I could begin replacing the joints.
jp39.jpg

Going fairly smooth so far. No surprises.
jp40.jpg


Stay tuned for more.
 
Last edited:

larry4406

Well-known member
Joined
Jan 27, 2006
Messages
19,576
Location
Northern Virginia
Hope everyone had a nice weekend. Mine was busy as hell and a couple things did not seem to go as planned. Don't you hate it when that happens? :mad:


Friday night I trimmed, edged and mowed lawns but it took me what seemed like forever to get home due to multiple accidents on the freeway and the secondary streets were also overwhelmed. After work I had to run about 8 miles north past our home to grab a yoke for the Jeep in the shop and by the time I finally made it home I was fuming after dealing with traffic and idiots for an hour and a half. Fortunately, once I got mowing my lawn my mood mellowed and I was able to relax.

I had been exchanging texts with a guy that was recommended to replace the dead sod in my back yard and he was finally able to stop by later Friday evening so I was in no hurry to get the lawn done. Just relaxed and enjoyed the mow. :bounce: He finally stopped by around 7:30 Friday night to give me a quote on cutting out, over-excavating the couple areas and bringing in some good topsoil and finally replacing with good quality sod. While I was at it, I had him give me an optional quote on a small section at the bottom of my stairs coming down from the deck. I had replaced the sod in this area about 4 years ago and the sod that I purchased locally was absolute garbage and I have had to look at it ever since. The quote seemed reasonable based on the amount of work he was going to do and I liked the detail he informed me he would go through so now just need to see when he can get me scheduled in.

Saturday morning after enjoying a few cups of coffee on the deck with the wife, I headed out to the shop to complete the Jeep JKU now that I had a new front yoke to complete the job. All that was remaining was to install the yoke, the front driveshaft and factory skid plate then a test drive and this job was done. Well, I thought it was anyways. :unsure:

Front yoke installed, torqued to spec. enough to net me a couple inch/pounds more rotating torque on the pinion then the front driveshaft was installed and all bolts torqued to spec.
jp31.jpg

After torquing the fasteners to specification, I paint marked each fasteners on both front and rear driveshafts.
jp32.jpg

jp33.jpg

jp34.jpg

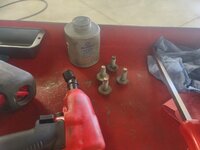
Lastly, the factory skid plate could be installed with a little anti-seize on the threads.
jp35.jpg

This job is done, so I thought.
jp36.jpg

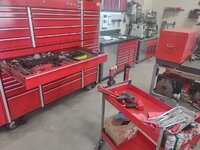
My wife and DIL were going to a baby shower so rather than take the test drive I cleaned and put tools away because I wanted to see my DIL and my grandson when they came to pick up my wife. My grandson was able to help me clean and put tools away for a couple of minutes before leaving. That little stink remembers that you have to slide the drawer locks to the side before pulling the drawers open. I think my son and DIL are going to be in trouble, that little guy only has to be shown something once and he remembers.
jp37.jpg

The test drive did not go as planned. To bring you up to speed, when the owner dropped the Jeep off last week, he asked me to address the rear pinion seal leak, but he also mentioned a clunking or clicking noise that he thought was coming from the rear end. Now while this concerned me because I had rebuilt both front and rear axles only 4k miles ago, I could not remember any part of either axle that stuck out to me as being questionable nor anything I should have been concerned about. I read back through my notes multiple times trying to jar my memory if anything seemed out of the norm while performing the work.

Now while I hate comeback work, I have also learned that no one, and I mean no one, is the exception to having work come back at some point. As **** as I am about doing things properly, I am human and I don't want to be one of "those" mechanics who point the finger everywhere but at himself when a client comes back and says something isn't right. I am one of the first to start looking where the last work was performed when a vehicle comes into my shop.

That being said, I saw absolutely NOTHING wrong in either front end when I pulled the diff. covers (this was the reason I pulled both covers and did a thorough inspection). The owner also could not duplicate the noise when I went for a test drive upon dropping the Jeep off, so I had nothing to go off of. I even commented about how deathly quiet and smooth the Jeep was during out test drive. With the doors and top off I was very impressed with the sounds I was not hearing, no rattles, squeaks or noises at all.

Well, upon completing the Jeep late Saturday morning and taking it for a test drive after the wife, DIL and grandson left the shop, I didn't even make it out of the neighborhood when I heard the noise or at least what I suspected was the noise the owner was talking about. Sounded like it was right under my feet, but I know how noises travel throughout powertrains. It definitely sounded exterior though, meaning not inside a differential or gearbox, too tinny or tingy sounding, much like maybe a U-joint. :unsure:

I racked it a few inches off the ground and run the powertrain in gear at idle. Nothing at all with just the rear end being driven. As soon as I stopped it and engaged the front axle the noise was evident. I took a couple recordings and sent them to the owner asking if this was something he wanted me to repair or if he would like to address it as it was a pretty simple job of replacing the passenger side axle shaft U-joint. He asked me to replace both sides so I ran and grabbed the parts from my local NAPA and began tearing into the front axle.

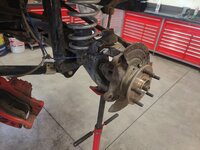
I cut these pole jacks down a few years ago for jobs just like this as they work perfectly for doing suspension or axle work when the vehicle is at mid-rise on the lift. I can tilt the axle up on the side I am working on to keep fluid from leaking out past the inner axle seals.
jp38.jpg

With the axle shaft out and on the bench, new U-joints at the ready I could begin replacing the joints.
jp39.jpg

Going fairly smooth so far. No surprises.
jp40.jpg


Stay tuned for more.
It is commendable that you keep an open mind that perhaps, in spite of your skill, diligence, and care, that you may have missed something and are willing to own up to it if that is the case.

We need more people with this level of commitment and decency.
 
OP
Z

zmotorsports

ALLIANCE MEMBER
Joined
Oct 20, 2009
Messages
21,469
Location
Northern Utah
Continuing on.

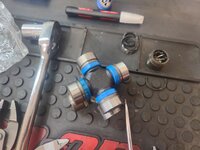
Passenger side U-joint replaced, greased and ready to reinstall into the axle.
jp41.jpg

Reassembly went relatively quick and smooth. Torquing all of the fasteners to spec.
jp42.jpg

Then applying torque seal to the critical fasteners after torquing. This is something I only recently starting doing on client's vehicles that are not race or specialty vehicles. Over the past couple of decades, I did this solely on race and specialty vehicles that rolled through my shop, but only within the past year or so have I started applying torque seal to daily drivers, at least on critical fasteners anyways. Definitely not necessary and probably overkill, but you know my saying. ;)
jp43.jpg

jp44.jpg

jp45.jpg

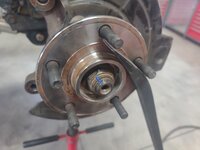
With the passengers side completed, less the tire/wheel, I turned my attention to duplicate the work on the driver's side. It was going smoothly, and I even thought I would be able to complete it quicker than the estimate I gave the owner.
jp46.jpg

Driver's side shaft out in relatively short amount of time.......
jp47.jpg

.............and on the bench to replace the U-joint.
jp48.jpg

This is when everything went to ****. See anything wrong here?
jp49.jpg

Yep, the shaft in the driver's side was not the same as the OEM one in the passenger's side. I reached out to the owner to see about getting some history on these axle shafts and learned that he installed a Dorman on the driver's side fairly recently. I made a trip back to my local NAPA to see about what other options were available for U-joints but quickly learned there was only one choice showing. 🤬 We looked up the Dorman shaft number hoping it showed a different U-joint number. It showed a Precision U-joint part # and when we crossed it over it crossed directly to the U-joint that I had already purchased and the same as the passenger side. Dorman strikes again on their **** parts and piss poor consistency.
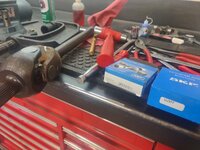
Now not having any idea what U-joint they would have used I asked for their book that showed sizes. Yes, they still have those and this was my specialty when I was a much younger parts counterman. I went through the spec's looking to match up cup size and then internal snap ring groove distances. The branch manager was awesome about pulling various U-joints for me to measure I brought my dial calipers with me to ensure I got the correct joint. It was getting late by this time and I was worried I wouldn't find what I was looking for as I now had several U-joints laid out on the counter and none of them were as close as I had hoped. There was one joint that the store didn't have in stock that matched the spec's I needed, but a nearby NAPA store did have one in stock. So, after a phone call to them to make absolutely certain they had it in stock and put their hands on it, because I know computer inventories are never wrong :ROFLMAO:, I drove to the other store and got their a few minutes before 6PM as they were getting ready to lock up for the night, but I made sure to confirm the specifications were correct.

With what I had hoped was the correct U-joint now in hand I headed back home to complete the job. The rest of the job went back together as it should. Although still not pleased about having different U-joints in both sides, but this was the least expensive option I could come up with for the owner. The other was to get another shaft, but that was not an inexpensive option, even one being another Dorman which I did NOT want to go with.
jp50.jpg


Stay tuned for final pics.
 
OP
Z

zmotorsports

ALLIANCE MEMBER
Joined
Oct 20, 2009
Messages
21,469
Location
Northern Utah
Completion of the Jeep.

Finished the driver's side torquing everything to spec. and applying torque seal. Then set it down and reinstalled the front tires/wheels and torqued them to spec. before another test drive.
jp51.jpg

Took a test drive, pulled it back into the shop to double check everything, then took it back out for a bit longer test drive at higher speed. Everything is as it should be and a call to the owner to let him know it was done.
jp52.jpg

That was about 7:30 Saturday evening and I was spent, plus the wife and I were watching our grandson while the kids went out for the evening to celebrate their anniversary and I was excited to play with my grandson.

Thanks for looking.
 
OP
Z

zmotorsports

ALLIANCE MEMBER
Joined
Oct 20, 2009
Messages
21,469
Location
Northern Utah
It is commendable that you keep an open mind that perhaps, in spite of your skill, diligence, and care, that you may have missed something and are willing to own up to it if that is the case.

We need more people with this level of commitment and decency.

Thank you. And while I don't like it when I make mistakes nor admitting when I am wrong, I do make mistakes on occasion, but I also hope I continue to learn from them and don't make them again. Hell, I've learned more from my mistakes over the course of my life than I have from my successes. The key I think is when a person does make a mistake, that he owns it, learns from it and moves on to try not to make the same one again. No one is perfect, but making things right with people I feel is more important than always having to be right.

That being said, I was pleased to find nothing wrong in either differential that was a result in something I did. Ultimately, I did eat the pinion seal on the rear axle as that was not the owner's fault and still unsure what caused it to leak. I have used these same master install kits with same seals and bearings for a very long time now and this was the first pinion seal I had leak on me.
 
OP
Z

zmotorsports

ALLIANCE MEMBER
Joined
Oct 20, 2009
Messages
21,469
Location
Northern Utah
Mike - what is “torque seal”?


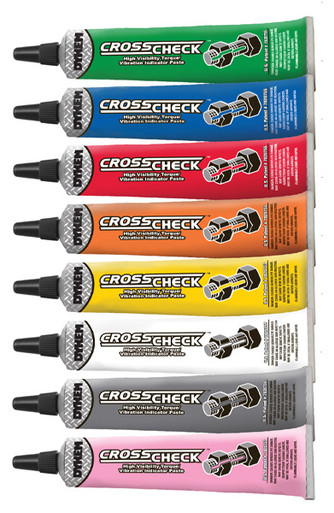
There are several manufacturers that make a similar product. But when I reference torque seal I am usually referring to Cross Check that I use in a couple different colors.

I also just started to use another one that I purchased from Kartek that is made by Revlok. I really like these small bottles with the stainless steel tube applicator for placing the product very precisely where I want it.


The end result is this on the axle nut.
jp43.jpg


For suspension markings and things like bolt marking I use a paint pen. I've used ones from Dykem in the past, but these new ones from Milwaukee are really impressing me lately.
jp33.jpg


Hope that answers your question.
 

larry4406

Well-known member
Joined
Jan 27, 2006
Messages
19,576
Location
Northern Virginia
There are several manufacturers that make a similar product. But when I reference torque seal I am usually referring to Cross Check that I use in a couple different colors.

I also just started to use another one that I purchased from Kartek that is made by Revlok. I really like these small bottles with the stainless steel tube applicator for placing the product very precisely where I want it.


The end result is this on the axle nut.
jp43.jpg


For suspension markings and things like bolt marking I use a paint pen. I've used ones from Dykem in the past, but these new ones from Milwaukee are really impressing me lately.
jp33.jpg


Hope that answers your question.
Understood - a witness mark showing alignment post torque.
 
OP
Z

zmotorsports

ALLIANCE MEMBER
Joined
Oct 20, 2009
Messages
21,469
Location
Northern Utah
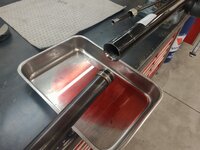
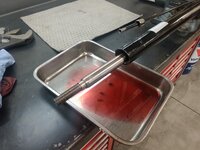
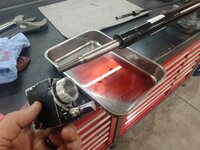
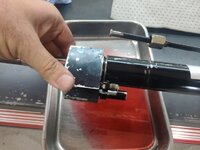
So while I awaited a response from the owner on the Jeep after sending the videos early Saturday afternoon, I went back and completed the assembly of the hydraulic cylinder that was sitting on my bench for our coach's slideout. I figured I would need the vise to do the U-joints if the owner wanted me to do them, so I finished up the cylinder by installing the new seals and prepped it for reinstallation into the coach.

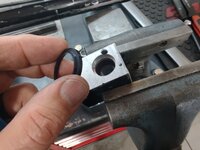
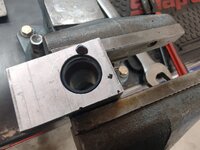
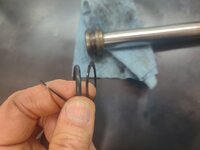
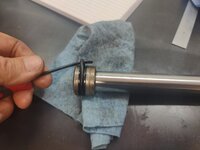
Slid the new packing into the manifold block and used a plastic tool to finesse it into place in the groove behind the phenolic bushing/bearing.
hyd24.jpg

Packing in place.
hyd25.jpg

Next inserted the wiper seal into place.
hyd26.jpg

hyd27.jpg

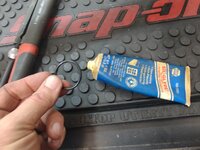
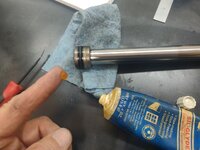
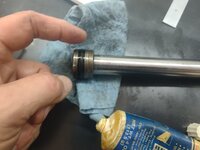
Then to close out the manifold block assembly, I prepped the O-ring with a little Sil-Glyde.
hyd28.jpg

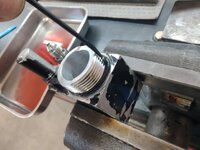
And installed it around the outside of the threads working it around gently to avoid cutting it. I really like these Snap-on seal tools. I've used standard picks my whole career and only recently purchased these seal tools a couple of years ago and they are less prone to nick or damage O-rings.
hyd29.jpg

With the manifold block completed and set aside, I removed the last nylon backing ring and prepped the new urethane rings and O-ring on the piston.
hyd30.jpg

O-ring guided into place.
hyd31.jpg

A little more Sil-Glyde ready to apply.
hyd32.jpg

O-ring and backing rings prepped and ready for assembly.
hyd33.jpg


Continued.
 

Swanny1953

ALLIANCE MEMBER
Joined
Jul 28, 2010
Messages
1,082
Location
Lucas, TX
Mike, it's amazing how many people in this world just absolutely refuse to own their mistakes!! It can drive me bat **** crazy. I have always told my kids and those I managed that it's OK to make mistakes, just understand what you did so you don't repeat it and have the integrity to admit you did something wrong! I have always viewed mistakes as learning opportunities.
Glad to see you were able to get to the bottom of the problems, just ***** you had to resort to measuring parts that were supposed to fit out of the box!!
 
OP
Z

zmotorsports

ALLIANCE MEMBER
Joined
Oct 20, 2009
Messages
21,469
Location
Northern Utah
Continuing on with the cylinder reseal.

Now the rod can be inserted into the cylinder along with the limiting sleeve. It is critical that these steel sleeves be reinstalled as these limit the travel of the cylinder to coincide with the travel distance of the slideout room.
hyd34.jpg

Also, make sure to remove the plugs on the end or you will not be able to insert the rod into the cylinder.
hyd35.jpg

With the rod installed, it was time to lube up the packing and wiper on the block with Sil-Glyde and assemble the manifold block on the end. Think of this as an end cap as not all cylinders have something like this. This particular style seems to be common on HWH cylinders as they also contain a brake or check valve.
hyd36.jpg

Threading the block into position.
hyd37.jpg

Tightening the block on the cylinder. Also, don't tighten the vise too tight as it can crush the cylinder.
hyd38.jpg

Make sure to tighten the block completely and then adjust the mounting plate at the opposite end of the cylinder to be in the same plane. Do not leave the manifold loose to match the other end as the manifold block must create a tight seal. The mounting plate can be adjusted to match the block end if needs be. They must be in the same plane though as they slide inside a rectangular tube that runs across the chassis.
hyd39.jpg

Everything wiped down and cleaned and ready to be reinstalled into the coach.
hyd40.jpg

At that point the vise and workbench were free to do the work if the owner of the Jeep wanted me to perform it, which he did so I was glad I chose to complete the hydraulic cylinder repair first.


Thanks for looking.
 
OP
Z

zmotorsports

ALLIANCE MEMBER
Joined
Oct 20, 2009
Messages
21,469
Location
Northern Utah
Mike, it's amazing how many people in this world just absolutely refuse to own their mistakes!! It can drive me bat **** crazy. I have always told my kids and those I managed that it's OK to make mistakes, just understand what you did so you don't repeat it and have the integrity to admit you did something wrong! I have always viewed mistakes as learning opportunities.
Glad to see you were able to get to the bottom of the problems, just ***** you had to resort to measuring parts that were supposed to fit out of the box!!

Thank you Gary. I agree, a mistake can still be valuable IF a person learns from it. Unfortunately, I see too many people these days making the same mistakes over and over again and unwilling to look at the root cause or evaluate their mistakes. Hell, some don't even see them as mistakes, just keep on going, and I'm not just talking about when working on things, but everything from a financial standpoint to a whole host of other things.
 
OP
Z

zmotorsports

ALLIANCE MEMBER
Joined
Oct 20, 2009
Messages
21,469
Location
Northern Utah
Understood - a witness mark showing alignment post torque.

Correct. A witness mark after torquing to spec. I used to only use these on suspension fasteners to be able to check at a quick glance back at camp if anything had moved. I have also used paint pens for decades now to mark rocker arms/adjusters when running overheads or valve jobs to ensure I don't miss anything as I move through the valve adjustment process. I only recently started using this method on more critical fasteners on client's daily drivers as well as my own.
 

Jgaz

Well-known member
Joined
Dec 16, 2016
Messages
1,709
Location
AZ
Correct. A witness mark after torquing to spec. I used to only use these on suspension fasteners to be able to check at a quick glance back at camp if anything had moved. I have also used paint pens for decades now to mark rocker arms/adjusters when running overheads or valve jobs to ensure I don't miss anything as I move through the valve adjustment process. I only recently started using this method on more critical fasteners on client's daily drivers as well as my own.
X2^^. When I was building data collection suspension vehicles I started using the torque seal in the 90’s
The final build on these vehicles could take several weeks and involve more than one mechanic at several different times.
My rule was, “if you torque it, mark it”. Easy to tell at a glance if everything was tight before the vehicle went to the proving grounds.
Yes, some of the “mechanics“ thought I was ****. Didn’t care, if I was lead on the build thats the way it was done.
 
To avoid these ads, REGISTER NOW!
Top Bottom