To avoid these ads, REGISTER NOW!

ZMotorsports Shop Projects 2.0

Grant Gunderson

Well-known member
Joined
May 17, 2013
Messages
2,331
Location
Bellingham, WA
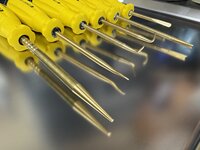
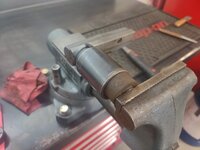
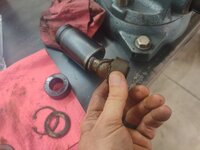
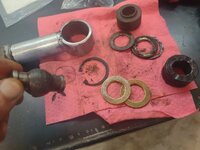
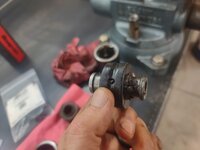
And installed it around the outside of the threads working it around gently to avoid cutting it. I really like these Snap-on seal tools. I've used standard picks my whole career and only recently purchased these seal tools a couple of years ago and they are less prone to nick or damage O-rings.
I have those in long and short versions, but never use them these days.
IMG_4039.jpeg
I only use brass tooling for removing or installing seals as all it takes is one small scratch / nick and the seals won’t seal. Especially at pressures in hydraulics. For installs the spoon shaped tips are my favorite along with a notched spoon end that help push the O-ring into an internal groove.

Most of what I’m working on is high end suspension dampers, but those are essentially the same as hydraulic cylinders just with some backing added to the pressure heads.

For installing a shaft into a seal I like to use a bullet tool on the shaft ends to protect the seal as square edges or threads damage them on insertion.

For internal seals that use those nylon backup rings / piston bands I like using a piston band sizer. Is essentially just a tube with chamfered edges you pass the seals through that compress it all to the correct size prior to installation. Makes installing them way quicker and easier.

I always like to use a healthy amount of slickolem on seals.
 
To avoid these ads, REGISTER NOW!
OP
Z

zmotorsports

ALLIANCE MEMBER
Joined
Oct 20, 2009
Messages
21,464
Location
Northern Utah
For internal seals that use those nylon backup rings / piston bands I like using a piston band sizer. Is essentially just a tube with chamfered edges you pass the seals through that compress it all to the correct size prior to installation. Makes installing them way quicker and easier.

I always like to use a healthy amount of slickolem on seals.

For internal packings, I have the three pronged install tools that fold the seal/packing in on itself and allow the packing to be inserted into the groove, then the tool opened up and the seal allowed to pop into the groove. I think I've shown them here before, but I know I showed them on my toolbox tour video. I have them in a small and medium size that fit cylinders ranging from about 1.5" up to around 6" range. This particular cylinder was just a bit too small for the smallest tool, so I pushed it down into the bore with the plastic tool.

I was given the install tools back in the early 90's by a vendor we bought a lot of hydraulic seal kits from and they work great. I don't do a ton of hydraulic cylinder work these days, but when I was wrenching daily as an Industrial Maintenance Mechanic I did a lot of repairs/reseals.
 

stinkity stoink

Well-known member
Joined
Apr 8, 2007
Messages
736
Location
New Jersey
The work you do, the attention to detail and the documentation is incredible. I appreciate the write ups just as much as everyone else along with the pictures. I can’t even comprehend how you can continue to take pictures and do the write up when things are going to ****. I would be losing my mind 😂😂.
 
OP
Z

zmotorsports

ALLIANCE MEMBER
Joined
Oct 20, 2009
Messages
21,464
Location
Northern Utah
The work you do, the attention to detail and the documentation is incredible. I appreciate the write ups just as much as everyone else along with the pictures. I can’t even comprehend how you can continue to take pictures and do the write up when things are going to ****. I would be losing my mind 😂😂.

Thank you. I appreciate the kind words. Yeah, when things start going south I have to step back and take a breathe, that's usually when I snap a picture or two so killing two birds. :ROFLMAO:
 
OP
Z

zmotorsports

ALLIANCE MEMBER
Joined
Oct 20, 2009
Messages
21,464
Location
Northern Utah
I did a thing the other day. I hate dealing with broken bolts and have quite an arsenal of "oh ****" tools over the course of my nearly 40-year career, but one relatively new tool to the game that I have been eyeballing for a couple of years now finally made its way to my shop. The MAC Tools RBRT extractor set. I try to stay off the tool trucks unless there is something specific that I need but a few months ago I was on our MAC truck and looking at these but couldn't pull the trigger. The other day our MAC rep. caught me and told me he had a promo and would be willing to make a deal on the RBRT extractors that I was inquiring about.

Well, after a bit of negotiating, I pulled the trigger.

I have to admit, MAC really stepped up their game on their blow molded cases, look at that hinge.
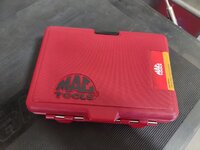
mac1.jpg

mac2.jpg

Personally, I think they could have used a bit smaller case though. But at the price of these things, maybe they wanted you to feel like you're getting more for your money. :headscrat
mac3.jpg

The thing I like about these are that they are a straight fluted extractor, so less chance of exerting more force on the fastener in the hole.
mac4.jpg

But the problem with most straight fluted fasteners are twofold. First, they are difficult to remove if you need to add a bit of heat while extracting or once the broken piece is extracted they can be somewhat difficult to pull the straight fluted end out of the extracted piece. Plus with a straight fluted extractor, you can work the tool in both directions to try and break the broken fastener free whereas with a spiral extractor, they only work in CCW direction. I have a couple other straight fluted extractors but I really like this built in threaded end that pushed the piece off, or pushed the tool out of the drilled hole, whichever you are trying to accomplish.
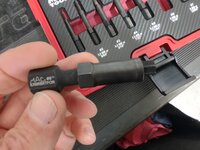
mac5.jpg

This is one of those drawers that I hate to have to open because it means something went to ****, hence why I call it my "oh ****" drawer. :oops:
mac6.jpg

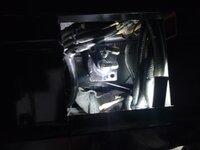
Upon arriving home yesterday I had some time so I cleaned out the rectangular tubing running across the chassis of our coach that had some hydraulic fluid in it, and then inserted the freshly rebuilt slideout cylinder.
hyd41.jpg

Once it was nestled into position, the retaining bolts were installed and then the hoses could be connected.
hyd42.jpg

After reconnecting the hydraulic lines, I went about bleeding the system and running the cylinders in and out multiple times before attempting to connect the rods to the slideout. I probably ran the cylinderes in/out a dozen times before the wife arrived home to help me. I wanted her to run the slideout cylinders while I watched their movement from underneath to verify they were moving in sync with one another.

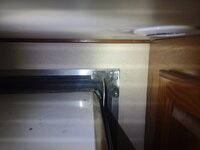
While I was waiting for my wife to arrive home, I tackled repairing the stainless steel lock plate above the rear of the slide. It never has really hit dead on where the front one does but it was starting to rub through after all these years and cycles. I drilled the rivets out last week before disconnecting the rods from the slide so I could weld up the groove that was worn and then made a small template to add a little sliver of material to the bottom of the radius to provide more surface area for the arm to push against as the lock engages.

I cut a small crescent shaped piece of 304 SS and welded it to the radius of the plate, then metal finished it. This should provide a bit more surface area for the arm engagement and hopefully last another 23+ years.
hyd43.jpg


Now for the rest of the story...... When the wife arrived home from work I gave her instructions on the slide operation while I went out underneath the slide to watch the cylinders extend and retract and ensure they were moving in unison. As I gave her the go ahead to run the cylinders out I heard a click but nothing else. She said she was pushing the extend button and nothing was happening, but I could hear an audible clicking with each push of the button from underneath the coach.

My first thought was that I had either left a compartment door open, or that I had multiple doors open throughout the week and one of them must not have engaged the door's safety lockout switch, but as I was crawling out from under the coach I thought that didn't make sense because the door switches are tied into the control side of the relay and won't even let the pump motor solenoid engage and by the sound of the clicking it sounded like the solenoid was engaging.

Well, I dismissed the wife for the time being so she wasn't standing around waiting on me and grabbed the meter and crawled under the front of the coach where the hydraulic pump and reservoir are located. I connected the meter and stuck it out far enough that I could see it remotely and when the switch was activated, sure enough, the solenoid was sending power to the pump motor. Next was the pump motor terminal and it was also getting power but no activity. I moved some wires around and saw the 2 ga. cable from the solenoid to the pump motor move on the stud.

Grabbed some wrenches, a wire brush and some NOCO battery terminal goop and crawled back under the coach. Sure enough, there was a connection issue but it was ironic that I had run the slide cylinders in and out probably a dozen times throughout the afternoon as well as all of the times over the course of the 18+ years we've owned it and never once did it faulter. Then at that moment when we were going to connect the rods that it decided to fail. :unsure:

At first I was a bit upset, but then I quickly changed my thinking to the fact that at least it happened at home in the shop and not when we were breaking camp somewhere on a rainy afternoon and I had to crawl underneath in less than desirable conditions. That helped convince myself that the timing was in fact, perfect. I could locate the issue and correct it immediately before we had issues on vacation. This was actually the best time to have an issue.

I called the wife back out and the rest of the install went successfully without any issues. I was able to reconnect the rods to the slideout box and run it in and out a few times with everything operating in sync.


Thanks for looking.
 
OP
Z

zmotorsports

ALLIANCE MEMBER
Joined
Oct 20, 2009
Messages
21,464
Location
Northern Utah
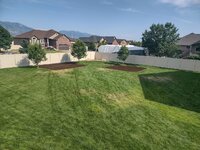
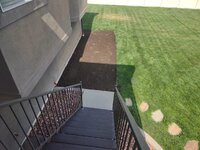
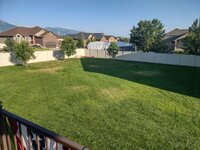
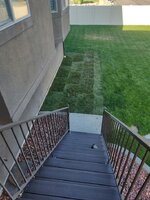
While I was working in the shop yesterday afternoon, the crew showed up to remove the dead sod, removed a couple inches of substrate and hauled in a couple inches of new topsoil to prep the areas for new sod in the yard.

I have more pictures on my garage build thread, but here are the three areas that will hopefully have new sod installed by this evening.

lawn10.jpg

lawn11.jpg
 
OP
Z

zmotorsports

ALLIANCE MEMBER
Joined
Oct 20, 2009
Messages
21,464
Location
Northern Utah
I like your change of thought/attitude on the coach Mike, those are never fun situations, but I think we've all been there and it takes time to remember to use the lemons to make lemonade :ROFLMAO:

Thanks Mike. Changing one's mindset is not always as easy as it sounds, and at my age I am noticing it is even harder to change behaviors and habits. Life's a journey though and always a learning opportunity.
 
OP
Z

zmotorsports

ALLIANCE MEMBER
Joined
Oct 20, 2009
Messages
21,464
Location
Northern Utah
I was able to run the slideout on the coach in and out a few more times last night to ensure everything is synchronized and moving as it should with no binding or racking of the slide.

Lock wear plates metal finished and prepped for installation. The one on the right is the one I added the sliver of material to so the lock would hit more centered vertically.
hyd51.jpg

Installed, slideout retracted and the lock hitting where there is more material so that should prolong the life and wear pattern. The original lasted 23 years, so this should last at least that long, in theory anyways. :unsure:
hyd52.jpg

Just as I was wrapping up the slideout work on the coach and reassembling the service bay where I removed the cylinder, my wife's aunt arrived to have me give her 2008 Avenger a look over before an upcoming road trip.
avenger.jpg


Thanks for looking.
 
OP
Z

zmotorsports

ALLIANCE MEMBER
Joined
Oct 20, 2009
Messages
21,464
Location
Northern Utah
Having just turned 60 I am finding that my tolerance for ******** is very, very low.

I concur. I used to think that as I aged, maybe I would let things bother me less and become more tolerable of people and situations. HOWEVER, I have found the exact opposite has happened. The older I get the less tolerable I have become of both people and situations. Even holding myself accountable has gotten more intense. If I have a certain number of things that I expect to get accomplished in a day and I don't, I get upset with myself. I have become more **** about my home, yard and vehicles where I want (and expect) everything to be a certain way.

I watched a couple of friends and relatives who were in my field, and as they aged they slacked off in the caring about the appearance of their vehicles and less care was given to their homes and yards and I swore I was never going to be that way. Fast forward I feel I have gone to the extreme in the other direction.

The wife and I have had lengthy discussions about this lately as she is just as **** about our home and making sure everything is just perfect before she leaves for work and before bedtime. We've come to the conclusion that we like the way we are and will not let our standards down just to be more "normal", so we've accepted the fact that this is who we are and we're happy with "us" as is. We are not out to impress or please anyone else so if we are comfortable in our own skin that is all that matters.
 

Jgaz

Well-known member
Joined
Dec 16, 2016
Messages
1,706
Location
AZ
I concur. I used to think that as I aged, maybe I would let things bother me less and become more tolerable of people and situations. HOWEVER, I have found the exact opposite has happened. The older I get the less tolerable I have become of both people and situations. Even holding myself accountable has gotten more intense. If I have a certain number of things that I expect to get accomplished in a day and I don't, I get upset with myself. I have become more **** about my home, yard and vehicles where I want (and expect) everything to be a certain way.

I watched a couple of friends and relatives who were in my field, and as they aged they slacked off in the caring about the appearance of their vehicles and less care was given to their homes and yards and I swore I was never going to be that way. Fast forward I feel I have gone to the extreme in the other direction.

The wife and I have had lengthy discussions about this lately as she is just as **** about our home and making sure everything is just perfect before she leaves for work and before bedtime. We've come to the conclusion that we like the way we are and will not let our standards down just to be more "normal", so we've accepted the fact that this is who we are and we're happy with "us" as is. We are not out to impress or please anyone else so if we are comfortable in our own skin that is all that matters.
Amen Mike. I can seriously relate.
Having just turned 60 I am finding that my tolerance for ******** is very, very low.
Wait until you get to almost 70.
I recently dropped a bomb at a retirement party on one of my former coworkers (not the guest of honor).

It was only my opinion, but one that was shared by former coworkers I respected. It was something that I felt needed to be said for a long time but I’m not sure I would have verbalized it 10 years ago.
My give a damn tank is real close to empty.
 
OP
Z

zmotorsports

ALLIANCE MEMBER
Joined
Oct 20, 2009
Messages
21,464
Location
Northern Utah
The guys showed up yesterday afternoon to install the sod. They did a great job. The seams are nice and tight and levels match very well, especially after they rolled everything.

With the summer heat starting to come on now being in the 90's, I bumped my time per zone on the sprinkler system yesterday plus I will spot water these few sections each night for the next week or so to help them get a good start.
lawn6.jpg

lawn7.jpg

Now to get back to work in the shop and try to keep the lawn green and looking good in this summer heat. Plus, I have a minor shop project or upgrade coming in the near future, but you'll have to wait to see that as I won't have time to install it for a few weeks. ;)

Thanks for looking.
 
To avoid these ads, REGISTER NOW!

rharman

Well-known member
Joined
Apr 22, 2012
Messages
8,905
Location
SoCal
The guys showed up yesterday afternoon to install the sod. They did a great job. The seams are nice and tight and levels match very well, especially after they rolled everything.

With the summer heat starting to come on now being in the 90's, I bumped my time per zone on the sprinkler system yesterday plus I will spot water these few sections each night for the next week or so to help them get a good start.
lawn6.jpglawn7.jpg


Now to get back to work in the shop and try to keep the lawn green and looking good in this summer heat. Plus, I have a minor shop project or upgrade coming in the near future, but you'll have to wait to see that as I won't have time to install it for a few weeks. ;)

Thanks for looking.
Isn't it nice when a vendor meets or exceeds your expectations?
 

PhantomEB

Well-known member
Joined
Feb 6, 2006
Messages
6,817
Location
Medicine Hat, AB, Canuckistan
Starting to really figure you out so I can follow your footsteps more!

finally got my shop cleaned up and somewhat organized now it’s easier to focus on a project. Need to get a maple top cut out for the workbenches then varithained.974F8CBC-4B32-4165-882F-D01E5C3D178A.jpeg

input on my sprinkler system? I am also looking at running all the X’s but shorter yet wider patterns for more coverage. All dead spots in the lawn will be cut out and reseeded once the system is in, August I think.
 

Attachments

  • 673B316D-1D8D-46A6-AC1E-2784D86B7537.jpeg
    673B316D-1D8D-46A6-AC1E-2784D86B7537.jpeg
    863.4 KB · Views: 37
  • 072AA261-9A14-4862-9B4C-6BF02ABF563C.jpeg
    072AA261-9A14-4862-9B4C-6BF02ABF563C.jpeg
    906.1 KB · Views: 34
OP
Z

zmotorsports

ALLIANCE MEMBER
Joined
Oct 20, 2009
Messages
21,464
Location
Northern Utah
Isn't it nice when a vendor meets or exceeds your expectations?

Yes it is Roger. Funny how things have changed or shifted just over the past short few years. I remember not so long ago a supplier or vendor really had to go above and beyond to impress me to the point I would praise them or recommend them as most people just delivered as promised, and now as a society our standards have slipped so far that all a company has to do is exactly what they say they will do to stand heads and shoulders above others. :unsure: Most fail to deliver on the most basic premise of their product or service. Sad, but I guess if you're one of those who keep your word and deliver on what you say you will do, you can rise to the top quickly and always be busy.


Clean install of the couch repair as usual

Let me know when you wanna try crafty artsy with that Peterbilt horn stand

Thanks Dave. I have a couple jobs yet and then a few personal projects I need to get done then I'll give you a shout and see what we can accomplish.
 
OP
Z

zmotorsports

ALLIANCE MEMBER
Joined
Oct 20, 2009
Messages
21,464
Location
Northern Utah
Starting to really figure you out so I can follow your footsteps more!

finally got my shop cleaned up and somewhat organized now it’s easier to focus on a project. Need to get a maple top cut out for the workbenches then varithained.974F8CBC-4B32-4165-882F-D01E5C3D178A.jpeg

input on my sprinkler system? I am also looking at running all the X’s but shorter yet wider patterns for more coverage. All dead spots in the lawn will be cut out and reseeded once the system is in, August I think.

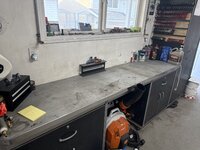
Bench is looking nice and organized, as is the socket rack above. I'm flattered by your comments and glad to have helped.

As for your sprinkler, one thing I ended up tweaking on mine is the head placement to get better coverage. I ended up moving a few and adding a few shortly after installation due to the fact that the heads didn't delivery to the range that they specified. I now have one head that can reach the next in either direction for 100% overlap. That is what I would shoot for. And don't trust that if a head manufacturers states it will reach 15' or 30' because that is so dependent on available pressure. I found out I had to move a few and add a few because placing them based solely on manufacturer's printed ranges was not quite accurate.
 
OP
Z

zmotorsports

ALLIANCE MEMBER
Joined
Oct 20, 2009
Messages
21,464
Location
Northern Utah
I hope everyone had a great weekend.

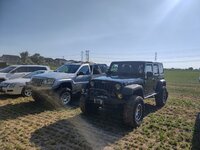
The kids invited us to attend our city's car show on Friday night so I postponed my normal Friday night lawn ritual until Saturday morning and we went to dinner then the car show with our kids and grandson. Had a great time, but I was a bit disappointed in some of the vehicles in the show. There were a few nice ones and a couple exceptional one, but most were just flogged on daily drivers.

We ended up parking in a field next to the park and I think our Jeeps looked every bit as nice as 85% or more of the ones in the show.
show1.jpg

show2.jpg

My grandson was absolutely adorable throughout the night. Looking at all the vehicles and oohing and aawing over them. One of his favorite was the Weber County SWAT vehicle and the ambulance parked nearby. :ROFLMAO: He was pointing to the axles and springs underneath and repeating everything I was telling him, then had to explain everything exactly the same way to his grandma. Loved it.
show3.jpg


Saturday morning I did my lawn routine before commencing a bunch of stuff in the shop, that I really can't show yet. Later in the day I spot watered the new sod and then Sunday morning with our coffee on the deck we were able to enjoy a full lawn again.
lawn10.jpg


Thanks for looking.
 
OP
Z

zmotorsports

ALLIANCE MEMBER
Joined
Oct 20, 2009
Messages
21,464
Location
Northern Utah
Prior to the last Jeeping trip during the pre-trip inspection, I detected a small amount of play coming from the front upper Johnny Joints at the frame. Nothing alarming, but to the point I wanted to address it before our annual Ouray/Silverton trip coming up next month.

I had a few minutes last night so I racked the Jeep and replaced the worn components in the two front upper links. I keep these rebuild kits on hand just in case I need one in a hurry. Fortunately, the Johnny Joints don't need a lot of attention and once a year I drop them and thoroughly grease them, but other than that I have not had to do much of anything with them since I built this last iteration of my suspension back in 2015, these joints have over 80k miles on them and all are still in excellent condition other that these two upper frame mounted joints.

Jeep racked.
jeep1.jpg

Upper driver's side link removed to inspect the mounting locations.
jeep3.jpg

The play was quite noticeable once out of the Jeep. I packed it with red EP-2 grease before last trip just to buy me some time. Normally, I use a moly grease in these Johnny Joints due to the load on them. I also scrape the big stuff off into the garbage can before parts ever go near my solvent tank. This prolongs the life of the solvent and keeps it cleaner longer.
jeep4.jpg

Cleaned in the solvent tank and ready to disassemble with the two new kits at the ready.
jeep5.jpg

Internals removed. I also ran a DA sander with 80-grit over the end of the link so I could repaint it. The paint on the length of the link itself is still holding up excellent.
jeep6.jpg

Also a thorough inspection of my welds to ensure no signs of cracking or defects starting. Everything looked good.
jeep7.jpg

On the standard 2" JJ and the 2.5" JJ the bushings come out and split in two in which the ball sleeve can be removed and reinstalled. However, on the narrow 2" internal bushing, they do not separate, therefore the steel ball and sleeve must be pressed out and pressed into the new bushing. Currie makes a special tool for these bushings based on the size, but the same task can be accomplished by using a socket and vise, then socket and press for reassembly of the joint. I keep telling myself I'm going to machine the tool similar to what Currie sells, but I put it off and then remember when I rebuild a joint. Fortunately, I don't rebuild Johnny Joints that often as they are very well designed and made of quality components. Don't even get me started on some of the imposters or knock-offs that I've seen and used in the past. :rolleyes:
jeep8.jpg

Bushing pressed out so it can be thoroughly cleaned and inspected.
jeep9.jpg

New components at the ready. Internal surface area of the bushing is greased with moly grease as well as the outer diameter of the sphere is liberally coated with moly grease.
jeep10.jpg

Greased sphere/sleeve being pressed into the new urethane bushing.
jeep11.jpg


More to follow...
 
OP
Z

zmotorsports

ALLIANCE MEMBER
Joined
Oct 20, 2009
Messages
21,464
Location
Northern Utah
Continuing on with the Johnny Joint rebuild.

Sphere/sleeve pressed into the new bushing and ready to reinstall into the link end.
jeep12.jpg

A thin-walled socket is needed to allow enough space to install the snap ring into the groove.
jeep13.jpg

This is the key part that many people who use Johhny Joints don't understand. These joints need to be moved through their range of motion at time of greasing to ensure the grease gets all the way around the sphere. Otherwise, the grease will take the path of least resistance and exit the joint without completely greasing the internals. This also makes the difference between a long life JJ or a short lived one. Simply greasing these joints in the static position while still bolted in the vehicle will not net the full benefits of these joints. Use a good quality EP-2 grease with molybdenum (moly). Currie sells their own house brand but a good quality moly fortified grease will work just as well.
jeep15.jpg

Then move it through its range of motion.
jeep16.jpg

Then add a bit more grease and do it again. This ensures the grease is evenly and spread throughout the joint.
jeep17.jpg

Wiped down with Wax & Grease remover, taped up and ready for a coat of paint.
jeep18.jpg

Paint shaker to the rescue again, shaking while I was doing other things.
jeep19.jpg

Painted and ready to reinstall. I only pulled one link at a time to allow easier reinstallation and less force on the axle to align the fasteners.
jeep20.jpg

The next joint, I opted to sand and paint prior to installing the new components.
jeep21.jpg

Links installed, fasteners torqued to spec. and torque sealed. The JJ ends can be done on the lift, but the axle ends with the OEM style of bushings must be torqued at ride height with the weight of the vehicle sitting on it to center the bushing in its range of motion.
jeep22.jpg


Thanks for looking.
 

PhantomEB

Well-known member
Joined
Feb 6, 2006
Messages
6,817
Location
Medicine Hat, AB, Canuckistan
Bench is looking nice and organized, as is the socket rack above. I'm flattered by your comments and glad to have helped.

As for your sprinkler, one thing I ended up tweaking on mine is the head placement to get better coverage. I ended up moving a few and adding a few shortly after installation due to the fact that the heads didn't delivery to the range that they specified. I now have one head that can reach the next in either direction for 100% overlap. That is what I would shoot for. And don't trust that if a head manufacturers states it will reach 15' or 30' because that is so dependent on available pressure. I found out I had to move a few and add a few because placing them based solely on manufacturer's printed ranges was not quite accurate.

yup just like the MW thinking is, split the difference. GF wants to have it all on at once but I said if we do this side first for 20-30 min and switch to the other side, each zone will get as much pressure as available instead of half per side. She ain’t gotten it yet…..

Front yard curb appeal NEEDS to be as much as the inviting back yard is. Garage one day will be as dialed in as yours.

so can’t wait to put the bronco in little car shows around here as I think I am one of the more extreme offroad trucks around here.
 
OP
Z

zmotorsports

ALLIANCE MEMBER
Joined
Oct 20, 2009
Messages
21,464
Location
Northern Utah
Garage one day will be as dialed in as yours.

Thank you, and yes it takes time so don't rush it, work in the shop a bit before making big changes, then make small tweaks as needed to fine tune the work environment.

I had my first shop for 25+ years and although it was dialed in, it took some time initially, plus needs and preferences changed over that timeframe. Once our new shop was completed in mid-2017, many items from the old shop were already done and just needed to be moved into the new. However, even in the new shop now that I've been working in it for exactly 8 years, my preferences have continued to change slightly so small "tweaks" are a constant thing.
 

PhantomEB

Well-known member
Joined
Feb 6, 2006
Messages
6,817
Location
Medicine Hat, AB, Canuckistan
Thank you, and yes it takes time so don't rush it, work in the shop a bit before making big changes, then make small tweaks as needed to fine tune the work environment.

I had my first shop for 25+ years and although it was dialed in, it took some time initially, plus needs and preferences changed over that timeframe. Once our new shop was completed in mid-2017, many items from the old shop were already done and just needed to be moved into the new. However, even in the new shop now that I've been working in it for exactly 8 years, my preferences have continued to change slightly so small "tweaks" are a constant thing.
Play the lotto and unless I/crew win then I don’t see us moving out of this place any time soon.
 
OP
Z

zmotorsports

ALLIANCE MEMBER
Joined
Oct 20, 2009
Messages
21,464
Location
Northern Utah
Play the lotto and unless I/crew win then I don’t see us moving out of this place any time soon.

Sounds like a solid plan.

I don't waste money playing the lottery, I put it towards worthwhile things, so I guess you can't win if you don't play. :ROFLMAO:

That being said, I had the same mindset at our last home until we were run out by scumbag neighbors. That was our first and last home in our minds and in our hearts until the last 3 years when we started questioning things and couldn't see us being there long term.

I don't regret moving, but I guess my point is we didn't treat it like a stepping stone to the next house as we sunk everything into it. It was our home until it wasn't and just became a house. Now this is our forever home and I pray I never have to leave it.
 

ronjon1190

Well-known member
Joined
Apr 1, 2015
Messages
121
Location
East Haddam CT
At first I was a bit upset, but then I quickly changed my thinking to the fact that at least it happened at home in the shop and not when we were breaking camp somewhere on a rainy afternoon and I had to crawl underneath in less than desirable conditions. That helped convince myself that the timing was in fact, perfect. I could locate the issue and correct it immediately before we had issues on vacation. This was actually the best time to have an issue.
I know I am late to the party on this one, but This paragraph immediately made me think of a situation a few years ago. I borrowed my father's pontoon boat to go out on the lake right down the road from his house with a group of friends. We had a great time floating around the lake and stayed till dusk to watch some fireworks that one of the lakeside property owners was setting off. We then put the boat back on the trailer and I towed it the whopping mile or so home. As I was turning into his driveway, a weld broke on the scissor lift type trailer, and dropped the boat to the ground. At the time, I was absolutely furious and let a simple mechanical failure ruin what was otherwise just about a perfect day. I angerly went down to our shop, grabbed a lifting sling and the Case front end loader, and proceeded to go pick up the front end of the boat and set it on some cribbing on another trailer hooked to my best friend's truck, and picked up the rear end of the boat and my friend and I carefully drove it the last 200 yards or so to its normal parking spot, setting it on some more cribbing, with it's trailer out from under it.

Something just clicked as I shut down the machine, there's nothing to be angry about here. S%$# happens. And I was ready to deal with it. I had the proper equipment so that it was almost a non-issue. Had that weld broken when my 75-year-old parents had the boat miles from home on a major road, it would have been MUCH MUCH worse. My wife couldn't believe that I was in a good mood when I got back in the truck.

The next day, I went back to my parent's house, and pulled the trailer into the shop, and re-welded the broken weld, and reinforced some other areas of the trailer. Within a few days, I enlisted the help of another friend to fix the small hole in the aluminum pontoon, and both the boat and trailer were in better shape than when I borrowed them in the first place.

To this day I think about that situation often when things do not go as planned, and I think I have a better mindset because of it
 
OP
Z

zmotorsports

ALLIANCE MEMBER
Joined
Oct 20, 2009
Messages
21,464
Location
Northern Utah
I know I am late to the party on this one, but This paragraph immediately made me think of a situation a few years ago. I borrowed my father's pontoon boat to go out on the lake right down the road from his house with a group of friends. We had a great time floating around the lake and stayed till dusk to watch some fireworks that one of the lakeside property owners was setting off. We then put the boat back on the trailer and I towed it the whopping mile or so home. As I was turning into his driveway, a weld broke on the scissor lift type trailer, and dropped the boat to the ground. At the time, I was absolutely furious and let a simple mechanical failure ruin what was otherwise just about a perfect day. I angerly went down to our shop, grabbed a lifting sling and the Case front end loader, and proceeded to go pick up the front end of the boat and set it on some cribbing on another trailer hooked to my best friend's truck, and picked up the rear end of the boat and my friend and I carefully drove it the last 200 yards or so to its normal parking spot, setting it on some more cribbing, with it's trailer out from under it.

Something just clicked as I shut down the machine, there's nothing to be angry about here. S%$# happens. And I was ready to deal with it. I had the proper equipment so that it was almost a non-issue. Had that weld broken when my 75-year-old parents had the boat miles from home on a major road, it would have been MUCH MUCH worse. My wife couldn't believe that I was in a good mood when I got back in the truck.

The next day, I went back to my parent's house, and pulled the trailer into the shop, and re-welded the broken weld, and reinforced some other areas of the trailer. Within a few days, I enlisted the help of another friend to fix the small hole in the aluminum pontoon, and both the boat and trailer were in better shape than when I borrowed them in the first place.

To this day I think about that situation often when things do not go as planned, and I think I have a better mindset because of it

Thank you for sharing your story. I have been doing much reflection and self-diagnosis lately and I am actively working on my mindset when things do not go as planned. Seems like dealing with unexpected **** in the industrial world is just normal, but when it happens to my personal fleet for some reason I take it personal and think the universe is attacking me. I need to change that mindset and look at the things I can control rather than reacting to the situation out of emotion.
 
OP
Z

zmotorsports

ALLIANCE MEMBER
Joined
Oct 20, 2009
Messages
21,464
Location
Northern Utah
Have a happy and safe 4th of July, Mike!

Thank you Mike. You as well.


I hope everyone has a safe and happy Fourth of July. Spend it with loved ones and cherish this great country, the vision our forefathers had and what was sacrificed so that we can enjoy the freedoms in which make this country stand apart.
 

NUTTSGT

Super Moderator
Staff member
Joined
Sep 14, 2009
Messages
51,128
Location
Northern Central Ohio
Sounds like a solid plan.

I don't waste money playing the lottery, I put it towards worthwhile things, so I guess you can't win if you don't play. :ROFLMAO:
I used to play the lottery on an occasional wild hair moment. Now I've been playing the Mega and Powerball more regularly since I got on DROP and pushing in on retirement. I just want to win a few million and I'm out.


Why ?

See below.
I concur. I used to think that as I aged, maybe I would let things bother me less and become more tolerable of people and situations. HOWEVER, I have found the exact opposite has happened. The older I get the less tolerable I have become of both people and situations. Even holding myself accountable has gotten more intense. If I have a certain number of things that I expect to get accomplished in a day and I don't, I get upset with myself. I have become more **** about my home, yard and vehicles where I want (and expect) everything to be a certain way.

I watched a couple of friends and relatives who were in my field, and as they aged they slacked off in the caring about the appearance of their vehicles and less care was given to their homes and yards and I swore I was never going to be that way. Fast forward I feel I have gone to the extreme in the other direction.

The wife and I have had lengthy discussions about this lately as she is just as **** about our home and making sure everything is just perfect before she leaves for work and before bedtime. We've come to the conclusion that we like the way we are and will not let our standards down just to be more "normal", so we've accepted the fact that this is who we are and we're happy with "us" as is. We are not out to impress or please anyone else so if we are comfortable in our own skin that is all that matters.
 

NUTTSGT

Super Moderator
Staff member
Joined
Sep 14, 2009
Messages
51,128
Location
Northern Central Ohio
I like that Eric, no sense in being greedy. ;) Like I told someone recently, I need as much money in retirement as I can acquire because cool **** ain't cheap and cheap **** ain't cool. :bounce:
Right on Mike. That's why I have been working overtime and buying tools. . . I just want them before I retire.

:beer:
 
To avoid these ads, REGISTER NOW!
Top Bottom