To avoid these ads, REGISTER NOW!

Between 485 & 705 SQ/FT Denver MCM garage expansion

Workspaces between 485 and 705 squarefeet.
To avoid these ads, REGISTER NOW!

badonk

Well-known member
Joined
Aug 20, 2011
Messages
226
A friend stopped by last evening with his latest purchase:
IMG_7546 copy.jpg
I'm curious, how many out there know what it is?

The funny thing about this is now I'm one of the last of my group of friends without an Italian classic. Despite the fact that I've been a proponent of small, often weird Italian cars. Maybe one day.

Neat car - Alfa hubcaps kind of give it away but I didn't know exactly what this was until I looked it up. Pretty low production. Neat Alfa
 
OP
K

kwyjibo

Well-known member
Joined
Apr 8, 2008
Messages
743
OK, for those of you who didn't follow badonk's link, the car is a 1960 Alfa Romeo Sprint Speciale. My friend is prepping the car so that he and his father can drive in the Colorado Grand this summer.

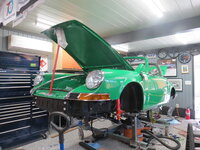
Projectconda update: I'm still sorting through the electrical system, but a few areas are still giving me troubles. To keep busy when the electrical is too frustrating, I've been working on the trunk-adjacent things, like lighting and fuel system.
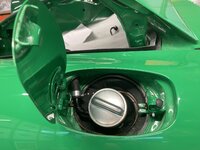
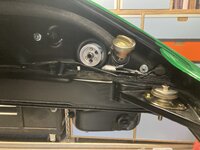
I've connected most of the fuel ventilation system, but the last bits require the actual fuel tank, the dash wiring and wiper system installed to be completed. Here's where it begins, the fuel filler overflow
IMG_7599 copy.jpg
then through a labyrinth of clear tubing and braided hoses the fuel and vapors flow to the engine,
IMG_2583 copy.jpg
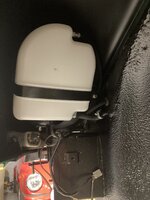
a plastic tank in the front fender
IMG_7607 copy.jpg
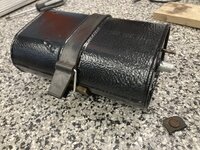
and a charcoal canister that sits on the trunk floor
IMG_7621 copy.jpg
For the canister I repainted it and its bracket and remade a rubber strap from an earlier 911's battery hold down
IMG_7617 copy.jpg
I need to relocate the fuel pump, but I haven't decided on exactly how, yet. In '71 the pump was located above the rear swaybar mount and was prone to vapor lock. The plan is to have the pump in the mastercylinder/steering rack area where is was in other years. I'll finalize the plan once the steering rack and fuel tank are installed so I can get a better look at the space.
 

badonk

Well-known member
Joined
Aug 20, 2011
Messages
226
I did the fuel pump relocation on my '72 - but mostly because I needed to convert to a higher pressure carrera style setup. Ultimately I worked with Len Cummings / BoxsterGT on Pelican to have some lines made up with the correct fittings for the fuel pump on one end and then compression fittings on the other that fit the factory steel lines that run through the tunnel. Same thing on the other end and IMO is a very clean and secure solution. Hopefully he is still around...

Post with Fuel Line pics
 
OP
K

kwyjibo

Well-known member
Joined
Apr 8, 2008
Messages
743
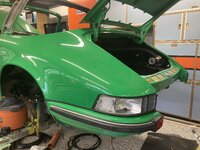
I'm behind on updates for ProjectConda. Here's how it sits currently
IMG_2699 copy.jpg
After the last update, I got far enough on the core electrical and plumbing that I could start assembling the more peripheral components.
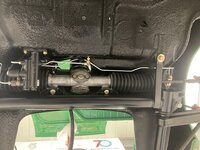
Installing the front suspension started with the steering rack. Looking up from the floor, you can see the fuel lines and brake cylinder and lines have a tight fit around the steering rack. (the fuel pump will go into the recessed area just above the passenger side tie rod boot)
IMG_7664 copy.jpg
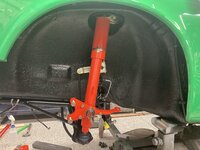
I was on a roll so I had to keep reminding myself to stop and take photos. Here's the front strut being installed
IMG_7688 copy.jpg
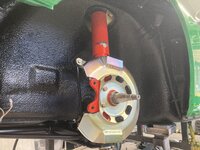
and a photo of when I was test fitting the brake components. I had to pause to chase all the threads on the painted strut housing. I'm working on bending the hardlines to fit better, otherwise the hub/disk and calipers are ready
IMG_7677 copy.jpg
 
OP
K

kwyjibo

Well-known member
Joined
Apr 8, 2008
Messages
743
ProjectCOnda update pt2
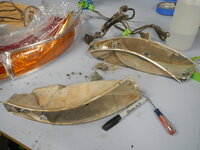
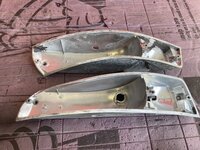
Flashback to a couple years ago (?) when I first had the turn signal housing out and found that a couple areas of the potmetal body had deteriorated away
DSCN6568 copy.jpg
After some research and talking with a few professionals, I settled on JB Weld to fix the holes in the housing. I was originally going to have the powder coater try to get a mirror-like finish on them, which would have required baking at a temperature greater than low-melting point metal repair material. JB Weld has a higher melting point. but then I settled on a rattle can "chrome" paint anyway
IMG_7579 copy.jpg
It ended up with a frosted silver rather than a chrome finish
IMG_7590 copy.jpg
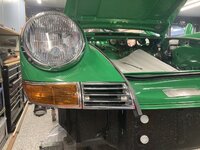
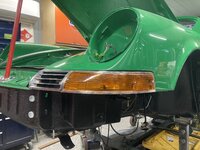
Here they are mounted
IMG_7629 copy.jpgIMG_7623 copy.jpg
 
OP
K

kwyjibo

Well-known member
Joined
Apr 8, 2008
Messages
743
And the last update for today
I mounted the driverside rear bumper
IMG_7685 copy.jpg
The passenger side rear corner houses the oil tank, so I needed to take care of that before the bumper. Here is the tank and some of the associated parts in place
IMG_7692 copy.jpg
Here's how it sits currently: I need to install the taillight housingand bumper on the passenger side
IMG_7694 copy.jpg
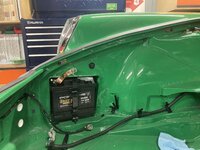
Lastly, the pair of batteries (these 911s had two, one in each front fender) arrived, which will be nice to see how well (or poorly) I put the electrical system back together
IMG_7689 copy.jpg
 
OP
K

kwyjibo

Well-known member
Joined
Apr 8, 2008
Messages
743
Excellent progress on a great project! Thanks for including us on your journey!
Thanks for following along for all these years!


Here's the update for today
The bumpers are now all mounted and I can start working on their fitment. Once again the worst part of this process was having to deal with the rubber body seals and gaskets. My fingertips are bleeding and bruised.
IMG_7748 copy.jpg

The rears are going to need more work to get aligned correctly. But with the center panel on, I had to get a photo of the license plate. My wife named the car Froggy and "Frosche" is german for frogs. I used the plural form of the word (with the 'e') because at a quick glance it looks like the word Porsche
IMG_2712 copy.jpg

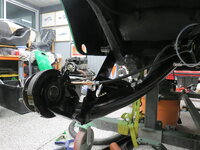
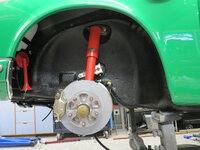
I also made some progress with the rear suspension
IMG_2703 copy.jpg
 

zanyad

ALLIANCE MEMBER
Joined
Apr 26, 2018
Messages
2,817
Location
NE Ohio
Lookin' good!
The rears are going to need more work to get aligned correctly. But with the center panel on, I had to get a photo of the license plate. My wife named the car Froggy and "Frosche" is german for frogs. I used the plural form of the word (with the 'e') because at a quick glance it looks like the word Porsche
IMG_2712 copy.jpg
:lol_hitti Love it!
 
OP
K

kwyjibo

Well-known member
Joined
Apr 8, 2008
Messages
743
The first FuelFed show of the year happened in Boulder. I had trouble sleeping and around 5am decided to fit a drive into the mountains before heading down into Boulder. So around sunrise I took off in the E9 for the hills to shake off the cobwebs from both myself and the car. Fuelfed took over an adjacent street to double the capacity, but being the first of the year, I was busy catching up with friends that I hadn't seen in a few months and missed checking out most of the cars.
I only took a few photos, the first shows the three "Ice Green Metallic" 911s, not a color commonly seen today.
IMG_7775 copy.jpg
Also an uncommon sight: a Citroen. even more uncommon: five Citroens
IMG_7771 copy.jpg

I took the weekend off from ProjectConda. Since the last update I've had the front bumper on and off for several rounds of adjusting its fitment. Once I was happy I mounted the trim pieces. The foglight covers
IMG_2728 copy.jpg
and the end cover.
IMG_2724 copy.jpg
I also now have a hard deadline to get the car rolling under its own power - I have a late June appointment with the upholsterer. Time to get back to work on the electrical wiring and suspension.
 
OP
K

kwyjibo

Well-known member
Joined
Apr 8, 2008
Messages
743
I made progress on a bunch of little things, but here is how it looks right now
IMG_7826 copy.jpg
The frontend is nearing completion. One day soon I'll sit down with some straightedges and string to get the alignment close to where it should be so that I can tighten the tierods. I'll be taking it over to a friend's shop for a real alignment once it's rolling under its own power so just need to get it steerable.
IMG_2760 copy.jpg
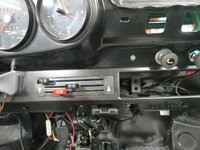
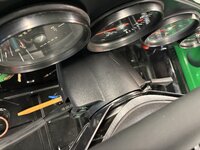
The electrical system (behind the dash) is done! I just want to double check the connections before I install the heating system and windshield wipers. I cleaned and lubed the heater control panel so the fan and valve sliders move much better now. Routing the bowden cables through the dash was a pain
IMG_2762 copy.jpg
Another *unexpected* pain in the **** was the installation of the plastic steering column cover, a new production replica. I could not get one of the tiny screws in - it felt like it was constantly cross threading. It turns out that the nutsert was not threaded. Fine, I'll tap some threads... great, until the nutsert started spinning (it's pressed into thin plastic). I finally gave up on saving the nutsert and mounted the cover with a flange nut and a longer screw.
IMG_7919.JPG
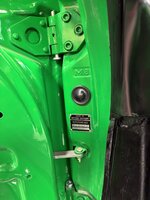
This photo of the door jamb is particularly satisfying to me. First is the contact switch for the interior lights which is covered by the round rubber cap. I don't know how many hours it took me to fish the wiring through the body. Because of the way the panels come together there it's very difficult to see or feel where the wiring should go. You can also see the paint code plate. It's a thin fragile aluminum plate held on with even more fragile aluminum rivets. It took me a couple hours to get it on without messing up the plate or the rivets.
IMG_7923 copy.jpg
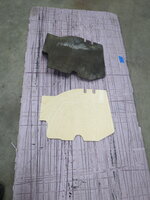
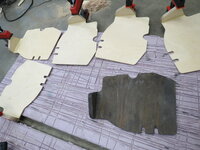
Last update for today: I've started to bring out and carefully inspect the interior parts because my date with the upholsterer is quickly approaching. I found that the original plywood floor boards (basically covers for the deadpedal area) were delaminating along the bottom. The driver's side was easily repaired but the passenger side felt like it was also dry rotting. I still have leftover BB ply from the cabinet build so I decided to make my own. I made templates off the original: a larger 1/4" face with a 3/4" spacer on the back
IMG_2771 copy.jpg
And because I had the templates and jigs set up and a pile of baltic birch "scraps", I made a few extra
IMG_2776 copy.jpg

up next: continue moving towards the rear of the car
1) finish connecting cables to the pedals and hand controls
2) complete rear suspension
 
Last edited:

kmcteer

Active member
Joined
Jan 5, 2022
Messages
25
Looking Great! Picked up an SC last year. Seems 911 are the most fun in pieces according to the internet :)

-Kelly
 
OP
K

kwyjibo

Well-known member
Joined
Apr 8, 2008
Messages
743
Looking Great! Picked up an SC last year. Seems 911 are the most fun in pieces according to the internet :)

-Kelly
I am enjoying myself, but I can't wait for mine to be in one piece!

I took a break from ProjectConda this weekend

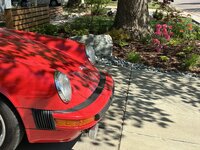
First, rolled the Carrera out of the garage and took a few photos. It's off at a friend's shop to get it ready for sale. I wish that I had the space and $$ to keep it. It's really a great car
IMG_7875 copy.jpgIMG_7890 copy.jpg

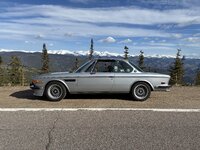
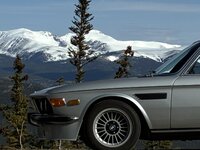
Then on Saturday morning I took the E9 out for a nice drive with a few friends. The weather was great and the roads were mostly clear.
IMG_7947 copy.jpgIMG_7940 copy.jpg
IMG_7951 copy.jpg

This morning I went to Boulder for the Fuelfed Coffee and Classics and couldn't pass on this scene in the British area
IMG_7969 copy.jpg
OK, I lied about taking a break from working on the targa - as soon as I finish mowing the lawn, I'm going back into the garage
 
OP
K

kwyjibo

Well-known member
Joined
Apr 8, 2008
Messages
743
Did that Lotus leak all that fluid just backing into that spot? :eek:
.....must have been Lucas fluids...
I was told that a connection to an auxiliary electric fan came loose and the car overheated driving on the city streets.

work on projectconda's interior continues
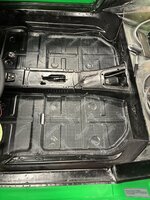
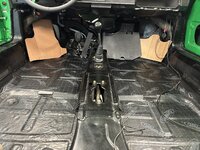
I stopped by the upholsterer earlier in the week to make sure that I got everything in place before my scheduled work. The carpet will be semi-custom because I'm deleting the rear seat. I'll be making a storage box for the area at a later date. Because the car is meant to be used as a driver and not for concours, I'll be lining the floor with Dynamat instead of the Porsche material. And also, it's less expensive, "better", and hidden under the carpet. It was delivered yesterday so I'll start on that soon.

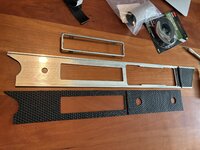
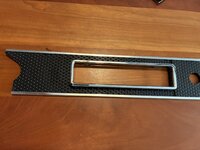
The basketweave vinyl trim for the dashboard is now done. First trimmed the material then glued the pieces to either the aluminum trim or the sheetmetal backing
IMG_8010 copy.jpg
the completed trim is then held onto the dash with double-sided foam tape
IMG_8011 copy.jpg
here's the completed panel behind the headlight and ignition switches.
IMG_8004 copy.jpg
also notice that all the gauges are now in place as is the knee pad (the padding directly behind the key fob). I'm happy that most components in this photo are original, just cleaned and/or refinished. Sadly, I need to replace the door panels, pockets and armrests

on the other side of the dash, the wiper is reinstalled and I'm working of refitting the air venting system.
IMG_2789 copy.jpg

Lastly, congratulations to all the new graduates and their friends and family. I don't know what Kimo did, but he was happy to pose for this photo when we came across this sign
IMG_7958 copy.jpg
 
OP
K

kwyjibo

Well-known member
Joined
Apr 8, 2008
Messages
743
Before i forget, I did get a couple sheets of Dynamat down on the floor last evening. The sheets are much better to work with than I remember for a couple decades ago: thinner material and no funky odors. The next sheets will require me to remove old adhesive and more fitting so I expect it to go a lot slower now
IMG_8020 copy.jpg
 
To avoid these ads, REGISTER NOW!
OP
K

kwyjibo

Well-known member
Joined
Apr 8, 2008
Messages
743
Coming together!

Didn't notice you mention it, what undercoating did you use?
I didn't end up scraping the original stuff off the bottom of the floors. After talking to the body guy (Jon at the MetalSurgeon) it didn't seem to be worth the effort or $$$. The original stuff was in good condition and, most importantly, still adhering well. There's only a few areas that were touched-up with Wurth and then the underside was given a coat of paint to give it a uniform look. I'm not sure what was used for the inside face of the new fender because it has a different texture - but then from what I've been told about the stuff it could be because of variation in temp or humidity.
 

Vette60

Well-known member
Joined
Mar 15, 2006
Messages
448
Location
Glen Allen, VA
Thanks for sharing. Love to see all your updates - the license plate Frosche is great! You seem to have such an active car community. It's great to see.
 
OP
K

kwyjibo

Well-known member
Joined
Apr 8, 2008
Messages
743
That's impressive it looks brand new/ fresh in your photos.
I think you might be looking at the inside wall of the wheelwells - that is the original undercoating with a fresh coat of black paint! It was in good enough condition that it got sprayed after just a quick cleaning (911s at this time got black paint under the fenders). I have the previous owner that kept it (or at least its parts) in a garage for the last 30 years to thank for its condition.

Thanks for sharing. Love to see all your updates - the license plate Frosche is great! You seem to have such an active car community. It's great to see.
Thanks for reading along. I was originally hoping to get FROGGY or even KERMEE but both of those were taken. In the end, I'm happy because FROSCHE just makes sense on a green German car with bulging headlights. The problem is that I want to correct it by adding an umlaut over the 'o' with a couple small decals. My 7th grade German teacher would be so proud
We do have a great car community here, but I'm lucky to have a few key friends that always have some interesting automotive-related thing going on

ProjectConda updates:
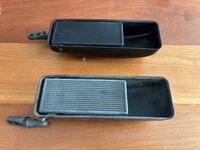
I need to get new door pockets and armrests but the handles seem to be cleaning up nicely so I'll save a few dollars here - finally! The dried plastic is absorbing a lot of the Griot's vinyl and rubber dressing but is starting to look new again
IMG_8027 copy.jpg

I spent most of the weekend removing 50 year old adhesive. I was having no luck searching for a 3M product that is apparently banned here so I went with the old standby: Goof Off. I don't know if this adhesive is particularly difficult or the GoofOff formulation is weak, but It's taking a lot longer than expected. Here's the result of a few hours work and several million brain cells
IMG_8035 copy.jpg
 
OP
K

kwyjibo

Well-known member
Joined
Apr 8, 2008
Messages
743
I'll mail you a can of the 3M stuff. It is nasty, but it works better than anything else.

That's the stuff! The local body/paint supply told me that it was recently banned in CO. I tried ordering from several online sellers and each time either got blocked at checkout or, the one time it shipped, fedex turned the box around at their distribution center here.

I really appreciate the offer but I'm almost done. I should have the Dynamat done in the next day or two.
 
OP
K

kwyjibo

Well-known member
Joined
Apr 8, 2008
Messages
743
My mother inlaw came for a visit last week. Now I can get back to ProjectConda

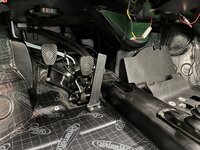
I came up short a couple sheets of Dynamat because I forgot about one spot and decided on covering another. The order should be here in a couple days. In the meantime I made the cardboard templates for the footwell area.
IMG_8070 copy.jpg
One additional piece is needed because I forgot about the inner face of the driver's door skin. The original door had some damage that was repaired with a coat of bondo that was removed during media blasting. The original sound deadening material in the door was removed to make the repairs. So now I need to replace the material.
The second spot(s) that I decide needed Dynamat are the side panels along the rear seats. Using the scientific tap-test, these panels have a terrible 'ting' sound. Porsche originally had heavy foam and cloth (wool? it looked like the padding in a moving blanket) sheets glued here. I don't know if those materials were more for sound deadening or padding but I didn't even bother looking for a replacement at the usual parts sellers. I'll just stick with Dynamat to deaden the resonance. All the trouble to go through preserving the original paint... just to cover it with rubber mats.
IMG_8080 copy.jpgIMG_8072 copy.jpg
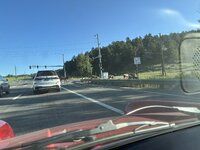
Like much of the country, we're experiencing a heatwave. So I tried to head out for an early drive but Colorado traffic is getting out of hand, even at 7am on a weekend. These young hooligans took over an intersection on my way to the pass.
IMG_8091 copy.jpg
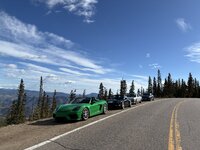
Once they cleared I went up my favorite local mountain pass. Of course I had to stop at the usual pulloff to get a couple photos
IMG_8107 copy.jpg
The drive was a good test because I just got the car back from my friend's shop who performed a 'pre-sale' inspection and tune. I decided a while back to sell the car. Actually, when I picked up the targa my thought was that once I got it running I would choose which I enjoyed more and sell the other. Project Conda is still not operational but its pretty clear that I would have a harder time selling the targa after all the work I put into it.
IMG_8098 copy.jpg
On the way home I stopped by a friend's house who was hosting a Father's Day drive (I didn't know it at the time but the route was basically the reverse of what I just finished to get there)
IMG_8108 copy.jpg
Hopefully the next update will be about how I finished the rear suspension so that the car can roll on it's own wheels into the upholstery shop
 
OP
K

kwyjibo

Well-known member
Joined
Apr 8, 2008
Messages
743
OK, I failed on getting the rear suspension installed. Part of the reason is that I needed to focus on the rear window. I was told by a glass installer that I should get the rear window in before going in for upholstery. Basically, he needs to remove some interior trim to install the window so to avoid paying him to partially redo a new interior, glass should go first.

So, time to dig out the glass and related parts. I already ordered the seals a while back so I was hopefully just cleaning and taking inventory.
First up, this is the chrome trim that runs along the bottom of the window, sitting below the glass seal. You can see scratches on the clean one above, but nothing that keeps me from reusing them. These got a new rubber gasket glued to the bottom face after cleaning
IMG_8165 copy.jpg
I decided to replace the "targa' script because they were completely faded. On the outside they look silber, but flip them over and they're still showing the original gold.
IMG_8171 copy.jpg
Here's a new badge on the just-cleaned stainless steel targa bar cover. Thanks to the Delorean forum and Bar Keepers Friend I got the cover looking pretty good (except for a small dent and deep scratch)
IMG_8211 copy.jpg
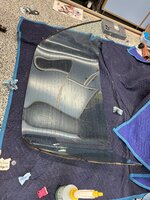
The actual glass cleaned up nicely, too. I'm just worried that after all the tedious work to connect the wiring that the defrost heat elements aren't functional. As with the rest of the electrical components of the car, I guess I'll find out when it's running
IMG_8212 copy.jpg
I *think* that I have all the seals and molding ready for the window install

Back to getting the interior ready for upholstery: The wires, rods and cables that connect to the pedal and hand controls are now complete. This means that we're ready for the carpet and trim.
IMG_8196 copy.jpgIMG_8193 copy.jpg
One last detail - the car originally came with fixed seatbelts and I want to install retractable ones. Luckily retractable belts were already standard outside the US so the bodies have the recessed area and what appeared to be a mounting bung
IMG_8183 copy.jpg
I always assumed that they just plugged the hole with some sealant. But the plug was obviously steel when I started to drill it out. I was afraid for a minute that they welded the hole shut but I could see a hexagon shape appearing as I scraped the blobs of undercoating off the fender side. Yup, it was a low-profile hex nut with a standard 7/16" thread used for seatbelt mounts
IMG_8186 copy.jpg

OK, now back to the rear suspension
 

kmcteer

Active member
Joined
Jan 5, 2022
Messages
25
Nice, progress looks good! I replaced my reels and webbing with generic sets from Seatbelt Planet. Transferred over all the parts from my originals and kept the receptacles. Couldn't justify the cost of OEM.

-Kelly
 

Bakafish

Well-known member
Joined
Feb 7, 2017
Messages
477
Location
Tokyo
Continuity test to see if there is a circuit. If there are broken elements I'm pretty sure there is conductive epoxy repair material that you can use to span any breaks.
 

gilr

Well-known member
Joined
Jul 26, 2008
Messages
296
Location
Richmond, VA
I've repaired the defroster lines on a car I had in the past and it works well. Just mask the lines and paint the liquid on the gaps and let it dry, works great. And yes, it would be easier to repair out of the car. just use a magnifying glass to carefully look at the grids, and any gaps will be easy to see.
 
OP
K

kwyjibo

Well-known member
Joined
Apr 8, 2008
Messages
743
Nice, progress looks good! I replaced my reels and webbing with generic sets from Seatbelt Planet. Transferred over all the parts from my originals and kept the receptacles. Couldn't justify the cost of OEM.

-Kelly
Exactly, I want to keep the original receptacles. How did you transfer the parts? Or did you send them your tongue for them to sew into a custom set? I've been casually looking for an oem set for a couple years so I should probably just get one of theirs.
Can you connect it to power outside of the car? Maybe a bench power supply?
Continuity test to see if there is a circuit. If there are broken elements I'm pretty sure there is conductive epoxy repair material that you can use to span any breaks.
I considered this but talked myself out of it because there are 6 wiring tabs and 20 or so lines of heating element across the glass. I don't know if I'm explaining this correctly but: If a line within a parallel series is broken, is the effect measurable? I thought that if I misted the glass with water then connected for X minutes, I should be able to see if one or all of the lines stay wet. The glass guy is coming tomorrow so I have a day to decide what to do.

Also, I found that one of the wiring tabs had broken off. Ten minutes after a $20 trip to the local O'Reilly's resulted in this
IMG_8240 copy.jpg
and this
IMG_8243 copy.jpg
As of last night the connector seems solid, but we'll see if it holds when we push on the wiring or seat the glass. There are six of these tabs running along the bottom of the glass. They are connected to the heating grid on the inside face of the glass but the connectors and the wiring run along the bottom which seems like a weakness in the design

Thanks again for all the helpful suggestions!
 
OP
K

kwyjibo

Well-known member
Joined
Apr 8, 2008
Messages
743
I've repaired the defroster lines on a car I had in the past and it works well. Just mask the lines and paint the liquid on the gaps and let it dry, works great. And yes, it would be easier to repair out of the car. just use a magnifying glass to carefully look at the grids, and any gaps will be easy to see.
sorry, I didn't see your message until I posted the last reply.

I noticed when cleaning that either there are gaps every few inches (it is a ~50 year old part) or the aging/oxidation of the material drastically changes how it looks. Also, judging from the residue I cleaned off, at some point there were at least two decals on the inside surface that crossed the lines.
 

gilr

Well-known member
Joined
Jul 26, 2008
Messages
296
Location
Richmond, VA
Are the "gaps" from apparent scratches or does it appear to be designed that way? I've seen strange looking patterns on defrosters, but usually they are continuous from side to side. The loose or missing tab may possible be soldered back to the copper on the glass, but maybe ask your glass guy. Also, some grids are for antennas that are embedded in glass, but the defroster grid is usually on the glass surface where it is vulnerable to things hitting it and scratching them. That Permatex is what I used to repair the defroster in my old Isuzu Trooper. It fixed several scratched lines and worked perfectly afterwards.
 

Bakafish

Well-known member
Joined
Feb 7, 2017
Messages
477
Location
Tokyo
From the picture you showed I'm leaning towards the idea that they are spreading the load across the whole side and all tabs on one side are joined together.

Hopefully it won't be too hard to measure it, there's not a ton of info to be gleaned by this inspection as you will have to use your eyes to check anyway. With 6 tabs it is either broken into 3 pairs each responsible for their own set of traces, or the 3 tabs on each side are spreading out the load across the lines as the material used is resistive to generate heat when a current is applied. Multiple tabs would help even out the heating so that the entire window is defrosted. If there is continuity between the tabs on the same side of the window, then it is spreading the load, if not then they broke it into 3 seperate circuits.

Set your meter to impedance (resistance), the Ohms Ω setting.
Test between the 3 terminals on the same side (A&B, A&C, C&B) the impedance should be similar between each pair, a little more for A&C as there is a longer path, but if there are three separate circuits there should be no continuity (OL) between them.

If they are 3 circuits, test the impedance across the matching pairs on either side of the window. They should be the same, the lowest impedance set will have the most intact lines, so that should give you some basic sanity checking.

Unfortunately that parallel design makes it hard to check the individual traces for continuity, but a visual inspection should be enough to spot potential breaks. It is very likely that a break can still be confirmed by touching either side of any questionable gaps and reading the impedance. A solid trace will have a lot lower impedance than a broken one (as the test voltage has to find a much longer path through the resistive elements.) So get a baseline on a known good trace and use that to evaluate any suspect area.
 

kmcteer

Active member
Joined
Jan 5, 2022
Messages
25
Exactly, I want to keep the original receptacles. How did you transfer the parts? Or did you send them your tongue for them to sew into a custom set? I've been casually looking for an oem set for a couple years so I should probably just get one of theirs.
I ordered these https://www.seatbeltplanet.com/i-30...retractable-seat-belt-push-button-buckle.html. Only kept the reel and webbing, transferred over my OEM SC parts, took it to a local upholsterer to stitch the end on. He charged me $30. I was apprehensive about sending out my parts and paying extra for their service.

Would love to see Conda sometime!

-Kelly
 
OP
K

kwyjibo

Well-known member
Joined
Apr 8, 2008
Messages
743
I spent some time last night carefullly cleaning, inspecting and testing the window. I really shouldn't be surprised by GJ, but as I sit here this morning waiting for the glass guy to arrive, I was happy to see the thoughtful comments

From the picture you showed I'm leaning towards the idea that they are spreading the load across the whole side and all tabs on one side are joined together.
Yes, this is the case... except for the tab that I glued back on. It is the middle of the three on the driver's side and unlike the others is not connected by a jumper wire to the others. The first and third are connected to each other as are the 3 on the passenger side connected via wire. Initially I thought that my glue job was bad, but the tab showed roughly the same resistance as the other two measured to any tab on the opposing side. In other words, the resistance across the grid was the same between any left-to-right combination. So my assumption is that the Permatex adhesive is holding and conducting as advertised

Now some background - the car has a 2-stage switch and the first and middle tabs are connected to two separate positive wires, the three on the opposite side connect to a ground wire.

If I measure between the first and middle tabs (or third to middle), I get approximately double the left-to-right value. Am I right in thinking that resistance is additive?

Unfortunately that parallel design makes it hard to check the individual traces for continuity, but a visual inspection should be enough to spot potential breaks. It is very likely that a break can still be confirmed by touching either side of any questionable gaps and reading the impedance. A solid trace will have a lot lower impedance than a broken one (as the test voltage has to find a much longer path through the resistive elements.) So get a baseline on a known good trace and use that to evaluate any suspect area.
WIth the additional cleaning, many of the spots that previously looked like gaps washed away. I think the heating elements nucleated some build up or someone's coke can exploded in the backseat. It also helped to visualize the grid when I backed the glass with a clean, white sheet of paper. Now I only have one line that looks suspect which should be easy enough to fix with the stuff @gilr mentioned

I ordered these https://www.seatbeltplanet.com/i-30...retractable-seat-belt-push-button-buckle.html. Only kept the reel and webbing, transferred over my OEM SC parts, took it to a local upholsterer to stitch the end on. He charged me $30. I was apprehensive about sending out my parts and paying extra for their service.

Would love to see Conda sometime!

-Kelly
Thanks for the into, I was going to call around to see if the seatbelt shops would even take in customers' used parts, but your plan sounds even easier.
I saw somewhere else that you mentioned FuelFed, did you go? Have we been walking past each other this whole time? Let me know the next time you're going or if you're ever down in Denver
 

kmcteer

Active member
Joined
Jan 5, 2022
Messages
25
Thanks for the into, I was going to call around to see if the seatbelt shops would even take in customers' used parts, but your plan sounds even easier.
I saw somewhere else that you mentioned FuelFed, did you go? Have we been walking past each other this whole time? Let me know the next time you're going or if you're ever down in Denver
I had Auto Weave in Wheat Ridge do the stitching on the webs. Very interesting owner that does high end 911 restos.

I tried to get up to FuelFed Sunday. The SC made it halfway before my brakes gave out... exciting trip but not the kind I was expecting. I'm not in the local car scene, spend my free time garage tinkering and use my cars as weekday drivers. I'd love to join next time you are meeting up or headed to the hills for a drive! I'm out in Wheat Ridge.

-Kelly
 
To avoid these ads, REGISTER NOW!
Top Bottom