To avoid these ads, REGISTER NOW!

What did you do "IN" your garage today?

zarex

Member
Joined
Jul 15, 2014
Messages
10
Location
Saudbury Ontario
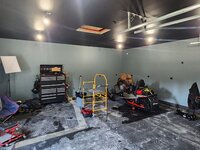
Got the paint done in the shop and washed the floor, prob the last time it'll be this empty lol. Gotta switch out the 2 random white outlets and can finally mount the real lights and wall mount garage door opener. Temp lights were nice but they don't output much light.
WXyYZz9.jpeg

Gonna eventually build something to hide the garage door track uprights or make them look built in with an enclosure. one of the doors the metal angle pieces were hanging lower then the other door for some reason so the drywall looked worse in some spots.
CRDwBd2.jpeg

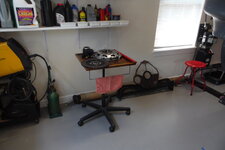
Not having a work surface has been such a pain and cant wait to build the first version of it. Gonna just leave the floor for now cause i'm torn on trying tile vs getting it epoxied but sled carbides will prob chew that up and until we build a shed the sled has to stay in this garage. Gonna be my woodshop and still have the option to park the truck inside in the winter. Hvac guys are coming next week for quote and site visit for installing a heat pump mini split for heat and AC. Def need to run internet out here cause it's just far enough from the house wifi doesn't work very well

SfUbccQ.jpeg

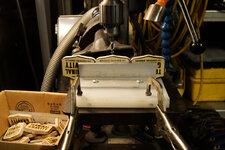
Been randomly hearing noises what we thought were birds on roof last few weeks, turns out we had an uninvited guest who managed to make her way into the attic to have a litter of Smols. Animal control guys helped remover her and she took babies elsewhere to a new den while they were fixing any damage and prevention for future. Lucky she and her litter were cute cause the price for everything to get done and cleaned up was not very nice lol
 
To avoid these ads, REGISTER NOW!

JEFFREYWisconsin

Well-known member
Joined
Oct 9, 2021
Messages
380
I imagine there's a glut of ash on the market with the ash borer basically destroying the trees throughout North America. They made it to Oregon in the last few years and have started in on the native lowland forests of Oregon Ash.

For the mess of drilling or otherwise working wood, you do have a shop vac, don't you?

54373684990_ce67e3b24e_o.jpg

54371773839_6bb703114e_o.jpg

My DP is mounted on casters, so, weather permitting, I'll often take wood projects outside.
I have a ton of Ash, we can't move it out of our county as firewood. The emerald Ash borer doesn't screw around, it's devastating.

However, around here it is leaving holes in forests where young maples are coming up quickly. I have read some articles about a few resistant Ash that have survived and there are plans to possibly work with those select trees to find a way to bring Ash back over time... We shall see.
 

Beerhippie

Well-known member
Joined
Oct 13, 2023
Messages
9,921
Location
Far NE Oregon
....
Not having a work surface has been such a pain and cant wait to build the first version of it. Gonna just leave the floor for now cause i'm torn on trying tile vs getting it epoxied but sled carbides will prob chew that up and until we build a shed the sled has to stay in this garage. Gonna be my woodshop and still have the option to park the truck inside in the winter. Hvac guys are coming next week for quote and site visit for installing a heat pump mini split for heat and AC. Def need to run internet out here cause it's just far enough from the house wifi doesn't work very well


...
Livestock matting. It's made for concrete-floor barns, where the hard floor is bad for hooves and for trailers, where horseshoes are bad for floors. At around 3/4" thick and made to take the weight of ton-plus critters concentrated over a few square inches, it'll do the job.
 

DGersic

Well-known member
Joined
Mar 12, 2017
Messages
6,348
Location
DeKalb, IL
I have a ton of Ash, we can't move it out of our county as firewood. The emerald Ash borer doesn't screw around, it's devastating.

However, around here it is leaving holes in forests where young maples are coming up quickly. I have read some articles about a few resistant Ash that have survived and there are plans to possibly work with those select trees to find a way to bring Ash back over time... We shall see.

I had two big ash trees in front of the house, until the bugs got them.

Read about the resistant trees a while ago, I hope it works.


Beerhippie

Well-known member
Joined
Oct 13, 2023
Messages
9,921
Location
Far NE Oregon

bugnut

ALLIANCE MEMBER
Joined
Jul 14, 2012
Messages
3,961
Location
Central Ohio
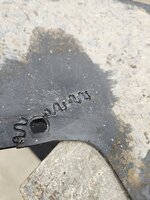
Little time trying a repair on the atv, Removed bolts only 1 needed drilled out. Then proceeded to plastic weld, will attempt to affix a backup square on the plastic to add a little more strength. Need to buy some bolts....
 

Attachments

  • 20250807_133729.jpg
    20250807_133729.jpg
    823.2 KB · Views: 25
  • 20250807_133734.jpg
    20250807_133734.jpg
    1 MB · Views: 26
  • 20250807_134106.jpg
    20250807_134106.jpg
    1 MB · Views: 26
  • 20250807_134946.jpg
    20250807_134946.jpg
    724.4 KB · Views: 27
  • 20250807_134948.jpg
    20250807_134948.jpg
    762.7 KB · Views: 23
  • 20250807_134952.jpg
    20250807_134952.jpg
    764.2 KB · Views: 24
  • 20250807_135327.jpg
    20250807_135327.jpg
    1 MB · Views: 24

LWB

Well-known member
Joined
Oct 6, 2019
Messages
1,250
Location
ON, Canada

DeeDubz

Well-known member
Joined
Nov 20, 2019
Messages
1,446
Location
Socal
Nah. You fill an old gym sock with the crystals, tie it off, and toss it in the skimmer. They melt down after a few hours and the chemical gets distributed.

You can also hang the sock in front of a return port, but that usually winds up with the sock on the bottom of the pool, and the pool boy chokes on it.
wouldn't it just be easier to get it in liquid form and pour it in the pool.... instead of having a sock in your pool.
 

JEFFREYWisconsin

Well-known member
Joined
Oct 9, 2021
Messages
380
FWIW I have had about 20 dead Ash on the property and 4 that are fine. Fingers crossed.
One kinda wild thing on my property is that I have lost most (maybe all) Ash trees. However the ash seedlings still come up and not until they hit a certain size do the AE borers even mess with them.

I wonder if one day they will begin to survive, nature is funny and there are countless ways that things have come back.

I have many confirmed eagle's nest within 10 miles of my house. That would not have been the case in this area when I was a child, nature is rebounding in some interesting ways.
 

JEFFREYWisconsin

Well-known member
Joined
Oct 9, 2021
Messages
380
Growing up in mass, there were chestnut trees everywhere. They’re all pretty much gone now.
There are some specific hybrid trees which are highly resistant to two line chestnut borers and other pests. I have a friend who is planting several acres as a chestnut farm...will take some years before they have nuts but it is supposedly a lucrative business. They planted the last two years I believe.
 

Gangly

Well-known member
Joined
Jun 9, 2025
Messages
281
Location
The Woodlands, Texas
That's cool and you left that side to the left for the Big Chicago Bears sign! Awesome. ;)
Haha. I do believe Caleb Williams will take a step forward this year. Y'all went all in on protecting him (which a good organization should do) so he should have plenty of time to make those throws that he was known for in college.
 

LWB

Well-known member
Joined
Oct 6, 2019
Messages
1,250
Location
ON, Canada
One kinda wild thing on my property is that I have lost most (maybe all) Ash trees. However the ash seedlings still come up and not until they hit a certain size do the AE borers even mess with them.

I wonder if one day they will begin to survive, nature is funny and there are countless ways that things have come back.

I have many confirmed eagle's nest within 10 miles of my house. That would not have been the case in this area when I was a child, nature is rebounding in some interesting ways.

We are starting to see eagles coming back here and herons as well.

Zebra mussels were the end of the world in the Great lakes. Lake Erie has never been cleaner. It was declared dead in the 70's. Nature has a way of balancing things out. The less we mess with her the better. I was not happy about trying to "take control" and cut down all the ash trees.
 

ararat

Well-known member
Joined
Dec 27, 2018
Messages
595
Location
Ararat NC
I had to stop somewhere. It was getting too depressing.
A little good news, there are several small/medium hemlock trees with nice green regrowth without many bugs on their property. It seems like something is controlling the adelgids or some trees are resistant possibly. I haven't seen any news on it though. Just personal observation.
 
To avoid these ads, REGISTER NOW!

ararat

Well-known member
Joined
Dec 27, 2018
Messages
595
Location
Ararat NC
There are some specific hybrid trees which are highly resistant to two line chestnut borers and other pests. I have a friend who is planting several acres as a chestnut farm...will take some years before they have nuts but it is supposedly a lucrative business. They planted the last two years I believe.
I was given 6 seedlings to plant on my property that are hybrids that are mostly American Chestnut. They are growing nicely. The hope is that they will be resistant.
 

lolaetype

Well-known member
Joined
Dec 11, 2019
Messages
2,096
Location
North Western Arkansas
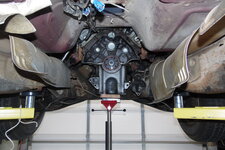
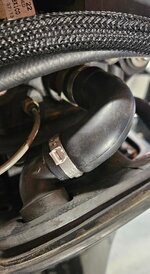
An addendum to my earlier post on replacing the clutch on the 97 V6 F150


I'm in the middle of replacing the clutch on the F150. The pressure plate is bolted to the flywheel with 6 bolts. One of the 6 on my truck is different, apparently a replacement for a lost bolt. I figured since I had everything apart, why not replace the odd bolt with the proper one. I took the bolt to the Ford dealer this morning. They looked up the price for a single bolt; $24.00. The parts guy and I agreed the odd ball bolt will be able to continue its duty just fine.

1754680914964.jpeg


Other lessons from this job:

It's cheaper to buy a new flywheel than to have the old one resurfaced.

And most importantly. The truck has a self-adjusting hydraulic clutch. The initial set-up depends on the self adjusters on the pressure plate being properly adjusted prior to installation. The manufacturer claims the pressure plate comes preadjusted from the factory; This is not so, at least in my recent experience. Double check and adjust as necessary or you will proudly start the truck only to find out the freeplay is all wrong and the transmission will not shift when the engine is running. The fix involves a complete redo. I'm getting quite skilled at removing the transmission.

One question for the F150 knowledgeable: The Haynes Manual says the self adjuster spacing for the pressure plate is 0.550". Can anyone verify that is correct? I obviously don't want to do this a third time.

Since the thing is still apart I guess I'll go down and take a few photos for posterity.

1754682355638.jpeg


1754682446176.jpeg
1754682538120.jpeg

1754682610848.jpeg
 
Last edited:

Beerhippie

Well-known member
Joined
Oct 13, 2023
Messages
9,921
Location
Far NE Oregon
Our Lead Brewer asked me to make a new, lower-water-usage post-fill can rinser for the canning line. Some beer gets spilled out of the can--ideally, just foam--before the lids go on and get seamed, so we need to rinse and dry them before applying the pressure-sensitive labels.

Unfortunately, he doesn't want it so much to reduce the water usage as to be able to determine just how much beer is being wasted by measuring it (there's a catch tray that goes to a floor drain) and subtract the amount of rinse water used. With the stock rinser, which uses about 4 gpm, it would overwhelm any beer, so we're cutting it down to 1.2 gpm with the nozzles I currently have.

While I'm a big fan of saving water (out here, whiskey's for drinkin'; water's for fightin' over), this sounds like a cockamamie way of determining beer loss in the canner.

Anyway, I do what I'm asked--it's my job. If I can save some water in the process, so much the better.

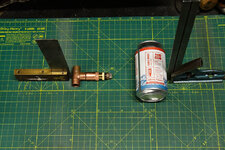
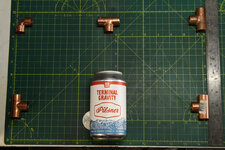
First thing is to lay it out so I can use the least water to rinse the cans--and keep the rinser as small as possible. My desktop cutting mat seems to be ideal for this!

The flat spray pattern is 90 degrees on these nozzles, and the cutting mat has 90-degree lay-outs.

54708389234_2ee965dedc_b.jpg

That'll do it. Now, measure between the two squares, subtract the radius of the can and double that, giving me the outside measurement of the frame--and that's all the math for this project. 14 11/16", which I'll round up to 14 3/4". No tens involved in this project--it's plumbing, not machining.

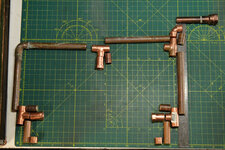
Now, find the overall height by the same process--but no math this time (9 1/2")--and the height of the side sprayers (2 1/2") and lay out my "leads":

54707331522_c31fc9f31d_o.jpg

From here on out, it's mark-in-place and a bunch of pipe cutting:

54708366358_9fd003e59f_o.jpg

There's my kit--some assembly required. I'm using as much salvage--all the pipe and a couple of fittings--as possible.

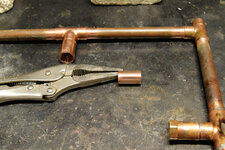
I made one little mistake. When I need to cut pieces too small to be easily held, I fist clean a long section of pipe so I don't have to hold the shorts--but I forgot.

54707331492_787b2b5179_o.jpg

Vise-grips to the rescue!

Now, lots of cleaning, de-burring, fluxing--and then sweat the little things:

54708495505_c7df53f4d2_o.jpg

Since this will be used for product contact and I'm using salvaged parts, it's in the USC with some lye solution right now. It'll get a buzz with some sodium citrate after that just to purty it up some, then build a mount, install the spray nozzles and test! I'll have to figure out something to use for an enclosure so we don't spray rinse water all over the room, too.
 
Last edited:

Skyman

Well-known member
Joined
Nov 9, 2021
Messages
1,208
Location
Central Maryland
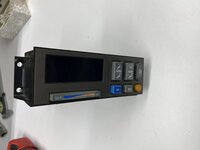
The display in this HVAC controller croaked a coupla weeks ago. I installed a used e-bay replacement yesterday, and am no longer flying blind when operating the HVAC. I then opened up the one I removed to see if there was an obvious and easily repairable fault such as a cold solder joint, cooked component, etc, but there was not. The DVM I was using was showing a low battery icon, so I swapped that out, and dropped the screw that secures the cover as I was reassembling it. Scoured the floor for it, and it had vanished. After hunting for at least 20 minutes, I gave up, moved the trash can back under the bench, and damned if that tiny screw didn't drop out of the foot pedal mechanism on that trash can.

Old dark unit:

1754685228736.jpeg

New used unit:

1754685176778.jpeg
 
Last edited:

rcktpwrd

Well-known member
Joined
Mar 5, 2008
Messages
1,094
Location
Raleigh, NC
The display in this HVAC controller croaked a coupla weeks ago. I installed a used e-bay replacement yesterday, and am no longer flying blind when operating the HVAC. I then opened up the one I removed to see if there was an obvious and easily repairable fault such as a cold solder joint, cooked component, etc, but there was not. The DVM I was using was showing a low battery icon, so I swapped that out, and dropped the screw that secures the cover as I was reassembling it. Scoured the floor for it, and it had vanished. After hunting for at least 20 minutes, I gave up, moved the trash can back under the bench, and damned it that tiny screw didn't drop out of the foot pedal mechanism on that trash can.

Old dark unit:

1754685228736.jpeg

New used unit:

1754685176778.jpeg
88-94 Chevy truck!

just like the HVAC controls in my wife's 454SS... It occasionally doesn't respond and needs a gently smack...
 

Wrench97

Well-known member
Joined
Jun 23, 2018
Messages
12,133
Location
Southeastern Pa
An addendum to my earlier post on replacing the clutch on the 97 V6 F150


I'm in the middle of replacing the clutch on the F150. The pressure plate is bolted to the flywheel with 6 bolts. One of the 6 on my truck is different, apparently a replacement for a lost bolt. I figured since I had everything apart, why not replace the odd bolt with the proper one. I took the bolt to the Ford dealer this morning. They looked up the price for a single bolt; $24.00. The parts guy and I agreed the odd ball bolt will be able to continue its duty just fine.

1754680914964.jpeg


Other lessons from this job:

It's cheaper to buy a new flywheel than to have the old one resurfaced.

And most importantly. The truck has a self-adjusting hydraulic clutch. The initial set-up depends on the self adjusters on the pressure plate being properly adjusted prior to installation. The manufacturer claims the pressure plate comes preadjusted from the factory; This is not so, at least in my recent experience. Double check and adjust as necessary or you will proudly start the truck only to find out the freeplay is all wrong and the transmission will not shift when the engine is running. The fix involves a complete redo. I'm getting quite skilled at removing the transmission.

One question for the F150 knowledgeable: The Haynes Manual says the self adjuster spacing for the pressure plate is 0.550". Can anyone verify that is correct? I obviously don't want to do this a third time.

Since the thing is still apart I guess I'll go down and take a few photos for posterity.

1754682355638.jpeg


1754682446176.jpeg
1754682538120.jpeg

1754682610848.jpeg
It's been a number of years since I did one but I don't recall any adjustment on the pressure plate, it's a diaphragm type correct?
Bolt the plate up and make sure all the fingers are even. The adjustment is in the throwout bearing assembly and it just pushes out with hydraulic action and the fingers push it back when you let off the clutch.

Form the r&r section.
1754688214965.png
 

Old Man Roger

Well-known member
Joined
Apr 6, 2017
Messages
17,701
Location
Palm Coast Florida
An addendum to my earlier post on replacing the clutch on the 97 V6 F150


I'm in the middle of replacing the clutch on the F150. The pressure plate is bolted to the flywheel with 6 bolts. One of the 6 on my truck is different, apparently a replacement for a lost bolt. I figured since I had everything apart, why not replace the odd bolt with the proper one. I took the bolt to the Ford dealer this morning. They looked up the price for a single bolt; $24.00. The parts guy and I agreed the odd ball bolt will be able to continue its duty just fine.

1754680914964.jpeg


Other lessons from this job:

It's cheaper to buy a new flywheel than to have the old one resurfaced.

And most importantly. The truck has a self-adjusting hydraulic clutch. The initial set-up depends on the self adjusters on the pressure plate being properly adjusted prior to installation. The manufacturer claims the pressure plate comes preadjusted from the factory; This is not so, at least in my recent experience. Double check and adjust as necessary or you will proudly start the truck only to find out the freeplay is all wrong and the transmission will not shift when the engine is running. The fix involves a complete redo. I'm getting quite skilled at removing the transmission.

One question for the F150 knowledgeable: The Haynes Manual says the self adjuster spacing for the pressure plate is 0.550". Can anyone verify that is correct? I obviously don't want to do this a third time.

Since the thing is still apart I guess I'll go down and take a few photos for posterity.

1754682355638.jpeg


1754682446176.jpeg
1754682538120.jpeg

1754682610848.jpeg
Ok, it happened.
 

Beerhippie

Well-known member
Joined
Oct 13, 2023
Messages
9,921
Location
Far NE Oregon
It's a pleasant, sunny 79F outside--perfect weather to test the new rinser!

First test at our line pressure of ~60 psi:

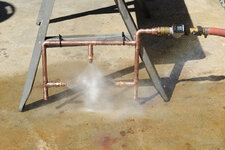
54708402871_3a0efcbbd0_o.jpg

Hmm... are those shock cones? Maybe a little overkill....

54708737055_a3950b717f_o.jpg

Yeah, we just want to rinse the can--not hydrotest it! I do like the rainbow.

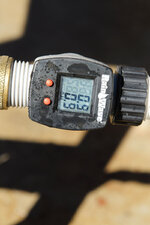
54708606798_23bc927dae_o.jpg

Timed 1-minute run. Still more usage than I like.

Second try. I put a 30 psi regulator in-line (the white thing to the right):

54708629964_7acafac0a0_o.jpg

https://flic.kr/p/2rmpUJf
54708629949_d03a817794_o.jpg

Much better! But I think I can get it down to half that with some lower-flow spray nozzles. These were what I had in the boneyard.
 
Last edited:

lolaetype

Well-known member
Joined
Dec 11, 2019
Messages
2,096
Location
North Western Arkansas
but I don't recall any adjustment on the pressure plate, it's a diaphragm type correct?
The Haynes Manual shows the process for adjusting the pressure plate. The springs (see the pencil pointing to one in the below picture) should be set to a length of 0.55 inches. The manual outlines the procedure for doing so. I've followed the procedure but was hoping someone could tell me if the 0.55" is correct. It probably is but I don't want to pull the transmission for a third time.

The three springs:

1754692486624.jpeg

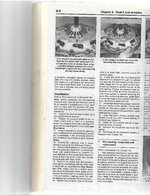
The process in Haynes (steps 13 through 16):

1754692390046.jpeg

No mention of any measurements or adjustments in the slave cylinder section. Could it be the procedure you cited is for a manual adjustment clutch and not the self adjusting variety that I have?
 

JimH74

Well-known member
Joined
Jun 26, 2015
Messages
283
Location
South Central Texas
An addendum to my earlier post on replacing the clutch on the 97 V6 F150


I'm in the middle of replacing the clutch on the F150. The pressure plate is bolted to the flywheel with 6 bolts. One of the 6 on my truck is different, apparently a replacement for a lost bolt. I figured since I had everything apart, why not replace the odd bolt with the proper one. I took the bolt to the Ford dealer this morning. They looked up the price for a single bolt; $24.00. The parts guy and I agreed the odd ball bolt will be able to continue its duty just fine.

1754680914964.jpeg


Other lessons from this job:

It's cheaper to buy a new flywheel than to have the old one resurfaced.

And most importantly. The truck has a self-adjusting hydraulic clutch. The initial set-up depends on the self adjusters on the pressure plate being properly adjusted prior to installation. The manufacturer claims the pressure plate comes preadjusted from the factory; This is not so, at least in my recent experience. Double check and adjust as necessary or you will proudly start the truck only to find out the freeplay is all wrong and the transmission will not shift when the engine is running. The fix involves a complete redo. I'm getting quite skilled at removing the transmission.

One question for the F150 knowledgeable: The Haynes Manual says the self adjuster spacing for the pressure plate is 0.550". Can anyone verify that is correct? I obviously don't want to do this a third time.

Since the thing is still apart I guess I'll go down and take a few photos for posterity.

1754682355638.jpeg


1754682446176.jpeg
1754682538120.jpeg

1754682610848.jpeg
What a clean shop. Do you really work there or is this all staged? I'm so jealous.
 

lolaetype

Well-known member
Joined
Dec 11, 2019
Messages
2,096
Location
North Western Arkansas
What a clean shop. Do you really work there or is this all staged? I'm so jealous.
It's called OCD. I prefer to work in a clean environment. When doing something I regularly use a cordless blower to push loose dirt out the garage door. I can never find my tools when I lay them down so I now have a habit of usually returning them to the tool chest when I'm not using them. When I'm done for the day I clean the floor, wipe down the work surfaces and put everything in order.
 
Last edited:

SMOKEYBEAR

Well-known member
Joined
Jan 3, 2016
Messages
459
Wrapped up the small boat project. New hose finally arrived after making a tour of the lower 48, thanks USPS.

Broken EGR bolt is the next task. I hope to have it wrapped up today while waiting on the new EGT probe to get delivered.
 

Attachments

  • WD5.jpg
    WD5.jpg
    304.7 KB · Views: 17

Wrench97

Well-known member
Joined
Jun 23, 2018
Messages
12,133
Location
Southeastern Pa
The Haynes Manual shows the process for adjusting the pressure plate. The springs (see the pencil pointing to one in the below picture) should be set to a length of 0.55 inches. The manual outlines the procedure for doing so. I've followed the procedure but was hoping someone could tell me if the 0.55" is correct. It probably is but I don't want to pull the transmission for a third time.

The three springs:

1754692486624.jpeg

The process in Haynes (steps 13 through 16):

1754692390046.jpeg

No mention of any measurements or adjustments in the slave cylinder section. Could it be the procedure you cited is for a manual adjustment clutch and not the self adjusting variety that I have?
Could be I've not seen that setup on a LT truck. HD trucks have self adjusting clutches but they have 4 bolts to install to relieve the pressure to "reset" the adjustment.
 

PhantomEB

Well-known member
Joined
Feb 6, 2006
Messages
6,787
Location
Medicine Hat, AB, Canuckistan
On the moneypit baja an auxbeam 12 switch keyboard was installed to replace light switches, etc. I need labels, been to Etsy to try and find a maker, striking out. I have tried making them with the labelmaker but no light penetrates. So thought why not 3d print a few as a test. I drew a couple and printed them, I immediately liked the texture imparted by the build plate. The same thickness as the factory label may be too thin and allow to much light transmission. I printed in both petg and pla, pla is much darker though both are black, head scratching and more work continues.
MY OCD wants them all 12 to match and be correct.
Is there one for exhaust brake? If so, want to do one up for me? I can’t seem to find a replacement decal for my 2012 Ram 3500, PO sure must of used that brake lots.
 

PhantomEB

Well-known member
Joined
Feb 6, 2006
Messages
6,787
Location
Medicine Hat, AB, Canuckistan
Back on tidying up all my camping gear and organizing up the trailer for next time. Making it easier to pull out what I don’t need, etc.

5C6C0D6F-FBC3-4074-AD4B-A2FD1AFE893D.jpeg
already made a kitchen gear tote of utensils, pots, plates, spices and cleaning stuff. Set up the table and Weber/Blackstone and this tote goes straight under! I rarely cook Or do anything inside when out camping.

then it’s back on tackling leaks on the bronco and see if she’s got power brakes now too. Then it’s onto 4x4 ****! Found a new favorite trail last weekend that I deem soon will be lockers mandatory! Up and Over. I estimate we were pushing 45* but the washout sections make it fun.

2F6BB7E2-F390-41A2-AC33-0A8080F92B5A.jpeg
 

MacAttack

New member
Joined
Feb 1, 2016
Messages
2
Not in but on and not a garage but a 100 year old horse barn. I've been trying to get this roof project done. About 5 years ago part of the metal roof went bye bye. I was still working as a millwright in a steel mill that I retired from. Since then several more wind storms removed the rest of the roof. The critters and rain ruined everything in the barn which we used as storage.
I wanted to tear it down but the wife wanted it repaired. I didn't want to spend 50 grand on an old barn so here I am. Permits in hand.
I have the new rafters installed. After a late night of installing blocking I found 10 blocks were long. I need to spend time to fix my mistake. I can't just leave it. It has to pass inspection. I also have one wall to replace.
I'm waiting on a dumpster and scaffolding. The mess inside the barn needs to be gone and the soffits on one side are over 12' up. The wife has to go through her things in there and I have a car to pull out.
I'll be glad to get back to just cutting grass and Honey Do jobs that never end.
 
To avoid these ads, REGISTER NOW!
Top Bottom