niget2002
Well-known member
Got the new Roku TV installed and the busted TV over in the trash pile. City has a city-wide trash day next month, so I've started making a pile of things to haul off.


Everyone working with hot stuff needs to buy an Aloe Vera plant. Cut part of a leaf, get the clear gel from inside, (not the yellow ****; that is latex..) and put it on burns. its magical! pain stops right now and stays stopped (cool water also works but only while its immersed)
Those in snow country need to keep it in a pot so you can bring it inside for the winter, or the thing freezes, and dies...
I've treated 3rd degree burns on me, my barista daughter (hot coffee...) and family. works great on sunburn as well.
My out of control aloe patch:
Some in pots almost as out of control:
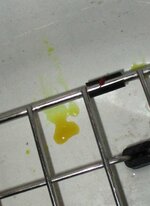
Sorry for the out of focus, camera is ****: but this is with latex leaking out:
Latex leaking out -this stops after maybe 5 min or so and doesn't recur from later cuts.:
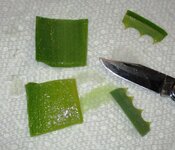
I cut this fast for pics; you can see some latex on the paper towel. I trim the spikes off, then slice the leaf in half exposing the pulp inside where the Aloe gel is:
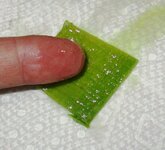
and this ia what you want: you can "milk" more aloe gel out by slicing across the pulp, and I use the leaf section as an "applicator"
Its immediately soothing to burns, any kind of burn, - good for dry or healthy skin, and reduces "age spots" as well. Its' also antiseptic.
Don't have any at this house but I do at my other one; surprised my wife hasn't asked to plant any.
It is very easy to pop a "Baby" off the lower stem and root/plant in a pot. I think you can propagate from a leaf section...
Potted it's very easy to control


The one suggestion I'd make for your gates--especially given the welds--is to add drain holes to every sealed pipe--because they probably aren't sealed. 1/8" hole on the lowest point of each pipe will do.It’s a hinge that’s cut at an angle so it returns to its close position. It does rise as it moves in any direction so gravity pulls it back down so yes, it’s a self rising hinge. It also has a greasable pivot shaft/bolt. You know what they say about a grinder and paint. It’ll hold and be licked clean soon enough
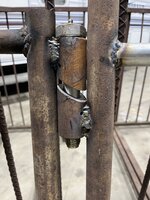
The one suggestion I'd make for your gates--especially given the welds--is to add drain holes to every sealed pipe--because they probably aren't sealed. 1/8" hole on the lowest point of each pipe will do.
I've had to cut into "sealed" structural pipe that was professionally factory welded and found it full of rust water more than once.
All pipes except the 8 on the feed through gate are set into the pipe they’re welded to so they’re open at both ends. I’ve got 1/8” holes drilled into the other 8 already. I hate trapped water.The one suggestion I'd make for your gates--especially given the welds--is to add drain holes to every sealed pipe--because they probably aren't sealed. 1/8" hole on the lowest point of each pipe will do.
I've had to cut into "sealed" structural pipe that was professionally factory welded and found it full of rust water more than once.

I wish ya luck with that Larry, I really do!Vert will not become a shelf again. Nope not happening.
That’s a pretty valuable shelf. Think of it this way, every ding you put in it adds to the time and cost of finally painting it.As @kaymccampbell would say, cleaned, flung, and threw out stuff. Best description out there.
Most of the **** on the vert is now off. More stuff in the truck to haul to dump and recycle.
Thinking maybe tomorrow vert gets pushed out and then the last of the 200SF Racedeck floor goes down. The tool boxes will be a bit of a pain.
Ugh.
Vert will not become a shelf again. Nope not happening.
Agreed.That’s a pretty valuable shelf. Think of it this way, every ding you put in it adds to the time and cost of finally painting it.

Sounds like it will be an awesome car, you know, if it gets finished.lolAgreed.
At times, wish I never disassembled it or started the long stalled restoration/ clone conversion.
2nd owner and I bought it 1983 from MD owner.
May/June 1985 I yanked the motor and auto trans to install in my ‘72 hardtop that the 440 oil pump drive had sheared off after ingesting a failed lifter hairpin during some “spirited” driving of the 4 speed. I needed a car to drive to work post college so we make the decisions we do while chasing the dollar.
And it’s been off the road ever since.
Originally a 383-2bbl auto plain Jane console shift with AC, power steering, power top, flat hood, and single exhaust. Was sold new in Washington DC; I have some of the sales paper work, fender tag, most of the build sheet (mice), ….
Clone plans are (thank god I have near all parts squirreled away years ago):
- 440 Sixpack 4sp. I have this from a wrecked 1970 original challenger 440-6 that I put in my ‘72 hardtop 1979/80 when I yanked its 340 auto. It was balanced and blue printed ~1987 but never fired; so will need refresh. Thinking maybe EFI…
- OEM shaker setup
- Power windows
- Dana 60 3.54. This was actually an NOS unit still strapped to a Mopar pallet I bought ~1986.
- Front discs. These are from a ‘73. Car originally had 11” drums all around.
- Hurst pistol grip
- Rally dash
- list goes on….
One day….
Wife looks at it and the parts hoard as a cash cow…… Sometimes I think the same. I’m 62…
Who hasn't been down that road a time or several? My current shelf.... Going on 4 or maybe 5 years come January.As @kaymccampbell would say, cleaned, flung, and threw out stuff. Best description out there.
Most of the **** on the vert is now off. More stuff in the truck to haul to dump and recycle.
Thinking maybe tomorrow vert gets pushed out and then the last of the 200SF Racedeck floor goes down. The tool boxes will be a bit of a pain.
Ugh.
Vert will not become a shelf again. Nope not happening.
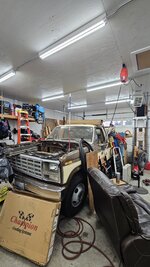
I've got a shelf, it's in the pic. And a set of lockers that are a type of shelf. And a work bench that seems to be a shelf. Oh, and a bike lift that seems to.....Cars are Not Shelves!
Shelf life's matter!
Just say no!




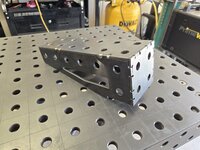
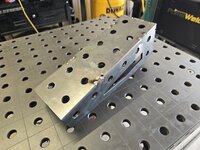

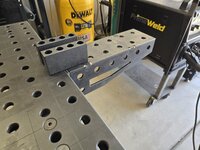
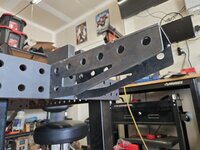
Is it possible to put a sprung wheel at the end of them for support ?but they’ve got some weight to them so that may cause an issue supporting them ……

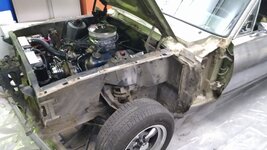

No one gives up all their secrets.Except how not to get caught.
DunNo one gives up all their secrets.
Sure could be. I was thinking a super simple chunk of wood lol. They won’t be moved often and when they do it may be over a foot of bedding so there will need to be clearance Clarance under them.Is it possible to put a sprung wheel at the end of them for support ?
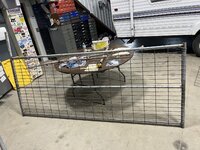
Powder River better look out!Sure could be. I was thinking a super simple chunk of wood lol. They won’t be moved often and when they do it may be over a foot of bedding so there will need to be clearance Clarance under them.
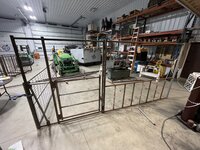
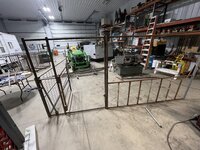
The littles and I got some crib paneling wired to one of the gates. Just gotta weld the hinges on the big gates and it’ll be ready to hang. Goodness this turned into a project !!
I miss my old Ubuntu daysLoaded up a friend's old PC with Ubuntu

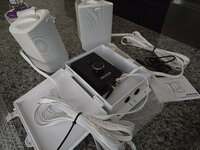

I miss my old Ubuntu days
I’m running Plex on a Debian server. Keeps a guys IT itch scratched having fun like that.Everyone should have a PC with Ubuntu or Fedora (I run Ubuntu on a mini PC in the garage)
Admittedly I know nothing about industrial kitchens, but that makes me want to puke. I would never knowingly eat anything from that kitchen.Back to work on installing the new rinser on our canning line after a morning of canning IPA.
I got to use my shop-made tool:
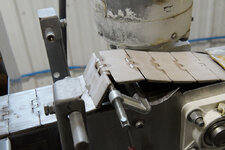
It's for pulling the pin to break conveyor belt:
That done, it's filthy inside the conveyor housing:
I've never understood why the manufacturers of these food-industry conveyors don't supply a Clean-In-Place system built in. A tube running the length of the conveyor with spray nozzles would go a long ways to keeping it clean in there. As it is, you have to pull the entire belt--30' in this is case--to access it for cleaning. I guess it's under the product, but still....
All power-washed and cleaned:
You can see those cross-pins in there. Those are drilled and tapped at the ends, which is where everything attached to the outside attaches and why I had to take the belt out to get the old rinser off. I'm going to try and get in there with the TIG gun and tack the ones I need to work with. Should be a PITA.
The power washer did a great job of cleaning the spoodge out of the conveyor housing and redepositing it all over me. Looking forward to a bath.
I'll get the new rinser installed tomorrow and be ready for canning next week.
Beer thirty!
It's a canning line, not a kitchen. The cans and product sit on top of the belt, not under it. But I am pushing for a more regular cleaning schedule for it. We used to have a gal who'd take the belt off and clean it monthly and I think we need to get back on that.Admittedly I know nothing about industrial kitchens, but that makes me want to puke. I would never knowingly eat anything from that kitchen.
True.lol The fact that cans sit on that belt, and not food make me feel a lot better, but still looks like the cleaning routine needs to be stepped up a bit.That said, the less you know about commercial kitchen the better unless you plan to raise, butcher/harvest and prepare all your own food.
I used to work commercial refrigeration, mostly ice makers in bars and restaurants. It's the reason I don't like to eat out much, although fast food restaurants are mostly cleaner than sit down places.That said, the less you know about commercial kitchen the better unless you plan to raise, butcher/harvest and prepare all your own food.
The ice machine in fast food is probably the biggest reason of diarrhea ever.lolI used to work commercial refrigeration, mostly ice makers in bars and restaurants. It's the reason I don't like to eat out much, although fast food restaurants are mostly cleaner than sit down places.
Most bars are disgusting and I won't go in one now unless forced.


Wait til you see some of the warehouses the case of goods gets stored in......True.lol The fact that cans sit on that belt, and not food make me feel a lot better, but still looks like the cleaning routine needs to be stepped up a bit.
Keep in mind that this area of the conveyor--the only really dirty part--is after the lids get sealed. The worst part was directly under the rinser that removes any beer from the outside of the cans (to keep O2 out, the cans get lidded "over foam"). Next step is a blower to dry the can off, then on to the pressure-sensitive labeler.True.lol The fact that cans sit on that belt, and not food make me feel a lot better, but still looks like the cleaning routine needs to be stepped up a bit.