-You want "more technical"? How about chucking it up in the lathe and using a sharp pointed cutting bit to scribe a very thin/shallow line on the shaft that's been blackened with a sharpie? That's what I do with either the lathe or just a height gauge off the surface plate.
-Looks like your drawing shows the thread ending at a shoulder and that 10mm length also includes the thickness of the shoulder.
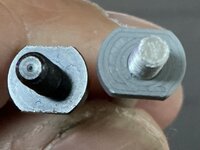
-And the locknuts capture or hold something on the 4mm threaded shaft? If some component is being held by the nut then the entire length of the shaft needn't be threaded does it?
-The that makes a full depth of cut so your die better be sharp and fairly unused.
-Most of them do unless you've got a kung-fu grip. I was inquiring how you intend to align the axis of the die with the axis of the 4mm shaft. Due to the pitch of a threading die or tap, the cut begins at one spot and that can cause the die to get leaned over one way or the other. Getting started off-angle will lead to bad things and the handles on a holder don't always offer enough control over the starting process. Once the die is started, whether aligned or off-angle, it's very difficult to correct it.
-I'm so relieved to hear that and my faith in you has been restored
")
-You're welcome, glad to offer something that might help someone.
-Just a little reading would have revealed how to calculate that, just a suggestion for future reference