To avoid these ads, REGISTER NOW!

Between 265 & 485 SQ/FT Kwik Fab's Small Shop

Workspaces sized between 265 and 485 squarefeet.
OP
K

KwikFab

Well-known member
Joined
Jul 27, 2024
Messages
1,213
Location
Central Valley, CA
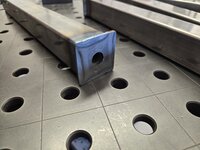
I was going to comment on the nice touch of adding the end caps. Nicely done.

Any tube that's open at the end is just an eyesore.

Plus it's a lot of work to cut, weld, and clean up an end cap and to do that 8 times on a small personal project like this isn't worth it.

Few plastic end caps and it's more than "good enough" in my eyes without all the extra effort!
 
To avoid these ads, REGISTER NOW!

rharman

Well-known member
Joined
Apr 22, 2012
Messages
8,894
Location
SoCal

M.Brane

ALLIANCE MEMBER
Joined
Feb 11, 2024
Messages
1,776
Location
1 hr N/W of LA LA Land
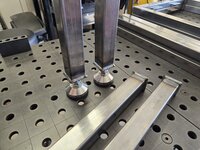
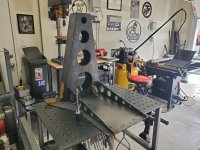
With the mounts in place, it was time to work on the legs.

20251110_133034.jpg

20251110_133045.jpg

These feet sure are beefy as hell, they use M14 nuts for mounting.

20251110_133325.jpg

Tacked up then welded the legs.

20251110_134757.jpg

Followed by tacking up and welding the remainder.

20251110_145413(0).jpg

Not bad!

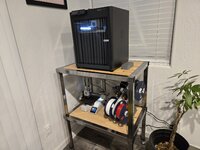
Both printers running and this thing barely moves at all.

20251110_173011.jpg

I had intended to paint it but after seeing the wood in place, both my wife and I agreed it looked good as is.
I've done that same thing with some amp/speaker stands I've built: just knock the mill scale off with a flap disc, and hit 'em with some satin clear. Makes a cool industrial look that's a nice contrast to the wood.

BTW quick question: where did you get your fixture table?
 
OP
K

KwikFab

Well-known member
Joined
Jul 27, 2024
Messages
1,213
Location
Central Valley, CA
I've done that same thing with some amp/speaker stands I've built: just knock the mill scale off with a flap disc, and hit 'em with some satin clear. Makes a cool industrial look that's a nice contrast to the wood.

BTW quick question: where did you get your fixture table?

Yeah I've always loved the classic wood on steel look.

Tables are fixtures from PrimeWeld. Had them for awhile and they get beat on quite a bit but still look new after a quick wipe down.
 

PugetDude

ALLIANCE MEMBER
Joined
Mar 13, 2013
Messages
22,439
Location
Superstition Mountains, AZ
Any tube that's open at the end is just an eyesore.

Plus it's a lot of work to cut, weld, and clean up an end cap and to do that 8 times on a small personal project like this isn't worth it.

Few plastic end caps and it's more than "good enough" in my eyes without all the extra effort!
I bought 1/2", 5/8", 3/4", 1", 1-1/4", 1-1/2" and 2" plastic end caps on Amazon. Really inexpensive, like 50 packs for $5.00-$10.00 Should have enough to last me the rest of my life, then one of you f'rs can buy the whole drawer full for $1.00 at my estate sale. 🤣
 
OP
K

KwikFab

Well-known member
Joined
Jul 27, 2024
Messages
1,213
Location
Central Valley, CA
For those that have watched this thread with interest, appreciate y'all.

Finally getting into normal activities.

Been going through a bit as I just lost my mom two weeks ago. However, the viewing, mass, burial, everything was beautiful and there are so many people there to show their support. Including many of my friends checking on me.

But, the day must go on. There will be moments to grieve, and others where I must occupy the mind.

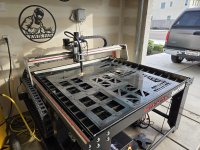
Today, I finally fired up the table and cut some aluminum.

20251220_125046.jpg

Not something I do much at all since I never have customers request it. But this is for a friend out in Spokane so I picked up some new 6061 and cut out some gullwing panels for his Land Cruiser.

20251220_125551.jpg

While Finecut consumables are not meant to be used with aluminum, I ran them anyway due to how clean they cut.

20251220_125142.jpg

20251220_125148.jpg

20251220_125154.jpg

Just gotta figure out the best way to pack them to ship them off.

He thinks he's paying for them but I'm just going to make it a gift for Christmas.
 
To avoid these ads, REGISTER NOW!

CMB41

Well-known member
Joined
Dec 31, 2018
Messages
88
Location
california
For those that have watched this thread with interest, appreciate y'all.

Finally getting into normal activities.

Been going through a bit as I just lost my mom two weeks ago. However, the viewing, mass, burial, everything was beautiful and there are so many people there to show their support. Including many of my friends checking on me.

But, the day must go on. There will be moments to grieve, and others where I must occupy the mind.

Today, I finally fired up the table and cut some aluminum.

20251220_125046.jpg

Not something I do much at all since I never have customers request it. But this is for a friend out in Spokane so I picked up some new 6061 and cut out some gullwing panels for his Land Cruiser.

20251220_125551.jpg

While Finecut consumables are not meant to be used with aluminum, I ran them anyway due to how clean they cut.

20251220_125142.jpg

20251220_125148.jpg

20251220_125154.jpg

Just gotta figure out the best way to pack them to ship them off.

He thinks he's paying for them but I'm just going to make it a gift for Christmas.
Sorry to hear. Lost mine 3 months ago. It just ***** and there is no way around it. I pray yours did not suffer. Hang in there and keep making cool stuff!
 

413dan

Well-known member
Joined
Feb 27, 2014
Messages
333
Location
Massachusetts
RIP to your mother,

In her honor, an Irish blessing:

May the road rise to meet you.
May the wind be always at your back.
May the sunshine warm upon your face.
May the rains fall upon your fields.
And until we meet again,
May God hold you in the hollow of His hand.
 
OP
K

KwikFab

Well-known member
Joined
Jul 27, 2024
Messages
1,213
Location
Central Valley, CA
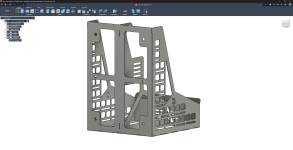
Customer requested I design a fuel jug carrier so I drew this up.

Screenshot 2025-12-27 202129.png

Screenshot 2025-12-27 202115.png

Done from scratch, but two ideas were borrowed from another company (per his request). The eye at the top of the center divider allows for one to run a steel cable over the fuel/water jugs, with the slots on the center divider to run flat strap to keep things tied down (optional).

Cut them out the next day.

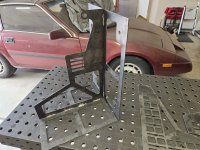
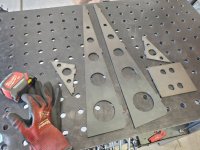
20251228_115937.jpg

Quick mock-up, it's obvious where the side panels go. I made it a tab and slot setup to allow for anyone to easily weld it together.

20251228_123226.jpg

Seeing as how the front panel is wider than my brake, the customer will bend this himself on his own brake.

20251228_124525.jpg

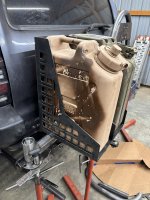
And pictures after the customer took it home and tacked it up for a bumper he's making for his customer.

IMG_4880.jpg

IMG_4881.jpg

IMG_4882.jpg

We spoke that same day and I've made some revisions to make it longer and wider to allow for extra room but the one I made is perfect.

Have to make 3 more now.
 
OP
K

KwikFab

Well-known member
Joined
Jul 27, 2024
Messages
1,213
Location
Central Valley, CA
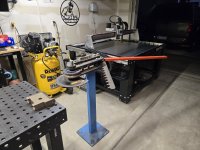
Well, this fell onto my lap for a measly $400 last night.

Have several orders to fulfill before I learn to use it.

20260104_172620.jpg

I've got some plans already for a rolling stand, as I cut one out over a year ago for my friend (same bender).

Unsure if I'll get a Vevor hydraulic setup or simply go air over hydraulic.
 

XJSuperman

Well-known member
Joined
Jan 26, 2018
Messages
3,088
Location
Central Iowa
It says Woodward Fab on the sticker in the pic.
The "overbend" you get used to fairly quickly, but I struggle more with the starting point setup. Getting the tube exactly where I need it to dictate the proper bend location.
Is the full hydraulic setup faster than air?
What size die(s) did you get?
 

zmotorsports

ALLIANCE MEMBER
Joined
Oct 20, 2009
Messages
21,441
Location
Northern Utah
The "overbend" you get used to fairly quickly, but I struggle more with the starting point setup. Getting the tube exactly where I need it to dictate the proper bend location.

Agreed. The spring-back can also differ from batch to batch so what I would do when I was building ATV and sandrail chassis is to do a test from each batch I purchased of 4130 chromoly, then tag them so when I was bending I could add that degree to the equation and usually be damn near spot on once determined.

When I purchased my JD Squared unit, I initially purchased the manual model as $$ was tight. A few years later I added an air over hydraulic setup to it and LOVE that setup.
 

Graham08

Well-known member
Joined
Dec 10, 2007
Messages
713
Location
Iron Station, NC
Unsure if I'll get a Vevor hydraulic setup or simply go air over hydraulic.

If you can afford doing electric over hydraulic, I highly recommend it. I have an air setup on my JD2 Model 4. I built my Hossfeld setup with electric. It's really nice not to listen to the compressor run...the air pumps use a lot of compressed air.

I ran a JD2 Model 3 with the manual ratchet like your bender for quite a while before I got the Model 4. The compound leverage in the ratchet gives you a surprising amount of power...the downside is having to anchor the bender to the floor.
 
OP
K

KwikFab

Well-known member
Joined
Jul 27, 2024
Messages
1,213
Location
Central Valley, CA
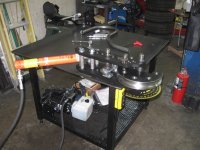
JD Squared? We have the hydraulic version mounted to the welding table. There's a bit of a learning curve as to how much to over-bend to get where you want, but overall works pretty damn good.

IMG_5200.jpeg

Nice setup!

This is the stand I cut out for a friend over a year ago which I'll make for myself as well -

20240322_152744.jpg

20240322_153826.jpg

20240324_140357.jpg

20240324_144555.jpg

It says Woodward Fab on the sticker in the pic.
The "overbend" you get used to fairly quickly, but I struggle more with the starting point setup. Getting the tube exactly where I need it to dictate the proper bend location.
Is the full hydraulic setup faster than air?
What size die(s) did you get?

I just know my friend loves his full hydraulic setup, and it's a cheap Vevor setup.

I already use air over hydraulic for my press brake so I could always go that route too.

The die I got with it is 7/8" round with a 3" CLR. Think it's a "240" so really for 180 degree bending.

If you can afford doing electric over hydraulic, I highly recommend it. I have an air setup on my JD2 Model 4. I built my Hossfeld setup with electric. It's really nice not to listen to the compressor run...the air pumps use a lot of compressed air.

I ran a JD2 Model 3 with the manual ratchet like your bender for quite a while before I got the Model 4. The compound leverage in the ratchet gives you a surprising amount of power...the downside is having to anchor the bender to the floor.

I'm pretty poor so we'll see what I end up with :ROFLMAO:

Fortunately Swag has an add-on for adding a jack so I don't need to make one myself.

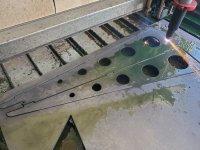
Also did a little bit of cutting today as my customer requested two more jerry can holders.

20260105_145104.jpg

I didn't want to be in the garage long since I had to run some errands but I'll load up the next sheet tomorrow and finish cutting the rest. Had to take care of another order in the meantime.
 
OP
K

KwikFab

Well-known member
Joined
Jul 27, 2024
Messages
1,213
Location
Central Valley, CA
Kits were picked up this morning.

20260106_135832.jpg

Also made a trip to Harbor Freight for kicks and got their 8-ton air over hydraulic jack for the new tube bender!

20260107_142742.jpg

Unfortunately after several calls to different metal suppliers, I've found that no one locally offers 7/8" DOM with a thickness greater than 0.060". Was really hoping for 0.083" or thicker but it's a no go meaning I will have to invest in a larger die for bending anything.

I did score a 4' section on Ebay for only $40 SHIPPED, and while it doesn't make sense financially to spend so much on such short pieces, it will give me some tube I can start practicing with.

Anyway once the printer is done printing, I'll see about printing a few knobs for releasing pressure on the new jack.
 
To avoid these ads, REGISTER NOW!
Top Bottom