To avoid these ads, REGISTER NOW!

ZMotorsports Shop Projects 2.0

To avoid these ads, REGISTER NOW!
OP
Z

zmotorsports

ALLIANCE MEMBER
Joined
Oct 20, 2009
Messages
21,495
Location
Northern Utah
Does your model of Wheel Horse have a rear PTO?

Yes, it has the rear PTO as well as 3-point hitch setup for pull behind implements.

Nice tractor!

What is the story on this? I don’t recall you working on it before.

Thanks. I haven't worked on it before, I purchased it a couple of years ago as a "project" but it hasn't made it to the inside of the shop until now. I don't know a lot of details about it, yet. It was one of those "good deals" that I ran across, or rather my son's coworker presented to us, and as I like to have older things that are a bit different than the norm, after learning a little history on the Wheel Horse company I was intrigued enough to buy the tractor as a restoration project. Still debating whether that was a smart move or not.... :headscrat
 
OP
Z

zmotorsports

ALLIANCE MEMBER
Joined
Oct 20, 2009
Messages
21,495
Location
Northern Utah
I just stumbled across this short video of my trailer. I thought the guy told me it was a "Dominator" series, but it is actually called the "Terminator" Series of tilt deck car hauler from Texoma trailers in OK. The only differences are that this particular trailer is a 24' and has a 7k pound capacity (dual 3500 pound axles), whereas mine is a 22' trailer with a 12k pound capacity (dual 6k pound axles).

 
OP
Z

zmotorsports

ALLIANCE MEMBER
Joined
Oct 20, 2009
Messages
21,495
Location
Northern Utah
I hope everyone had a nice weekend. We had a pretty nice one, got to spend a lot of time with our son and his family over the Thanksgiving holiday, so it was awesome. The Ogden Nature Center had their annual open house again this year the Saturday after Thanksgiving, so we went with our son and his family. It was great to watch our grandson experience all of the animals they have onsite there. He was a trooper, he walked nearly the entire preserve including the whole perimeter nature hike so those short little legs had to do double or triple what ours did and he didn't miss a beat. Typical little boy things like climbing up on the rocks, picking up sticks and smacking rock and trees with them and even got to see a small herd of deer cross the trail right in front of us.


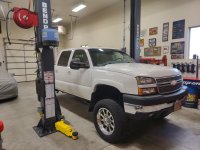
Friday night after work I pulled the truck into the shop and racked it to replace the shocks that have been sitting on the shelf for the past several weeks. I've had such great results with the Bilstein 5100 series on the truck, I opted to replace with the same thing.
shocks1.jpg

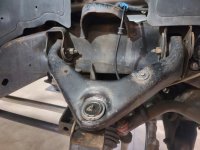
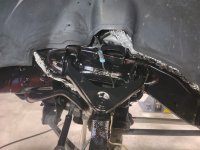
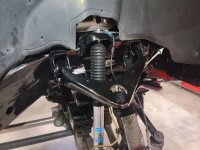
At first I thought I would just swap out the shocks and not need to pull the front tires/wheels, but upon removing the first one, I didn't think I could let it back out of the shop looking like it did.
shocks2.jpg

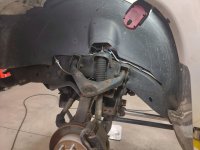
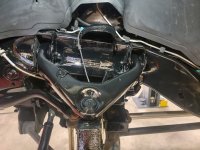
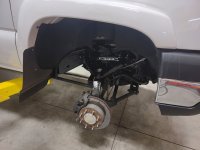
So off came the front tires/wheels so I could scuff the front frame rails and suspension for paint.
shocks3.jpg

Prepped and wiped down as well as some aluminum foil wrapped around the brake line and ABS sensor moved out of the way while the paint was in the shaker.
shocks4.jpg

A couple coats of paint and it looks as good as new.
shocks5.jpg

Foil removed and ABS sensor reinstalled back in place.
shocks6.jpg

I then moved over to the driver's side to repeat the process.
shocks7.jpg

Removing the shock.
shocks8.jpg

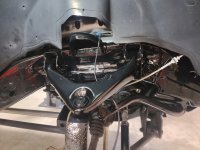
Foil covering the brake lines and ABS sensor wiring moved out of the way.
shocks9.jpg

Driver's side painted and unmasked.
shocks10.jpg


Stay tuned for more..
 
OP
Z

zmotorsports

ALLIANCE MEMBER
Joined
Oct 20, 2009
Messages
21,495
Location
Northern Utah
Continuing on with the shock replacements.

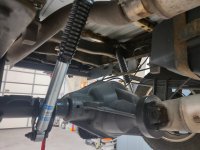
With the front end in wet paint I moved to the rear and replaced both rear shocks before calling it a night.
shocks11.jpg

shocks12.jpg

Saturday afternoon after we returned from the Ogden Nature Center and lunch with our kids and grandson, the wife had some house cleaning she wanted to do in preparation for Christmas decorating and I wanted to get the truck put back together now that the paint had overnight to dry.

I am quite impressed with this Seymour Big Rig high solids paint thus far. Winter driving will be a good test for it, but so far I'm a fan. It dried very nice and hard and lays down exceptionally nice and flat.
shocks13.jpg

shocks14.jpg

Shocks installed.
shocks15.jpg

shocks16.jpg

Tires/wheels reinstalled and torqued to spec.
shocks17.jpg

shocks18.jpg

And ready to back out of the shop.
shocks19.jpg


I no sooner got it parked back in the attached garage and the wife informed me she needed some items for Sunday so we took the truck for a test drive. Although the shocks weren't completely shot, they were in need of replacement as I could tell a difference in the ride.
 
OP
Z

zmotorsports

ALLIANCE MEMBER
Joined
Oct 20, 2009
Messages
21,495
Location
Northern Utah
Upon arriving back home, the new UV tire covers/protectors had arrived so I ran out and installed them on both trailers before I lost my daylight.

These ones were a bit nicer than the last ones I had on the small utility trailer, plus these have a strap that runs around the back so they should stay put better in the wind and I won't have to chase them around the backyard.
trailer11.jpg

trailer12.jpg

trailer13.jpg

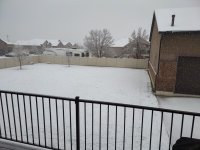
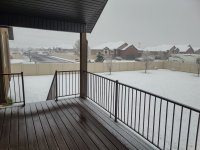
The we awoke to this on Sunday morning. We've had slightly above average temperatures all through the month of November, except the last day. It was a nice relaxing day and at least we were home and didn't have to drive in it with all of the idiots on the roads learning how to drive all over again in snow. I was worried that my son and DIL both had activities in the evening, but I think the roads were pretty cleared by mid-afternoon. The wife and I went out about 1pm when it stopped snowing and shoveled the front yard and then brought up the Christmas tree and got the house decorated for Christmas. Overall it was a nice and relaxing Sunday.
trailer14.jpg

trailer15.jpg

trailer16.jpg


Thanks for looking and I hope everyone had a nice weekend.
 
OP
Z

zmotorsports

ALLIANCE MEMBER
Joined
Oct 20, 2009
Messages
21,495
Location
Northern Utah
Paint job looks good.
You don't carry a spare tire in your truck? Or is it tucked in the bed?

Thanks. The spare is in the bed, it won't fit underneath. It was close until I installed the larger rear diff. cover and put the Curt 15k pound hitch under it years ago, then there was no chance of it fitting.
 

ntsqd

Well-known member
Joined
Jan 22, 2005
Messages
1,001
Location
Lower left coast
Ran into the same thing with Patch, the Wonder Yota. Larger OD tire didn't fit under the bed. Hated having it laying down flat in the bed because no matter where it was, it was in the way of something. So I built a mount for the spare that stood it up in the LR corner of the bed. I called it the "Pro-Farm" spare tire mount.
 
OP
Z

zmotorsports

ALLIANCE MEMBER
Joined
Oct 20, 2009
Messages
21,495
Location
Northern Utah
Ran into the same thing with Patch, the Wonder Yota. Larger OD tire didn't fit under the bed. Hated having it laying down flat in the bed because no matter where it was, it was in the way of something. So I built a mount for the spare that stood it up in the LR corner of the bed. I called it the "Pro-Farm" spare tire mount.

I don't want it to be visible which is why I haven't stood it up. However, I have thought about building a small riser to mount it to lying down just to get it off the floor of the bed and have the ability to slide something under it. But, I don't haul much in the truck as I don't like scratching the bed up (that's what my utility trailer is for) so fabricating a mount just hasn't been a priority all these years.
 

SilverJimmy

Well-known member
Joined
Apr 14, 2012
Messages
1,695
Location
Prescott/Flagstaff, AZ
Mike, those UV covers are interesting, how much do they really help the life of the tires? I’ve never used them but I do try to park my trailer tires on pieces of leftover Trex decking. I was talking with a tire rep and he told me that tires parked long term on dirt or concrete can suffer from the oils in the rubber being sucked out. You ever heard that before?
 
OP
Z

zmotorsports

ALLIANCE MEMBER
Joined
Oct 20, 2009
Messages
21,495
Location
Northern Utah
Mike, those UV covers are interesting, how much do they really help the life of the tires? I’ve never used them but I do try to park my trailer tires on pieces of leftover Trex decking. I was talking with a tire rep and he told me that tires parked long term on dirt or concrete can suffer from the oils in the rubber being sucked out. You ever heard that before?

Sterling, yes, I have heard some of those claims as well, but haven't found them to be true in real life as I have had tires exceed the normal or average in many cases. I have heard however, that the carbon black in the tires can become stagnant and not allow the tires to breath if not exercised on a regular basis. I have heard/read that the best thing for tires to keep the carbon black "rejuvenated" is by driving and creating a little heat in the tire and routine washing with a mild detergent. I have not been a fan of tire treatments and have been told by our tire rep. that those are some of the worst products to use because they don't allow the tires to breath and that carbon black won't sluff off and heat up properly.

I am a firm believer that keeping the tires out of direct sunlight is also a benefit so I have used tire covers on all my coaches and trailer tires when parked outside and have had excellent results with tire longevity. Personally, I think they are worth the ~$40 for a full set of good tire covers. We have RV friends who full-time and stay in one location for months at a time and seldom ever get more than about 5 or so years out of a set of tires whereas I just got 9+ years out of my last set and they showed absolutely no signs of sidewall cracking.
 
Last edited:
OP
Z

zmotorsports

ALLIANCE MEMBER
Joined
Oct 20, 2009
Messages
21,495
Location
Northern Utah
I've attempted to keep the spare tire on my utility trailer covered, however the neighbor's horse would pull the cover off and chew them up out of boredom. :confused:
The spare recently had a spectacular failure, complete blowout of tread and belts. Never touched the road or had any dry rot or cracks, just cheap junk.

You bring up a good point on trailer spares Justin. My trailers don't get a normal tire rotation, just removal and inspection annually and that's when I will swap out the spare with one of the others to keep them exercised. Probably overkill, but during all our miles of towing trailers to the races or dunes over the past several decades, I have seen quite a few blowouts on trailers shortly after installing the spare on the side of the road due to a previous failure. I can only attribute those spares failing so quickly due to the fact that they were not being exercised regularly and forgotten about until needed. It is too easy to swap them out at home vs. the side of the road, and safer too.
 

SilverJimmy

Well-known member
Joined
Apr 14, 2012
Messages
1,695
Location
Prescott/Flagstaff, AZ
I’ve diminished my trailer tire woes by buying all my trailer tires from Discount Tire who offer a 10 year warranty for only $7.50 per tire. I have already gotten all 4 tires on a trailer warrantied for sidewall cracking and one blowing out. And if you pay the $7.50 per tire at replacement, the 10 years starts all over!
 

ScepterToad

Well-known member
Joined
Nov 9, 2023
Messages
346
9+ years out of my last set and they showed absolutely no signs of sidewall cracking.
9 years!! The HORROR!! :ROFLMAO:

RV folks are nuts for the 5 year or whatever "rule" they've been told by the internet.... I'm a firm believer that if you keep your coach tires properly inflated and stored properly they can last. Well, that, and a quality tire to begin with.
 

ntsqd

Well-known member
Joined
Jan 22, 2005
Messages
1,001
Location
Lower left coast
Repeat a fallacy often enough and it becomes the 'truth' no matter what the real experts have to say. Applies to politicians too.

Old friend of mine used to cut two pieces of plywood the *just* fit up inside the fender wells of his trailers. This was decades before such tire covers were available.
 

OutlawDrifter

Well-known member
Joined
Jan 20, 2015
Messages
3,905
Location
KS
Repeat a fallacy often enough and it becomes the 'truth' no matter what the real experts have to say.

I spent years trying to get people to understand that lack of backpressure was not why their TBI 350s were running like doodoo when they put better exhaust on...just needed a heated O2 senser :rolleyes:

I still hear that myth vomited more than I like "you need more backpressure" :unsure:🤦‍♂️
 
To avoid these ads, REGISTER NOW!

WoodsTruck

Well-known member
Joined
Jan 12, 2013
Messages
1,028
My pickup has a set of Cooper tires on it. 10 years old and about 15K total miles. Traction *****, they are riding super hard and create some noises I thought were differential bearings failing. My tire guy said the Coopers crack in the face of the tire between the lugs and not necessarily on the sidewall where you would typically look for issues.
Snow tires will be going on in the next month and new summer tires will be purchased when those come off next spring.
 
OP
Z

zmotorsports

ALLIANCE MEMBER
Joined
Oct 20, 2009
Messages
21,495
Location
Northern Utah
9 years!! The HORROR!! :ROFLMAO:

RV folks are nuts for the 5 year or whatever "rule" they've been told by the internet.... I'm a firm believer that if you keep your coach tires properly inflated and stored properly they can last. Well, that, and a quality tire to begin with.

Yeah Keith, we have a lot of RV friends as well that follow the 5-year rule religiously and regardless of what the tire actually looks like. They've fallen for the propaganda hook, line and sinker and no matter what logic I try to use, they continue to believe the lie. I'm not one to tell someone how to spend their hard-earned money, but for me if I can take care of the tires and get a few more than five years out of a couple of sets, then it's just like not having to buy one complete set to the tune of about $6k. Hell, I saved one full replacement set just in the last set of tires alone. I'll take that all day long over just a little care and attention.

If I'm being honest, I really could have run my last set another year without worry as they had absolutely no sidewall cracking and when we dismounted them and took a look at the inside, they were still like new. Even the guy mounting and dismounting them commented on how good they looked for having nearly a 10 year old build date and over 50k miles. Granted the miles were nothing in the scheme of things, in fact, the guy I sold them to was planning on running them on his trailers and he was shocked when he saw them upon me delivering them to him.


Repeat a fallacy often enough and it becomes the 'truth' no matter what the real experts have to say. Applies to politicians too.

Old friend of mine used to cut two pieces of plywood the *just* fit up inside the fender wells of his trailers. This was decades before such tire covers were available.

My dad used to do the same thing with all of our tractors and farm wagons Thom, and that was back in the 70's as far back as I can remember and well before such tire covers were commercially available. Money was tight so anything he could do to prolong the life of the farm assets was tried and either proven or disproven rather quickly, and the plywood trick worked well.


My pickup has a set of Cooper tires on it. 10 years old and about 15K total miles. Traction *****, they are riding super hard and create some noises I thought were differential bearings failing. My tire guy said the Coopers crack in the face of the tire between the lugs and not necessarily on the sidewall where you would typically look for issues.
Snow tires will be going on in the next month and new summer tires will be purchased when those come off next spring.

That's odd, my son is currently running Coopers on his 2500HD and they seem to be wearing great and the tire performs quite well. It was our first experience with Coopers and were even talking about them a couple of weeks ago when doing some routine maintenance on his truck and he said he'd run them again in a heartbeat.
 

ntsqd

Well-known member
Joined
Jan 22, 2005
Messages
1,001
Location
Lower left coast
A good friend of mine pointed out that usually the roots of the lugs in the tread is where BFG's tend to crack when they do so.
 

Jgaz

Well-known member
Joined
Dec 16, 2016
Messages
1,716
Location
AZ
I don't miss the 16.5's either, nor that split ring. :rolleyes:
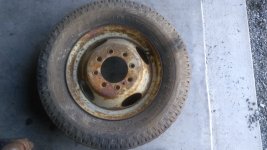
Does anyone remember when most (if not all) 3/4 ton and up pickups all came with split ring wheels and tube type tires?
The first tubeless 8 lug wheels I remember seeing from the factory were on a ‘75 GMC 3/4 ton.

I worked in a gas station/garage from ‘71 thru ‘75. I wonder how many 100s of split rings I did from the 16.5 size all the way thru school bus and gravel train tires. Never had a problem

Can you imagine today’s 16 year olds changing truck tires?
Farm kids maybe, but certainly not the vast majority.
 
OP
Z

zmotorsports

ALLIANCE MEMBER
Joined
Oct 20, 2009
Messages
21,495
Location
Northern Utah
Does anyone remember when most (if not all) 3/4 ton and up pickups all came with split ring wheels and tube type tires?
The first tubeless 8 lug wheels I remember seeing from the factory were on a ‘75 GMC 3/4 ton.

I worked in a gas station/garage from ‘71 thru ‘75. I wonder how many 100s of split rings I did from the 16.5 size all the way thru school bus and gravel train tires. Never had a problem

Can you imagine today’s 16 year olds changing truck tires?
Farm kids maybe, but certainly not the vast majority.

My first experiences with those dang split rings was around '79-'80 when I was about 12 years old. I hated them, although I respected them, I still hated and feared them. Probably because my dad put the fear of God in me when he spoke of them. Looking back, I still can't believe I was working on them at that age, but I so enjoyed working on farm equipment and farm vehicles much more than working on the farm. :bounce:
 

Jgaz

Well-known member
Joined
Dec 16, 2016
Messages
1,716
Location
AZ
“I was about 12 years old”

You’ve got me, I was 15 when I started doing split rings.

I was so fortunate to have been taught by the station owner’s Dad that was about 70 years old.
He told me he was going to teach me the smart way because both he and I didn't have “enough ***” to try and muscle those tires.

No safety cage.
We put the assembled rim and tire under one of the hoist arms, used a locking air chuck and an air pressure regulator on the air line to inflate the tire.

I was pretty scared at first and was always respectful even after I got more confident.
 
OP
Z

zmotorsports

ALLIANCE MEMBER
Joined
Oct 20, 2009
Messages
21,495
Location
Northern Utah
“I was about 12 years old”

You’ve got me, I was 15 when I started doing split rings.

I was so fortunate to have been taught by the station owner’s Dad that was about 70 years old.
He told me he was going to teach me the smart way because both he and I didn't have “enough ***” to try and muscle those tires.

No safety cage.
We put the assembled rim and tire under one of the hoist arms, used a locking air chuck and an air pressure regulator on the air line to inflate the tire.

I was pretty scared at first and was always respectful even after I got more confident.


I think the highlighted part can be said about many things in life, especially in the mechanical field as there are so many things that can bite us and bite us hard. No matter how comfortable I am with a lot of things I try to treat them with the respect they deserve.
 

ntsqd

Well-known member
Joined
Jan 22, 2005
Messages
1,001
Location
Lower left coast
Grandad didn't allow them on any of his vehicles, so I've never worked on one. Older brother of a good friend in HS lost a co-worker to one. Description of it was grisly, as I imagine most are. They worked for a tire co. that mostly worked on big rig and tractor tires.
 

SilverJimmy

Well-known member
Joined
Apr 14, 2012
Messages
1,695
Location
Prescott/Flagstaff, AZ
Saw a big split rim come apart in the bay at the old Texaco station. The mechanic had it stuck under the arms of the in floor single post lift and when the split rim blew the hoist flew all the way up against the stop! I’ve also seen many a safety cage with a large bulge too. And it’s not just split rims that can kill ya, had a customer filling a patched tire on his tire machine that blew the sidewall out. He was leaning over it when it blew, the rim pretty much scalped him from his eyebrows up!
 

PugetDude

ALLIANCE MEMBER
Joined
Mar 13, 2013
Messages
22,490
Location
Superstition Mountains, AZ
Can you imagine today’s 16 year olds changing truck tires?
Farm kids maybe, but certainly not the vast majority.
I was working almost full time at the local Texaco as a nozzle jockey when I was 16. After a couple of months I was doing oil changes, tire rotations, mounting new tires and fixing flats. Glued in a lot of patches, sidewall boots :oops: and got to be pretty good with a bubble balancer...
 

CGarage

Well-known member
Joined
Nov 23, 2018
Messages
3,068
Location
United States/Switzerland
Saw a big split rim come apart in the bay at the old Texaco station. The mechanic had it stuck under the arms of the in floor single post lift and when the split rim blew the hoist flew all the way up against the stop! I’ve also seen many a safety cage with a large bulge too. And it’s not just split rims that can kill ya, had a customer filling a patched tire on his tire machine that blew the sidewall out. He was leaning over it when it blew, the rim pretty much scalped him from his eyebrows up!


Scalped as in fatality ??
 
OP
Z

zmotorsports

ALLIANCE MEMBER
Joined
Oct 20, 2009
Messages
21,495
Location
Northern Utah
So, it looks like I have a major wrinkle in my sub-floor mounted winch idea. One of the things I liked about this trailer when I looked at it was the fact that the crossmembers were on 16" centers. Perfect for a heavier vehicle as some I looked at were at or even over 20" centerlines. After getting it home and when I looked under it at first glance a couple of weeks ago, I measured nearly 14" from the front of the tilt deck tube back to the front of the first crossmember. My initial idea was that it would be tight to build a box less than 14" due to the arc in which it would need to swing to drop down flush, but I thought worse case, when I cut through the decking if I needed to trim a little of that front crossmember I could just weld it back to the box and make everything one solid mounting and it may actually work out better having the entire front of the trailer braced using the sub-floor winch box at the intersection point between the front and the first crossmember.

While I was looking under it a couple of weeks ago, I measured for a HPU (Hydraulic Power Unit) and decided I had plenty of room to mount both the HPU and the battery box under the deck about 5' back from the front. This would work to keep the weight low and centered under the trailer and more importantly, out of the way and not in the tongue box taking up valuable space. I would do it similar to my last trailer and have remote battery lugs/connection point to connect jumper cables to in the event of a low battery issue, but with the deck up the battery would be quite easy to access and be out of the way. I also figured it would be easier to route battery cables up to the winch if the battery was already under the deck and nestled in the frame rails so it would be a win/win.

I still think the HPU and battery will go right where I have planned, but I am going to have to rethink my approach to the winch. I've ordered the HPU and battery box, but before I purchased the winch I figured I had better take some more measurements, and that is where I saw what I originally missed. With the tilt deck of the trailer up and looking underneath it all looks like a great plan. However, with the deck lowered and sitting on the frame rails there simply isn't enough room for a sub-floor mounted winch, unless I want to cut into structural crossmembers and the latching system for the deck which I do NOT. I had not taken the front tongue crossmember and latching system into account during my initial planning.

It may be hard to see what I am talking about in the pictures, so I'll try to explain why this plan is dead before it started.


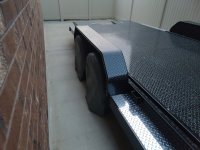
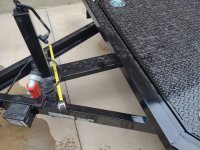
Here you can see I only have 5" between the underside of the deck and the frame rails with the deck in the lowered position.
trailer1.jpg

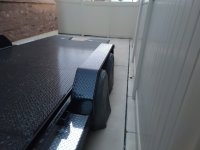
Then, what I thought was 14" front to rear space originally, has now shrunken down to less than 8" with the deck lowered. This is the front crossmember tying across the tongue, providing the mounting location for the latching system as well as the longitudinal support for where the tilt cylinder mounts. There is no way a standard winch will fit in this space, and I surely don't want to cut the entire tongue apart including the latching system just to move it a few inches. I guess maybe that explains why I see so many tilt deck trailers come equipped with a winch mounting plate right here at the front of the deck, it is even an option from Texoma on this particular trailer.
trailer2.jpg

Then as I was measuring for a tongue box, I thought I would just do a surface mounted winch similar to my last trailer's second iteration. On my previous 18' Big Tex car trailer, originally I came up with a temporary mounting solution for a winch, however, I got tired of having the winch sitting on the floor under the cabinet in my home's attached garage and having to install it when needed. It never failed, if I needed the trailer at my parent's farm where my paint shop was located, the winch was at home, if I needed the winch for the trailer at home, I had left it at the paint shop. So when I redid the trailer the second and final time, I permanently mounted the winch to the front and used one of those soft sided Warn covers to keep it covered and "somewhat" protected. It worked well having it permanently mounted on the trailer, but I went through multiple covers over the course of about 10 years.

I am leaning towards surface mounting the winch and installing a 1/4" winch mounting plate under the deck which I can tie into both the front 2" x 5" main tube and the first crossmember back, which will really be a solid mount and tie the front of the trailer together much like the sub-floor box idea that I was originally going to run with. Then, rather than a soft cover, I think I will fabricate a box enclosure that will bolt down to the deck to fully enclose the winch and protect it both from the elements and theft. I seriously doubt I will ever need that space at the very front of the trailer anyways as the winch box will be about even with the rear of the flush mounted 6k pound swivel D-rings.

This is relatively close to where the winch and winch box will reside side to side on the front of the deck and where I have seen winch mounting plates installed from several manufacturers on these tilt deck trailers.
trailer3.jpg

This is about where the winch and winch box would lie front to rear.
trailer4.jpg

Measuring for my tongue box. I think by the time I install a tongue box, it may be very close in height to the winch box once completed and actually tie in quite nicely. I was also thinking of putting a small solar charger on the tongue box to keep the battery maintained.
trailer5.jpg

trailer6.jpg

trailer7.jpg

trailer8.jpg


In the winch box, I think I will install a 4-pin trailer style of connector that can act as a quick connect for the winch controller and make it less cumbersome to connect the controller than inside the box. Then just open the front of the box where the fairlead and hook are at, plug the controller into the side of the box and be set, easy peazy.

This will free up nearly the entire tongue box for tie downs, controllers and still have room remaining rather than trying to stuff all of the trailer's mechanics into the tongue box.

Also planned are adding 4 more flush mounted 6k pound D-rings, a permanently mounted spare tire mount on the right side and I still want to make the fenders removable. I also don't particularly care for the tread plate style of fenders so I may convert them over to smooth dual cutout fenders once I get the originals removed.

Thanks for looking and sorry to disappoint, no drop-down winch being installed on this trailer.
 
OP
Z

zmotorsports

ALLIANCE MEMBER
Joined
Oct 20, 2009
Messages
21,495
Location
Northern Utah
While I was out measuring the trailer last night the neighbor stopped by to ask some questions about a diesel pusher coach he is looking at. He's tired of the fifth wheel life and wants to step up to motorized travel for him and his wife so he has a bunch of questions and I was trying to cover the pros and cons of each with him as well as giving him some suggestions on what to look for. Not quite sure just how serious he is, but he has had nothing but problems with his relatively new Montana fifth wheel trailer as it's been in the shop more in its 4-year life that it's been on the road.

After heading into the shop, I commenced the year end service on the lawnmowers prepping them for winter storage as well as fired up the snowblower and prepped it.

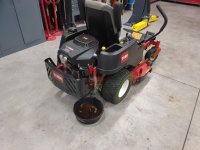
With the engine warm I dumped the oil.
ope1.jpg

While the oil was draining from the ZTR, I sucked the oil from the 34+ year old 21" Snapper walk-behind mower.
ope2.jpg

Along with a new oil filter on the Toro ZTR, I also picked up a new air filter for replacement.
ope3.jpg

New air filter installed as well as oil filter and fresh oil.
ope4.jpg

I turned my attention to the deck cleaning and blade sharpening/balancing on the walk-behind mower.
ope5.jpg

Blade was still pretty well balanced.
ope6.jpg

Just needed a little touch-up on the cutting edges.
ope7.jpg

And double checked the balance.
ope8.jpg

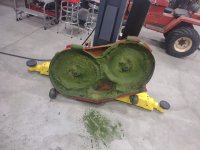
With the deck cleaned, blade reinstalled and oil replaced on the walk-behind mower, I turned my attention to the deck from the ZTR. The last month or so of mowing really packed the grass under the deck with the unusual amount of precipitation we had in October.
ope9.jpg

One of the two blades was slightly out of balance. I double checked to ensure all of the caked on grass was cleaned and not skewing the balance, but it was in fact out of balance a bit. I had a little bit of a ding in one of the cutting edges so I must have hit something in the lawn. The neighbor kids cut across my front yard and sometimes they walk across the kidney and kick rocks out onto my grass. I generally find them and put them back while trimming but it's possible I missed one and hit it with this blade.
ope10.jpg


Stay tuned for some more pictures.
 
To avoid these ads, REGISTER NOW!
Top Bottom