To avoid these ads, REGISTER NOW!

ZMotorsports Shop Projects 2.0

OP
Z

zmotorsports

ALLIANCE MEMBER
Joined
Oct 20, 2009
Messages
21,495
Location
Northern Utah
Mike, I was going to say don't compression gauges have a schrader valve in the end of them so they hold max pressure? But while typing I vaguely remembered something about removing the valve for small engine testing. I can't remember ever testing a small engine now that I think about it, have used the thumb over the hole to see if there is any compression at all. LOL

I have a few of the spark plug thread repair kits, the calvan kit for the ford tritons and then a lisle 14mm kit and last year I had to buy a kit for the smaller 12mm plugs for a newer jeep engine that someone stripped out replacing the plugs to fix a misfire caused by an injector. Got a time sert kit for that one.

Scott, yes, most compression gauges have a Shrader valve to hold max pressure, but my experience on "questionable" engines is that they can cause erroneous readings, mainly because they require some pressure to open the Shrader valve. When I'm working on a questionable or what I think may be a lower compression cylinder, I remove the Shrader valve just to get a more accurate reading. I just watch what the highest reading is while cranking and with the throttle valve wide open and make mental note. The Shrader valves really come into play when you can't stand right there and watch the needle on the gauge, such as cranking from a driver's seat while the gauge is connected in the engine bay.
 
To avoid these ads, REGISTER NOW!

signcrafter

Well-known member
Joined
May 9, 2012
Messages
12,535
Scott, yes, most compression gauges have a Shrader valve to hold max pressure, but my experience on "questionable" engines is that they can cause erroneous readings, mainly because they require some pressure to open the Shrader valve. When I'm working on a questionable or what I think may be a lower compression cylinder, I remove the Shrader valve just to get a more accurate reading. I just watch what the highest reading is while cranking and with the throttle valve wide open and make mental note. The Shrader valves really come into play when you can't stand right there and watch the needle on the gauge, such as cranking from a driver's seat while the gauge is connected in the engine bay.
Thanks for the explanation Mike. Makes sense.
 
OP
Z

zmotorsports

ALLIANCE MEMBER
Joined
Oct 20, 2009
Messages
21,495
Location
Northern Utah
Great news on waking up the sleeping giant.

I have confidence in your ability to fix the stripped spark plug threads.

Thank you. I was pleased to hear it come to life.

I've fixed quite a few damaged spark plug threads in small engines over the years so I'm not too worried about it, just trying to decide whether I want to mess with it now or just when the engine gets torn down. Depends on how much I want to mess with it prior to full teardown. :unsure:
 

ronjon1190

Well-known member
Joined
Apr 1, 2015
Messages
121
Location
East Haddam CT
Good to see the old Wheel horse finally getting some love. Go through it mechanically and put the blade back on for the winter... Get some seat time while speeding up the cleaning of your concrete! Then restore it on it's off season!!

I have my grandfather's 1986 Wheel Horse 314-8 with a 36" rear discharge mower deck and a 42" single stage snow thrower, and I just picked up a 94 314-Hydro that came with a 42" two stage snowblower. I am actually hoping for a little bit of the $%0W soon so I can compare the two.
 

Finallygotit

ALLIANCE MEMBER
Joined
Jul 6, 2013
Messages
4,103
Location
Tucson, AZ
I put the odds of @Grizz1963 escalating his platonic relationship higher than you avoiding scope creep on this lawn tractor project.
Anyone want the over/ under on this one?
Ahhhhh...I wouldn't be so sure about that. Up until now, Mike just glossed over the tractor. Wait!

So that over/under, what have you got in mind? 😉

:beer:
 
OP
Z

zmotorsports

ALLIANCE MEMBER
Joined
Oct 20, 2009
Messages
21,495
Location
Northern Utah
Last night I put the deck back under the Toro ZTR, parked it and the Snapper walk-behind back in the attached garage, removed the battery from the ZTR as it will need to be replaced come spring and then hung the line trimmer and edger back on the wall and everything is ready for spring.
ope.jpg


I then went back to work on the Wheel Horse to see if I could pick up where I left off.

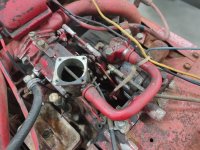
Now that I know it runs, I wanted to see if the transmission worked as that has been my worry all along. Before that I had to get the throttle linkage freed up as it was seized and didn't want to move and I didn't want to break or bend any of it by forcing it. I started at the carburetor by removing one pivot at a time, making sure that part moved and spraying a little Zep 45 on it, then moving on to the next pivot point.
wh24.jpg

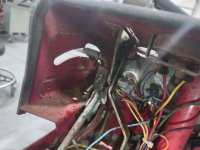
Now that the linkage moves freely at the carburetor.....
wh25.jpg

it was time to turn my attention to the lever on the dash. This was the worst as far as being seized, but after removing the bolts and spraying some Zep 45 at the pivots, then assembling one by one, the lever control moved much better.
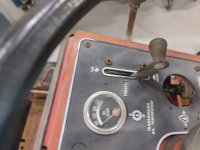
wh26.jpg

I now have full range of throttle control from idle.....
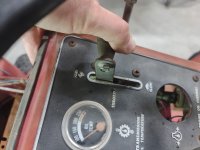
wh27.jpg

to fast as hell. :ROFLMAO:
wh28.jpg

I had to give the transmission linkage a similar treatment going pivot point by pivot point, until the lever on the dash would move the linkage for the swash plate on the transmission. Success. I have both forward and reverse directions and both seem to vary with throttle input. All good signs. Now I just need to get front tires, fix the spark plugs and I can put it on the ground and see if it moves under its own power.

If all seems to work at that point, I will change fluids, filters and play with it a bit before teardown. I do need to rig up a fuel reservoir. I have the OEM one, but it is pretty rusted through and needs a lot of work. I may just pick up a small universal tank for the time being.
wh29.jpg

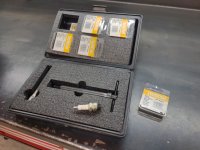
Also dug my spark plug repair kit out of the cupboard. I haven't had to use this in quite some time but it's gotten good use over the years.
wh30.jpg


I started looking at tire options last night, but damn, they're not cheap. I don't think the turf tread that is currently on the front will be the best for snow removal. I have read that the 3-rib style work the best for lateral control on snow, followed by the 5-rib style. On the farm on our larger tractors we pretty much ran the tri-rib design, but of course, when looking for the tire size I need and it not being one of the more popular sizes, the tri-rib are the most expensive. Just not sure I can justify the cost at nearly double the 5-rib design. Or better put, no, I cannot justify paying double for the tri-rib over the 5-rib. 😲

Thanks for looking.
 

larry4406

Well-known member
Joined
Jan 27, 2006
Messages
19,657
Location
Northern Virginia
Last night I put the deck back under the Toro ZTR, parked it and the Snapper walk-behind back in the attached garage, removed the battery from the ZTR as it will need to be replaced come spring and then hung the line trimmer and edger back on the wall and everything is ready for spring.
ope.jpg


I then went back to work on the Wheel Horse to see if I could pick up where I left off.

Now that I know it runs, I wanted to see if the transmission worked as that has been my worry all along. Before that I had to get the throttle linkage freed up as it was seized and didn't want to move and I didn't want to break or bend any of it by forcing it. I started at the carburetor by removing one pivot at a time, making sure that part moved and spraying a little Zep 45 on it, then moving on to the next pivot point.
wh24.jpg

Now that the linkage moves freely at the carburetor.....
wh25.jpg

it was time to turn my attention to the lever on the dash. This was the worst as far as being seized, but after removing the bolts and spraying some Zep 45 at the pivots, then assembling one by one, the lever control moved much better.
wh26.jpg

I now have full range of throttle control from idle.....
wh27.jpg

to fast as hell. :ROFLMAO:
wh28.jpg

I had to give the transmission linkage a similar treatment going pivot point by pivot point, until the lever on the dash would move the linkage for the swash plate on the transmission. Success. I have both forward and reverse directions and both seem to vary with throttle input. All good signs. Now I just need to get front tires, fix the spark plugs and I can put it on the ground and see if it moves under its own power.

If all seems to work at that point, I will change fluids, filters and play with it a bit before teardown. I do need to rig up a fuel reservoir. I have the OEM one, but it is pretty rusted through and needs a lot of work. I may just pick up a small universal tank for the time being.
wh29.jpg

Also dug my spark plug repair kit out of the cupboard. I haven't had to use this in quite some time but it's gotten good use over the years.
wh30.jpg


I started looking at tire options last night, but damn, they're not cheap. I don't think the turf tread that is currently on the front will be the best for snow removal. I have read that the 3-rib style work the best for lateral control on snow, followed by the 5-rib style. On the farm on our larger tractors we pretty much ran the tri-rib design, but of course, when looking for the tire size I need and it not being one of the more popular sizes, the tri-rib are the most expensive. Just not sure I can justify the cost at nearly double the 5-rib design. Or better put, no, I cannot justify paying double for the tri-rib over the 5-rib. 😲

Thanks for looking.
How do the thread inserts install while not letting any metal shavings/chips into the cylinder? I assume this is an in situ repair vs head removal.
 

PugetDude

ALLIANCE MEMBER
Joined
Mar 13, 2013
Messages
22,490
Location
Superstition Mountains, AZ
Always impressed by your thoughtful, methodical approach to problem solving, Mike.
I probably would have broken the cables, half of mounting brackets and at least one attachment point trying to unstick them.
While it often works, I have firsthand experience ( and empirical evidence) suggesting brute force and ignorance isn't always the best course of action...
 
Last edited:
OP
Z

zmotorsports

ALLIANCE MEMBER
Joined
Oct 20, 2009
Messages
21,495
Location
Northern Utah
How do the thread inserts install while not letting any metal shavings/chips into the cylinder? I assume this is an in situ repair vs head removal.

I coat the tools with grease and they catch the vast majority of the chips before they get into the combustion chamber. It sometimes requires removing, cleaning, reapplying grease several times but the key is stopping when the grease gets loaded with chips and cleaning. Works exceptionally well and I've never had an issue in all the years I've been doing them that way.

Granted, removing the head is the best alternative, but sometimes not the most convenient nor practical.
 
OP
Z

zmotorsports

ALLIANCE MEMBER
Joined
Oct 20, 2009
Messages
21,495
Location
Northern Utah
Always impressed by your thoughtful, methodical approach to problem solving, Mike.
I probably would have broken the cables, mounting brackets and attachment points trying to unstick them.

Thanks Scott. Oh trust me, in my younger years I broke a lot of **** due to being impatient and just diving into something ham-fisted. I hope to have overcome much of that as I have become more, let's say, "seasoned". Yeah, let's call it that. ;)
 

signcrafter

Well-known member
Joined
May 9, 2012
Messages
12,535
Last night I put the deck back under the Toro ZTR, parked it and the Snapper walk-behind back in the attached garage, removed the battery from the ZTR as it will need to be replaced come spring and then hung the line trimmer and edger back on the wall and everything is ready for spring.
ope.jpg


I then went back to work on the Wheel Horse to see if I could pick up where I left off.

Now that I know it runs, I wanted to see if the transmission worked as that has been my worry all along. Before that I had to get the throttle linkage freed up as it was seized and didn't want to move and I didn't want to break or bend any of it by forcing it. I started at the carburetor by removing one pivot at a time, making sure that part moved and spraying a little Zep 45 on it, then moving on to the next pivot point.
wh24.jpg

Now that the linkage moves freely at the carburetor.....
wh25.jpg

it was time to turn my attention to the lever on the dash. This was the worst as far as being seized, but after removing the bolts and spraying some Zep 45 at the pivots, then assembling one by one, the lever control moved much better.
wh26.jpg

I now have full range of throttle control from idle.....
wh27.jpg

to fast as hell. :ROFLMAO:
wh28.jpg

I had to give the transmission linkage a similar treatment going pivot point by pivot point, until the lever on the dash would move the linkage for the swash plate on the transmission. Success. I have both forward and reverse directions and both seem to vary with throttle input. All good signs. Now I just need to get front tires, fix the spark plugs and I can put it on the ground and see if it moves under its own power.

If all seems to work at that point, I will change fluids, filters and play with it a bit before teardown. I do need to rig up a fuel reservoir. I have the OEM one, but it is pretty rusted through and needs a lot of work. I may just pick up a small universal tank for the time being.
wh29.jpg

Also dug my spark plug repair kit out of the cupboard. I haven't had to use this in quite some time but it's gotten good use over the years.
wh30.jpg


I started looking at tire options last night, but damn, they're not cheap. I don't think the turf tread that is currently on the front will be the best for snow removal. I have read that the 3-rib style work the best for lateral control on snow, followed by the 5-rib style. On the farm on our larger tractors we pretty much ran the tri-rib design, but of course, when looking for the tire size I need and it not being one of the more popular sizes, the tri-rib are the most expensive. Just not sure I can justify the cost at nearly double the 5-rib design. Or better put, no, I cannot justify paying double for the tri-rib over the 5-rib. 😲

Thanks for looking.
That thing is going to be pushing snow before you know it Mike!

Tires seem to have gone way up over the years. Seems crazy but everything has gone way up so not sure if it just seems like tires have gone up more then other stuff or not.

I have an old Montgomery ward tractor with a blower and plow. It has turf style tires on it and the rear wheels have weights and chains. When plowing the front has little to no steering, it just goes which ever way it's pointed. I never thought about a tri tread type tire to get a little steering back. I'm going to have to look into them, Thanks for mentioning them.
 
OP
Z

zmotorsports

ALLIANCE MEMBER
Joined
Oct 20, 2009
Messages
21,495
Location
Northern Utah
That thing is going to be pushing snow before you know it Mike!

Tires seem to have gone way up over the years. Seems crazy but everything has gone way up so not sure if it just seems like tires have gone up more then other stuff or not.

I have an old Montgomery ward tractor with a blower and plow. It has turf style tires on it and the rear wheels have weights and chains. When plowing the front has little to no steering, it just goes which ever way it's pointed. I never thought about a tri tread type tire to get a little steering back. I'm going to have to look into them, Thanks for mentioning them.

Scott, don't get me wrong, I am not a tractor aficionado by any means. :bounce: I am learning as I go here but I did reflect back to pushing snow with my dad's tractor on the farm and remembered him saying the tri-rib were the best all-around tire for our applications, whether it being snow pushing or plowing in the field and he explained the reasoning. Funny the things we remember or recall from our youth that didn't seem to mean much at the time but mean a LOT when we can recall them later in life.

I have also been reading a bit on the redsquareforum and the wheelhorse forums over the past several weeks to familiarize myself a bit more with the tractor I have acquired. There are some real knowledgeable people on those forums and can be a bit intimidating. I thought about joining the forums and documenting my restoration project, but I don't want to make a fool of myself with all of that knowledge and experience on those forums and me just being a newbie to the Wheel Horse family. I do however, really like the fact that it is such a rare tractor and has such a strong following in the yard tractor community. Oh and by the way, do NOT call it a "lawnmower", it is a "yard tractor". Don't ask me how I now know that. :bounce:

I learned about the "roller chain mod" that many do to their "yard tractors" for wintertime traction and how effective of a mod it really is. Seems almost a no brainer looking at it now, but just imagine the first guy to think; "hey, what if I strap a roller chain around the center of my steer tire?" :dunno: But then again, thinking about the premise of the principle, it is the same as the tri-rib tire, only a less expensive option. I discounted that particular option right quick though because it can and will tear up a nice concrete driveway. :oops:


I also read something yesterday, or a question rather, that Albert Einstein posed; he pondered "if you had one wish to be granted, would it be to possess all of the knowledge of all things, or would it be the ability to pursue knowledge of all things?" :unsure: Hmmm, that REALLY got me thinking because although I think I know so much more than I did 20 or 30 years ago, or hell, even yesterday, but by learning more, I discover that there are so many more questions that I have and more to learn. I did a little more researching last night after dinner and talking with the wife and I think what Einstein's intent with his question was is the thrill of the hunt. Searching for answers if you will. He mentioned that most of the time "imagination is more important that knowledge" and then followed up by stating that "the source of true knowledge is experience". Both of these comments hit me hard, because when we stop to think how fortunate we are living in this day and age as far as information and how readily available information is today, this information that is now so abundant was not always there nor known. Someone at some point had to think it up, put it into action and either confirm or disprove the results. That is mind-blowing if you stop to think about it long enough.

Not quite sure where I was going with that other than to say I think he was on to something, because as much as I want answers to all my questions and I want those answers now, I really enjoy the search for such answers almost as much, if not more.
 

PugetDude

ALLIANCE MEMBER
Joined
Mar 13, 2013
Messages
22,490
Location
Superstition Mountains, AZ
Scott, don't get me wrong, I am not a tractor aficionado by any means. :bounce: I am learning as I go here but I did reflect back to pushing snow with my dad's tractor on the farm and remembered him saying the tri-rib were the best all-around tire for our applications, whether it being snow pushing or plowing in the field and he explained the reasoning. Funny the things we remember or recall from our youth that didn't seem to mean much at the time but mean a LOT when we can recall them later in life.

I have also been reading a bit on the redsquareforum and the wheelhorse forums over the past several weeks to familiarize myself a bit more with the tractor I have acquired. There are some real knowledgeable people on those forums and can be a bit intimidating. I thought about joining the forums and documenting my restoration project, but I don't want to make a fool of myself with all of that knowledge and experience on those forums and me just being a newbie to the Wheel Horse family. I do however, really like the fact that it is such a rare tractor and has such a strong following in the yard tractor community. Oh and by the way, do NOT call it a "lawnmower", it is a "yard tractor". Don't ask me how I now know that. :bounce:

I learned about the "roller chain mod" that many do to their "yard tractors" for wintertime traction and how effective of a mod it really is. Seems almost a no brainer looking at it now, but just imagine the first guy to think; "hey, what if I strap a roller chain around the center of my steer tire?" :dunno: But then again, thinking about the premise of the principle, it is the same as the tri-rib tire, only a less expensive option. I discounted that particular option right quick though because it can and will tear up a nice concrete driveway. :oops:


I also read something yesterday, or a question rather, that Albert Einstein posed; he pondered "if you had one wish to be granted, would it be to possess all of the knowledge of all things, or would it be the ability to pursue knowledge of all things?" :unsure: Hmmm, that REALLY got me thinking because although I think I know so much more than I did 20 or 30 years ago, or hell, even yesterday, but by learning more, I discover that there are so many more questions that I have and more to learn. I did a little more researching last night after dinner and talking with the wife and I think what Einstein's intent with his question was is the thrill of the hunt. Searching for answers if you will. He mentioned that most of the time "imagination is more important that knowledge" and then followed up by stating that "the source of true knowledge is experience". Both of these comments hit me hard, because when we stop to think how fortunate we are living in this day and age as far as information and how readily available information is today, this information that is now so abundant was not always there nor known. Someone at some point had to think it up, put it into action and either confirm or disprove the results. That is mind-blowing if you stop to think about it long enough.

Not quite sure where I was going with that other than to say I think he was on to something, because as much as I want answers to all my questions and I want those answers now, I really enjoy the search for such answers almost as much, if not more.
There is a difference between knowledge and wisdom.
Knowledge is knowing that a tomato is a fruit.
Wisdom is not putting it in a fruit salad.
 

larry4406

Well-known member
Joined
Jan 27, 2006
Messages
19,657
Location
Northern Virginia
I recently bought new rear tires for our Husky 54"garden tractor mower.

The originals were made by Carlisle and were Made In USA. Mower is circa 2001 time frame.

The jungle store carried them and said Made in USA. Great, 2 please. Upon receipt, there are stickers on them saying that Carlisle is now Carlstar, and you guessed it, the star means Red Star of China, as in Made in China.

There were many other made in china options at cheaper prices that I could have purchased. I just moved on and gave a poor review.

I think all of your new tire options will be from ROC.
 
OP
Z

zmotorsports

ALLIANCE MEMBER
Joined
Oct 20, 2009
Messages
21,495
Location
Northern Utah
I think all of your new tire options will be from ROC.

Unfortunately, that is what I'm discovering. Oh well, doesn't look like any other real option. I did see a company listed as Miller Tire that came highly recommended on the Wheel Horse forums, however, it isn't made in USA either, it appears to be manufactured in Vietnam and is over $100/per tire plus freight. Much more than I am willing to spend.

The turf save tires on it now are Carlisle branded tires but they are ancient and one has failed in spectacular fashion and I don't think the other is far behind it.


I was finally able to locate a 3-rib that is "somewhat" reasonably priced, at least within reason and similar in price to what I was looking to spend on a 5-rib style. I ordered two of them so will see how the quality looks once they arrive next week.
 

OutlawDrifter

Well-known member
Joined
Jan 20, 2015
Messages
3,905
Location
KS
Unfortunately, that is what I'm discovering. Oh well, doesn't look like any other real option. I did see a company listed as Miller Tire that came highly recommended on the Wheel Horse forums, however, it isn't made in USA either, it appears to be manufactured in Vietnam and is over $100/per tire plus freight. Much more than I am willing to spend.

The turf save tires on it now are Carlisle branded tires but they are ancient and one has failed in spectacular fashion and I don't think the other is far behind it.


I was finally able to locate a 3-rib that is "somewhat" reasonably priced, at least within reason and similar in price to what I was looking to spend on a 5-rib style. I ordered two of them so will see how the quality looks once they arrive next week.

Mike, for what it's worth I've had good luck with Miller Tire over the years. My old JD 318 that I parted with had 3-ribs from them...they weren't all that cheap 10+ years ago either. Sure was worth it in looks for the cool factor!
 
OP
Z

zmotorsports

ALLIANCE MEMBER
Joined
Oct 20, 2009
Messages
21,495
Location
Northern Utah
Mike, for what it's worth I've had good luck with Miller Tire over the years. My old JD 318 that I parted with had 3-ribs from them...they weren't all that cheap 10+ years ago either. Sure was worth it in looks for the cool factor!

Thanks Marc. I hadn't heard anything bad about them, they're just about double what I was hoping to spend. Yes, I found some less expensive ones, but won't have a verdict for a bit yet.
 

Swanny1953

ALLIANCE MEMBER
Joined
Jul 28, 2010
Messages
1,082
Location
Lucas, TX
Mike, not surprised at all you're finding the majority of your options are China/Taiwan/Indonesia sourced. While walking through the wheel & tire exhibits at SEMA, I was not aware there were so many international manufacturers. It was probably 90/10 international/domestic just based on company names and languages being spoken in the booths!!!
 
To avoid these ads, REGISTER NOW!
OP
Z

zmotorsports

ALLIANCE MEMBER
Joined
Oct 20, 2009
Messages
21,495
Location
Northern Utah
Mike, not surprised at all you're finding the majority of your options are China/Taiwan/Indonesia sourced. While walking through the wheel & tire exhibits at SEMA, I was not aware there were so many international manufacturers. It was probably 90/10 international/domestic just based on company names and languages being spoken in the booths!!!


Gary, I figured that there were not many US made options but I wouldn't have guessed the ratio would have been that far biased. I'm saddened, but I shouldn't be surprised by that though.
 
OP
Z

zmotorsports

ALLIANCE MEMBER
Joined
Oct 20, 2009
Messages
21,495
Location
Northern Utah
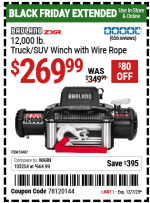
@zmotorsports - You may have already seen this but, with the coupon, the 12000 is cheaper than the 9500.

1764993477459.png


Thank you. I hadn't seen that actually. It won't be until after the first of the year until I get the trailer in the shop so I haven't been actively looking to purchase the winch quite yet. I figured it would be one of the easier items to source when the time comes, but at that price I may have to do some thinking. :unsure:

I've purchased some of the items needed such as the HPU, battery box, additional 6k pound swivel D-rings and am looking at tongue boxes. Trying to spread out my purchases at the moment.

Thank you.
 

PhantomEB

Well-known member
Joined
Feb 6, 2006
Messages
6,858
Location
Medicine Hat, AB, Canuckistan
I had the wife order them from the jungle. Looks like the price jumped up a bit over the past couple of weeks though.

Here are the ones I went with, a 4-pack of the TireShield Pro's.
Added to my cart! Actually need a couple sets as I want to put the trailer spare tire as well the spare tire for the truck on the front of the trailer above my Superwinch 12000, which I also run on the front of the bronco.

need to replace the solar panel on top of the tongue box that holds the battery/tie down chain/load binders.

other trailer plans are to run Aux beam LED pods next to the winch as well under carriage.

I plan to roll down the highway looking like I am possessed on a cloud of red, just like my Ram3500 will be decked out similar. SEE AND BE SEEN!
 
OP
Z

zmotorsports

ALLIANCE MEMBER
Joined
Oct 20, 2009
Messages
21,495
Location
Northern Utah
I hope everyone had a great weekend as we are into the last month of the year.

I was able to meet my son and grandson for our Saturday breaking bread ritual that I am growing accustomed to. I love our boy's breakfast.

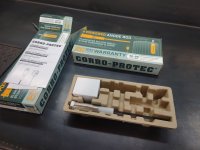
The wife and DIL were going to a Christmas boutique so after breakfast and while the wife wasn't home I decided to kill the water in the house and replace the anodes that I have been wanting to do for a couple of months now, but just haven't made the time. I opted to try the electric version as I have heard good things about them and they've been sitting on the shelf for a couple months now.

water1.jpg

After turning the water off, gas off and draining a few gallons out of each water heater, I removed the anode from the hardest one to reach. Neither of which are hard to get to in my equipment room, but this one is closest to the wall and I have to reach over the accumulator. As I removed it I could see the sacrificial material missing on much of the rod.
water2.jpg

New one installed after applying some thread sealant. Next was to connect the electrical connection and ground it to the exterior. Once they were both installed and wires ran, I zip-tied the wiring and used a surge protector at the bottom of the wall to connect, this way either the wife or I can see at a glance if the lights are on when going downstairs.
water3.jpg

Both anode rods were deteriorated to about the same degree. Not completely used up, but on their way there.
water4.jpg


As I was finishing up the anode project, turning the water back on and bleeding the air from the hot water for when the wife arrived home, I heard the big brown truck pull up.

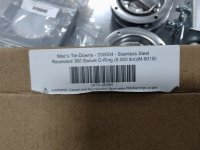
For those of you who followed along on my previous shop projects thread, you will know my love for Mac's Tie Downs and their products. I have used them ever since they opened their doors in the mid-90's as their products are second to none and relatively close as they are manufactured in Idaho, north of us. I used them to haul our race car/street rod, all our sand toys, snowmobiles and Harleys whether on open trailer or in our enclosed trailers. I have multiple versions of their tie downs, including their 10k super strap ratchet kit, axle straps, and motorcycle tie down sets and all have performed flawlessly over the years. I even have their 2" receiver hitch style of vise that I carry in the Jeep for those trail repairs.

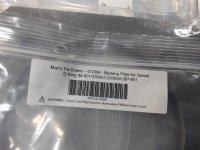
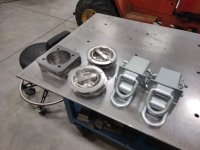
When we purchased our new 26' Haulmark Edge race trailer in 2008 I replaced the cheaper 6k pound swivel D-rings with the Mac's D-rings as well as various sections of E-track and other accessories in the trailer. I wanted to do the same thing here. Although my new trailer already came with 6k pound swivel D-rings, I wanted to add a few more, plus I really prefer the ones from Mac's. I am going to replace the ones already in the trailer with these new Mac's stainless steel ones as they will more than likely be the most used, and then move the ones that came with the trailer to different locations on the deck of the trailer for more tie down point options. I also purchased their backing plates for all 8 flush mount D-rings as well as a few slip in pocket tie-downs for other options.
macs1.jpg

macs2.jpg

macs3.jpg

macs4.jpg

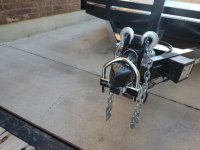
Also my new trailer tongue lock arrived.
trailer1.jpg

So I installed it while I was outside.
trailer2.jpg


Thanks for looking.
 
OP
Z

zmotorsports

ALLIANCE MEMBER
Joined
Oct 20, 2009
Messages
21,495
Location
Northern Utah
After finishing up outside and with the water heaters in the house, I went out to the shop to get to work on the Wheel Horse until the wife came home.

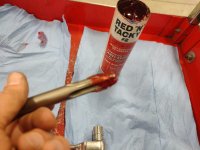
I commenced the spark plug thread repair by liberally coating the Helicoil tap with grease to catch the shavings.
wh31.jpg

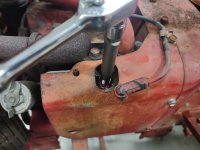
Threading the new threads for the Helicoil insert.
wh32.jpg

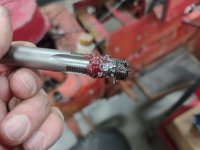
Here you can see all of the shavings captured by the grease.
wh33.jpg

The grease does a great job to hold the shavings to keep them out of the cylinder.
wh34.jpg

Here you can see just a little grease around the outside of the hole and just a few shavings stuck in grease around the inside of the threaded hole. These can easily be removed with a small screwdriver as the shavings and grease will stick to the screwdriver blade as it is run around the perimeter of the threads.
wh35.jpg

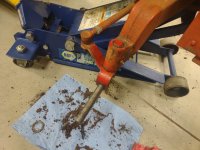
Once the grease and shavings are removed from the inside of the hole, I use an old broken off drift punch that is near the size of the spark plug threads and put a couple wraps of electrical tape around it so create a tight seal in the spark plug hole.
wh36.jpg

Then insert to get a tight seal and spray with some brake wash and compressed air to remove any remaining grease and/or shavings from the exterior of the cylinder head.
wh37.jpg

Nice and clean.
wh38.jpg

Next, I prep the insert by choosing the correct one based on the reach needed.
wh39.jpg

Inserted into the outer sleeve of the tool.
wh40.jpg


Stay tuned for more pictures.
 
OP
Z

zmotorsports

ALLIANCE MEMBER
Joined
Oct 20, 2009
Messages
21,495
Location
Northern Utah
Continuing on.

The tool placed perpendicular to the spark plug bore and the insert installed into the hole until the outer sleeve is loose from the insert. Then the insert is turned just enough that the first of the threaded insert is just below the surface of the head. You can see the wear on this particular tool from years of use. This was a good investment many years ago and has been heavily used over the years.
wh41.jpg

Once the insert is fully installed, the tang will be visible and in need of removal.
wh42.jpg

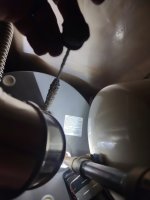
During many Helicoil installs this is usually just tapped with a punch and broken off, but being in a cylinder bore, I prefer to grab these with some needle nose pliers to remove.
wh43.jpg

I simple rock back and forth and it breaks right off and can be removed without worry of it dropping into the cylinder.
wh44.jpg

Thread repair complete.
wh45.jpg

Spark plug installed and torque to spec and this side is completed.
wh46.jpg

Moved on to the other side and lather, rinse, repeat.
wh47.jpg

wh48.jpg

Now both are completed and that can be marked off the list.
wh49.jpg

If anyone is interested, here is the part # for the master kit. Keep in mind a master kit really isn't necessary, a one size spark plug thread repair can be purchased with a single reach size of insert. I purchased the master kit about 30+ years ago as I found myself needing a variety of inserts and I had a Lawson rep at the time that was freaking awesome. He made me a really good deal on multiple Helicoil master sets so it was worth it in the long run.
wh50.jpg


Stay tuned for more work on the Wheel Horse from Saturday.
 
OP
Z

zmotorsports

ALLIANCE MEMBER
Joined
Oct 20, 2009
Messages
21,495
Location
Northern Utah
Continuing on.

With new tires on their way, I thought I'd remove the front tires/wheels and begin to clean, inspect and prep the spindles. This is another area in which I have read that these Wheel Horse tractors have a high failure rate, the spindle bores in the axle. I really didn't inspect these before purchasing as I was raining quite hard when I bought this and had no way to raise the front end so I kind of rolled the dice here. My thinking was worst case, I have a full machine shop so if I need to remove the front cast iron axle to put it in the mill and bore the damaged spindle bores out and then make new bushings it wouldn't be beyond my shop's capabilities. Fortunately, after raising the front end and removing the front tires and wheels, I discovered they were actually in good condition. But they needed some serious cleaning as the grease was caked on there and pretty hard.
wh51.jpg

A little TLC and the spindle and axle cleaned up quite nicely.
wh52.jpg

Then I did the same on the other side.
wh53.jpg

Mess swept up.
wh54.jpg

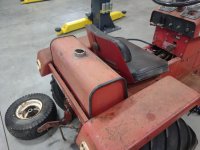
With the wife still not home yet, I turned my attention to the fuel tank. I had tried to remove as much as the corrosion from the inside as I could a few night ago by shaking and tapping on the corners and sides. Even after most of the debris was removed, I wanted to make sure it was salvageable so I capped it off and poured some vinegar into the tank to try to remove the last of the corrosion. While I was working on the water heaters, I had removed the vinegar and flushed it multiple times with water and set outside in the sun to dry.

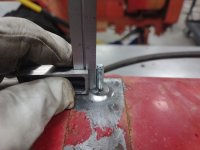
With the tank dry, I began to prep and plan for the stud replacement. Originally there were four studs that went through a strap which was welded to the tank's exterior. Three of the four studs were broken off and the one remaining was in sad condition. I removed the one remaining stud and prepped the four areas for new studs to be welded on, rather than trying to remove the strap that was spot welded to the bottom of the tank.
wh55.jpg

Once the tank was prepped and I was ready to begin tacking the new studs on, I wanted to ensure there were no vapors remaining in the fuel tank. I felt pretty confident that I was going to be fine as the tank hadn't seen fuel for over a decade according to the person I bought the tractor from. But still, whenever welding on fuel tanks I like to trust but verify. Standing back and waving an open flame over the opening confirmed that there are no remaining vapors.
wh56.jpg

I cut four 5/16"-18 x 1-1/14" bolts off at the shoulder so there was just a little shoulder remaining in which to weld to the bottom of the tank. I spot welded them in place.
wh57.jpg

Making sure they were perpendicular to the base of the tank.
wh58.jpg

Test fitted the tank to ensure I had the bolts aligned properly before final welding.
wh59.jpg

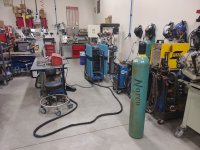
As I was tacking the last bolt, it began to sputter and spit. I knew I was getting very low on argon, but I like to use as much of the bottle as possible and to avoid wasting any. Well, I ran it right to empty, so I ran out of gas before I could finish for the day.
wh60.jpg


It was perfect timing however, as I was removing the bottle from my welder so I could swap it out on Monday afternoon, the wife arrived home so it was the perfect time to close up the shop as we had some Christmas shopping to do.


Thanks for looking.
 

signcrafter

Well-known member
Joined
May 9, 2012
Messages
12,535
Mike, when you get some time I'd be interested to hear your opinion on different types of thread repair kits like helicoil and time sert etc. I've done a little reading and I vaguely remember you talking about them in a post a while back, I think it was you but it may not have been and I couldn't find it. I know when I was researching ford spark plug blow outs in modular engines the helicoils didn't get much love. The cal van kit was the standard for that repair. It's been a while but if I remember correctly the helicoils were known to fail again in those engines so I just went with the cal van kit. I don't have much experience but have done some thread repairs. Spark plug threads in those ford 5.4s, one in a honda fit and one in a jeep with m12 threaded plugs. Have done a few other repairs in things like valve cover bolt holes someone over torqued the bolt in an aluminum head. I'd like to increase my knowledge on these things if you have the time. Thanks.
 
OP
Z

zmotorsports

ALLIANCE MEMBER
Joined
Oct 20, 2009
Messages
21,495
Location
Northern Utah
Great progress on the tractor Mike!

Looking forward to seeing it in action, I can only imagine how excited your grandson will be riding along and learning how to plow!

Thanks Mike. Yeah, he's enjoying playing on it so far. I brought him out to the shop yesterday after brunch and he played on it a little. I think it will be a fun project and something he can drive as he gets older.
 
OP
Z

zmotorsports

ALLIANCE MEMBER
Joined
Oct 20, 2009
Messages
21,495
Location
Northern Utah
Mike, when you get some time I'd be interested to hear your opinion on different types of thread repair kits like helicoil and time sert etc. I've done a little reading and I vaguely remember you talking about them in a post a while back, I think it was you but it may not have been and I couldn't find it. I know when I was researching ford spark plug blow outs in modular engines the helicoils didn't get much love. The cal van kit was the standard for that repair. It's been a while but if I remember correctly the helicoils were known to fail again in those engines so I just went with the cal van kit. I don't have much experience but have done some thread repairs. Spark plug threads in those ford 5.4s, one in a honda fit and one in a jeep with m12 threaded plugs. Have done a few other repairs in things like valve cover bolt holes someone over torqued the bolt in an aluminum head. I'd like to increase my knowledge on these things if you have the time. Thanks.


Scott, I remember a few years ago I think you asked a similar question pertaining to my thought on Helicoil vs. others. Rather than rehashing my opinion, I found the thread and copied it here.


Mike, what's your opinion on helicoils vs timeserts? I've heard of helicoils failing so try to use timeserts when I need to do a thread repair. I just did a ford 5.4 blown out plug repair that had been fixed once years ago with a helicoil and that didn't hold. Just curious if they get a bad rap from user error or something else since I know you do your homework and wouldn't be using them if they were an issue.

Scott/Anders, I very much appreciate you guys following along and asking questions as this exchange turns into more of a discussion vs. me just posting pictures of work. That way I feel we all learn, me especially.

I can't remember who asked a similar question a couple of years ago, I think it was graham08 but not sure.

Anyways, I have used a variety of Helicoils, Keenserts and Timeserts in my 35+ years of wrenching now. I have had great success and some failures with all three as well. At work back in the 90's we had a vendor come in and demonstrate Keenserts and my boss at the time was sold on them and ordered a full set with all of the required tools and a metric ****-ton of inserts in a variety of sizes. That was pretty much all I used at work for quite a few years but then started using Helicoils at my home shop, mainly because they were less expensive as it was hard to charge a client for a one-off repair for a $100+ Timesert kit vs. a $40 Helicoil kit. However, after using the Helicoils for a while and having a high success rate, I ended up ordering several of the larger Helicoil master sets that included taps, insert tools and inserts for a range of fasteners and have just purchased additional inserts as needed over the years of use. Even to this day I have had very few Helicoil failures and those that did fail were after heavily repeated uses. I have actually had more Keensert failures than Helicoil failures to be honest.

For several years I looked at it as Helicoils were my first stage repair and the solid insert (Keensert or Timesert) were what I went to as a second stage repair. What I mean by that is the Helicoil was at least as strong as the OEM fasteners and the parent material so I looked at it that if the parent material did what it was designed/engineered to do for a while then the Helicoil would do a better job. I also liked that the Helicoil removed less of the parent material and as you know on many of the motorcylce cases, there is not much material left around even a factory drilled and tapped hole, so I didn't want to go any larger than absolutely necessary. In some of those applications there would be no way to remove enough material for a solid insert to be used without rendering the case useless. Also, I would look at some applications whereas the hole was so damaged and so enlarged that I didn't feel a Helicoil would have enough parent material to grab so I would use a Timesert or Keensert as the only possible repair.

When I was building 2-stroke race engines I used a lot of Helicoils. At some times in some applications where I knew they were prone to failing I would drill and install a Helicoil as a preventive measure knowing that even though the threads were fine while it was in my shop, the threads would fail rather soon when pushing more cylinder pressure when trying to double the horsepower output, so it was a preventive measure.

During all this was when I got into building VW engines where I started purchasing hi-po VW cases from Pauter Machine that had the machine work already done. They bragged in their literature and even on the phone that they installed Timeserts in the common failure points around the cases for better clamping force. I figured hell, if a well known machine shop was using them they must be better than Helicoils so I purchased a couple of the more common sizes to have on hand in the shop. For the applications I used them in they worked fairly well but I avoided their use in situations where I felt the parent material would be weakened too much by the size of the solid insert. I did like the Timesert a bit more than the Keensert to be honest. My thinking was, and I am not sure how accurate this is as I'm just a mechanic and not an engineer, that the Timersert would be stronger than the Keensert solely due to the threaded engagement being a stronger mechanical bond and more surface area vs. the staked sides of the Keensert. The failures I had from the Keenserts were mostly due to the stakes failing and allowing the insert to bang around and damage the threads and then fail whereas I felt the Timesert maintained a more constant and solid bond with the parent material. Not very scientific however, just an observation from various failures. Also keep in mind these were on things like gearboxes, electric motor mounts, hydraulic ram mounting and other industrial pieces of equipment that see much more adverse conditions than anything automotive would encounter.

So after many years of Helicoils being my first stage repair I have had exponentially more successes than I have failures with them. Then a couple of years ago I stumbled across Rob Wendland's YouTube channel. Rob Wendland is Terry McMillen's crew chief and has extensive knowledge in racing and has some cool videos of various projects that come through his shop. One of his videos in particular caught my attention a couple/few years ago and that was specific to Helicoils vs. Timeserts. I can't remember but it was titled something like Helicoil for the win or something to that affect. Anyway in the video he did side by side comparisons using a new insert for each test and creeping up in torque value until the inserts would fail. The Helicoil held much longer than the Timeserts. If memory serves the Timeserts were failing around the 60 ft/lbs. with 3/8"-16 fasteners whereas the Helicoil blew past that. He then started using the same Helicoil insert for multiple tests and kept going up past 90 ft/lbs. What drove this test was he was having some failures and set out to do some side by side testing using controlled parameters and even made some alterations near the end of his testing to the process used to install the Timeserts.

In all of his early tests the Helicoils held up substantially better than the Timeserts. The Timeserts were failing much sooner than the Helicoils when installing in exact materials and under the same circumstances. Near the end of his testing he was pushing the 3/8-16 inserts well beyong their normal operating range of around 38-42 ft/lbs. He was pushing them to over 100 ft/lbs. and the Helicoils were holding, he actually had a bolt yield at just over 100 ft/lbs. yet the Helicoil insert was still holding fine after about 10 uses and the Timesert failed around 80 ft/lbs. (if memory serves).

Then the last test he did he decided to drop the drill bit size required by the Timesert by approx. .020". He stated the undersize drill bit did create a bit more drag on the lip cutting tool for the Timesert insert and the tap but after forcing his way through the increased friction of the installation and then going through the thread forming procedure with the last tool that the Timesert finally surpassed the Helicoil and failed around 123 ft/lbs where the standard Helicoil actually failed around 105 ft/lbs.

So after all that work and modifying the installation process the Timesert finally surpassed the Helicoil but at nearly 3 times the torque that you would normally tighten a 3/8" fastener to and in which one would be stepping to a larger size fastener when it came to those torque values.

Sorry for the long answer to what quite possibly was a quick question, but I've put a lot of thought into these thread repair inserts over the years and although not as extensive testing and proving as Rob did, I came to the conclusion that the Helicoil in most applications will provide more than adequate holding strength. That being said, I have seen failures due to sloppy installations so for that the failure really can't be blamed on the insert. Most of the Helicoil failures I have seen were from previous repairs where I feel the installer either did not sink that first coil of the Helicoil below the surface far enough or break the tang off in the bottom of the hole. I like to go at least a full thread and two if possible below the surface to ensure the fastener won't grab that first coil and pull it up out of the hole and to be sure to break the tang off so it doesn't try to drive the insert down further into the hole or "stretch out" the Helicoil insert in the threaded bore.
Short answer, I generally use Helicoil inserts these days as I feel they provide much more strength than the original material.


I will also include the videos that Rob Wendland posted to his YouTube channel that I was referring to as he can explain it better than I.


Thanks.

OK, so that was bugging me when I quoted Rob Wendland's Helicoil vs. Timesert testing so I had to go back and find those couple of videos to ensure I wasn't misquoting or repeating erroneous information.

Here are the first couple of videos (shorts) that caught my attention a few years ago and led me to his channel.

First one titled Helicoil is winning. WTF?

Second one titled Helicoil taking the win.

Here is the final video he did on the series where he made the Timesert better where it outperformed the Helicoil, finally.
 

signcrafter

Well-known member
Joined
May 9, 2012
Messages
12,535
Scott, I remember a few years ago I think you asked a similar question pertaining to my thought on Helicoil vs. others. Rather than rehashing my opinion, I found the thread and copied it here.


I will also include the videos that Rob Wendland posted to his YouTube channel that I was referring to as he can explain it better than I.


Thanks.
Thanks for finding that Mike. I thought you had posted something but i couldn't remember and couldn't find it when I searched. Sorry I think my memory is starting to go.
 
OP
Z

zmotorsports

ALLIANCE MEMBER
Joined
Oct 20, 2009
Messages
21,495
Location
Northern Utah
Thanks for finding that Mike. I thought you had posted something but i couldn't remember and couldn't find it when I searched. Sorry I think my memory is starting to go.

No problems Scott. I knew I had posted something in the past and remembered Rob Wendland's videos that I posted, I just couldn't remember where or how long ago.

Hope those help to answer your questions, about where I stand anyways.

As specific to the Triton engines, I also have the Cal Van kit that I used on those engines. Fortunately, I haven't had to break that out in quite a while as I haven't had to do one of those for several years now.
 

signcrafter

Well-known member
Joined
May 9, 2012
Messages
12,535
No problems Scott. I knew I had posted something in the past and remembered Rob Wendland's videos that I posted, I just couldn't remember where or how long ago.

Hope those help to answer your questions, about where I stand anyways.

As specific to the Triton engines, I also have the Cal Van kit that I used on those engines. Fortunately, I haven't had to break that out in quite a while as I haven't had to do one of those for several years now.
Thanks Mike that was a nice refresher. I too remembered something but couldn't find it. I will watch those videos tonight.

It's been a couple years since I did a triton also but they are still running around and every now and then I get one in.
 

mattthemuppet

Well-known member
Joined
Dec 9, 2023
Messages
245
Location
San Antonio TX/ Spartanburg SC
interesting to see the helicoil STI tap with a threaded guide region at the tip to match the original threads. Clever way of making sure the tap goes in straight (and presumably cuts the existing thread a little deeper) if some existing threads remain. Never seen that before - all my STI taps are a single diameter
 

larry4406

Well-known member
Joined
Jan 27, 2006
Messages
19,657
Location
Northern Virginia
interesting to see the helicoil STI tap with a threaded guide region at the tip to match the original threads. Clever way of making sure the tap goes in straight (and presumably cuts the existing thread a little deeper) if some existing threads remain. Never seen that before - all my STI taps are a single diameter
I had to go back and find the picture of the tap to understand what the heck you were talking about!

That is clever!

1765230384785.jpeg
 
OP
Z

zmotorsports

ALLIANCE MEMBER
Joined
Oct 20, 2009
Messages
21,495
Location
Northern Utah
I had to go back and find the picture of the tap to understand what the heck you were talking about!

That is clever!

1765230384785.jpeg

Yes, it uses the remaining original threads to start the tap straight and then transitions into the new threads with the lead in taper. Works well and does not require predrilling the hole to size first.
 

larry4406

Well-known member
Joined
Jan 27, 2006
Messages
19,657
Location
Northern Virginia
Yes, it uses the remaining original threads to start the tap straight and then transitions into the new threads with the lead in taper. Works well and does not require predrilling the hole to size first.
Looking at that tap, for thin materials, I can see it loosing register as it transitions thru the taper.
 

ntsqd

Well-known member
Joined
Jan 22, 2005
Messages
1,002
Location
Lower left coast
The double thread sizes on the tap caught my eye too. The thin section concern is valid, but given that it is likely made specifically for repairing spark-plug holes I doubt it's an issue.
Looked up that kit's p/n on Amazonian Car Hobbyist Supply and holy smokes those aren't inexpensive!

A page or three back we were talking about the trailer and I recalled that Mac's had a nifty E track option so I went looking it for it. NLA, it was a flush mounted E track that was carefully made to be the same dims as decking timber so that you could simply replace one section of decking with it. In the process of looking for that I discovered that Mac's is no longer in Idaho. They are now in Illinois. I have to say that I'm a little disappointed about that.

https://www.macscustomtiedowns.com/contactus.aspx
 
Last edited:
To avoid these ads, REGISTER NOW!
Top Bottom