To avoid these ads, REGISTER NOW!

Two car garage, the journey begins.

abrahamfh

Well-known member
Joined
Jun 6, 2010
Messages
111
Location
Union City
Good evening everyone, I have been wandering the forum for some time now and have finally gotten off my **** and figure it was time to get her done.

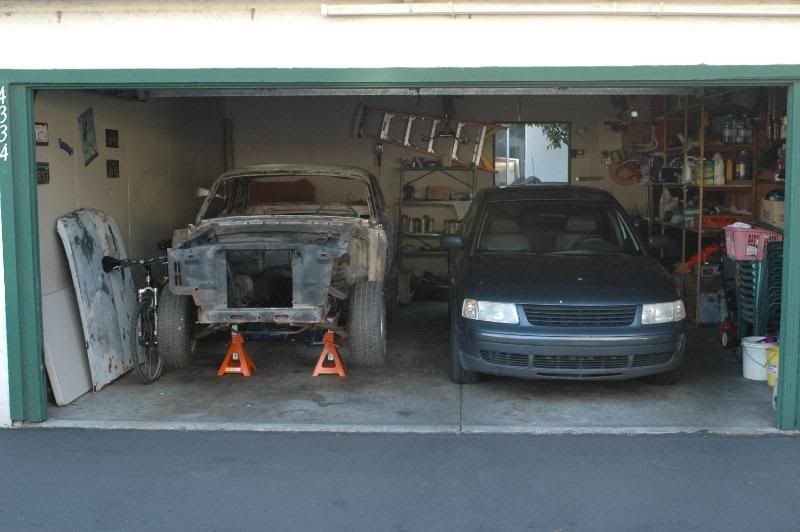
I am currently restoring a 65 Mustang and when I brought in my new 40 pound blast cabinet and 60 gallon air compressor it forced me to move some things around which kind of kick started everything.

Here is the mess! :scared:
DSC_2893.jpg


DSC_2894.jpg


DSC_2895.jpg


DSC_2898.jpg


DSC_2899.jpg


DSC_2900.jpg


I must send out a huge thank you to Jack who has inspired most of the ideas that I have floating around in my head and that are getting drawn out in AutoCAD. Unfortunately my building skills are not that great, I have never built anything out of wood or metal so all of this stuff are firsts for me.
 
To avoid these ads, REGISTER NOW!
OP
A

abrahamfh

Well-known member
Joined
Jun 6, 2010
Messages
111
Location
Union City
If anyone during my little journey of mine has a better way of doing something please please do not hesitate to throw out the ideas.

Even if I have already done something everything and anything can always be redone.
 
OP
A

abrahamfh

Well-known member
Joined
Jun 6, 2010
Messages
111
Location
Union City
This kick started all the moving around of stuff and to finally get moving on getting the garage all PERDY. LoL

45ed7932.jpg


The night began by organizing the existing storage that I have. A lot of stuff got thrown away and the stuff that stayed were organized by caterogry, for examplet; gardening, paint, camping, and so forth.

26fca3bc.jpg


The shelves will be painted fjord blue as will anything I do in the garage that should be painted.

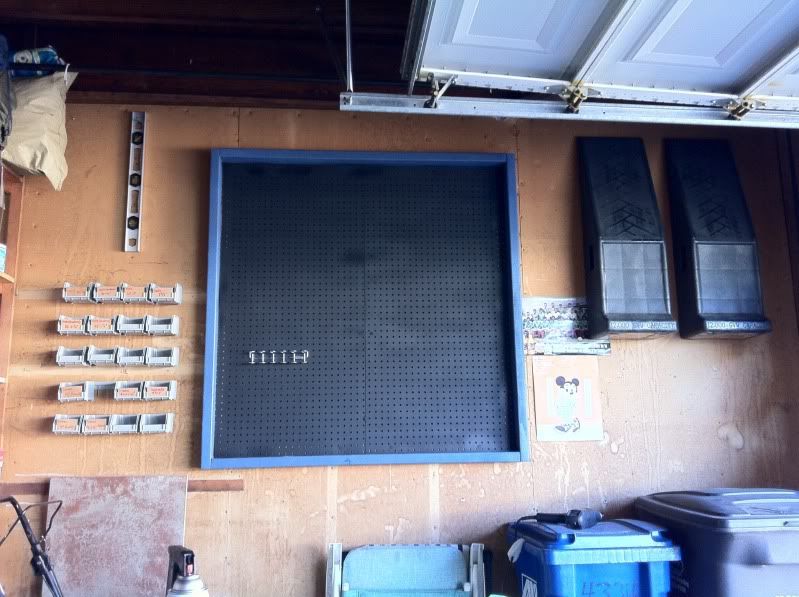
I really would like to get as much stuff as I can off the floor, so I hung up the shovels, folding sawhorses and the cars rhino ramps.

c2589106.jpg


I then took down some of the unsafe shelves along the wall and figured it would be a good use of space by putting up some nut and bolt organizing tubs. I really don't like what I did so if anyone has any suggestions I would really appreciate it.

3aae8302.jpg


After that I started to build the frame for my pegboard. I figured I would use two by fours along with some one by twos along the interior to hold the peg board out to avoid being flush with the wall and use the one by twos also to screw into the studs to hold it all up.

9d4ac8ba.jpg


66aae069.jpg


11603c12.jpg


9a8e3841.jpg


fef8dead.jpg


38e3c1b8.jpg
 
Last edited:
OP
A

abrahamfh

Well-known member
Joined
Jun 6, 2010
Messages
111
Location
Union City
I understand that garden tools have no business being in the garage so any shovels brooms rakes that you see will end up in a standing two foot wide by four foot deep by seven foot high shed next to the house. I don't have a lot of room living in a town home but trying to work with the space as much as I can.

Tonight I am going to start trying to figure out the overhead storage issue and start building tomorrow so I can store some things like the Mustangs fenders and what not. I don't think I can build anything with the weight capacity to store the doors but if anyone has any ideas I am up for anything.

After the overhead storage I am going to start working on the wall mounted metal tire rack I am going to build with some old bed frame I have laying around.
 

v7guy

Well-known member
Joined
Jun 7, 2009
Messages
557
Location
Hudson valley, NY
it looks like you're moving in the right direction.
I would suggest painting any wall that isn't a light color, it will really help visibility.
Also you may want to check this thread, there are a lot of really good cheap/free ideas there.
This thread is also pretty good.
 
Last edited:
OP
A

abrahamfh

Well-known member
Joined
Jun 6, 2010
Messages
111
Location
Union City
it looks like you're moving in the right direction.
I would suggest painting any wall that isn't a light color, it will really help visibility.
Also you may want to check this thread, there are a lot of really good cheap/free ideas there.
This thread is also pretty good.

Very cool thread, a lot of great ideas, thanks Jason "v7guy".

I think I am almost done with the design of the overhead storage on AutoCAD but I'm getting tired and need to catch some ZZzz's. I sure did learn a lesson with building the pegboard frame, design and plan thoroughly, measure as many times as it takes so you only have to cut once. LoL

Think I might stop by Harbor Freight and pick up one of these for all my spray paint cans.

http://www.harborfreight.com/hanging-tool-cabinet-39213.html

Not completely sold on it yet, only due to needing to see it in person so I can figure out what else can be kept inside of it.

Goodnight
 
Last edited:

Keep

Well-known member
Joined
Jan 1, 2009
Messages
1,398
Location
Oshawa, Ontario
I would suggest painting all the walls white. Pull everything off the walls, paint em white, then start putting things back.

You seem to be wasting space with the spacing of your items. I did the same at first, now everything is close together, its amazing how much more stuff you can fit if you close up the gaps.

For instance, if you moved your ramps up and closer together you can fit all your bolt bins, and then some, under them freeing up all the room.

Don't worry, you will change the layout a few times before you settle on the one you like.
 

vlpronj

Well-known member
Joined
Nov 28, 2008
Messages
263
Location
Wharton State Forest, NJ
Just a thought-

If you're going to frame out your pegboard nicely like that, why not see if you can make a shallow cabinet instead of a frame (for items like... spray paint cans?) and use the pegboard as doors, that can also hold lightweight items.
 
OP
A

abrahamfh

Well-known member
Joined
Jun 6, 2010
Messages
111
Location
Union City
I would suggest painting all the walls white. Pull everything off the walls, paint em white, then start putting things back.

You seem to be wasting space with the spacing of your items. I did the same at first, now everything is close together, its amazing how much more stuff you can fit if you close up the gaps.

For instance, if you moved your ramps up and closer together you can fit all your bolt bins, and then some, under them freeing up all the room.

Don't worry, you will change the layout a few times before you settle on the one you like.

Good idea with the painting the wall white. It does look funny having 1 out of the 3 walls not painted white. LoL

I was thinking about moving the shovels out to the shed as soon as I build it and put the ramps where the shovels are. I agree with you completely and didn't really think about how much space I am wasting by spreading everything out so much.
 
OP
A

abrahamfh

Well-known member
Joined
Jun 6, 2010
Messages
111
Location
Union City
Just a thought-

If you're going to frame out your pegboard nicely like that, why not see if you can make a shallow cabinet instead of a frame (for items like... spray paint cans?) and use the pegboard as doors, that can also hold lightweight items.

Believe it or not, the framed pegboard started out with the idea of doing just that, a cabinet with pegboard doors. LoL! One thing lead to another and I ended up with a framed pegboard. :lol_hitti
 

Coolabah

Well-known member
Joined
Jun 6, 2010
Messages
1,378
Location
2nd Floor, 3rd on the Right,Narooma, Australia
I was thinking about moving the shovels out to the shed as soon as I build it.......snip.....

I started off doing the same thing- trying to find a place for the garden stuff "before I built the shed" then quickly realised that I would THEN have to AGAIN reorganise the garage. My solution ? Put all the "shed" stuff in a pile in a corner for the time being or else outside under a tarpaulin etc , then organise the garage ONLY with garage stuff. Advantages: 1/ So my wife instantly recognised that I needed that shed after all -heck where else was all this stuff to go ? 2/ you can better organise the actual garage/shop closer to its final incarnation.

Worked for me , anyway ! BTW The garden shed is more useful than I first realised- now also used for all the explosive kind of stuff- gasoline, lp gas cylinders, acetone- heck if it all blows it is better off only taking out the shed, the petunias, and that irritating possum that lives in the tree above the shed (note to any animal activists: joking about the tree) ....
 

28HopUp

Well-known member
Joined
Mar 16, 2010
Messages
295
Location
Lowcountry SC
Good idea with the painting the wall white. It does look funny having 1 out of the 3 walls not painted white. LoL

I was thinking about moving the shovels out to the shed as soon as I build it and put the ramps where the shovels are. I agree with you completely and didn't really think about how much space I am wasting by spreading everything out so much.

You're making nice progress. Having a shed will definitely help with your garage organization. It's very helpful to place seldom used items in other locations (shed, basement, under the deck, garage sale pile, the dump, etc). Then you can tweak the layout of the items that need to be in the garage.

Thanks for the pics - nice Stang too!
 
OP
A

abrahamfh

Well-known member
Joined
Jun 6, 2010
Messages
111
Location
Union City
First thing is first I guess, I got no tunes to do any of this work with. BLAW!

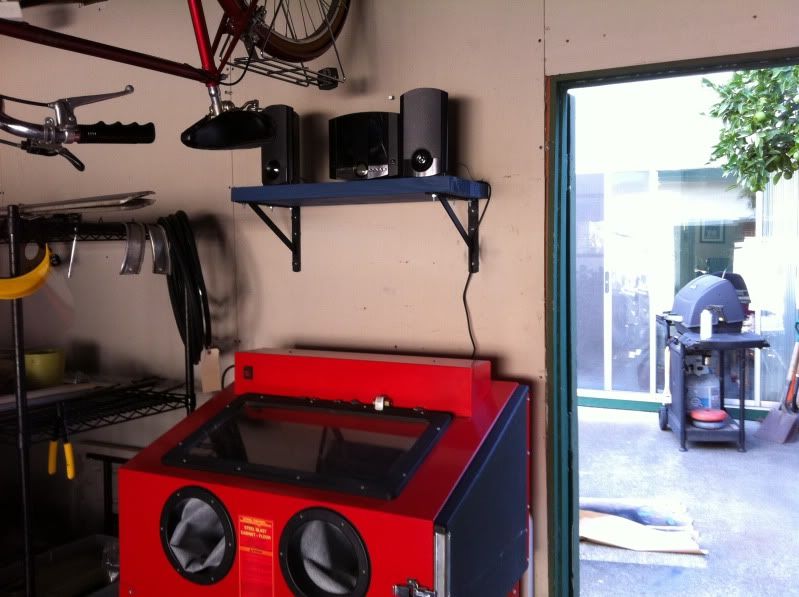
Decided to chop up a piece of 2x6 to make a shelf for the little stereo I picked up on clearance at Walmart (it was on my way home from Home Depot, I can't help if it was convenient). LoL

0f9d4edb.jpg


It's hard to see it in the photo but its nothing special, just something to make noise in the background.

As you can see the shovel in the photograph, I started taking things down from that brown wall, I picked up some white paint and will be attacking in a few minutes. Also, a big thanks to "Coolabah" for the suggestion of getting tihngs out of the garage that will be going in the shed.
 

g0ldfing3r

Well-known member
Joined
Sep 27, 2010
Messages
161
Location
Bay Area, CA
One of the pains of living here in CA esp in the Bay, your lucky to have a two car garage. Me, Im trying to maximize the potential of my one car garage. I work with the car outside and all of the equipment inside.
 

SpeedCoach

Well-known member
Joined
Oct 18, 2007
Messages
633
Location
Chicagoland
Ditto the previous poster who mentioned painting the walls a light color. It does wonders to brighten the place up.

my only other suggestion would be building or buying a workbench....this will help with other projects as you progress in the project.
 
OP
A

abrahamfh

Well-known member
Joined
Jun 6, 2010
Messages
111
Location
Union City
You're making nice progress. Having a shed will definitely help with your garage organization. It's very helpful to place seldom used items in other locations (shed, basement, under the deck, garage sale pile, the dump, etc). Then you can tweak the layout of the items that need to be in the garage.

Thanks for the pics - nice Stang too!

Thanks for the wisdom and for the complement on the ride. I have always wanted a 1965 Mustang coupe since I was 7 and now I have it. My son named it Fred, LoL, after the rusted out car by the same name in the movie Cars. It's ready to be media blasted but saving up the funds to do it, new one piece floor pan just arrived today but it will have to wait until next week.

Just made arrangements to pick up a T10 and already have a 1969 351w waiting to be freshened up.

Should be a fun ride, but I would really like to have Fred ready to drive the little guy to his first day of school next year and maybe one day when he is 17 or so we can head south for the Panamericana.
 
Last edited:
OP
A

abrahamfh

Well-known member
Joined
Jun 6, 2010
Messages
111
Location
Union City
Okay, finally got the brown wall painted white.

7a9a01db.jpg


Please do not purchase the fast hide olympic flat white paint. Doh! Used up the whole gallon and I can still see through it a little. Oh well, it's better than it was but I am heading to LA tomorrow so I will get some better quality white paint and give it another coat on Monday.
 
Last edited:
OP
A

abrahamfh

Well-known member
Joined
Jun 6, 2010
Messages
111
Location
Union City
One of the pains of living here in CA esp in the Bay, your lucky to have a two car garage. Me, Im trying to maximize the potential of my one car garage. I work with the car outside and all of the equipment inside.

A lot of folks on here have some great ideas for one car garages. I really like what "Scotto" did with his http://www.garagejournal.com/forum/showthread.php?t=26989 I am definitely lucky and count my blessings, sometimes I feel like I still don't have enough space but I have been enlightened :shocking: it's because I waste a lot of it.
 
OP
A

abrahamfh

Well-known member
Joined
Jun 6, 2010
Messages
111
Location
Union City
Ditto the previous poster who mentioned painting the walls a light color. It does wonders to brighten the place up.

my only other suggestion would be building or buying a workbench....this will help with other projects as you progress in the project.

I saw some great thread on here not too long ago about folks building benches from scratch. I might end up going that route since I have some 4x4's laying around. My only problem is that I picked up a Ryobi 10 inch table saw from Home Depot on clearance for 40 dollars in order to cut the 4x4's and cant get it to work. It looks as though a piece is missing, I need to do some research, I was just too excited to even notice. :headscrat Oh well, if anyone has some insight I would greatly appreciate it.

fe154198.jpg
 
Last edited:
To avoid these ads, REGISTER NOW!

v7guy

Well-known member
Joined
Jun 7, 2009
Messages
557
Location
Hudson valley, NY
if I'm not mistaken that saw is only capable of 3" deep cuts. might want to look that up online if you don't have the instructions for that model.
the light wall looks great.
there haas been lots of good suggestions in this thread, look forward to more updates and pics.
 
OP
A

abrahamfh

Well-known member
Joined
Jun 6, 2010
Messages
111
Location
Union City
You are absolutely right, just went out and measured it at 3 inch max. How sad is that, I guess I can always cut one side and then flip it to cut the other, but the darn thing needs to turn on first. I might return it and just buy one new for 60 bucks more, or search through craigslist.

As I was out in the garage, I measured how high the bottom frame of the pegboard is to the floor and I might see some annoyances coming my way when designing the bench.

Thanks Jason for all the tips and encouragement so far.
 

v7guy

Well-known member
Joined
Jun 7, 2009
Messages
557
Location
Hudson valley, NY
no problem, that's why we're all on these forums.
you'll find a lot of little things that can cause some serious problems later on. that's just part of the learning experience.
sometimes you have to make mistakes to get a good grasp of the process, nothing its better than experience.
 

ct71rr

Well-known member
Joined
May 19, 2009
Messages
478
Location
Massachusetts
That hole looks like it might be for the re-set button. My Delta table saw has a small button to re-set the breaker when the motor shuts down during hard loads.
 
OP
A

abrahamfh

Well-known member
Joined
Jun 6, 2010
Messages
111
Location
Union City
That hole looks like it might be for the re-set button. My Delta table saw has a small button to re-set the breaker when the motor shuts down during hard loads.

I think you are right. I decided to just take it back to Home Depot or as my son calls it, "the Bob the builder store".
 
OP
A

abrahamfh

Well-known member
Joined
Jun 6, 2010
Messages
111
Location
Union City
that's just part of the learning experience.

You got that right Jason, as I have come to learn not to buy paint based on the price (when I got back from Los Angeles I could see through the paint completely now that it was dry). Would have saved myself time, gas, and the price I paid for the paint to have just gotten a primer paint all in one and the job would have been done on the first attempt. Glad to have the wall painted nicely now, I didn't think it was going to make that big of a difference but it really did, tons brighter.

photo3.jpg


Time to work on the ceiling storage. I think.
 
Last edited:
OP
A

abrahamfh

Well-known member
Joined
Jun 6, 2010
Messages
111
Location
Union City
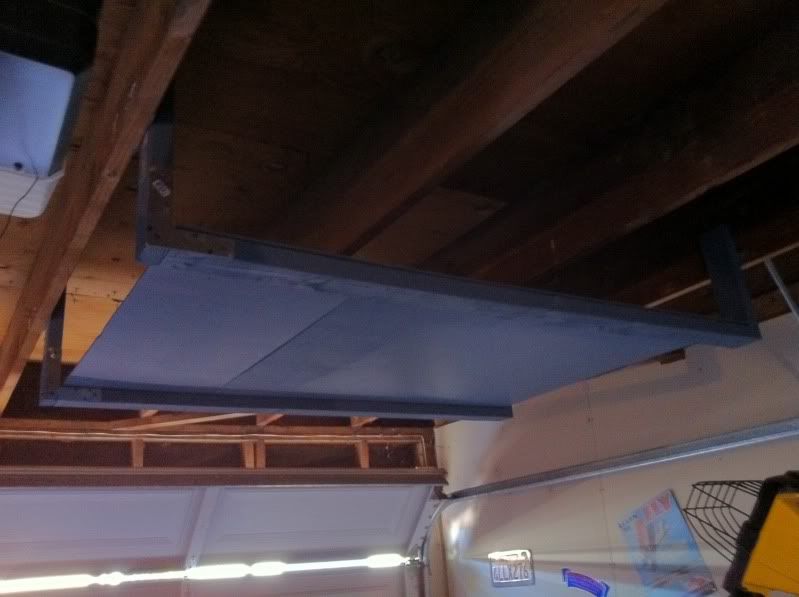
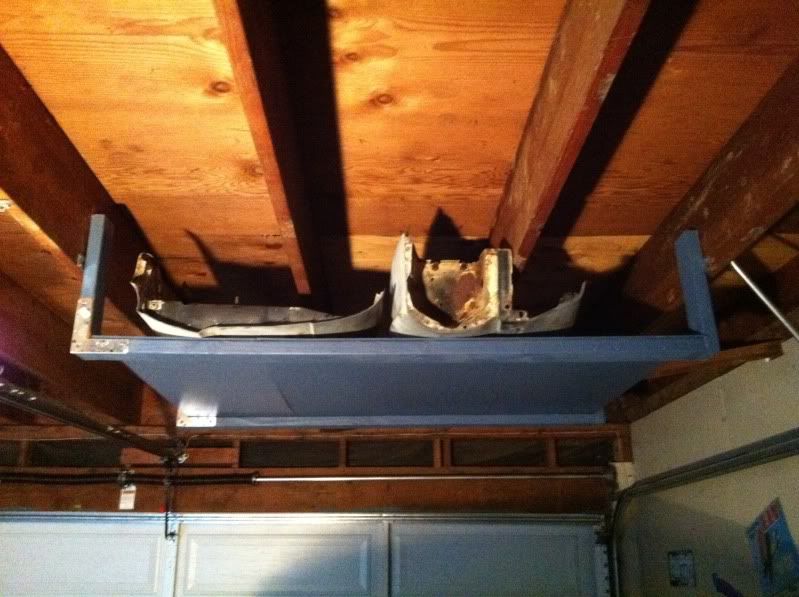
My ceilings are not very high and I couldn't make the base too low due to garage door clearance so I did what I could. I have hung the frames but need some ideas on what to do now in order to save as much usable storage space as possible. The supports are 48 inches apart, everything that will be stored there is 60 inches in length. Any suggestions on what to use as a base would be great.

I used some simpson strong-ties to make sure everything was extra extra strong.

44114313.jpg


The 3/16ths plywood is only there for visual aid but almost thinking about just cutting a second piece and running with it. Still need to finish painting it as you can see, some of the wood needed to be replaced due to the discovery of cracks that I didn't want to take a chance with supporting items above the Mustang.

6a556cdc.jpg
 
Last edited:
OP
A

abrahamfh

Well-known member
Joined
Jun 6, 2010
Messages
111
Location
Union City
Now to make the hanging tire rack.

I tried picking up one of the Mustangs tires and they are pretty darn heavy. Starting to rethink the wall mounted tire rack idea, just not totally sold on it yet even though I think it would help.
 
OP
A

abrahamfh

Well-known member
Joined
Jun 6, 2010
Messages
111
Location
Union City
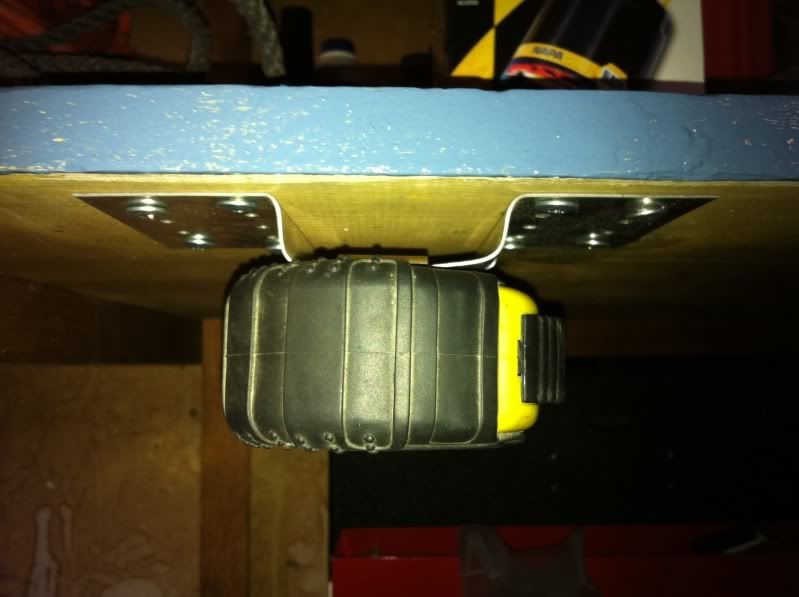
Somehow, some random strong tie made it home with me, so I figured I would try to put it to some good use. I have noticed through out this project so far that I spend a lot of time looking for my tape measure. LIGHTBULB! Decided to make a tape measure bracket out of it, using a pair of 2x4's to hold it in place to bend it, then drilled it into my existing shelves. WhoRaw!

a3179fad.jpg


Okay, sorry, back to building the tire rack.
 
Last edited:

WSMC633

Well-known member
Joined
Jul 20, 2008
Messages
484
Location
Los Angeles, CA
Skimmed through the thread but didn't read every post, so forgive me if I repeat anything. I work out of a 2 car garage also. It was really hard because I downsized from a 1800 sq ft. shop. So condensing was very important. It is possible to have a lot of tools, and still accomplish a lot of work in a small space. You just have to be very diligent and creative with storage.
Currently in my Small Shop big items of note I have are:
72" SO chest
8ft workbench
48" sheet metal brake
Small Mill
9x20 lathe
mig welder
tig welder
Plasma Cutter
oxy/acyt. rig
drill press
parts washer
shop press
6'x3' welding/fab bench
30gal air compressor
horizontal band saw
a motorcycle lift
Media blast cabinet
2 road race bikes


yeah, it's pretty full, but I still have room to work and get stuff done. I'm restoring a VW for a guy right now and I have plenty of room to put the chassis in there and work on it.

Here's what I found. Shelves are paramount. Get things you can off the floor and up in the air. So I have shelves all around the perimeter. Including a shelf I squeezed above the garage door. If I can lift it, it goes up there. Everything else is on wheels. Build stuff so it "nests". ie my Metal brake is on a rolling stand and the bandsaw rolls in below it. Welders are all stacked so they take up the same footprint.
That tactic has allowed me to squeeze a lot of junk in.

As others mentioned, get the garden ****, bicycles etc. out of there if you can. That will help too. I built a shed behind the garage to hold all of that stuff. If you can do that you'll appreciate the extra room it gives you.

I'd love to have my big shop back, but it's just not in the cards right now, so I'm working with what I've got!

I'll try to grab some pics this weekend if I remember.
Your build looks like it is coming along quite well though! Keep up the good work. I know it's a long tiring process. I'm constantly reworking stuff to get a few more inches.
 
OP
A

abrahamfh

Well-known member
Joined
Jun 6, 2010
Messages
111
Location
Union City
Currently in my Small Shop big items of note I have are:
72" SO chest
8ft workbench
48" sheet metal brake
Small Mill
9x20 lathe
mig welder
tig welder
Plasma Cutter
oxy/acyt. rig
drill press
parts washer
shop press
6'x3' welding/fab bench
30gal air compressor
horizontal band saw
a motorcycle lift
Media blast cabinet
2 road race bikes

First off, thanks for taking a look at my fun filled days of trying to get the garage in somewhat working condition.

WOW! Dude, you have all that in a two car garage, I would love to see photographs of how you organized it all.
 
OP
A

abrahamfh

Well-known member
Joined
Jun 6, 2010
Messages
111
Location
Union City
Decided that I will be going with the wall mounted tire rack, now just trying to figure out where on the wall it would make the most sense in putting it, location 1, 2 or 3.

123456.jpg


The only location I am concerned about the location 3, the compressor is hanging out in that corner, is there any reasons why it shouldn't go there?
 

Kevin54

MEMBER EMERITUS
Joined
Jan 12, 2005
Messages
29,341
Location
Urbana, Ohio
Just a thought-

If you're going to frame out your pegboard nicely like that, why not see if you can make a shallow cabinet instead of a frame (for items like... spray paint cans?) and use the pegboard as doors, that can also hold lightweight items.

I was thinking the opposite. I liked the frame and thought that doors would be appropriate mounted to the 2x's.

Just tossing a thought out there :bounce:

I've never been a huge fan of pegboard, but the more I see it on here I am thinking about getting some to mount on a wall above my bench for some smaller items. Amazing how GJ can totally change your thought process :thumbup: :mad: :headscrat

As for the tire rack, the corner would be the ideal place. Out of the road, BUT putting the tires up there, the compressor is in the road. Unless you make it a little longer so you can slide the tires down
 
Last edited:
OP
A

abrahamfh

Well-known member
Joined
Jun 6, 2010
Messages
111
Location
Union City
Sorry all, my drive to get this garage organized is still there but I just got back from a nice Roadtrip from SF to LA, from LA to New Harmony, UT (for some Mustang parts) back to LA and then LA to SF. Just got back this AM, I'm tired but not tired enough not to get back in the garage.

Took the time to plan out what I want to accomplish and stopped at Lowes to get what I needed.

I will be cutting and painting everything in an hour so it is all done by 8pm so if anyone notices something wacky in the DWG let me know. Thanks again everyone for the support and knowledge.

tire_rack-1.jpg
 
Last edited:

g0ldfing3r

Well-known member
Joined
Sep 27, 2010
Messages
161
Location
Bay Area, CA
I saw some great thread on here not too long ago about folks building benches from scratch. I might end up going that route since I have some 4x4's laying around. My only problem is that I picked up a Ryobi 10 inch table saw from Home Depot on clearance for 40 dollars in order to cut the 4x4's and cant get it to work. It looks as though a piece is missing, I need to do some research, I was just too excited to even notice. :headscrat Oh well, if anyone has some insight I would greatly appreciate it.

fe154198.jpg

Where Home Depot did you went? The one by Target in Union city? Im just asking because I have never seen any clearance stuff in Hayward and San Leandro HDs.
 
OP
A

abrahamfh

Well-known member
Joined
Jun 6, 2010
Messages
111
Location
Union City
Where Home Depot did you went? The one by Target in Union city? Im just asking because I have never seen any clearance stuff in Hayward and San Leandro HDs.

Yeah, I live about a mile away from the HD near whipple by the Target in UC. There is a clearance area in the tool department.

When you enter HD make a right when coming in through the main entrance, first aisle of the tool department make a left and when you dead end in the corner, turn to your right and its on your right. A few racks tucked at the end of the aisle, great deals on stuff sometimes.
 

ChristopherLutz

Well-known member
Joined
Jun 17, 2010
Messages
270
Location
Flower Mound, TX (DFW)
It looks like you have enough room above (hard to tell from posted pics) to store your tires/wheels above the ceiling joists? If you can....that would save you a TON of room on the walls and you could add a cabinet and/or shelves where you currently have the tire rack planned.

Unless you're in and out of the rack every weekend for racing - I wouldn't think the tires need to bo "that handy".

Just my 2cents.

You're making great progress - thanks for taking the time to post.
 
OP
A

abrahamfh

Well-known member
Joined
Jun 6, 2010
Messages
111
Location
Union City
It looks like you have enough room above (hard to tell from posted pics) to store your tires/wheels above the ceiling joists? If you can....that would save you a TON of room on the walls and you could add a cabinet and/or shelves where you currently have the tire rack planned.

Unless you're in and out of the rack every weekend for racing - I wouldn't think the tires need to bo "that handy".

Just my 2cents.

You're making great progress - thanks for taking the time to post.

That is a really great idea, using that space between the rafters. It could probably work right between the wall that I mounted the tire rack now and the door. Dang it, I guess when the times comes that I need more wall space I will most definitely move it. Thanks again for the great idea.

I actually will only be using the tires whenever I need to roll Fred around, like getting Fred on the tow truck to be media blasted.
 
OP
A

abrahamfh

Well-known member
Joined
Jun 6, 2010
Messages
111
Location
Union City
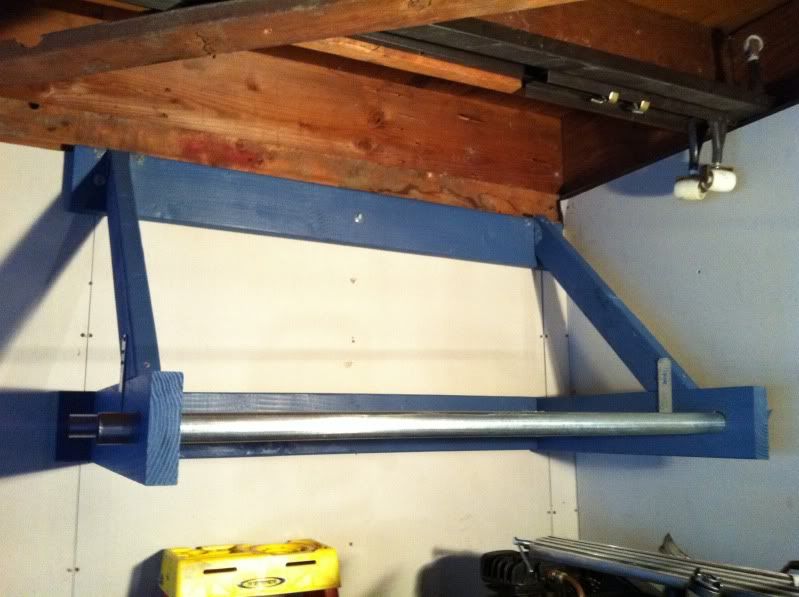
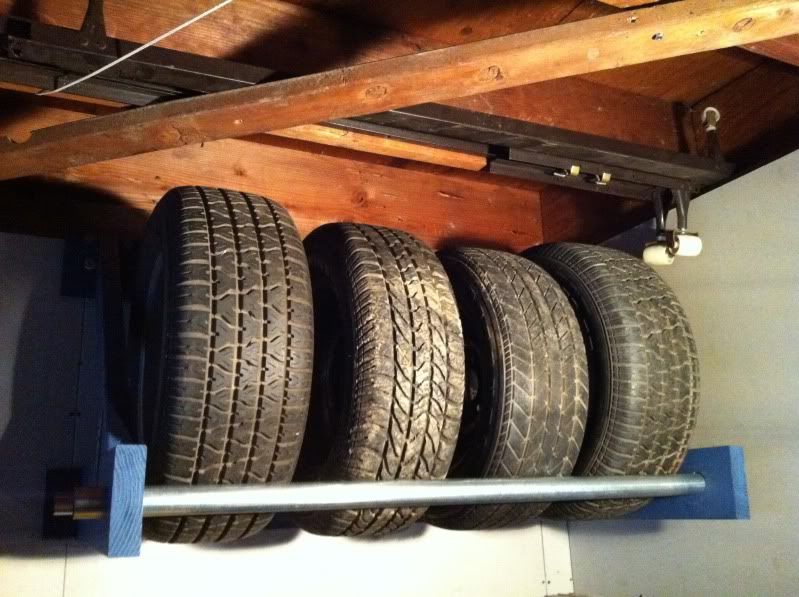
Enjoy the pic's of the tire rack build.
Please, if you see anywhere where I can improve the strength of the tire rack, let me know. It is real strurdy as of now, meaning, I was hanging from the two pipes and it didnt budge, but I like to go above and beyond when it comes to keeping things from possibly falling and going crash, bang, @$#%!

I must add, it was hard as he!! doing it with no help, but in the end, everything turned out perfectly level and square. WhoRaw!

5c4ca053.jpg


b41e293a.jpg


f012c23d.jpg


9002cc42.jpg


9cfba16c.jpg


8988a755.jpg


02d64baa.jpg


03015055.jpg


067d3847.jpg


98e2a04d.jpg


1910ddb9.jpg
 
Last edited:
To avoid these ads, REGISTER NOW!
Top Bottom