Beerhippie
Well-known member
Right after they ask, "Who's McCartney?"
That's Sir Paul to you, mister!


Right after they ask, "Who's McCartney?"


Pieced together a front accessory drive for the '73 Mustang build. I need to swap out the AC compressor clutch for an 8-groove unit; the 6-rib belt here is just temporary. I still need to install the beauty cover on the idler pulley, too. We're running a Sanden 709 AC compressor, a Saginaw P-series power steering pump, a high performance water pump, and a 140 amp one-wire alternator.


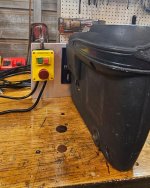
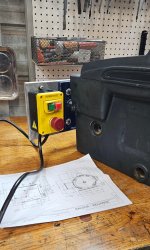
 Free market place find before clean up.


You don't need no stinkin' synchros--just learn to double-clutch!Took the cover off my toploader... I think something is wrong with the 3/4 synchro.


reminds me of a few years ago doing a 65 fairlane... Notice the open doors.. they dont come that way...Clear coated. Not perfect, but I can live with it.


****. Shopping around for 12V PAR36 LED bulbs with lower wattage ratings than the 5W ones I'm using. No luck.
Wondering about adding a resistor to reduce the wattage, but not sure if that works with LED.
Maybe I can get by with swapping the tow batteries over each day--one on the charger, one on the lights.... PITA, but it should work. I'll test it out tonight.
Ultimately, I'll need to change the very nice-looking and bright PAR36 floods for something with a lower draw. I had some cheap crappy landscape lights on there previously and they worked just fine even on the shortest of days--with only 14 AH of batteries.

a microscope ring light will often be a good solution:Doing some casual searching for a work light, wire it to come on with the drill press. I haven't found one I like yet... LED preferred
Don't wire it to come on with the drill motor. You won't be able to see to set up the press before you drill.Doing some casual searching for a work light, wire it to come on with the drill press. I haven't found one I like yet... LED preferred


 got new LED headlight bulbs, new wipers, and a seat cover. The side windows got the Barkeeper's Friend buffer treatment. Hopefully I'll be able to see where I'm going in the dark/rain, and the hole in the driver's side of the lower seat will be kept at bay.
We need to have a discussion re: Ohm's Law.It will dim the LED, however the resistor is burning the electricity anyway... maybe a solid state VR?
Hmm, that is something to think about, I typically find myself chasing more light after its setup though, May take some trial and error to see what I prefer. I have no light currently.Don't wire it to come on with the drill motor. You won't be able to see to set up the press before you drill.


Hmm, that is something to think about, I typically find myself chasing more light after its setup though, May take some trial and error to see what I prefer. I have no light currently.
Starter wouldn't catch on the snowblower. Turned out 2 bolts were loose. Odd that both of them were. Anyway, not knowing the torque spec, I tightened them to, "I'm freezing my nuts off thats good enough".
I'm surprised these things don't shake apart with all the abuse they take.
This^^^Look for “sewing machine light”. There are many. Magnet mounted, LED on a flexible stalk for easy repositioning.


Man I always wanted a pinball machine . Would love to have a Vintage KISS Pinball machinePushed Farfalla back to the lineup, and pulled the next game in to the shop.
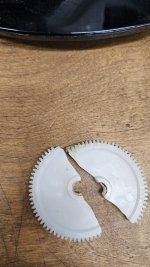
Cleaned, waxed, new rubbers installed. Glued a broken plastic, waiting for the glue to set so I can finish putting this one back together.

Still an improvement, at least to my old eyes.The shadowing shown here is why the ring lights are a better solution for DPs and mills in particular - even more so with small bits and accurate centering to marks: