To avoid these ads, REGISTER NOW!

What did you do "IN" your garage today?

LeonardY

Well-known member
Joined
Apr 16, 2011
Messages
5,059
Location
Southern California
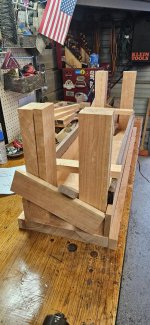
Fixed a crappy leg for a cabinet for my coach. She is fond of dragging furniture. Ripped the insert out.

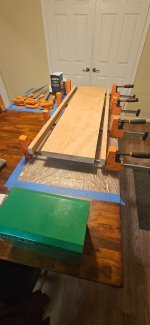
I drilled out the leg and glued a 3/4 dowel to replace the crappy wood stud they turned. Drilled three holes a around the leg. I'll glue and screw it back in. Unless you've got shitfaced and fell to the ground you'll never see the repair. If you notice it then you won't remember it when you come to.
 
To avoid these ads, REGISTER NOW!

2001ZR2

Well-known member
Joined
Jan 4, 2018
Messages
411
Location
Kansas City
Today I worked to clean up the Hanta Hilton or the red gray stack I bought off of Marketplace.

Was only working to make it a non bio hazard. Pulled out three dead mice and lots of debris much of it was wet. The liners and carpet were pulled yesterday.

20260208_161505.jpg

That is showing how dirty the bottom cabinet was...cleaned the top. Note that the top two smaller drawers don't fit right. They are side specific and on the wrong side.

20260208_162202.jpg
Top unit is cleaned up with mostly water and beach cleaner. Then scrubbed with a decreased. Still needs more cleaning but now can worked without PPE.

20260208_162216.jpg

Another shot of clean upper and as found bottom.

I didn't get picture of both clean as I had lost light.

I started fixing some of the issues with bent drawers and got them back in place correctly.

Lubricated the slides so the drawers slide in and out as they should. Found a bent slide on bottom drawer and one other drawer the rails on the drawer were bent out. Fixed those and also started to straighten up the bent drawers.

Next steps will be lubricate the casters and get the adhesive off of bottom of the drawers.
 

pancholasvegas

Well-known member
Joined
Nov 6, 2017
Messages
251
Got some time to play in between real life this weekend.

Started off by removing what remained of the lower driver bedside. With how much rust there was, it went pretty quick with the angle grinder.

IMG_4118.jpeg

I have intentions of doing surgery on, and saving these wheel wells, so I removed it from the fender and will rid of what remains of the flanges and spot welds.

IMG_4121.jpeg

There’s a bunch of ways to get rid of spots welds and they all ****. I had the quickest success locating the spot welds and zipping through the sections between them with cutoff wheel to remove the non welded sections in little strips (careful not to cut through both layers), leaving little tabs to grind off to get rid of the spot welds.

IMG_4123.jpeg

After some sweeping of the dust, I was hesitant to make a pile of shavings again, so I turned to work a bit of getting a couple dings on the bedside corner shaped up.

IMG_4127.jpeg


Some tricky angles here to play in - too bad it can’t tell us what happened in its life. This is looking better!


IMG_4131.jpeg

Put off the inevitable long enough - the other sides coming off as well. That will make the remodel of the wheel well easier and cleaner, and had to happen eventually.

IMG_4133.jpeg

This side was a touch more aggressive. The lower panel was cut out surrounding the wheel well, and then a notch was cut separating the top from the spare tire carrier, which I’ll be transferring. The process of removing the flanges from the wheel well was repeated, once it was freed.

IMG_4138.jpeg

The seam busted clears through rusted sections, leading to spot welds. Here you can cut off the strip that is not spot welded, and start again past the spot weld.

IMG_4139.jpeg

Come back with your grinder and you can clean these up! I prefer to cut them into smaller strips than shown above before grinding, as much as possible.

Continuing in next post.
 

Attachments

  • IMG_4127.jpeg
    IMG_4127.jpeg
    667.7 KB · Views: 13
  • IMG_4123.jpeg
    IMG_4123.jpeg
    706.7 KB · Views: 5

pancholasvegas

Well-known member
Joined
Nov 6, 2017
Messages
251
The wheel wells are being ran to the sand blast cabinet. I’m sure they’ll come back with plenty more holes - that’s fine. They have to have new flanges added to affix to the floor anyhow, so there was reconstruction on the horizon either way.

The plan is to build a brace / jig to hold the body in place while more work is done, including the floor - makes sense to start mocking it up to get measurements and find out what sections need more attention.

IMG_4136.jpeg

It almost seems like we’re getting somewhere! If you ignore all the colors, you can almost forget it will have taken 5 trucks!

IMG_4137.jpeg

I thought we were making good headway. Today when we stood back, I wasn’t so sure. I took a look at what we started with and it’s a bit reassuring, to say the least!

IMG_3881.jpeg

The uphill climb continues!
 

swsman

Well-known member
Joined
May 5, 2021
Messages
575
Location
Earthbound
Installed Baja Designs headlight kit on DR650 last night. Wrapped it up earlier today.

My hand was forced with a fun car sustaining some damage yesterday, another vehicle project is set to take off very soon. This coming weekend I will assess what is needed and go from there.
 

Attachments

  • IMG_20260208_110321724_HDR_AE.jpg
    IMG_20260208_110321724_HDR_AE.jpg
    419.8 KB · Views: 45
  • IMG_20260207_111501 (1).jpg
    IMG_20260207_111501 (1).jpg
    791.3 KB · Views: 49

Fordguy1964

Well-known member
Joined
Mar 3, 2015
Messages
3,915
Location
Houston County, Alabama
Attachment system for the jack meets or exceeds Wallowa County Rancher standards!
Unfortunately I have to use the jack for other things. In order to use the external C clip to hold it on the jack that will require me to completely disassemble the top half of the jack. That is actually in the plan. I just haven't gotten around to it yet. Once that happens it will allow the entire assembly to swivel. This will make it a lot easier to install the doors. Good eye on that flaw.
 

Beerhippie

Well-known member
Joined
Oct 13, 2023
Messages
9,848
Location
Far NE Oregon
Unfortunately I have to use the jack for other things. In order to use the external C clip to hold it on the jack that will require me to completely disassemble the top half of the jack. That is actually in the plan. I just haven't gotten around to it yet. Once that happens it will allow the entire assembly to swivel. This will make it a lot easier to install the doors. Good eye on that flaw.

I didn't even notice a flaw! Just appreciating the use of Vise Grips.

Mostly, I was admiring the creative genius of the rig. Beats hell out of trying to start the hinge bolts while a helper is getting the shakes from holding the door in line!
 

Fordguy1964

Well-known member
Joined
Mar 3, 2015
Messages
3,915
Location
Houston County, Alabama
I didn't even notice a flaw! Just appreciating the use of Vise Grips.

Mostly, I was admiring the creative genius of the rig. Beats hell out of trying to start the hinge bolts while a helper is getting the shakes from holding the door in line!
I know how my bad luck works. I'll be deep into the crack of the door with bolts in one hand, a ratchet in the other, and I'll hear the gut wrenching sound of vice grips snapping open! Gotta fix that before I get too much deeper. I don't want that to happen once all of the body work is done and paint is on them.
 

Beerhippie

Well-known member
Joined
Oct 13, 2023
Messages
9,848
Location
Far NE Oregon
I know how my bad luck works. I'll be deep into the crack of the door with bolts in one hand, a ratchet in the other, and I'll hear the gut wrenching sound of vice grips snapping open! Gotta fix that before I get too much deeper. I don't want that to happen once all of the body work is done and paint is on them.
C-clamps. Problem solved.
 

Fordguy1964

Well-known member
Joined
Mar 3, 2015
Messages
3,915
Location
Houston County, Alabama
C-clamps. Problem solved.
Thought of that and tried some at first but they are too tall when clamping so they get in the way. Easiest will be either make the modifications to the jack base to accept the jig or get a dedicated jack specifically for the jig and weld it to it.

I like the idea of making the modifications to this jack. That way it will be easy to rotate the jig on the top plate of the jack without having to turn the entire jack. That will make fit up easier.
 

kaymccampbell

Well-known member
Joined
Feb 27, 2015
Messages
29,549
Location
Upstate New York
Grabbed a step stool and new bulb to replace one of the bulbs in the kitchen. I can just reach the can light if I stretch up on my tippy-toes. Was very happy I didn't have to grab the larger ladder off the rack.
A few more years and that tippy-toes on a stepstool will be over. You'll want place for both feet, and flat.
 

Fordguy1964

Well-known member
Joined
Mar 3, 2015
Messages
3,915
Location
Houston County, Alabama
The wheel wells are being ran to the sand blast cabinet. I’m sure they’ll come back with plenty more holes - that’s fine. They have to have new flanges added to affix to the floor anyhow, so there was reconstruction on the horizon either way.

The plan is to build a brace / jig to hold the body in place while more work is done, including the floor - makes sense to start mocking it up to get measurements and find out what sections need more attention.

IMG_4136.jpeg

It almost seems like we’re getting somewhere! If you ignore all the colors, you can almost forget it will have taken 5 trucks!

IMG_4137.jpeg

I thought we were making good headway. Today when we stood back, I wasn’t so sure. I took a look at what we started with and it’s a bit reassuring, to say the least!

IMG_3881.jpeg

The uphill climb continues!
Nice! If you haven't done it yet, you should start your own thread on this build.
 
To avoid these ads, REGISTER NOW!

SMOKEYBEAR

Well-known member
Joined
Jan 3, 2016
Messages
456
Wrapped up a few pieces for the bench, the pieces are just roughed out. I have some gluing, planning, joining to do before anything gets cut to dimension.

Moved it all inside to get ahead of the weather so I can get it glued up sooner... I have some boat projects up next and want them done before the weather/ bass fishing breaks.
 

Attachments

  • BB4.jpg
    BB4.jpg
    138.8 KB · Views: 40
  • BB3.jpg
    BB3.jpg
    138.9 KB · Views: 36
  • BB2.jpg
    BB2.jpg
    124.9 KB · Views: 28
  • BB1.jpg
    BB1.jpg
    80.7 KB · Views: 29
Last edited:

Fordguy1964

Well-known member
Joined
Mar 3, 2015
Messages
3,915
Location
Houston County, Alabama
I got back to my wagon build. Mounted doors, that part is in my wagon build thread. Pulled out the box of Duetsch (I think I spelled that right) wire connectors and tried to figure these things out. This is the first time I have ever looked at them. I have no idea how they go together and there is no instructions in the box. Great!
 

kaymccampbell

Well-known member
Joined
Feb 27, 2015
Messages
29,549
Location
Upstate New York
I got back to my wagon build. Mounted doors, that part is in my wagon build thread. Pulled out the box of Duetsch (I think I spelled that right) wire connectors and tried to figure these things out. This is the first time I have ever looked at them. I have no idea how they go together and there is no instructions in the box. Great!
It'll keep you off the streets at night.
 

56vette461

Well-known member
Joined
Jan 13, 2013
Messages
493
Location
Northern California
Today I worked to clean up the Hanta Hilton or the red gray stack I bought off of Marketplace.

Was only working to make it a non bio hazard. Pulled out three dead mice and lots of debris much of it was wet. The liners and carpet were pulled yesterday.

20260208_161505.jpg

That is showing how dirty the bottom cabinet was...cleaned the top. Note that the top two smaller drawers don't fit right. They are side specific and on the wrong side.

20260208_162202.jpg
Top unit is cleaned up with mostly water and beach cleaner. Then scrubbed with a decreased. Still needs more cleaning but now can worked without PPE.

20260208_162216.jpg

Another shot of clean upper and as found bottom.

I didn't get picture of both clean as I had lost light.

I started fixing some of the issues with bent drawers and got them back in place correctly.

Lubricated the slides so the drawers slide in and out as they should. Found a bent slide on bottom drawer and one other drawer the rails on the drawer were bent out. Fixed those and also started to straighten up the bent drawers.

Next steps will be lubricate the casters and get the adhesive off of bottom of the drawers.
In the 1970's the Central valley of California was ripe with older farm families selling off their grape acreage for top dollar. Many of the farms had equipment auctions to sell off older equipment. Craftsman and Snap On truck boxes were sold for pennies on the dollar. A friend who farmed in the area and I bought 8 or 10 of the boxes to restore. Farm boxes were mounded to the truck bed and were notoriously scratched, dented and filled with dirt. But $15/box was too good to pass up. We pulled them apart, straightened the metal and sand blasted the boxes and drawers. We bought new drawer glides where needed and new name plates from the local friendly Snap-On dealer and repainted them in the shop paint booth. (For our older members, read that as a big plastic wrapped corner of the shop, an exhaust fan and watered down cement floor). Once painted we used two for my friend's field trucks, I kept a Craftsman for myself and the Snap-On dealer sold the rest for us. Your top box is the exact copy of the original truck box.
 

welder4956

Well-known member
Joined
Apr 8, 2010
Messages
3,071
Location
Birmingham, AL USA
I decided to rewire my lights before installing ceiling insulation, so I've been working on that off and on over the last few days. The old lights were 4 ft. LED hanging plug in style with a row of 3 bulbs down the center. I left the 3 bulb fixtures plus 3 hanging lights in place so I could have some light while working. New lights are 4 ft. surface mount hard wired LED fixtures. I had to add a piece of 1 x 6 board with an electrical box at each light and I bumped the wire size up to 12 gauge, although the original 14 gauge would probably have been fine. 6 lights done and 3 more to go, plus removing the old wiring and bulb fixtures.

20260208_134307.jpg

20260209_162028.jpg

I found some 24" long flexible ties at HD to hold the lights up while I made the electrical connections.
20260209_133505.jpg
 

Beerhippie

Well-known member
Joined
Oct 13, 2023
Messages
9,848
Location
Far NE Oregon
I decided to rewire my lights before installing ceiling insulation, so I've been working on that off and on over the last few days. The old lights were 4 ft. LED hanging plug in style with a row of 3 bulbs down the center. I left the 3 bulb fixtures plus 3 hanging lights in place so I could have some light while working. New lights are 4 ft. surface mount hard wired LED fixtures. I had to add a piece of 1 x 6 board with an electrical box at each light and I bumped the wire size up to 12 gauge, although the original 14 gauge would probably have been fine. 6 lights done and 3 more to go, plus removing the old wiring and bulb fixtures.

20260208_134307.jpg

20260209_162028.jpg

I found some 24" long flexible ties at HD to hold the lights up while I made the electrical connections.
20260209_133505.jpg
First, you are aware that wiring size--AWG--is determined by breaker rating? You can put larger gauge wire than what the breaker can handle, but never smaller. Unless, of course, you want to see what the Magic Smoke looks like in your own shop.

Second, LED lights, while wonderful and all, don't last forever. I used to hang hard-wired ones, but went back to plug-ins as they were easier to replace.

But, then, I'm just plain lazy.
 

DGersic

Well-known member
Joined
Mar 12, 2017
Messages
6,332
Location
DeKalb, IL
Oil and filters changed in the Camry (oil, air, cabin). Just over 5000 miles since I last changed it in October. I normally drive about 5K miles a year, so all of those trips to the hospital and rehab centre for Dad added up.

Pulled the wheel with the slow leak off my Dakota and took it to the local tyre shop. No obvious puncture, so probably will be the bead.

Investigated a new leak on the Dakota. Looks like the power steering lines have rusted out. Need to order some new ones.

Got a new tool, didn’t know these existed until a thread here.

IMG_8581.jpeg


Disassembled for cleaning.

IMG_8582.jpeg
IMG_8583.jpeg


Smoothed any rough surfaces on the sliding parts with 150 grit Emory cloth. A bit of lube, and reassembled.

IMG_8585.jpeg
 

Beerhippie

Well-known member
Joined
Oct 13, 2023
Messages
9,848
Location
Far NE Oregon
Made a final check of the gravity in the glycol back. Perfect. It takes a while to be sure the new solution has fully mixed with the old. Wheeled the 55 gal. drum of glycol out of the shop to where it's less in the way--one thing I don't have to worry about freezing outside.

Fixed more plumbing stuff--new flapper valves for two toilets, some more leaking faucets, etc.

Worked on the Brick and fixed my throttle problem--with far less investment or work than I ever expected. See my thread in the sig line.
 

welder4956

Well-known member
Joined
Apr 8, 2010
Messages
3,071
Location
Birmingham, AL USA
First, you are aware that wiring size--AWG--is determined by breaker rating? You can put larger gauge wire than what the breaker can handle, but never smaller. Unless, of course, you want to see what the Magic Smoke looks like in your own shop.

Not sure what you are implying here. Going from 14 gauge wire to heavier 12 gauge wire might let the Magic Smoke out?
 

DGersic

Well-known member
Joined
Mar 12, 2017
Messages
6,332
Location
DeKalb, IL
I’m confused about what this tool does? I mean there seems to be a roll pin keeping anything from moving?

It’s a 1/4” drive socket screwdriver type handle. It’s also an extension. The knurled part slides to lock or unlock from the extension part, so you can spin the socket with the handle, or use the handle to hold it while spinning the socket from the drive end.

Supposedly the Williams T handle drive fits inside the handle and makes an extended T shaped spinner. I don’t have the T handle to confirm this.

I don’t honestly know if this is useful, but I thought it was a neat variation on the standard 1/4” drive screwdriver handle.
 

Old Man Roger

Well-known member
Joined
Apr 6, 2017
Messages
17,652
Location
Palm Coast Florida
It’s a 1/4” drive socket screwdriver type handle. It’s also an extension. The knurled part slides to lock or unlock from the extension part, so you can spin the socket with the handle, or use the handle to hold it while spinning the socket from the drive end.

Supposedly the Williams T handle drive fits inside the handle and makes an extended T shaped spinner. I don’t have the T handle to confirm this.

I don’t honestly know if this is useful, but I thought it was a neat variation on the standard 1/4” drive screwdriver handle.
Ok! So the roll pin doesn’t go all the way through. Thank you for the explanation. :beer:
 

DGersic

Well-known member
Joined
Mar 12, 2017
Messages
6,332
Location
DeKalb, IL
Ok! So the roll pin doesn’t go all the way through. Thank you for the explanation. :beer:

Right. It’s captured, riding in a recess machined in to the inside of the knurled handle. There is also a captive ball bearing, so the handle snaps between locked and unlocked. When locked, the roll pin provides the drive link to the extension shaft.
 

Outlawmws

Well-known member
Joined
Aug 9, 2011
Messages
39,266
Location
The Badlands
It’s a 1/4” drive socket screwdriver type handle. It’s also an extension. The knurled part slides to lock or unlock from the extension part, so you can spin the socket with the handle, or use the handle to hold it while spinning the socket from the drive end.

Supposedly the Williams T handle drive fits inside the handle and makes an extended T shaped spinner. I don’t have the T handle to confirm this.

I don’t honestly know if this is useful, but I thought it was a neat variation on the standard 1/4” drive screwdriver handle.
I would think a short 1" extension would allow a ratchet or even an impact or screw gun to be used?
 

Outlawmws

Well-known member
Joined
Aug 9, 2011
Messages
39,266
Location
The Badlands
I'm perfectly fine going off a vertical slope on a 200' rope, but ladders scare me these days.

Same. I can climb rock walls all day, but have started hating ladders more and more. As long as I have something to reach up to, I'm fine.

I just want a ladder tall enough - no more standing on the effing top step for me...
 

Outlawmws

Well-known member
Joined
Aug 9, 2011
Messages
39,266
Location
The Badlands
I've thought of that but didn't know if would gain any traction or if it was worth a thread on. Maybe i'll try that.

Don't sweat the small stuff - you are doing a lot of really good work and a build thread gets a lot of really great work and documenting it well, so someone doing something similar has a great reference.

Copy/Paste is your friend.
 

Beerhippie

Well-known member
Joined
Oct 13, 2023
Messages
9,848
Location
Far NE Oregon
Not sure what you are implying here. Going from 14 gauge wire to heavier 12 gauge wire might let the Magic Smoke out?
The opposite--using 14 AWG wire on a 20A breaker, for instance. I've seen this many times on branch circuits for lighting--well, the light only draws 60 Watts, why do I need 12 AWG wire for it? Then the rat in the attic chews through the wires....
 
To avoid these ads, REGISTER NOW!
Top Bottom