To avoid these ads, REGISTER NOW!

Some of Bodj Built's builds

OP
B

Bodj Built

Well-known member
Joined
Feb 3, 2016
Messages
1,167
Location
Moorpark, CA
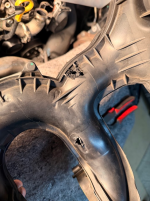
Got the parts in to reassemble the Touareg. Upon reassembling, I flipped the intake manifold over to remove the old o-rings and install new ones. I guess I didn't really flip this thing over, because I found TWO MORE HOLES MELTED IN THE PLASTIC.

1772122110226.png

Those make perfect sense because I saw white smoke and smelled burning plastic coming from the center rear of the engine, near the turbo. Basically, the EGR cooler cracked, leaking coolant into the valley and no longer cooling the exhaust gasses. Hot exhaust is circulated back into the intake, punching holes through the plastic. Hot intake blowing over the coolant pooled in the valley caused the white smoke.

Now I get to decide if I want to spend $700 on an oem replacement, or $200 on an ebay knockoff...
 
To avoid these ads, REGISTER NOW!
OP
B

Bodj Built

Well-known member
Joined
Feb 3, 2016
Messages
1,167
Location
Moorpark, CA
Been working on swing steering for the prerunner. 1772660059908.png

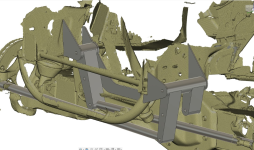
Passenger side ******* will abut the crossmember via a 1/4" overlay plate since i'm chopping a good chunk of the lip off the crossmember. One drag link to passenger side from pitman arm, one drag link to driver side from pitman arm. Not what was planning on doing, so now I need to order two more heims lol. Going to import the ******* bodies into solidworks since I like their convert to sheetmetal tool better.
 
OP
B

Bodj Built

Well-known member
Joined
Feb 3, 2016
Messages
1,167
Location
Moorpark, CA
Possibly switching things around here. I'm getting much faster at making changes, and in a better workflow so it's easier to go back and make changes

1772833896886.png
1772833907926.png

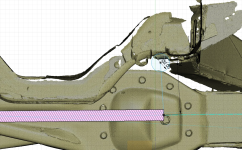
Swingers will be shorter than I wanted (5.75" bolt hole - bolt hole), but should still work ok.
1772833930633.png
 

WoodsTruck

Well-known member
Joined
Jan 12, 2013
Messages
1,025
Do you need to put the pivot points in line with the suspension pivot mounts to reduce bump steer?
It would look like the DS would be longer than the PS due to the Ford IFS.
 
OP
B

Bodj Built

Well-known member
Joined
Feb 3, 2016
Messages
1,167
Location
Moorpark, CA
Do you need to put the pivot points in line with the suspension pivot mounts to reduce bump steer?
It would look like the DS would be longer than the PS due to the Ford IFS.
The beams do not only pivot around the beam pivot. They also pivot about the radius arm mounts. Draw a line through the driver radius arm pivot and driver beam pivot, and the tie rod pivot is on that line. I’ll get pictures Monday when I’m back at my computer
 
OP
B

Bodj Built

Well-known member
Joined
Feb 3, 2016
Messages
1,167
Location
Moorpark, CA
Installed a DirtKing rear setup on a gmt900 Silverado over the weekend. What a great kit and cool truck. Chopacabra cam, tune, long tubes, black widow exhaust... It sounds awesome. Nice Izzyfab kit up front, too. Everything fit together so easily with the DK kit. I didn't have to fight a single thing. Instructions were really only needed for measuring holes to cut in the bed, and they were spot on. Hardest part was dropping the tank because GM thought it would be funny to run the forward leafspring bolt from inside the frame.

While I was doing that, my dad's old trans tech from his GM days came by to program the TCU. HPtuners couldn't get the last 10% of the programming, effectively locking me out of the computer. After we got the program to run, we tried going for a drive. Reverse and drive were both neutrals - truck wouldn't go anywhere. I checked fluid and it was low so I ran to get more. Came back and he told me I needed to drop the trans again... right after I top off the fluids and we go for a test drive. My heart sank until I realized he was screwing with me. Apparently the vasoline I used as assembly lube plugged valve body ports, so no fluid was getting through. Once it got hot enough to melt the vasoline, fluid pressure built and it went into gear. We took it for a test drive and it's shifting the smoothest I've ever felt it. Heck yeah! Drove it to work today. So pumped! The intake manifold came in for the Touareg so hopefully that'll be back on the road after work today as well.

1773077905751.png1773077912238.png
 

rattle_snake

Well-known member
Joined
Jun 25, 2015
Messages
5,225
Location
Chandler, AZ
Glad you are down to one neutral.

Is the Chopacabra cam a 'sounds cool' or a performance grind?
I ask as recently I have learned that intentionally choppy cams are typically made at the expense of lift and/or area under curve, and hence power output. This allows for long duration that would otherwise be a poor choice for the rest of the engine combination. Shallow ramp rates, stock springs.
 

OutlawDrifter

Well-known member
Joined
Jan 20, 2015
Messages
3,895
Location
KS
Glad you are down to one neutral.

Is the Chopacabra cam a 'sounds cool' or a performance grind?
I ask as recently I have learned that intentionally choppy cams are typically made at the expense of lift and/or area under curve, and hence power output. This allows for long duration that would otherwise be a poor choice for the rest of the engine combination. Shallow ramp rates, stock springs.

214/222 .550/.550 108 LSA 106 ICL

Mostly for sound. Crank claims of 65ish HP and 25ish ft/lbs. Supposed to drive okay with a stock converter and uses stock LS6 springs. Similar to the Truck Norris cams from BTR. I'm guessing both dyno sheets look pretty similar.

Richard Holdener sells his "Low Buck Truck Cam" BTR clone for about 1/2 the money.
 

Mark_17

Well-known member
Joined
Jun 27, 2018
Messages
754
Location
NJ
Glad you are down to one neutral.

Is the Chopacabra cam a 'sounds cool' or a performance grind?
I ask as recently I have learned that intentionally choppy cams are typically made at the expense of lift and/or area under curve, and hence power output. This allows for long duration that would otherwise be a poor choice for the rest of the engine combination. Shallow ramp rates, stock springs.
I think you're looking for "street friendly".

It has decent performance but is really designed for a mostly stock street engine in a big heavy truck.
 
OP
B

Bodj Built

Well-known member
Joined
Feb 3, 2016
Messages
1,167
Location
Moorpark, CA
I have no knowledge to add to this. I will say that it did feel like the brakes were a little soft, which I heard can be attributed to lack of vacuum from a choppy cam.
 
OP
B

Bodj Built

Well-known member
Joined
Feb 3, 2016
Messages
1,167
Location
Moorpark, CA
Back when I initially built the rear end of the truck I had made a mounting tray for two Craftsman tool boxes.
1774030763073.png

I have since switched to two tool rolls, taking up much less space, that sit under the spare tire where the propane tank is sitting in the picture above. That left me with a void where those boxes were. I finally got around to building a storage box to drop in. The plan is for it to be fully sealed with a lid, and a movable internal divider (not sure how I want to do that yet).

Built the box two nights ago
1774031080718.png

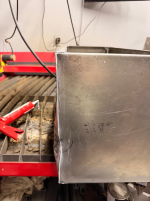
Got it all tacked together and dropped it in the truck to find that the corner contacts a diagonal tube from the bedcage. My options were to remove half an inch from one side of the box and re-weld it, losing a fair amount of volume in the process, or percussive maintenance.


Percussive maintenance won. I would have liked for it to be cleaner and tidier looking, but the truth is, it's a quick cheap box, the dent is hidden by the tube, and I get to keep that much more space inside. Hit all the seams (inside and out) with seam sealer, and will make a top for it soon.

1774031263542.png

1774031275417.png

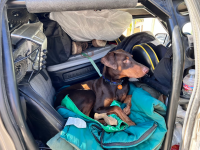
I'm excited to have somewhere to put all the things I normally keep in the cab, like my electrical tool bag, air compressor, impact gun, spare fluids, and backpack of clothes. The cab won't have to look like this anymore

1774031867978.png
 
OP
B

Bodj Built

Well-known member
Joined
Feb 3, 2016
Messages
1,167
Location
Moorpark, CA
@Bodj Built , maybe you've answered this, but what are you using for 3D scanning and do you like it?

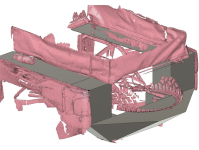
I'm using the Einstar Shining 3D scanner
Einstar Scanner

I don't have any experience with anything else, so I guess I like it haha. It sometimes feels like a lot of cables, but it's really not too bad. Scan quality is good enough for what I need, and the software is pretty solid to get good scans. You can do multiple scans of the same thing and merge them together, which is helpful. I think the hardest part of 3D scanning is actually doing something with it after the scan. Right now I have the back half of the Sonoma scanned and am designing paneling. Just when I thought I was getting decent at it, I hit snags. I'm trying to do it all with Fusion360's sheet metal tools, but it doesn't come to me as intuitively as SW sheet metal tools. I do like Fusion better for dealing with the mesh, though.

1774563507633.png
 
Last edited:

bggrnchvy

Well-known member
Joined
Nov 14, 2011
Messages
589
Location
Pleasant Hill, CA
I'm using the Einstar Shining 3D scanner
Einstar Scanner

I don't have any experience with anything else, so I guess I like it haha. It sometimes feels like a lot of cables, but it's really not too bad. Scan quality is good enough for what I need, and the software is pretty solid to get good scans. You can do multiple scans of the same thing and merge them together, which is helpful. I think the hardest part of 3D scanning is actually doing something with it after the scan. Right now I have the back half of the Sonoma scanned and am designing paneling. Just when I thought I was getting decent at it, I hit snags. I'm trying to do it all with Fusion360's sheet metal tools, but it doesn't come to me as intuitively as SW sheet metal tools. I do like Fusion better for dealing with the mesh, though.
Thanks for the feedback.

Managing the mesh does seem like the hardest part. Friends have recommended Creality products. After fighting an Ender V3 for years, I'm leary :ROFLMAO:

I've been a SW user for 20+ years, I guess I will find out the hard way how it manages importing scans.
 
To avoid these ads, REGISTER NOW!
OP
B

Bodj Built

Well-known member
Joined
Feb 3, 2016
Messages
1,167
Location
Moorpark, CA
Thanks for the feedback.

Managing the mesh does seem like the hardest part. Friends have recommended Creality products. After fighting an Ender V3 for years, I'm leary :ROFLMAO:

I've been a SW user for 20+ years, I guess I will find out the hard way how it manages importing scans.

I've seen good things about certain Creality scanners, but I can't speak fully on their behalf.

I should say that I only use free versions of both products, so I'm quite throttled with their capabilities. I'm sure the full version of SW is far better than the 2017 version I'm using hah. I do like that Fusion has a feature called mesh section sketch, which is incredibly useful for reverse engineering or even having your designed part bodies 'cut' by existing features.
 
OP
B

Bodj Built

Well-known member
Joined
Feb 3, 2016
Messages
1,167
Location
Moorpark, CA
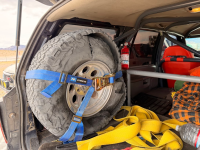
I'm going to be doing Mojave Rd. next weekend and have been on a mission to add more storage to the truck. I've been cramming stuff at the feet of the rear passenger compartment and behind the rear seat. It not only made it really inconvenient to find things, it's also just not safe should a roll over occur. I got the vast majority of big items out of the cab and into the storage box (propane heater, camp stove, collapsible toilet, air compressor, and electrical tool bag). Two tool rolls sit in the compartment under the spare tire, and I just added a circular storage bag made by Bucket Boss to hold the 30k tow strap and two ****** blocks (planning on switching to those aluminum donut things) that is currently sitting on the spare wheel and is held down by the spare tire Y strap. The bag is slightly too short for the strap to effectively push down, so I think it's possible for it to eject itself, and it may end up in the compartment below the spare tire. I'm trying to avoid that, because if I'm stuck somewhere that my rear is backed against a wall/hill and I'm unable to remove the spare, I want to be able to still get to the strap. I still have my kinetic rope/soft shackle bag shoved under the rear seat, which is easily accessible and my typical go-to for getting unstuck, so that might be a non-issue.

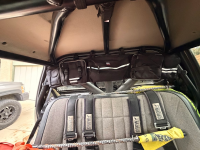
Anyways, I bought a couple of these UTV roll cage bags to try out from Amazon. One works perfectly at the back window, and one works well for above the driver/passenger. Not sure if I'm going to keep that one, as I feel the rattle/jiggle from the bag and contents will drive me nuts, and I'm not sure what I really need to put in there.

In the back bag I have rags, wet wipes, toilet paper, fleece blanket, first aid kit, lug nut socket, and crescent wrench. I think I'll see if I can fit a spare belt in it/zip tied to it. That all only took up three of the six pouches

1775145120776.png1775145142888.png


I also made a new PTFE trans cooler hose as the old rubber one had a slight crack and was seeping fluid.
 
OP
B

Bodj Built

Well-known member
Joined
Feb 3, 2016
Messages
1,167
Location
Moorpark, CA
What a weekend. I started planning this Mojave Rd. trip a few months ago, and was supposed to leave Thursday around midday to get to the first campsite before beginning the trip. I had noticed a leaking trans cooler line, so I rebuilt it during the week leading up, but found it leaking again as I was letting it warm up before taking off. Spent some time making a new one and decided to leave early in the morning and meet up with everyone at the gas station.

Got there early and waited for the gang. My buddy with the Explorer I built was the first to show up
1776109320801.png

We waited a while for the rest of the group. The Tundra-V8-swapped-Tacoma popped a main fuse leading to now power. They got it figured out and we left the gas station a bit later than planned. Noooo big deallllllll.

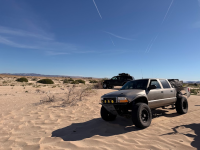
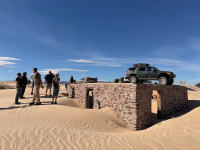
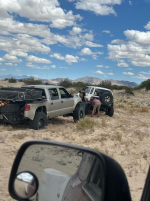
First stop was the buried house, where I got stuck three times (I think I've been stuck maybe three times in all the years I've been doing this...)
1776109291556.png
1776109344986.png1776109355490.png
1776109389099.png

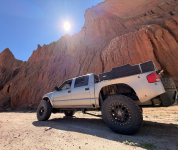
Continued on and entered Afton Canyon
1776109419086.png
1776109428758.png

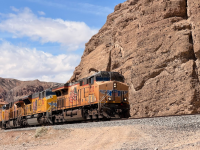
This absolute unit graced us with its presence just before we entered Spooky Slot Canyon
1776109440475.png


The weather was impeccable. Plenty of fluffy cloud cover, slight breeze, and vivid colors.
1776109475551.png

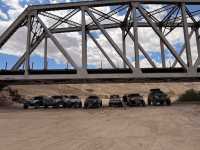
Stopped at the trestle for a quick picture and then headed east on the south side of the train tracks. I've never been that way, and the trail is really fun, fast, and flowy!
1776109488209.png
 
OP
B

Bodj Built

Well-known member
Joined
Feb 3, 2016
Messages
1,167
Location
Moorpark, CA
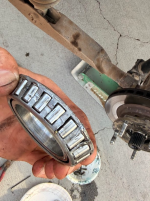
The truck was working great, until it wasn't. In a long sandy section I saw temps starting to climb. Not terrible, but I wanted to be cautious. As I slowed to a stop I heard clunking coming from the rear. Smoked a wheel bearing, thanks to a lock ring screw backing out. Pulled my ******** the truck to assess the damage to find the piston seized and wouldn't return. Borrowed Brad's floor jack, and then found I forgot my impact gun to remove the wheel, so I borrowed Brad's. Thanks Brad!
1776109589234.png
1776110191965.png
I collected the rollers and reassembled the bearing, bending the cage back into place, while one friend called around and found a bearing at O'reilly's in Barstow. The plan was to get it back together, drive 23 miles south to Ludlow, and another friend and I would drive in his Sequoia to get the part (absolutely in debt to this guy). On the way down to Ludlow, the Explorer shredded a tire. He threw his spare on, which was a REALLY old tire, and he didn't want to chance the rest of the 150+ miles we had left, so he called it a trip and took highway home.
1776109686874.png

While we were out, the others had a DairyQueen parking lot bon fire and grilled burgers. Here's the bearing after reassembling and driving on it
1776109609296.png
1776109652452.png
New bearing installed, gear oil added (seal was destroyed), and we soldiered on 30 miles to Kelso Sand Dunes. We were all a bit bummed because we were hoping to camp in Caruther's Canyon, but it just wasn't meant to be this trip. (PS: I got stuck two or three more times getting to the campsite).

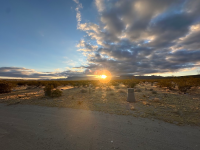
Although we didn't get to Caruther's, the morning views were incredible
1776109717857.png


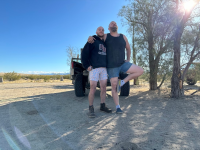
Another fine gentleman and I donned our attire for the day...
1776109767489.png

We packed up and made our way to the Lava Tubes. Always a cool sight.
1776109787694.png


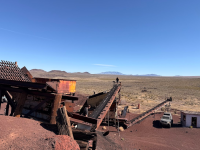
And then stopped at the nearby Aiken Pumice mine
1776109802321.png
 

Attachments

  • 1776109728911.png
    1776109728911.png
    653.8 KB · Views: 21
Last edited:
OP
B

Bodj Built

Well-known member
Joined
Feb 3, 2016
Messages
1,167
Location
Moorpark, CA
After smashing through the Joshua Tree forest and big whoop section (insanely fun!) I heard a familiar clunking from the driver rear. Stopped to assess and found two of the 5 lug nuts were missing, and three were hanging on by a few threads.
1776109962921.png

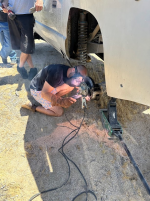
The wheel floppage caused the lug stud knurling to no longer hold in the hub. James' onboard welder to the rescue! Welded them onto the backside, swapped out for the spare tire since the holes were smoked, and we were back in biznus
1776109977320.png1776109983266.png1776110018563.png

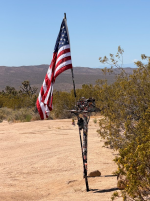
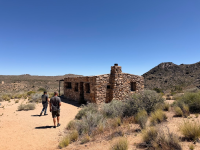
Rock Cabin was a cool, quick stop, followed by Balancing Rock
1776110032382.png1776110042566.png
 
OP
B

Bodj Built

Well-known member
Joined
Feb 3, 2016
Messages
1,167
Location
Moorpark, CA
The sight of Laughlin had never looked so sweet!
1776110067108.png

Dipped our toes in the river before heading to a well-earned sushi dinner.
1776110077340.png


The group split off with some continuing to Arizona, some camping on the river, and some staying at the oh-so luxurious Tropicana.
1776110091255.png


Hit the pike in the morning and made it home at 2:45pm, bruised and battered, but not defeated!
1776110104980.png

710 miles total, 227 of which were dirt. It's time to park the truck for some much needed prep and updates.
 

Bigblue&Goldie

Well-known member
Joined
Mar 12, 2009
Messages
10,714
Location
AZ
The one and only Barstow to Laughlin trip I did resulted in a very similar mechanical nightmare! I vividly remember our group of 4 cars blowing a wheel (and tire), 2 spindles, brake line, an alternator, and one car finished with 3rd gear only. To top it off, we couldn't find the fuel that we had stashed out in the desert for the one guy that couldn't run pump gas. We ran out of beer and froze our butts off after the sun went down.

That was 20yrs ago, and it wasn't until earlier this year that we even considered doing it again!
 
OP
B

Bodj Built

Well-known member
Joined
Feb 3, 2016
Messages
1,167
Location
Moorpark, CA
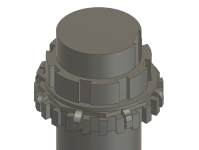
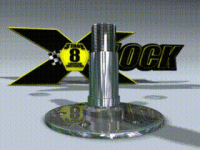
I've been sorting through various ways to future-proof my rear axle spindle nut situation. I don't love relying on small screws to hold a thin lock ring in place, especially on a wheel that is constantly trying to unscrew the spindle nut as the car drives forward (RHD). I have the Stage8 X lock system on the front D44 hubs, and absolutely love them. They do not rely on any fasteners to keep the spindle nut from backing out, only the mechanical lock of the lockring teeth. Unfortunately, they only make it for D44 and D60, so I'm planning on recreating my own. I have it all drawn up as a parametric model, so when I disassemble the hub I can take measurements and input those accurately, and the model will update accordingly. I have the ability to build everything in-house, but I will have the toothed ring laser cut for more precision than my plasma table can produce, and I might need my cousin's machine shop to make the spindle nut, since the only off the counter 1-13/16"-16 nuts are the spindle nuts for this snout, and they are not thick enough/large enough OD for what I'm wanting to do. I'd need him to bore out some sock and single point thread.

There's a chance I may just get a standard spindle nut, drill/thread/counterbore, and cut a slot across the threads, allowing me to use a socket head cap screw to pinch the spindle nut on the threads. That would be 100x easier than the Stage8 system, but I'd still be relying on a screw to not back out. I honestly may end up going this route.

In the meantime, here's the model.

1776891631906.png
1776891640896.png

xlock_193x145l.gif
 
OP
B

Bodj Built

Well-known member
Joined
Feb 3, 2016
Messages
1,167
Location
Moorpark, CA
The one and only Barstow to Laughlin trip I did resulted in a very similar mechanical nightmare! I vividly remember our group of 4 cars blowing a wheel (and tire), 2 spindles, brake line, an alternator, and one car finished with 3rd gear only. To top it off, we couldn't find the fuel that we had stashed out in the desert for the one guy that couldn't run pump gas. We ran out of beer and froze our butts off after the sun went down.

That was 20yrs ago, and it wasn't until earlier this year that we even considered doing it again!

I just saw this, sorry for the late reply.

Oh man, what a cluster! This is my third time on Mojave Rd - and the second with my truck. The first trip I rode passenger, but one of the other trucks had a slew of issues: lost his clutch going through a dune section, alternator issues, broke one blade on his radiator fan... It makes for a long trip. We are able to do the 220+ mile run fairly easily in a couple of days. I can't imagine how miserable it must be to do it in a Jeep or Subaru haha. I just saw a video on instagram of a group of guys doing it in some 1920s Fords. Wild.
 
OP
B

Bodj Built

Well-known member
Joined
Feb 3, 2016
Messages
1,167
Location
Moorpark, CA
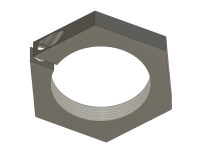
Split nut design. Not my favorite if I'm using an off the shelf spindle nut. They're only 3/8" thick, so I'd have to turn the 1/4"/20 SHCS head from 3/8" dia to 5/16" dia, not leaving much material on the nut. Even though the nut is at zero preload, I still feel it's under enough stress/side loading that I'm not comfortable with that small amount of material left.

1776895623588.png
 

bggrnchvy

Well-known member
Joined
Nov 14, 2011
Messages
589
Location
Pleasant Hill, CA
Is there anything available for your rear like the late model AAM axles with the single thick spindle nut and 6 keyways matching the spindle that accepts a square key and hold the thrust with a snap ring? Simple and works well.
 
OP
B

Bodj Built

Well-known member
Joined
Feb 3, 2016
Messages
1,167
Location
Moorpark, CA
Is there anything available for your rear like the late model AAM axles with the single thick spindle nut and 6 keyways matching the spindle that accepts a square key and hold the thrust with a snap ring? Simple and works well.

Funny you mention that. Someone on another forum just mentioned that. I briefly looked and didn't find anything.
 
OP
B

Bodj Built

Well-known member
Joined
Feb 3, 2016
Messages
1,167
Location
Moorpark, CA
Been busy with life lately. Applied and got into an administrative credential program, so hopefully this is my last year teaching in the classroom and I can be an assistant principal, principal, or work for the district office or county office of education from here on out. Looking to move up in the world a bit.

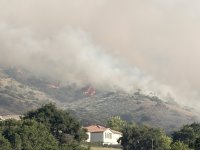
Visited my sister in TX and saw some old friends out there. While gone, a huge brush fire started at the end of our street. We were in the evacuation zone and it was definitely close, but praise God everything was ok.

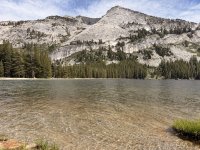
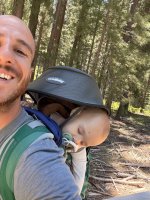
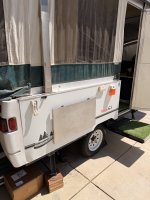
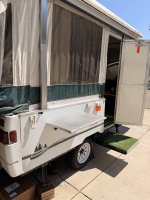
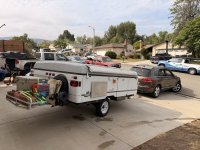
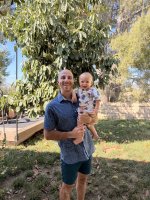
The school year ended at the beginning of June. I spent the first week of break by prepping the pop up camper. Wheel bearings and new tires were the biggest need/preventative maintenance. The rest was packing and building a fold down table for the outside. We did a week long road trip, towing it with the VW Touareg TDI from further up on this page. It towed awesome and averaged 19mpg through mostly mountain passes, and we did some pretty solid off-roading to get to the most beautiful camp spot I’ve ever been. Torque was only once an issue while off-roading, as I was stopped, pointed uphill, kind of crossed up, and starting from a dead stop with a 2200# trailer behind me so I couldn’t get into boost. Aside from that, power was never an issue. The trip took us 1200+ miles from our home, to Yosemite, Lake Tahoe, through Sacramento into Napa for wine tasting, down through San Francisco to Big Sur and then the coast the rest of the way home. It was an absolutely incredible trip with my wife, son, and our two dogs. Looked under the camper when we got home to see how much water was left in the tank/if it was still leaking (had to flex seal it in a Tahoe parking lot) and found the front leaf spring hanger almost completely ripped off. Thank God we got home when we did. Easy enough fix. Aside from that, I lost a wheel bearing cap, the front plastic panel cracking to pieces, and the generator wouldn’t charge the battery when plugged in with the shore plug, even running the generator for 5 hours on the road didn’t charge it. I saw online that it may be due to the generator being a floating ground, so I stopped at home depot and made a jumper plug, connecting the ground and neutral for the second outlet on the generator to try and trick the on board charge controller, but that didn’t work either. Ended up stopping at Walmart and buying a battery charger. Connected it directly to the battery and generator and it worked great. I will say, that after the setting up and taking down the pop up camper 7 days in a row, we are going to start saving for a 24-27ft class C.

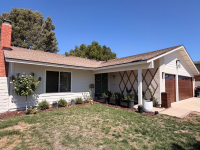
Got home from the trip and spent about a week getting the battens removed, paper, flashing, and hanging Hardie Siding. Then a couple days looking at paint colors for the house. Once we finally settled, I spent the last week and a half spraying it all. My mom has been a huge help by coming over to watch my son and help paint during his naps, since my wife is at work during the day. We just finished yesterday, with minor spots to touch up and finish putting away the equipment/getting things sorted again. I hate painting so much. It is 100% the least enjoyable trade, but I think we saved about $12,000 doing it ourselves. That said, I got quotes for new garage doors, so those should be getting installed hopefully next week or the week after. I’m really trying to get the exterior of the house looking good. I’ve always wanted a manicured home, and this is a big step towards that. I need to get the grass to come back, since it’s been pretty hot and I haven’t been able to run the front sprinklers with the new siding/fresh paint. And then some landscaping, paint the front doors, and it should be looking good.

More pictures in next post
 

Attachments

  • IMG_7525.jpeg
    IMG_7525.jpeg
    1.6 MB · Views: 16
  • IMG_7532.jpeg
    IMG_7532.jpeg
    1,020.8 KB · Views: 16
  • IMG_7608.jpeg
    IMG_7608.jpeg
    541.1 KB · Views: 16
  • IMG_7621.jpeg
    IMG_7621.jpeg
    441 KB · Views: 16
  • IMG_7622.jpeg
    IMG_7622.jpeg
    590.1 KB · Views: 16
  • IMG_7784.jpeg
    IMG_7784.jpeg
    1.6 MB · Views: 16
  • IMG_7484.jpeg
    IMG_7484.jpeg
    553.7 KB · Views: 17
  • IMG_7336.jpeg
    IMG_7336.jpeg
    1.7 MB · Views: 20
  • IMG_7247.jpeg
    IMG_7247.jpeg
    1.1 MB · Views: 20
  • IMG_5917.jpeg
    IMG_5917.jpeg
    714 KB · Views: 20
  • IMG_8339.jpeg
    IMG_8339.jpeg
    306.3 KB · Views: 20
  • IMG_7051.jpeg
    IMG_7051.jpeg
    755.6 KB · Views: 20
  • IMG_7052.jpeg
    IMG_7052.jpeg
    717 KB · Views: 20
  • IMG_7092.jpeg
    IMG_7092.jpeg
    918.9 KB · Views: 21
  • IMG_7107.jpeg
    IMG_7107.jpeg
    1.9 MB · Views: 27
OP
B

Bodj Built

Well-known member
Joined
Feb 3, 2016
Messages
1,167
Location
Moorpark, CA
Mas pictures. I included a before, during, and after of our house, along with the AI generated image Gemini did of our house that we are using for a guide.

Forgot to include that I also got to celebrate my first Father’s Day, followed by our fourth anniversary. Needless to say, life has been busy. God is good!
 

Attachments

  • IMG_8840.png
    IMG_8840.png
    4.1 MB · Views: 26
  • IMG_8841.png
    IMG_8841.png
    4.6 MB · Views: 24
  • IMG_8724.jpeg
    IMG_8724.jpeg
    584 KB · Views: 26
  • IMG_8722.jpeg
    IMG_8722.jpeg
    704.9 KB · Views: 26
  • IMG_8720.jpeg
    IMG_8720.jpeg
    691.2 KB · Views: 27
  • IMG_8457.jpeg
    IMG_8457.jpeg
    885.3 KB · Views: 27
  • IMG_8230.jpeg
    IMG_8230.jpeg
    1,006.1 KB · Views: 26
  • 20260609_192340.jpeg
    20260609_192340.jpeg
    1.4 MB · Views: 26
  • 20260609_152420.jpeg
    20260609_152420.jpeg
    745.6 KB · Views: 26
  • IMG_9169.jpeg
    IMG_9169.jpeg
    808 KB · Views: 25
  • IMG_8839.png
    IMG_8839.png
    3 MB · Views: 33
  • IMG_8860.jpeg
    IMG_8860.jpeg
    1.5 MB · Views: 36
  • IMG_8989.jpeg
    IMG_8989.jpeg
    483.7 KB · Views: 36
To avoid these ads, REGISTER NOW!
Top Bottom